Loading ...
Loading ...
Loading ...
Selecting a Dog Collar Device
Before you can select and control a dog collar device, you must
pair the dog collar device with the handheld device (Pairing a
Dog Collar Device with the Handheld Device, page 2).
Move the dog collar device toggle switch to select the color
associated with a dog collar device.
The training keys control the dog collar device associated with
the selected color.
Fitting the Collar on Your Dog
CAUTION
To prevent irritation from the contact points, remove the collar
for at least eight hours out of every 24-hour period.
This device is not intended for human use. Do not attempt to
use on any person.
Do not spray the device or collar with harsh chemicals including
but not limited to flea or tick spray. Always ensure that any flea
or tick spray that is applied to the dog is completely dry before
placing the collar on the dog. Small amounts of harsh chemicals
can damage the plastic components and collar laminate.
In order to properly correct the dog, the collar and device must
fit the dog properly. If the collar is too loose or positioned
incorrectly, corrections may be inconsistent. This can delay or
prevent successful training.
1
Position the device at the front of the dog's neck, with the
status LED facing toward the dog's chin and the contact
points against the throat.
2
Tighten the strap so that it is very snug around the dog's
neck, and fasten the buckle.
NOTE: The collar should fit tightly and should not be able to
rotate or slide on the dog's neck. The dog must be able to
swallow food and water normally. You should observe your
dog's behavior to verify the collar is not too tight.
3
Wiggle the device to work the contact points through the
dog's coat.
NOTE: The contact points must have contact with the dog's
skin to be effective.
4
If the strap is too long, cut off the excess, leaving at least 8
cm (3 in.) to spare.
TIP: You can mark the hole used to fasten the buckle for
future reference.
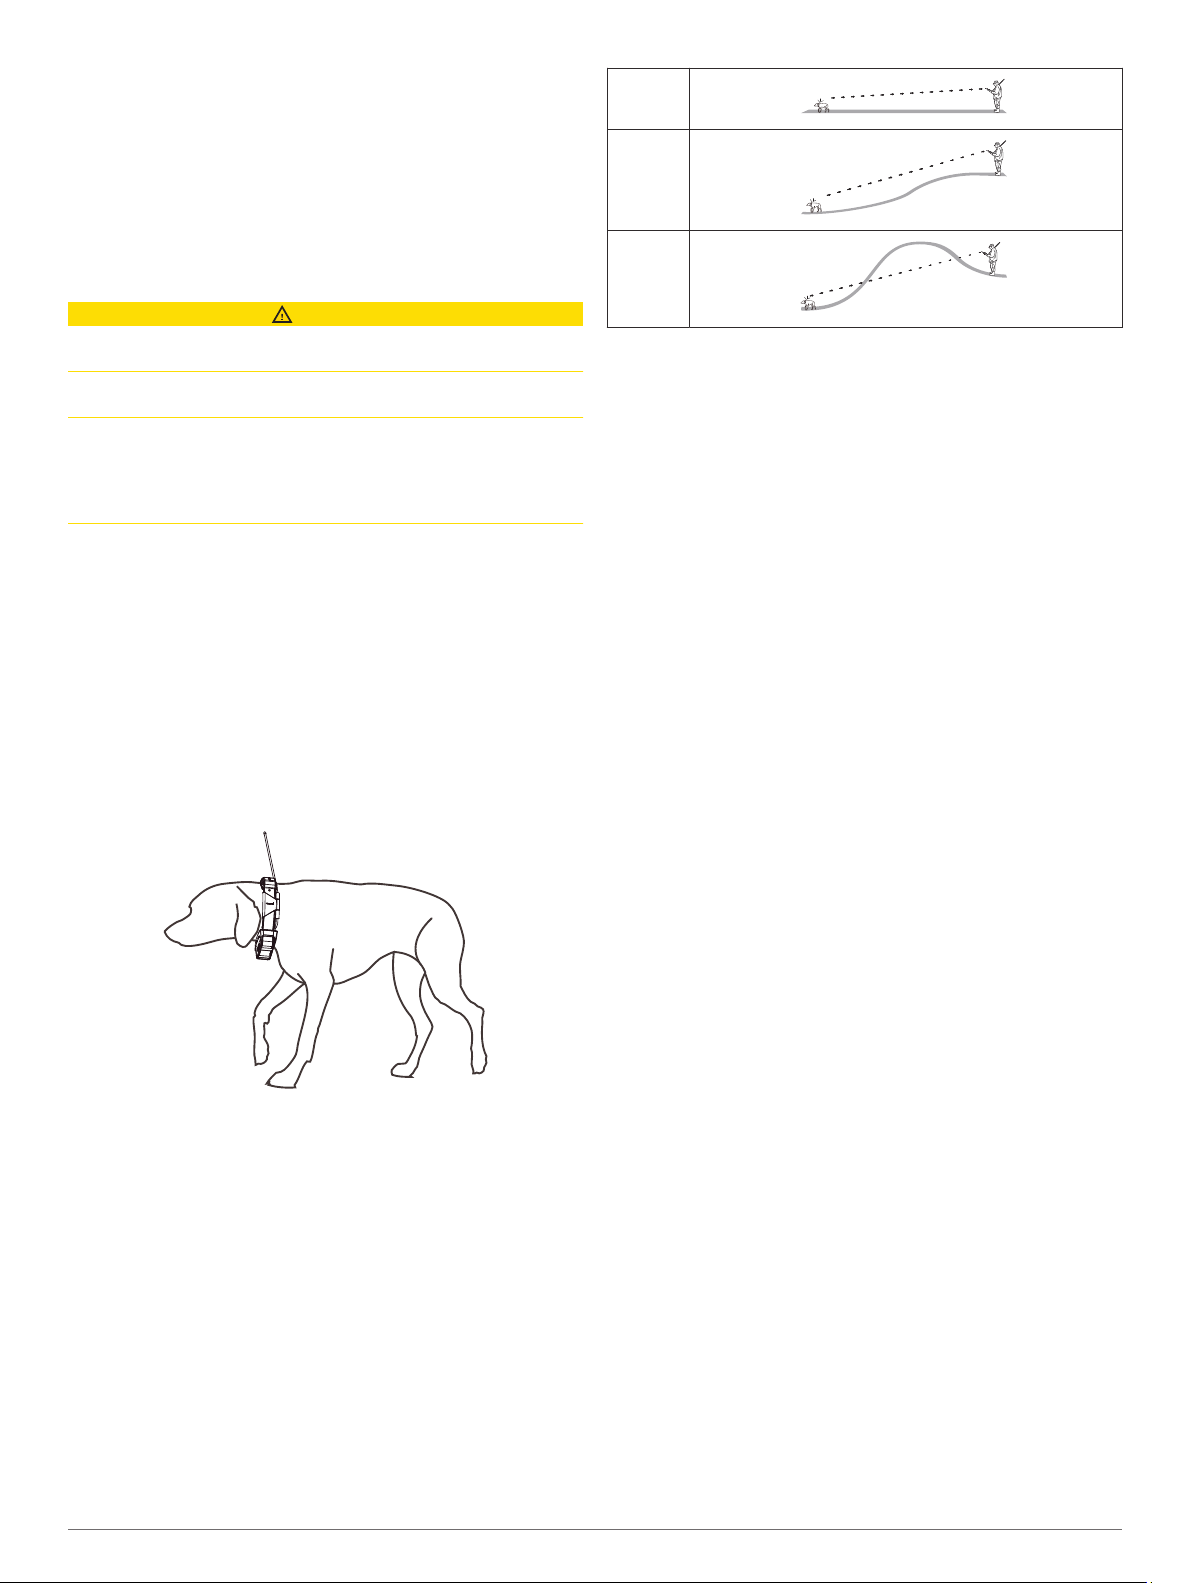
Communication with the Collar
You should keep an unobstructed line of sight between your
handheld device and the dog collar device to produce the best
communication signal. To achieve the best line-of-sight
conditions, you should move to the highest elevation point in
your area (for example, on the top of a hill).
Best
Good
Poor
Dog Training
You should research and investigate the training methods best
suited for you, your dog, and your needs.
When used properly, the Pro 550 Plus training system is an
effective training tool to aid your dog in reaching its full potential.
The use of the training system should be part of an overall
training program.
Radio Interference
If your handheld device experiences interference from another
transmitter, the LED flashes yellow when you press a training
key.
TIP: If you often experience interference, re-pairing a dog collar
device to the color it is already assigned to may resolve the
problem. Re-pairing changes the frequency used by the
handheld device to communicate with the dog collar device.
Selecting and Installing the Contact Points
For best results, select the correct contact points based on your
dog's coat.
1
Select the correct contact point length for your dog's coat
type:
• For dogs with thicker coats, use the longer contact points.
• For dogs with shorter coats, use the shorter contact
points.
2
If necessary, use the included wrench to remove the contact
points.
3
Twist the contact points into the collar.
4
Tighten with the included wrench, but do not overtighten.
When you put the collar on the dog, make sure the contact
points are tight against the neck.
Removing the Contact Points
When you are not training the dog using the training keys,
remove the contact points.
1
Use the included wrench to remove both contact points.
2
Place the cap over the contact point holes.
Training Methods
Momentary stimulation: Applies a brief stimulation when you
press the training key, regardless of how long the key is
depressed.
Continuous stimulation: Applies stimulation to the dog the
entire time you press the training key, for a maximum of 10
seconds. Your stimulations should typically be much shorter
than 10 seconds.
Tone: Activates an audible tone instead of stimulation. A tone
can be used as either a positive or negative training cue,
depending on your training program.
Vibration: Applies vibration instead of stimulation to the dog the
entire time you press the training key, for a maximum of 10
Dog Training 3
Loading ...
Loading ...
Loading ...