
Loading ...
Loading ...
Loading ...
29 — English
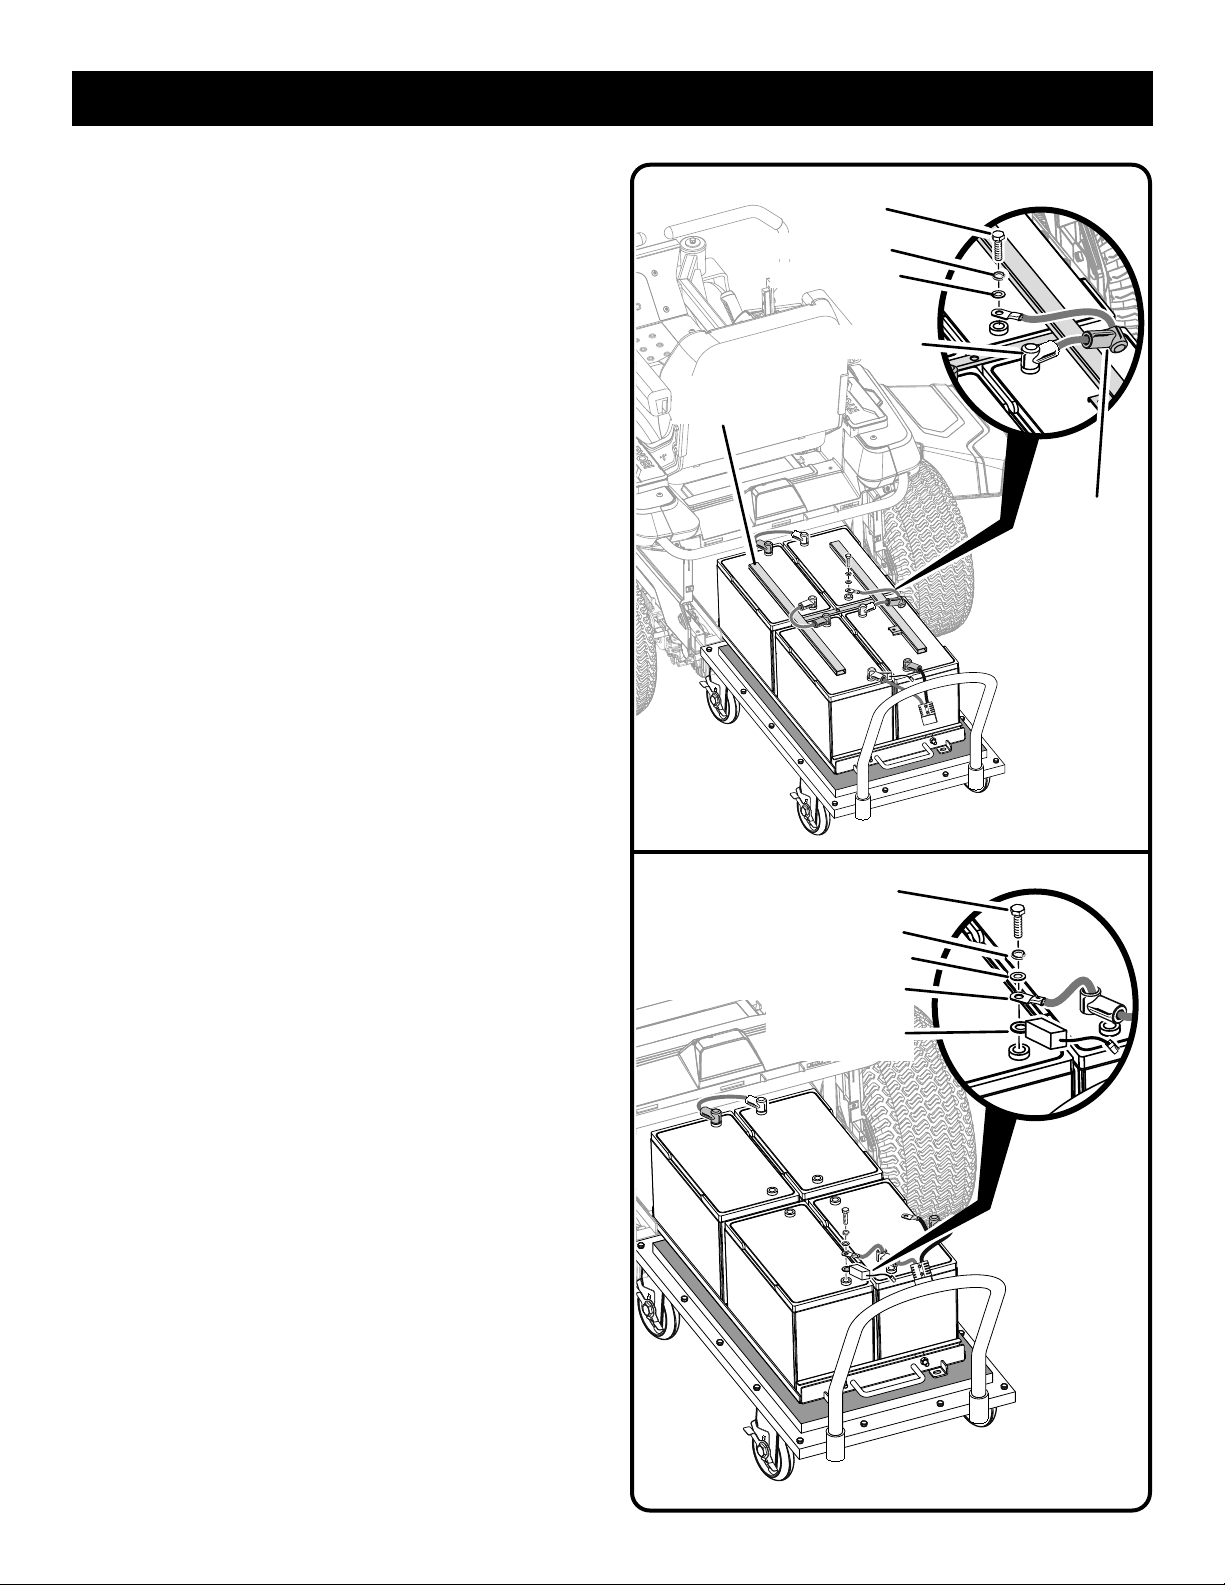
Disconnect the two center battery cables that are routed
over the securing bracket. Disconnect the negative (black)
cable first, then the positive (red) cable, being careful not
to short across the terminals.
Lift the battery securing bracket off the batteries and set
aside.
Disconnect the front and/or rear battery cables connecting
the battery or batteries you intend to replace. Disconnect
the negative (black) cable first, then the positive (red)
cable, being careful not to short across the terminals.
NOTE: If you are disconnecting the cables at the rear of
the mower, note the position of the battery thermistor
terminal on the positive post and be sure to replace the
terminal in the same location.
Replace the battery or batteries as needed.
Reinstall the battery securing bracket.
Reinstall the battery cables. Connect the positive (red)
cable first, then the negative (black) cable, being careful
not to short across the terminals.
Replace the battery covers.
Push the battery tray back inside the mower and recon-
nect the battery thermistor and battery quick-connect
plugs.
Reinstall the spacers, flat washers, lock washers, and
hex head bolts, that secure the battery tray tabs. Tighten
securely.
Reinstall the rear crossmember, then replace the hex head
bolts and nuts. Tighten securely.
Reinstall the hex head bolt through the securing bracket
to secure battery tray in place. Tighten securely.
Replace the battery compartment cover and reinstall the
screws to secure.
NOTE: Make sure the tabs on the battery compartment
cover are seated in the slots on the mower top and side
panels before tightening the screws.
Reinstall the wiring cover and push down until it latches
securely in place, then lower the mower seat.
NOTE: Always ensure the safety interlock cable connec-
tion is still fully seated when replacing the wiring cover.
NOTE: Always abide by the safety warnings provided with
the battery. Dispose of old battery according to local and
state regulations.
MAINTENANCE
Fig. 32
Fig. 31
SECURING
BRACKET
BOLT
BOLT
FLAT WASHER
LOCK WASHER
LOCK WASHER
BLACK ( – )
RED ( + )
RED ( + )
THERMISTOR
TERMINAL
FLAT WASHER
Loading ...
Loading ...
Loading ...