
Loading ...
Loading ...
Loading ...
14 — English
OPERATION
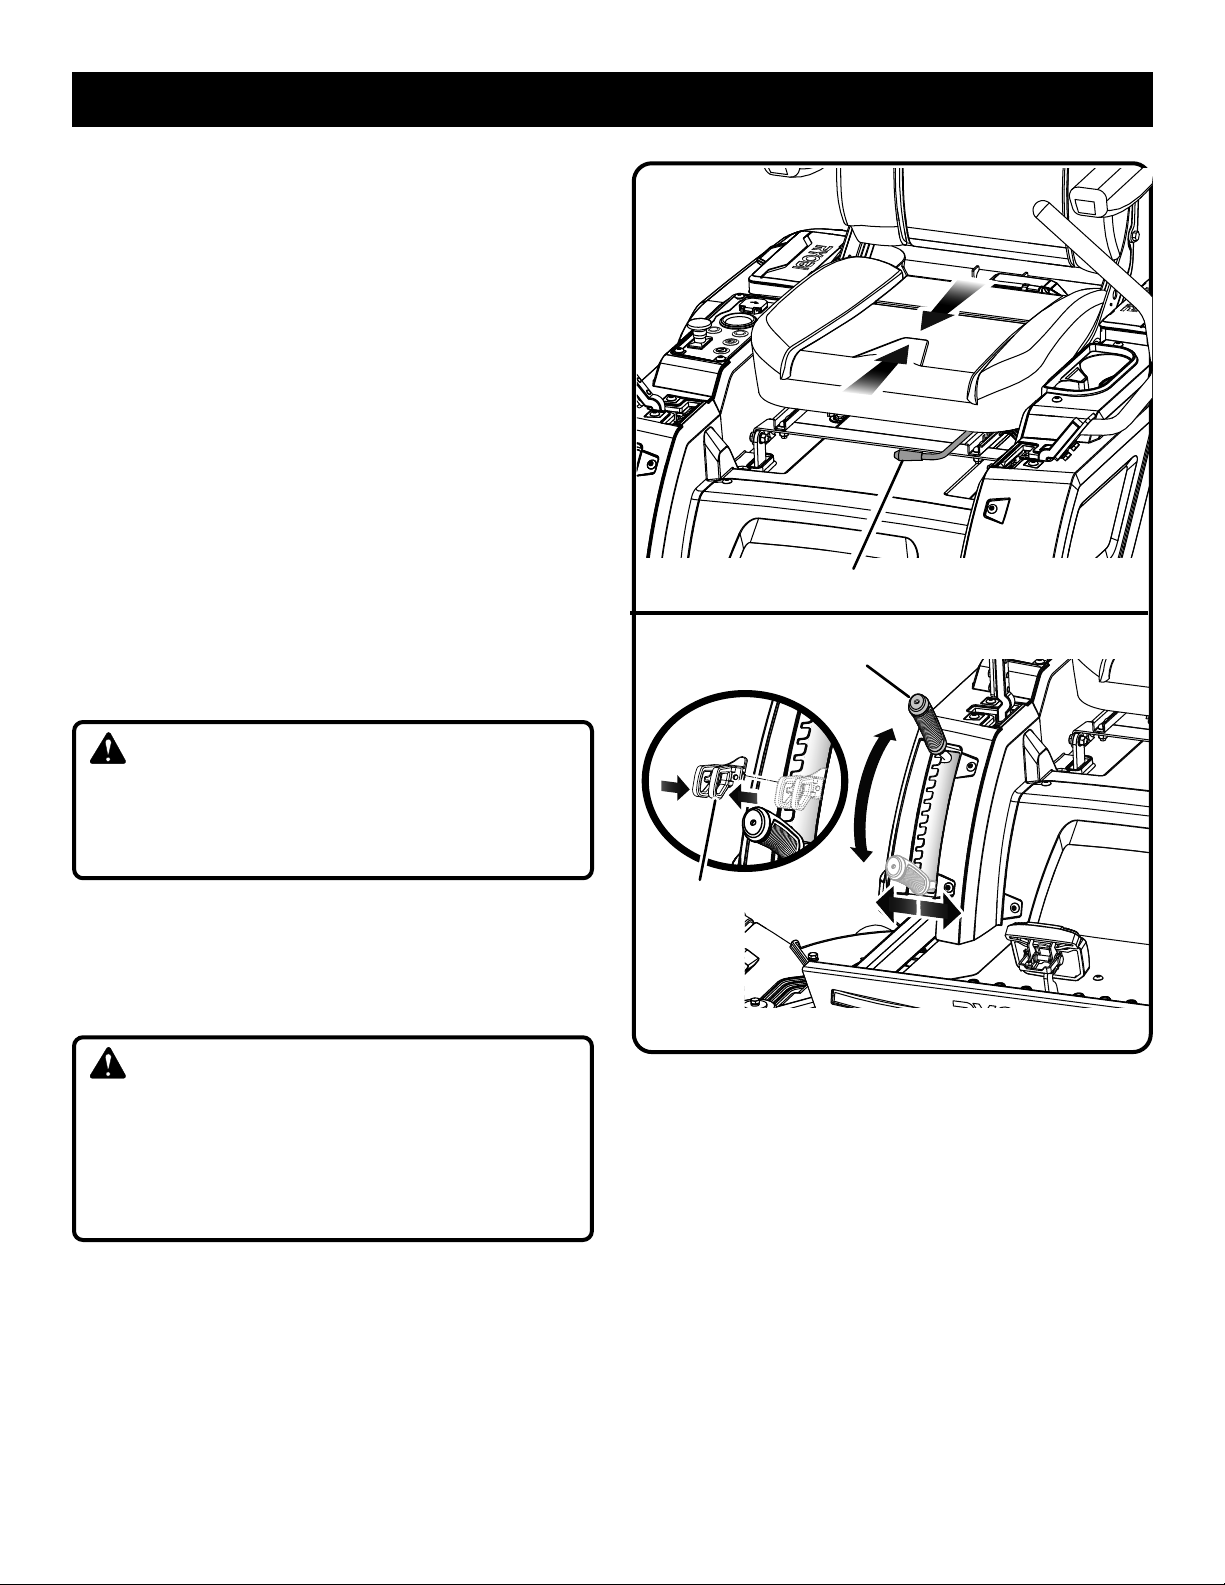
SETTING THE CUTTING DECK HEIGHT
See Figure 4.
Before using the mower, raise the deck height to the cutting
position best suited for your lawn.
NOTE: To prevent scalping the lawn when encountering
high spots, the cutting deck wheels should be positioned
approximately 1/2 in. off the ground when the mower is at
the desired cutting height. When shipped, the cutting deck
wheels are set to the 1.5 in. position. Depending on your
desired cutting height, you may need to change the position
of the cutting deck wheels. To do so, refer to Adjusting Cut-
ting Deck Wheels in the Maintenance section of this manual.
To adjust the cutting deck height:
Stop the mower and disengage blades.
Turn key to OFF position and set the parking brake.
To raise the cutting deck, grasp the deck height adjustment
lever, push left to disengage from slot, move toward the
back of the mower, then push right into slot to secure.
To lower the cutting deck, grasp the deck height adjust-
ment lever, push left to disengage from slot, move toward
the front of the mower, then push right into slot to secure.
CAUTION:
Hold the deck height adjustment lever firmly when setting
the deck height and only release when it is secure in the
desired slot. Quickly letting go of the lever may create a
pinching or pulling hazard to the operator’s hand.
NOTE: Once you have determined the correct cutting height
for your lawn, install the auto stop plug just below that posi-
tion to easily return to the correct mowing height every time.
CHARGING THE MOWER
See Figures 5 - 6.
WARNING:
Only charge mower batteries indoors in a dry location. Do
not charge battery or expose mower to rain or damp loca-
tions. Water and liquids can come in contact with mower
components and the battery and damage connections
and electronic components, which can result in a short
circuit, increased risk of fire, and serious personal injury.
Mower batteries must be charged overnight before first
use. To verify mower batteries are fully charged, check the
battery level indicator.
For best results:
Do not charge in an area of extreme heat or cold.
Never charge a frozen battery.
Mount or place the charger in an area with adequate
ventilation, ideally with the charger in a horizontal position
with the cooling fins facing up.
DECK HEIGHT
ADJUSTMENT LEVER
Fig. 4
AUTO STOP
PLUG
Fig. 3
SEAT ADJUSTMENT LEVER
To charge:
Make sure both the charger and mower connections are
clean and free of dirt or debris.
Insert charger plug into charging port on mower, making
sure it is properly connected.
Connect charger to power supply using normal household
current of 120 V, AC only, 60 Hz. The batteries should
automatically begin to charge.
NOTE: The charger is equipped with a plug featuring a
grounding pin and must be plugged into a matching stan-
dard three-prong outlet that has been properly installed
and grounded in accordance with all local codes and
ordinances. Do not use a two-prong outlet, adaptors, or
modify the plug provided. If it will not fit the outlet, have
the proper outlet installed by a qualified electrician.
Loading ...
Loading ...
Loading ...