Loading ...
Loading ...
Loading ...
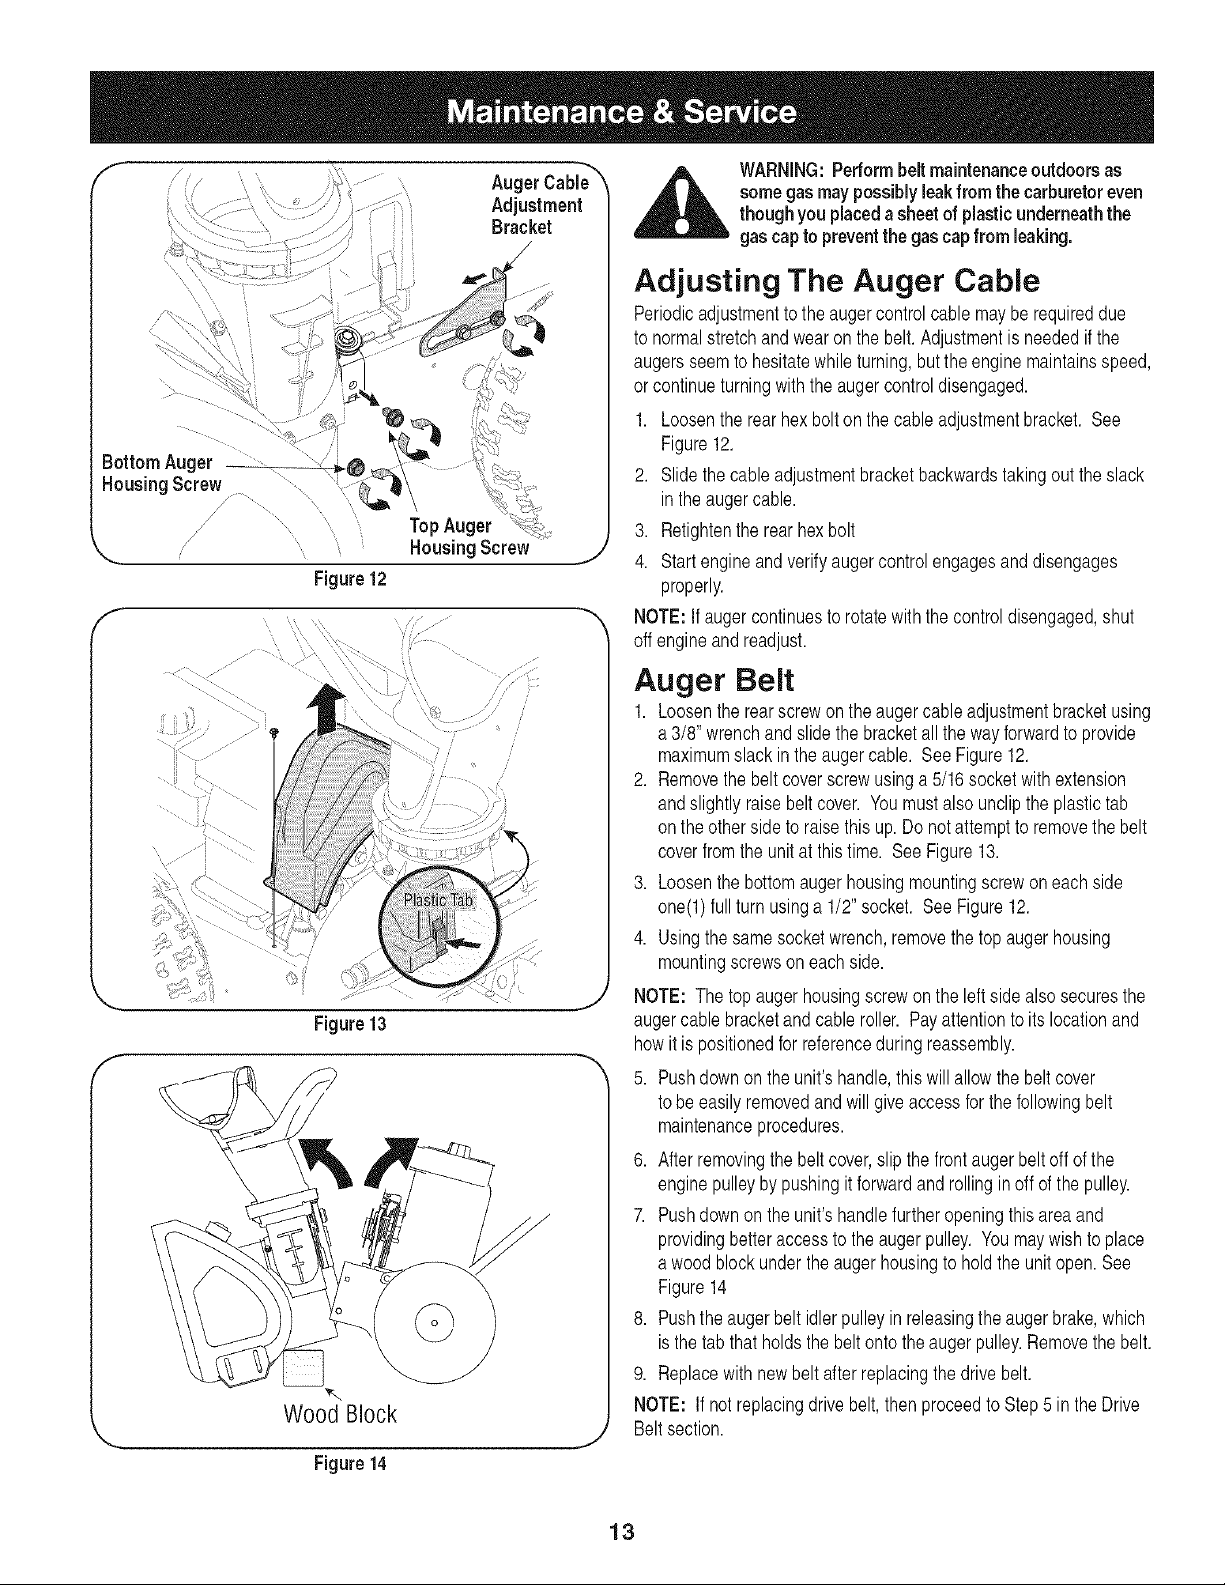
fAugerCabi_ "_
Adjustment
Bracket
"-... HousingScrew ,j
Figure12
F....
Figure 13
Wood Block
Figure14
WARNING:Performbelt maintenanceoutdoors as
somegas maypossiblyleakfrom the carburetoreven
though you placedasheetof plasticunderneaththe
gas cap to preventthe gascap from leaking.
Adjusting The Auger Cable
Periodicadjustmentto the augercontrolcablemayberequireddue
to normalstretchandwearonthe belt.Adjustmentis neededif the
augersseemto hesitatewhile turning,butthe enginemaintainsspeed,
or continueturningwiththe augercontroldisengaged.
1. Loosenthe rear hex boltonthe cableadjustmentbracket. See
Figure12.
2. Slide thecable adjustmentbracketbackwardstakingout theslack
inthe augercable.
3. Retightenthe rear hexbolt
4. Startengineandverifyaugercontrolengagesand disengages
properly.
NOTE:If augercontinuesto rotatewiththe controldisengaged,shut
off engineandreadjust.
Auger Belt
1. Loosenthe rearscrewonthe augercableadjustmentbracketusing
a 3/8' wrenchandslidethe bracketall thewayforwardto provide
maximumslack inthe augercable. SeeFigure12.
2. Removethe belt coverscrewusinga 5/16 socketwith extension
andslightlyraise beltcover. Youmustalso unclipthe plastictab
on theotherside to raisethis up. Donot attemptto removethe belt
coverfromthe unit at thistime. SeeFigure13.
3. Loosenthe bottomaugerhousingmountingscrewoneach side
one(l) fullturn usinga 1/2" socket. See Figure12.
4. Usingthe samesocketwrench,removethe topaugerhousing
mountingscrewson eachside.
NOTE: The topaugerhousingscrewonthe leftside alsosecuresthe
augercablebracketandcableroller. Payattentionto itslocationand
howit is positionedfor referenceduring reassembly.
5. Pushdownon the unit'shandle,this willallowthe beltcover
to be easilyremovedand willgive accessfor the followingbelt
maintenanceprocedures.
6. Afterremovingthe belt cover,slip thefront augerbelt off of the
enginepulleyby pushingit forwardandrollingin offof the pulley.
7. Pushdownon the unit'shandlefurtheropeningthisareaand
providingbetteraccessto the augerpulley. Youmaywishto place
a woodblockunderthe augerhousingto holdthe unitopen.See
Figure14
8. Pushthe augerbelt idler pulleyin releasingthe augerbrake,which
isthe tab that holdsthe beltontothe augerpulley.Removethe belt.
9. Replacewith newbelt after replacingthe drivebelt.
NOTE: If not replacingdrivebelt,thenproceedto Step5 in the Drive
Beltsection.
13
Loading ...
Loading ...
Loading ...