Loading ...
Loading ...
Loading ...
67
EN
7
7
INSTALLATION
Fitting the Hood canopy
BEFORE FITTING THE HOOD TO THE WALL UNIT, PROCEED AS FOLLOWS:
• Disconnect the wires to the Commands at the connectors.
• Disconnect the wires to the Light at the con-
nectors.
• The Hood can be installed directly on the
underside of
the wall unit (Minimum 650 mm
from the Cooker Hob).
• Create an opening in the bottom of the wall unit,
as shown.
• Insert the hood until the side supports snap into
place.
• Fasten using the 10 screws 12a provided.
• Lock in position by tightening the screws Vf from
underneath the hood.
• Open the suction panel by turning the specific knob.
• Disconnect the panel from the hood canopy by sliding the
fixing pin lever.
• Remove grease filters.
• Screw the Frame into place
using the 6 scr
ews 12f, re-
connect the wires to the
Commands and Light, re-
place the metal grease filter
and the Panel.
260
13
495 - 675
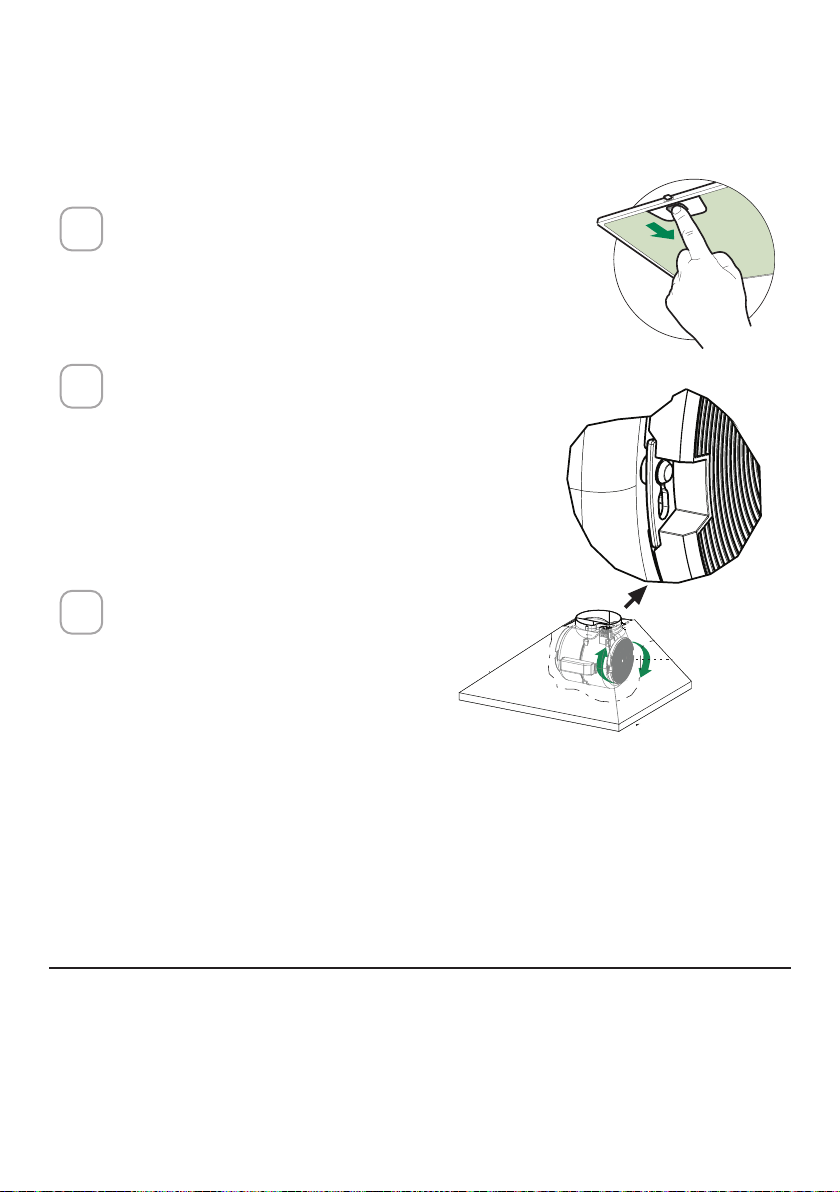
Retirar los filtros de grasa.
Retire el filtro de carbón satu-
rado girándolo hacia la dere-
cha (hacia atrás) hasta que se
desbloquee de la carcasa del
motor y tire hacia el lateral.
Para volver a colocar cada filtro
de carbón, colóquelo contra el
lateral del ventilador y presióne-
lo hacia dentro. Después gire el
filtro de carbón hacia la derecha
(hacia delante) hasta que se
quede en su posición.
1
2
3
SUSTITUCIÓN DEL FILTRO DE CARBÓN ACTIVADO
Los ltros de carbón activado no son lavables y no pueden ser regenerados,
por lo que deben ser reemplazados aproximadamente cada 4 meses de fun-
cionamiento, o con mayor frecuencia en caso de uso intensivo.
SUSTITUCIÓN DE LA ILUMINACIÓN
Las luces LED deben ser sustituidas por el servicio técnico autorizado de
Faber.
Loading ...
Loading ...
Loading ...