Loading ...
Loading ...
Loading ...
8
and hold the (B6) button for 3 seconds to start descaling
(
see instructions in section
Descaling) .
If you accidentally activate descaling, you can stop it by pressing
and holding the
(B6) button for at least 10 seconds.
5.3 Auto-o
To set the Auto-o time press
(B7) button:
5 minutes
1.5 hour
3 hour
5.4 Default values
To reset the default values press
(B5) button; the indi-
cator light blinks. Press and hold the
(B5) button for 3
seconds to resets all menu settings.
5.5 Water hardness
To set the one of the 3 levels of water hardness, press
(B4)
button:
Water Hardness
Test Result
Corresponding
indicator light
Level
n
1
soft water
nn
2
medium water
nnn
nnnn
3
hard or very hard
water
5.6 Measuring water hardness
The
(B3) indicator light comes on following a predetermined
period of operation that depends on a water hardness setting.
The machine can also be programmed according to the actual
hardness of the local water supply, in which case descaling may
be required less frequently.
• Remove the water hardness test indicator paper (A19)
from its pack.
• Immerse the paper completely in a glass of water for one
second.
• Remove the paper from the water and shake lightly. After
about a minute, 1, 2, 3, or 4 red squares form, depending
on the hardness of the water.
6. CLEANING
Important: Before maintenance or cleaning of the appliance,
turn it o, unplug from the main socket and allow to cool.
Do not use solvents, abrasive detergents or alcohol to clean the
coee machine.
Do not use metal objects to remove encrustations or coee de-
posits as they could scratch metal or plastic surfaces.
None of the components or accessories is dishwasher safe.
If the machine is not used for more than one week, before using
it again, we strongly recommend you perform a rinse cycle.
The following parts of the machine must be hand cleaned and
dry regularly:
• drip tray (A8): the drip tray should be emptied and
cleaned after each use or when the level indicator (red)
rises through the metal grid.
Remove the drip tray, empty the water and clean the drip
tray with a cloth, dry and then reassemble the drip tray.
• cups lter (A15), (A16): After using the appliance, always
rinse the lters under abundant running water. Use the
brush (A9) to clean (g. 14).
• coee spout (A7): After every 200 coees, rinse the cof-
fee spout by delivering about 0.5 l of water from the coee
spout (press the
(B6) button without using ground
coee).
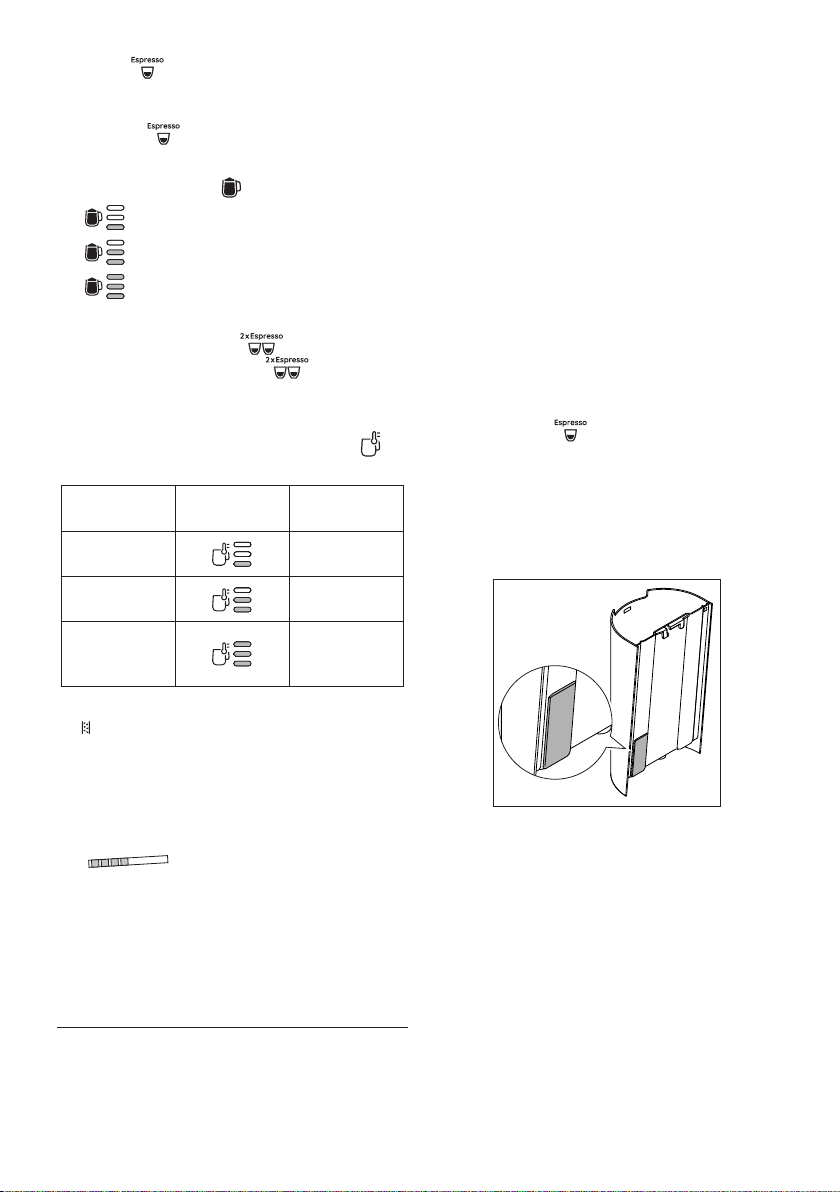
• water tank (A2):
Clean the water tank regularly (about
once a week) and whenever you replace the water softener
lter (if present) with a damp cloth and a little mild wash-
ing up liquid, especially internally in the sensor area (g. 13);
rinse with running water.
13
• steam wand (A5): After every use, remove with a soft
damp cloth any milk residues from the steam wand. Lift the
steam wand and place it in “OFF” (auto clean) position (g.
10). The appliance delivers water from the steam wand.
Wait that the steam wand cool down and open the hole of
the nozzle with the cleaning needle (A10) (g. 14).
Loading ...
Loading ...
Loading ...