Loading ...
Loading ...
Loading ...
www.insigniaproducts.com
19
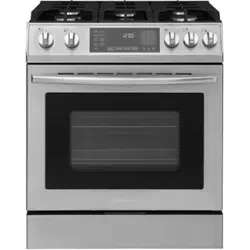
4.8 Cu. Ft. Gas Convection Range with Self Clean and Air Fry
• Ground Fault Circuit Interrupters (GFCIs) aren’t required or recommended for the gas range receptacles.
• NEVER connect the ground wire to plastic plumbing lines, gas lines, or water pipes.
Installing your gas range
Important notes to the installer
1 Read this manual before installing your range.
2 Observe all governing codes and ordinances.
3 Make sure that you leave these instructions with your range.
4 Before installing your range in an area covered with linoleum or any synthetic floor covering, make sure that the floor
covering can withstand temperatures of at least 180° F (82° C) without shrinking, warping, or discoloring.
5 Don’t install your range over carpeting unless you place an insulating pad or sheet of .25 in. (.6 cm) thick plywood
between your range and carpeting.
Before installing your range
1 Remove the exterior and interior packing.
2 Wipe the surfaces of your range with a damp cloth or sponge, then wipe them dry with a clean, dry cloth.
Connecting to gas
1 Shut off the main gas supply valve before disconnecting an old range. Leave the valve off until the new hookup is
complete. Don't forget to relight the pilots on other gas appliances when you turn the gas back on.
2 Install a manual gas line shut-off valve in the gas line in an easily accessed location outside of your range.
Make sure that everyone operating your range knows where the valve is and how to shut off the gas supply to your
range.
3 Install a male 0.5 in. (1.3 cm) flare union adapter to the 0.5 in. (1.3 cm) NPT internal thread at the regulator inlet. Use a
backup wrench on the elbow regulator fitting to avoid damage.
When installing your range from the front, remove the 90° elbow for easier installation.
4 Install a male 0.5 in. (1.3 cm) or 0.75 in. (1.9 cm) flare union adapter to the NPT internal thread of the manual shut-off
valve, taking care to back up the shut-off valve to keep it from turning.
5 Connect a flexible metal appliance connector to the adapter on your range. Position your range to allow room for the
connection at the shut-off valve.
WARNING: We recommend that a professional installer install your range.
If your range isn’t installed correctly, incorrect electrical grounding or gas leaks can cause a fire or explosion which can lead to injury or
death.
WARNING: If the gas isn’t installed correctly to your range, a gas leak can cause a fire or explosion which can lead to death or injury.
We recommend that a professional installer connect the gas.
WARNINGS:
Don’t store or use gasoline or other flammable vapors and liquids in or near your range.
IF YOU SMELL GAS:
• DO NOT light a match, candle, or cigarette.
• DO NOT try to light any appliance.
• DO NOT touch any electrical switch.
• DO NOT use any phone in your building.
• Clear the room, building, or area of all occupants.
• Immediately call your gas supplier from outside the building. Follow the gas supplier’s instructions.
• If you cannot reach your gas supplier, call the Fire Department.
Never use an old connector when installing your range. If you use the hard-piping method, carefully align the pipe. You can’t move
your range after the gas is connected.
Notes:
• Because hard piping restricts movement of your range, we recommend that you use a CSA International-certified flexible metal
appliance connector unless local codes require a hard-piped connection.
• To prevent gas leaks, apply pipe-joint compound or wrap pipe-thread tape with Teflon on all male (external) pipe threads.
CAUTIONS:
Don’t over-tighten the flare union adapter to the NTP internal thread at the regulator.
To prevent gas leaks, apply pipe-joint compound in the vicinity of the joints.
Loading ...
Loading ...
Loading ...