MADE IN CHINA
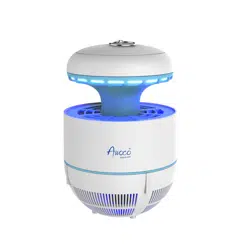
This Awoco sticky fly trap lamp is specifically designed to keep
the living space or sanitary area free of pests, such as flies,
mosquitoes, moths and other small insects. The lamp ultilizes
the UV black light, which the pests find irresistable, and
captures the pests with a sticky glue board, which is coated
with a special non-toxic attractant. Replace the board every
1 - 2 months or when the board is full for most effective result.
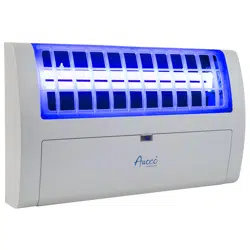
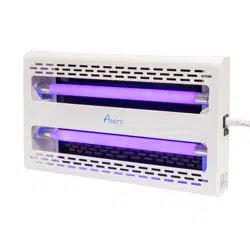
FLY TRAP LAMP USER MANUAL
MODEL: FT-1E36
Test the Device Before Installing
1. Remove the device from the package carefully. Check the body and parts for shipping
damage.
2. Check the posistion of the bulb and the board to see if they are seated correctly.
3. Connect the device to the nearest 110V AC outlet.
4. If the lamp lights up immediately, proceed to installing the lamp.
5. If the lamp doesn’t light up, refer to the troubleshooting section to determind the issue.
Cautions and Warnings
1. For indoor use only. DO NOT install the lamp outdoors where it’s exposed to weather
elements.
2. Always disconnect the power before servicing the lamp.
3. DO NOT touch the base the bulb when the lamp is connected to a power outlet.
4. DO NOT stare at the UV light directly for a long period of time as doing so will cause
damage to your eyes.
5. DO NOT install the lamp in an area that contains flammable gas or explosive powder..
Installation Preparation
1. Choose a location with high insects desity, close to an electrical outlet (hard wired
availability) and easy serviceability.
2. DO NOT install the lamp near any competing light sources, such as bright sunlit
windows, indoor lighting fixtures.
3. Install the lamp at least 70” high from the floor to avoid direct visual contact with the
UV black light.
4. The distance between the lamp and the ceiling should be 24” or more for maximum
light attraction.
Installation Instruction
1. Lift the front shell and remove the UV bulbs to avoid causing damage to them during
the installation.
2. Hold the back plate against the wall. Determind the installing location and mark the
screws’ locations with a pencil.
3. Drill holes on the marked locations and insert the plastic drywall anchors.
4. Install the back plate using the included screws to the anchors. Level the back plate
and then tighten the screws.
5. Install the bulbs and the sticky glue board. Note that the sticky side of the board should
be facing the bulbs.
6. Connect the power cord to the power outlet.
Maintenance
Replacing the Sticky Glue Board:
1. It’s recommended to replace the board every 1 - 2 months.
2. Unplug the power cord and wait for 5 minutes.
3. Lift the front shell and remove the old sticky glue board.
4. Install a new sticky glue board with the sticky side facing the bulbs.
5. Close the front shell.
6. Connect the power cord to the electrical outlet.
Replacing the UV Bulbs:
1. It’s recommended to replace the UV bulbs after 5000 hours of normal operation.
2. Unplug the power cord and wait for 5 minutes.
3. Lift the front shell and remove the old UV bulb by rotating it.
4. Install new UV bulbs in reversed rotation.
5. Close the front shell.
6. Connect the power cord to the electrical outlet.
Troubleshooting
Issue: The lamp doesn’t light up when I connect it to a power outlet.
Solution:
A. Check if the bulbs are popped out of the correct seating position during shipping.
B. Check if the power cord is connected to the ballast or connector.
C. Unplug the power cord, lift the front shell and rotate the bulbs slightly to adjust the
contact point between the bulbs and the bulb holders.
Issue: The lamp flickers when it lights up.
Solution: It’s normal for a new fluorescent lamps to flicker when used for the first time.
Unplug the power cord and plug it back after a few seconds. Leave the lamp on
for 48 hours and the flicker will not occur again.
If the issue persists after 48 hours, please contact Awoco technical support team.
Product Warranty
This product is warranted for a limited period of ONE YEAR Parts, begins from the date of
purchase.
This limited warranty is applied to the original retail purchaser and valid only for products
purchased for home use in the continental United States of America.
This limited warranty is non-transferable and does not extend to the subsequent owners of
this product.
Any applicable implied warranties, including the warranty of merchantability, are limited in
duration to a period of express warranty as provided herein beginning with the date of
original purchase at retail and, no warranties, whether express or implied, shall apply to
this product thereafter.
Product Support
If you need help with other issues not listed above, please contact us at 1-888-412-3428,
between 10 AM and 5 PM, Monday - Friday, Pacific Time.
Or
Email us at [email protected].