Loading ...
Loading ...
Loading ...
8
Read and understand all
assembly instructions before attempting
assembly. Failure to comply may cause serious
injury.
Note: Some illustrations in this manual may be
representative only, and not show your specific
model.
5.0 Setup and assembly
5.1 Contents of carton
1 Grinder
1 Serrated contact wheel 8”x2” (installed)
1 Abrasive belt (installed)
1 Operating Instructions and Parts Manual
1 Product registration card
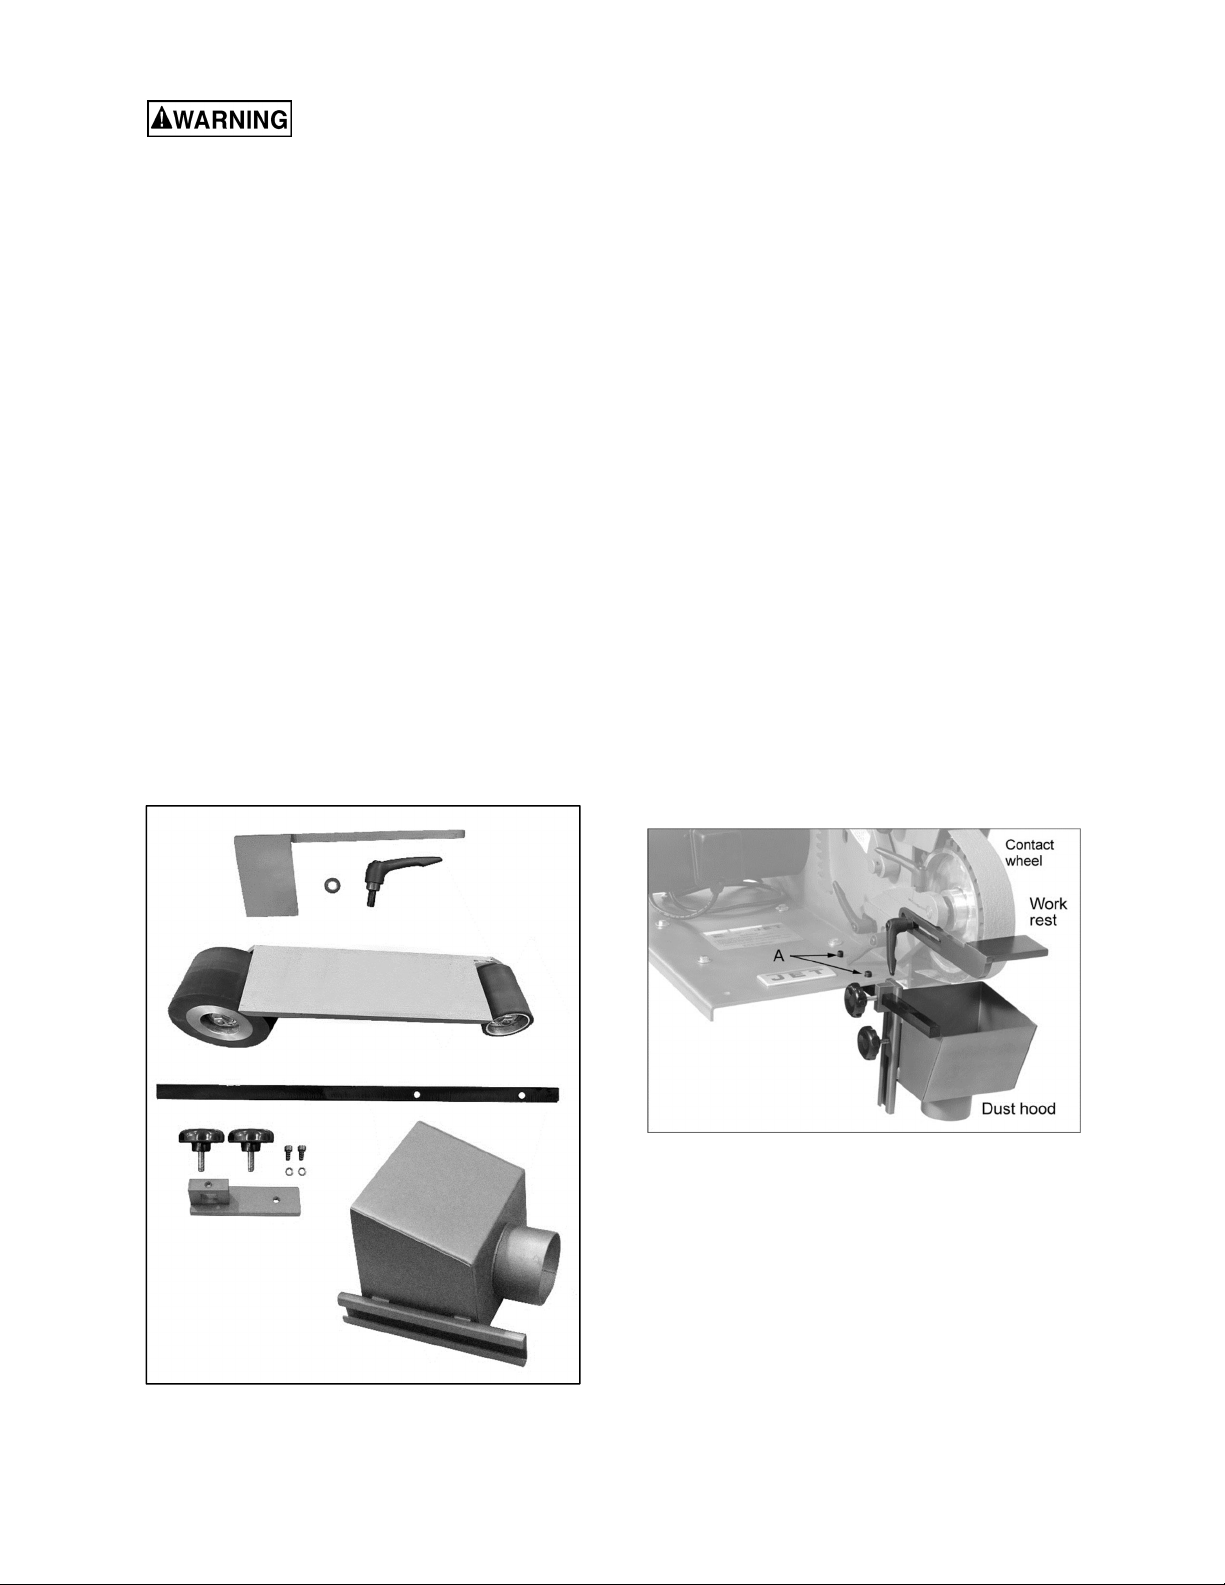
Uninstalled accessories (Figure 5-1):
1 Work rest
1 Adjustable handle 3/8x3/4”
1 Flat washer 3/8”
1 Platen assembly
1 Rail
1 Channel slide
2 Hand knobs 5/16x1
2 Socket hd cap screws 1/4x1/2
2 Lock washers 1/4
1 Dust hood
Figure 5-1: contents (not to scale)
5.1 Location
It is strongly recommended that the machine be
secured to a bench or stand. The base has multiple
holes (some are accessed behind the side panel) to
accept fasteners for this purpose. Sect. 4.1 shows
the hole patterns.
An optional JET stand is available for this machine.
See sect. 10.0. Use the 4 holes in front of the motor
to secure to this stand.
5.2 Installing work rest
The work rest mounts to a channel on left side of
head casting. See Figure 5-2. Attach work rest with
adjustable handle. Slide work rest inward until it is
about 1/16 inch from front of contact wheel. Tighten
cap screw.
5.3 Installing dust hood
It is recommended that the dust hood be used, and
connected to a metal dust collection system by a 3-
inch diameter hose secured with a hose clamp (not
provided).
Assemble dust hood parts as shown in Figure 5-2.
Also, secure the rail below the stand using the 2
socket head screws with lock washers (A, Figure 5-
2). Slide the dust hood assembly onto the rail and
tighten with the knobs.
The dust hood can be positioned as needed below
the contact wheel.
Figure 5-2: work rest and dust hood
Loading ...
Loading ...
Loading ...