Loading ...
Loading ...
Loading ...
Installation
3. Place brass nut I[A) and sleeve lIB)
on copper tube end as illustrated.
Reminder: Do not use an old
sleeve. The nut and sleeve are
provided in the Use and Care
packet.
t
4. Place end of copper tubing into
water valve inlet port. Shape
tubing slightly. Do not kink - so
that tubing feeds straight into inlet
port.
5. Slide brass nut over sleeve and
screw nut into inlet port.
Place adjustable wrench on nut (1)
attached to plastic waterline and
maintain position.
Using second adjustable wrench
turn the lower nut (2)
counterclockwise and fully tighten
while holding the upper nut in
place.
Important: Do not over-tighten. Cross threading
may occur.
.
Pull on tubing to confirm
connection is secure.
Connect tubing to frame
with water tubing clamp (C)
and turn on water supply.
Check for leaks and correct
if necessary. Continue to
observe the water supply
connection for two to three
hours prior to moving the
refrigerator to its permanent
location.
7. Monitor water connection for 24 hours. Correct
leaks, if necessary.
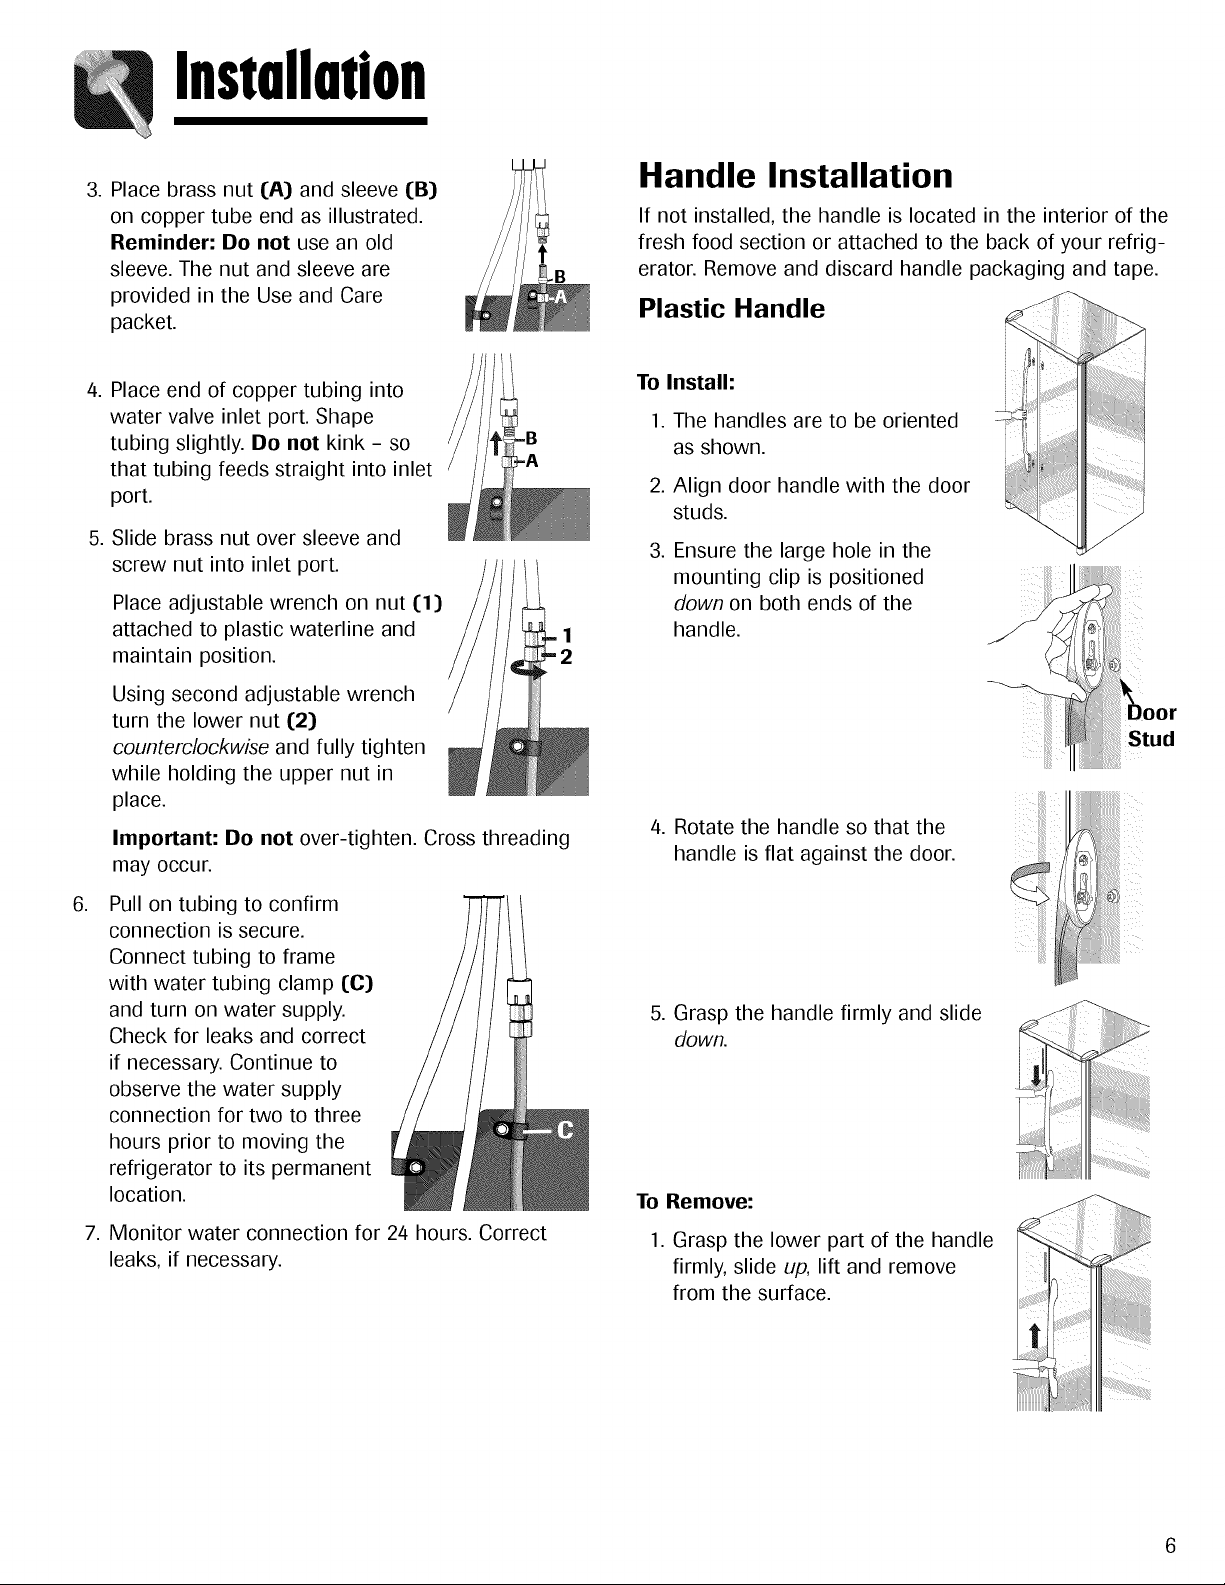
Handle Installation
If not installed, the handle is located in the interior of the
fresh food section or attached to the back of your refrig-
erator. Remove and discard handle packaging and tape.
Plastic Handle
To Install:
1. The handles are to be oriented
as shown.
2. Align door handle with the door
studs.
3. Ensure the large hole in the
mounting clip is positioned
down on both ends of the
handle.
oor
Stud
4. Rotate the handle so that the
handle is flat against the door.
5. Grasp the handle firmly and slide
down.
ii
,jiiiii_ii_ii_ii_i!_ii_iii_!i_ii!i_ii___
II IIII
To Remove:
1. Grasp the lower part of the handle
firmly, slide up, lift and remove
from the surface.
Loading ...
Loading ...
Loading ...