
Loading ...
Loading ...
Loading ...
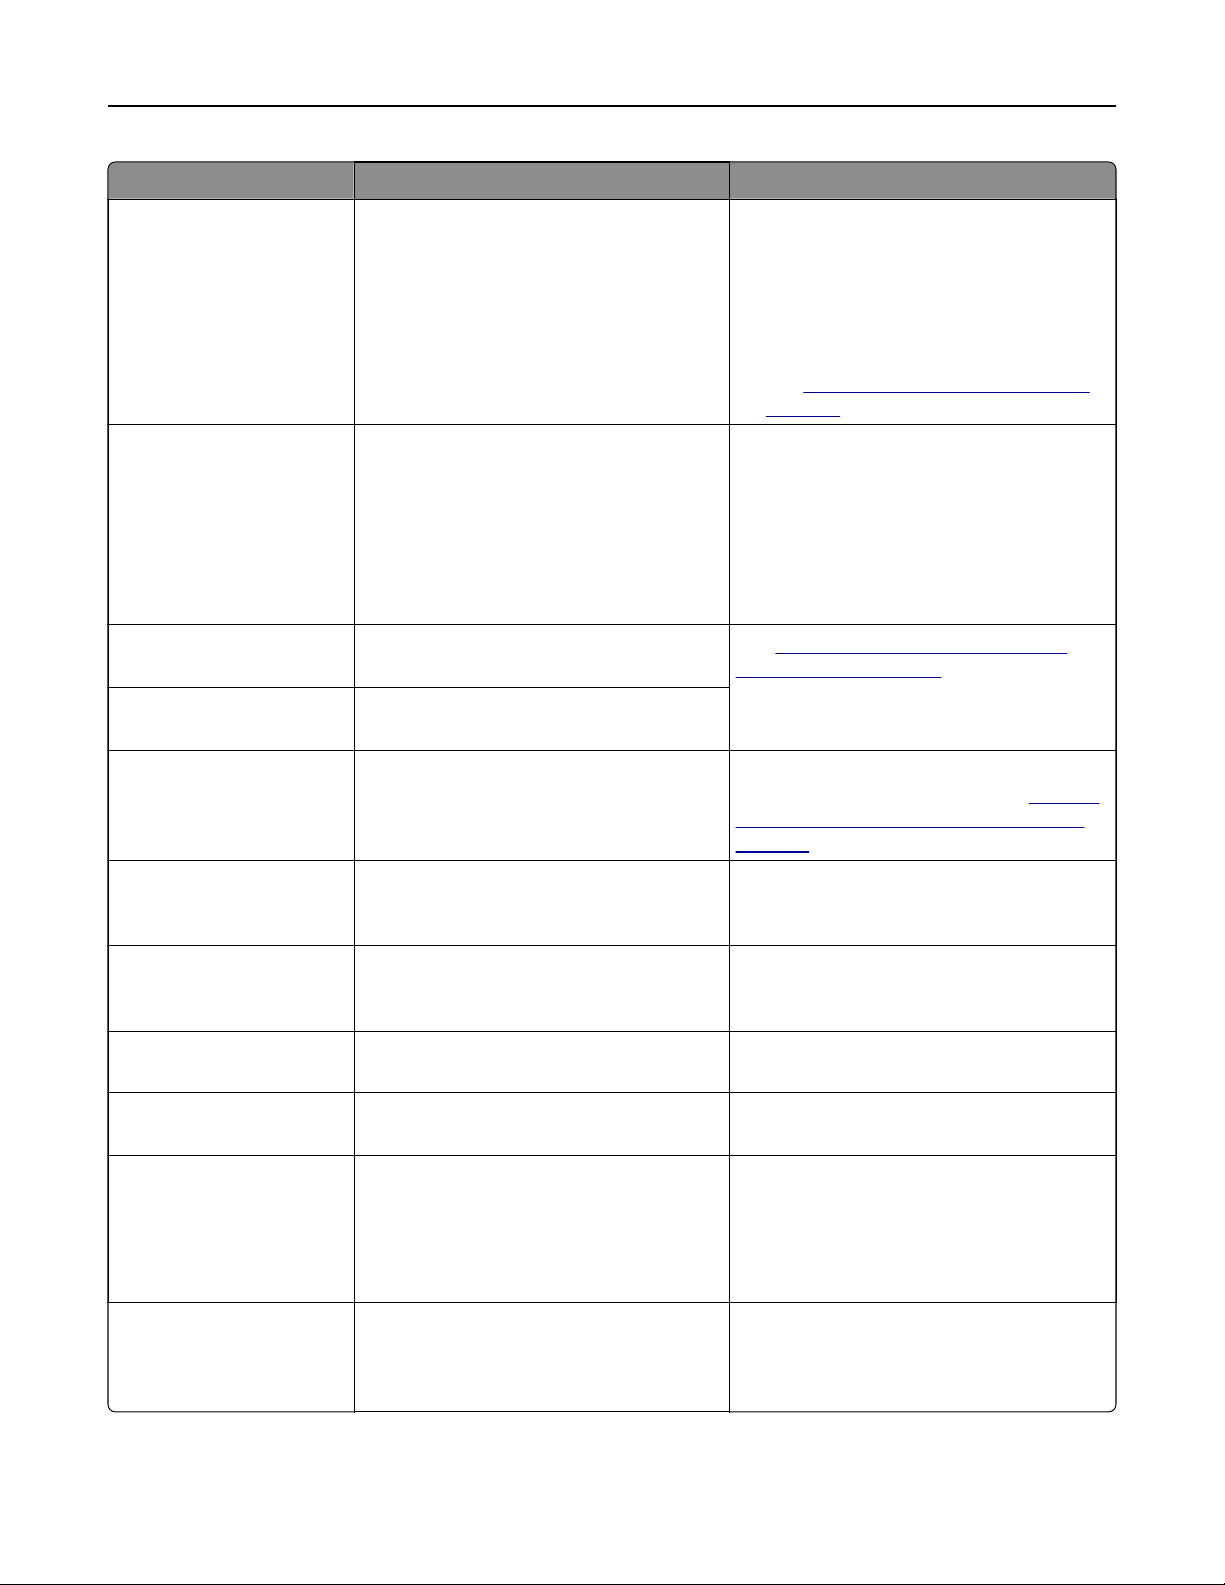
Error codes Error message Solution
62 Disk full. Try one or more of the following:
• Tou ch Continue to clear the message
and continue printing.
• Delete fonts, macros, and other data
stored in the hard disk.
• Install a hard disk. For more information,
see “Installing a printer hard disk” on
page 171.
63 Format the disk. Formatting now wipes all information from
the storage drive.
To format the disk, do the following:
1 Tou ch Settings > Device >
Maintenance > Out of Service Erase.
2 Tou ch Sanitize all information on hard
disk, and then touch ERASE.
71.01 Fax Station Name not set up.
Contact system administrator.
See
“Setting up the fax function using
analog fax” on page 45.
71.02 Fax Station Number not set up.
Contact system administrator.
71.03 No analog phone line connected
to modem, fax is disabled.
Check the connection and the line for a
signal. For more information, see
“Setting
up the fax function using analog fax” on
page 45.
71.06 Unable to connect to HTTPS Fax
Server.
Connection to HTTPS Fax Server is
disconnected. Check the Internet
connection of the printer.
71.07 Printer is not registered to
HTTPS Fax Server.
Make sure that the printer is added to the
device list in the HTTPS Fax Server portal.
Contact the system administrator.
71.11 Fax partition. The fax partition is not working. Contact the
system administrator.
71.12 Memory full, cannot print
faxes.
Tou ch Print All to print as many of the faxes
as have been saved.
71.13 Memory full. Cannot send
faxes.
Try either of the following:
• Continue and try sending the fax again.
• Scan the original document one page at
a time, dial the fax number, and then fax
the document.
71.40 Printer's time is incorrect. Configure the printer time. From the home
screen, touch Settings > Device >
Preferences > Date and Time >
Configure.
Troubleshoot a problem 427
Loading ...
Loading ...
Loading ...