Loading ...
Loading ...
Loading ...
OPERATION
ALWAYS WEAR SAFETY GOGGLES OR SAFETY
GLASSES WITH SIDE SHIELDS WHEN OPERATING
YOUR SANDER. TO adjust Sahding belt, connect
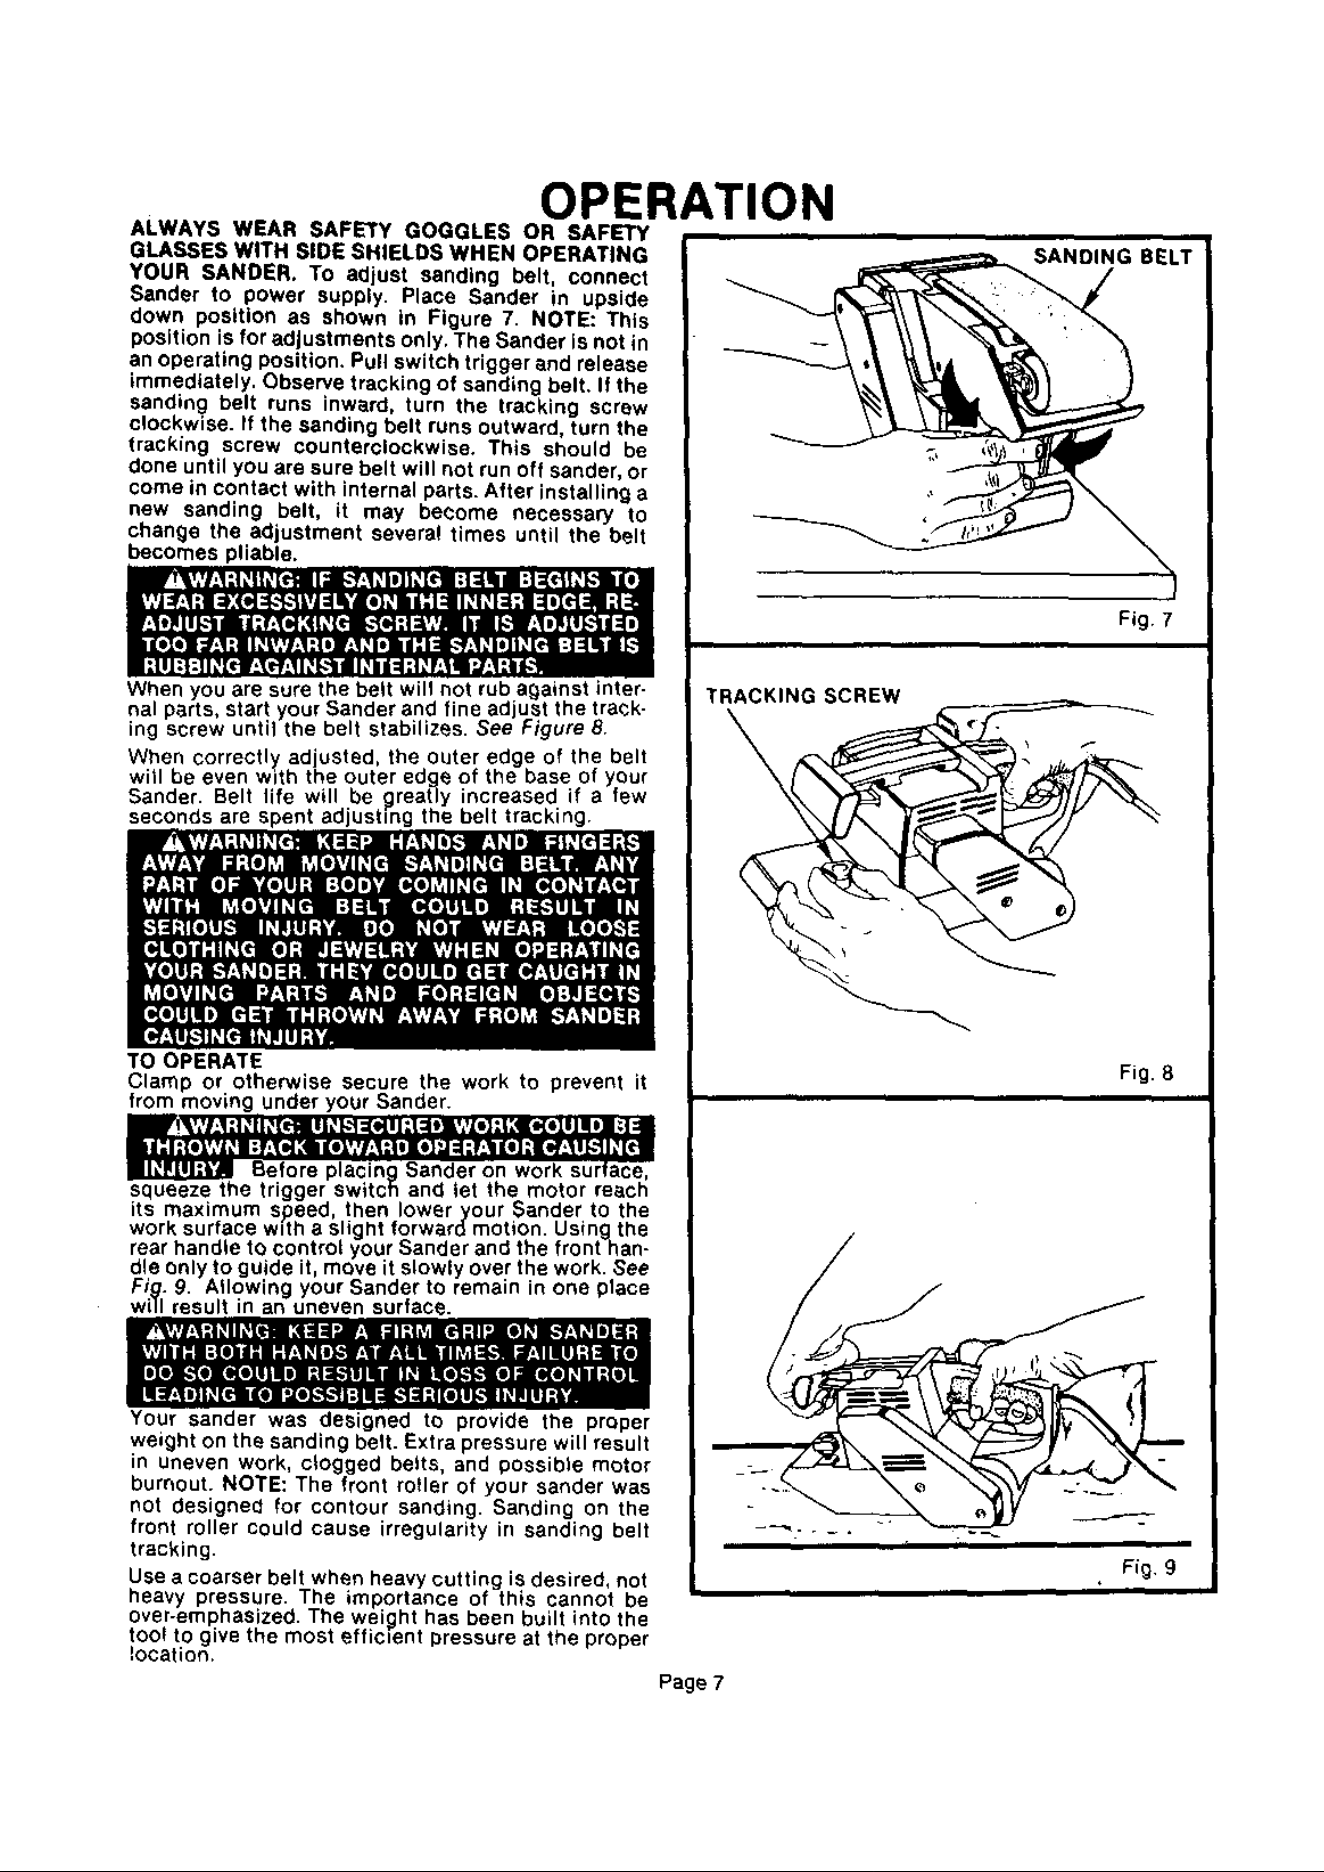
Sander to power supply. Place Sander in upside
down position as shown in Figure 7. NOTE: This
position is for adjustments only. The Sander is not in
an operating position, Pull switch trigger and release
immediately, Observe tracking of sanding belt, If the
sanding belt runs inward, turn the tracking screw
clockwise. It the sanding belt runs Outward, turn the
tracking screw counterclockwise, This should be
done until you are sure belt will not run off sander, or
come in contact with internal parts. After installing a
new sanding belt, it may become necessary to
change the adjustment severa! times until the belt
becomes pliable,
When you are sure the belt will not rub against inter.
nal pats start your Sander and fine adjust the tra_k-
ing screw unt I the be t stabilizes. See F gure 8
When co ec I_/adjusted the outer edge of the belt
witlbeevenw_th heou er edge of the base of your
Sande. Belt life will be greatly increased if a few
seconds are spent adjusting the belt tracking
TO OPERATE
Clamp or otherwise secure the work to prevent it
from moving under your Sander.
Before placing Sander on work ce,
squeeze the trigger switch and let the motor reach
s max mum speed then Ioweryour Sander to the
work surface w_th a slight forwardmotion, Usin=_!the
ear handle to controt your Sander and the front han-
d e bn y 1o gu de it, mcNe it s_wly over the work• See
Fig. 9, Allowing your Sander to remain in one place
will result in an uneven surface.
Your sander was designed to provide the proper
weight on the sanding belt. Extra pressure will result
in uneven work, clogged belts, and possibte motor
burnout. NOTE: The front ro_ler of your sander was
not designed for contour sanding• Sanding on the
front roller could cause irregularity in sanding belt
tracking•
Use a coarser belt when heavy cutting is desired, not
heavy pressure• The importance of this cannot be
over-emphaSized• The weight has been built into the
too{ to give the most efficient pressure at the proper
location.
TRACKING SCREW
\
SANDING BELT
Fig 7
Fig. 8
Page 7
/ r _ I_ _"
Fig 9
Loading ...
Loading ...
Loading ...