Loading ...
Loading ...
Loading ...
OPERATION
Selecting the correct size and type sanding bert isan
important step in achieving a high quagty Sanded
finish. Standard 3 Inch x 21 Inch sanding belts made
of aluminum oxide, silicone carbide, and other syn-
thetic abrasives are best for power sanding. In
general, coarse grit will remove the most material
and fine grit will produce the smoothest finish in all
sanding operations. The condition of the surface to
be sanded wig determine which grit belt wIJI do the
job. If the surface is rough, start with a coarse grit
belt sanding until surface is uniform. Medium grit
belt may then be used to remove scratches left by
the coarser belt and fine grit belt used for finishing
of the surface. Always continue sanding with each
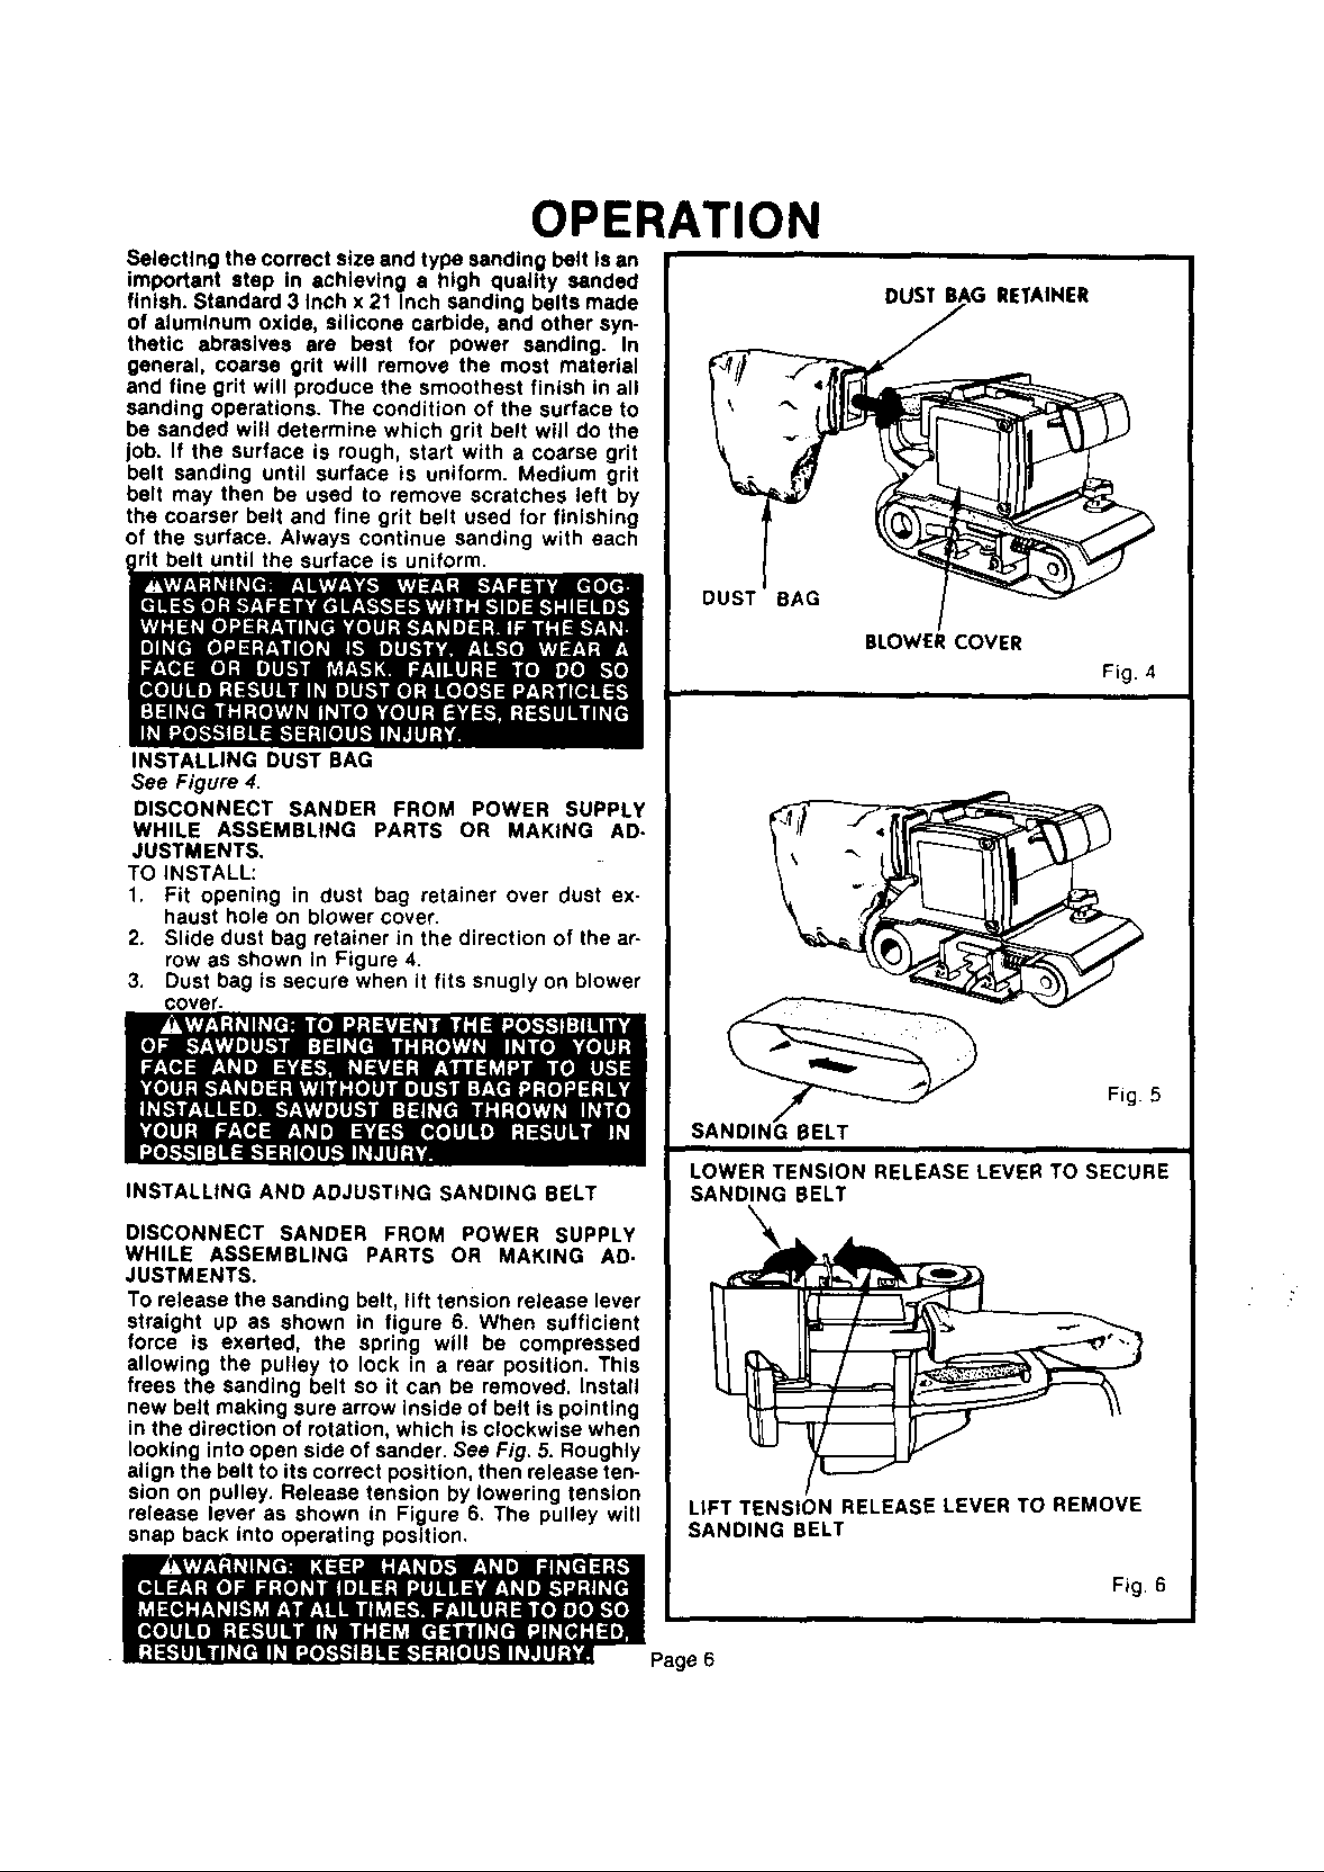
INSTALLING DUST BAG
See Figure 4.
DISCONNECT SANDER FROM POWER SUPPLY
WHILE ASSEMBLING PARTS OR MAKING AD-
JUSTMENTS.
TO INSTALL:
1. Fit opening in dust bag retainer over dust ex-
haust hole on blower cover.
2. Slide dust bag retainer in the direction of the ar-
row as shown in Figure 4.
3. Dust bag is secure when it fits snugly on blower
cover.
INSTALLING AND ADJUSTING SANDING BELT
DISCONNECT SANDER FROM POWER SUPPLY
WHILE ASSEMBLING PARTS OR MAKING AD.
JUSTMENTS.
TO release the sanding belt, Hft tension release lever
straight Up as shown in figure 6. When sufficient
force is exerted, the spring will be compressed
allowing the pulley to lock in a rear position. This
frees the sanding belt so it can be removed. Install
new belt making sure arrow inside of belt is pointing
in the direction of rotation, which is clockwise when
looking into open side of sander. See Fig. 5. Roughly
align the belt to its correct position, then release ten-
sion on pulley. Release tension by lowering tension
release lever as shown in Figure 6. The pulley will
snap back into operating position,
DUST BAG RETAINER
DUST RAG
BLOWER COVER
Fig. 4
SANDING BELT
i
LOWER TENSION RELEASE LEVER TO SECURE
SANDING BELT
LIFT TENSION RELEASE LEVER TO REMOVE
SANDING BELT
Fig 6
Page 6
Loading ...
Loading ...
Loading ...