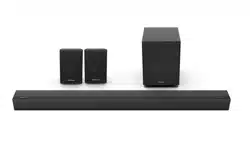
Loading ...
Loading ...
Loading ...
9
9 1110 12 13
6
1 2 3
14
87
4
5
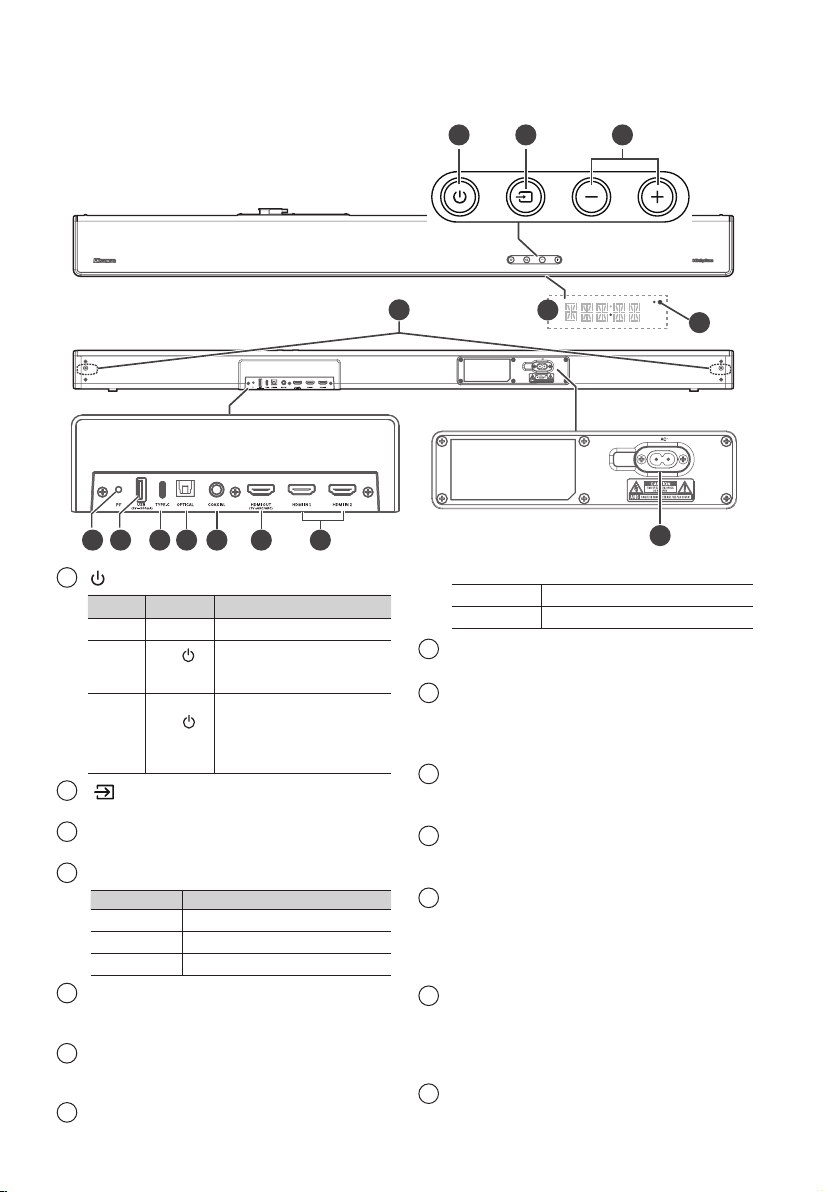
3. Identifying the Parts
3.1 Main Unit
1
(ON/OFF) button
State Action
Function
On • Follow source state
Semi
Standby
Press
once
• Wi-Fi is still on.
• It still supports Play-Fi and
Airplay2.
Eco
Standby
Press and
hold
5 seconds
• Wi-Fi is o.
• The product enters the lower
power consumption mode.
• Restarting the system will
take a relatively longer time.
2
(SOURCE) button
Select the play function.
3
VOL+/VOL- buttons
Increase/decrease the volume level.
4
Wi-Fi LED indicator
LED State Status
Blink
Wi-Fi Access Point (AP) mode
Double blink
Wi-Fi Protected Setup (WPS) mode
Constant on
Connected / Paired successful
5
Display Window / Remote Control Sensor
Show the current status.
Receive signal from the remote control.
6
Screws
Remove the screws then install the wall
mounting screws into the back of the unit.
7
PF (Wi-Fi Setup) button
• Trigger Wi-Fi setup for Play-Fi.
• Press and hold the button
:
8 seconds
Wi-Fi Access Point (AP) mode
3 seconds
Wi-Fi Protected Setup (WPS) mode
8
USB Socket
Insert the USB device to play music.
9
TYPE-C Socket
For the Dongle of wireless rear surround speaker.
This port can't be used to connect to other
Type C devices.
10
OPTICAL Socket
Use to connect to the OPTICAL OUT socket
on an external device.
11
COAXIAL Socket
Use to connect to the COAXIAL OUT socket
on an external device.
12
HDMI OUT (TV eARC/ARC) Socket
The port for connecting a TV. The port
supports the eARC/ARC HDMI feature, which
allows the soundbar to play audio that
originates on the connected TV.
13
HDMI IN (1/2) Sockets
Two HDMI ports for connecting HDMI source
devices, such as a DVD player, Blu-ray Disc™
player, or gaming console. Note that only
one HDMI input is usable at a time.
14
AC~ Socket
Connect to power supply.
Loading ...
Loading ...
Loading ...