Loading ...
Loading ...
Loading ...
www.blackstoneproducts.com
14
ASSEMBLY
!
WARNING: The manufacturer has made every effort to eliminate any sharp edges.
However, you should handle all components with care to avoid accidental injury.
Tools required: The only tool needed is a Phillips Screwdriver needed for minimal assembly on the
cover and main body handles.
Please read all instructions thoroughly before proceeding. Find a large, clean area in which to assem-
ble your grill. Please refer to the parts list and assembly diagram as necessary. Grill assembly involves
large components; therfore, it is advised to have two people set up the unit.
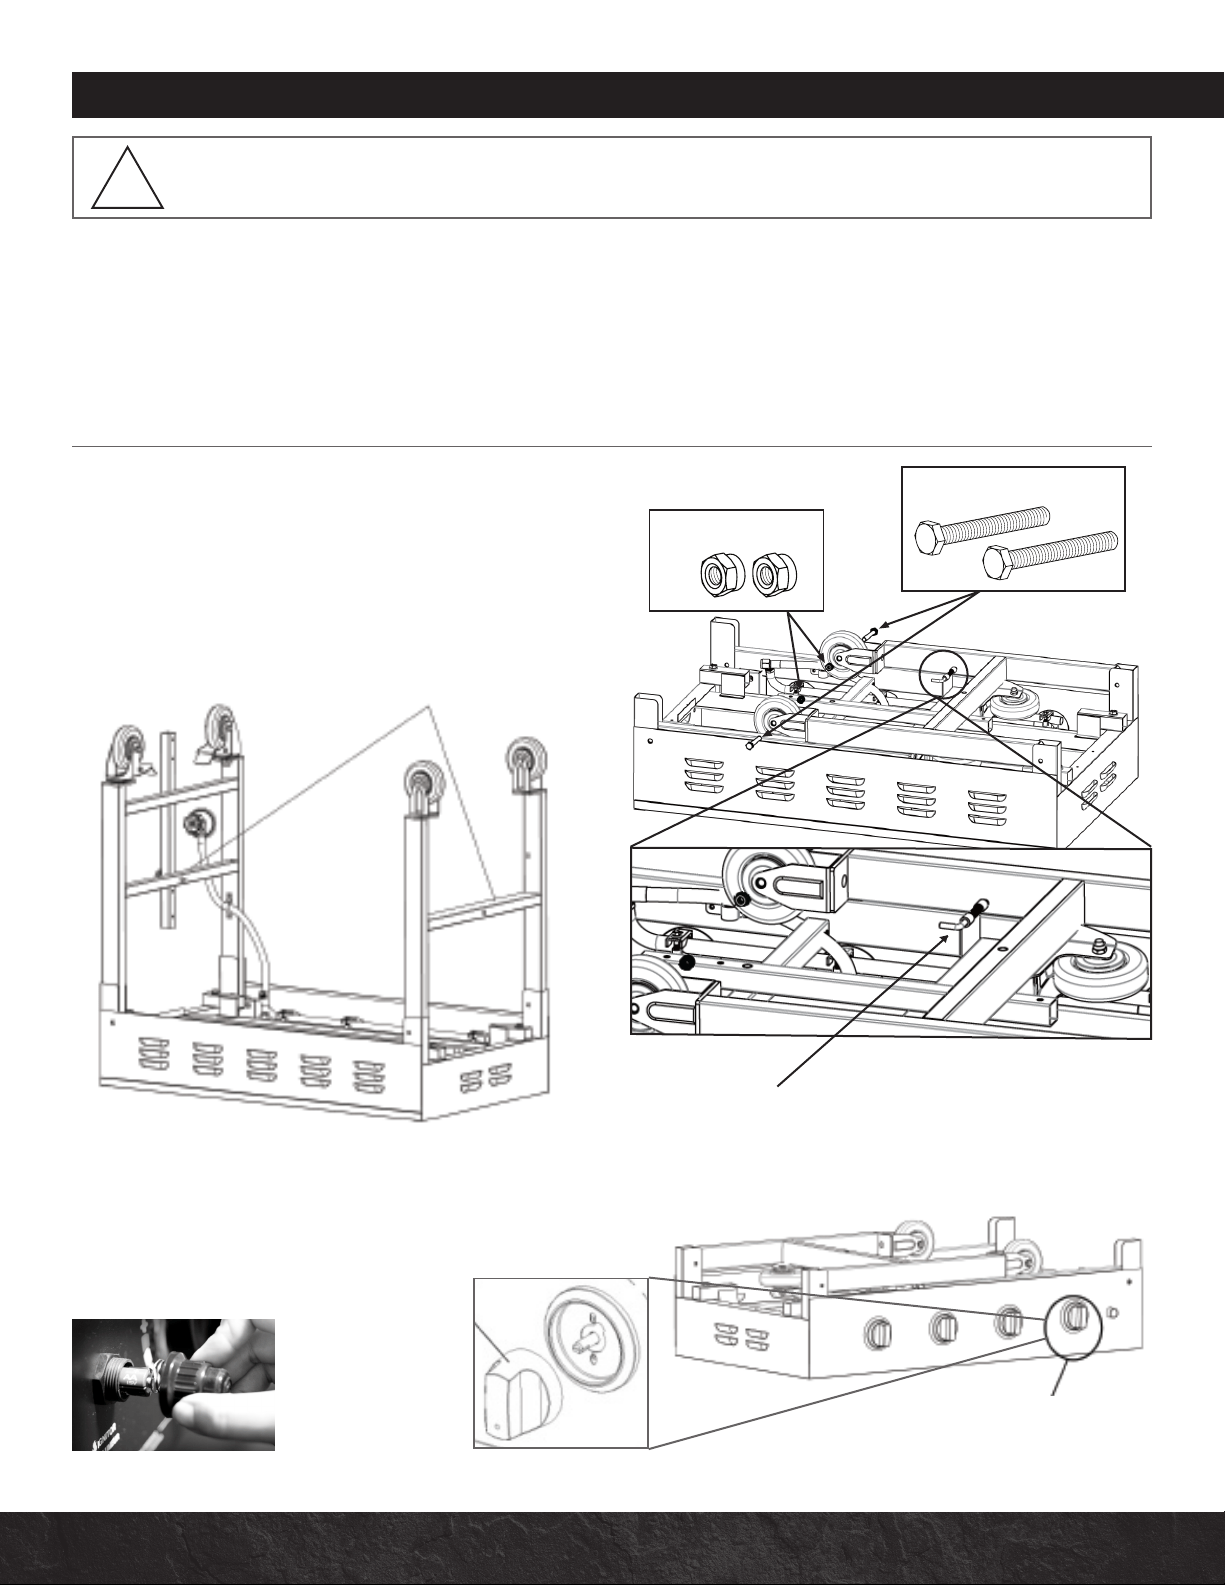
STEP 1: Install the two(2) wheels to the leg assembly
with two(2) M6x38 bolts and two(2) M6 nuts
(as shown in Diagram A).
Next, open the leg assembly by rst pulling out the
leg locking lever (as shown in Diagram B) and then
pivot both leg assemblies to a vertical position (as
seen in the image below).
STEP 2: Place four(4) Valve Knobs on a burner valve
(see Diagram C). Then insert a AA battery (battery
not included) into the battery socket with the positive
terminal facing out, and then screw on the Ignition
Button (view image below).
NOTICE: Make sure all the plastic protection is removed before assembling.
Valve Knob
Leg Assembly
Pull out on the lever to unlock the legs and then bring
the legs up to a vertical position.
Diagram A
Diagram B
Install Four(4) Valve Knobs
One AA battery (+ positive side facing out)
Diagram C
Two(2) Bolts
Two(2) Nuts
Loading ...
Loading ...
Loading ...