Loading ...
Loading ...
Loading ...
12
36” GAS RANGETOP INSTALLATION INSTRUCTIONS
When checking if the regulator is working properly,
the inlet pressure must be at least 1" greater than
the operating (manifold) pressure above. When con-
verting for propane gas use, the pressure supplied
to the regulator must be between 11" and 13" of the
water column.
The pressure regulator located in the inlet of the
range manifold must remain in the supply line.
Use a flexible metal appliance connector or rigid
pipe to connect the range to the gas supply. The
connector should have an inside diameter of 1/2”
and be 5 ft (1.5 m) or less in length.
(Exception: Maximum connector length in Massa-
chusetts installations is 3 ft (0.9 m). In Canada, the
connector must be single-wall metal and not longer
than 6 ft (1.8 m).
Save the nozzles removed from the appliance for
future use.
Parts included with the propane gas nozzle kit:
6 x nozzle number 48
4 x nozzle number 91
2 x nozzle number 115
1 x adhesive label for LPG nozzles
1 x 92849A078 Nozzle Change Warning label
1 x 913094470 Propane Gas Injector Kit label
1 x sealing gasket
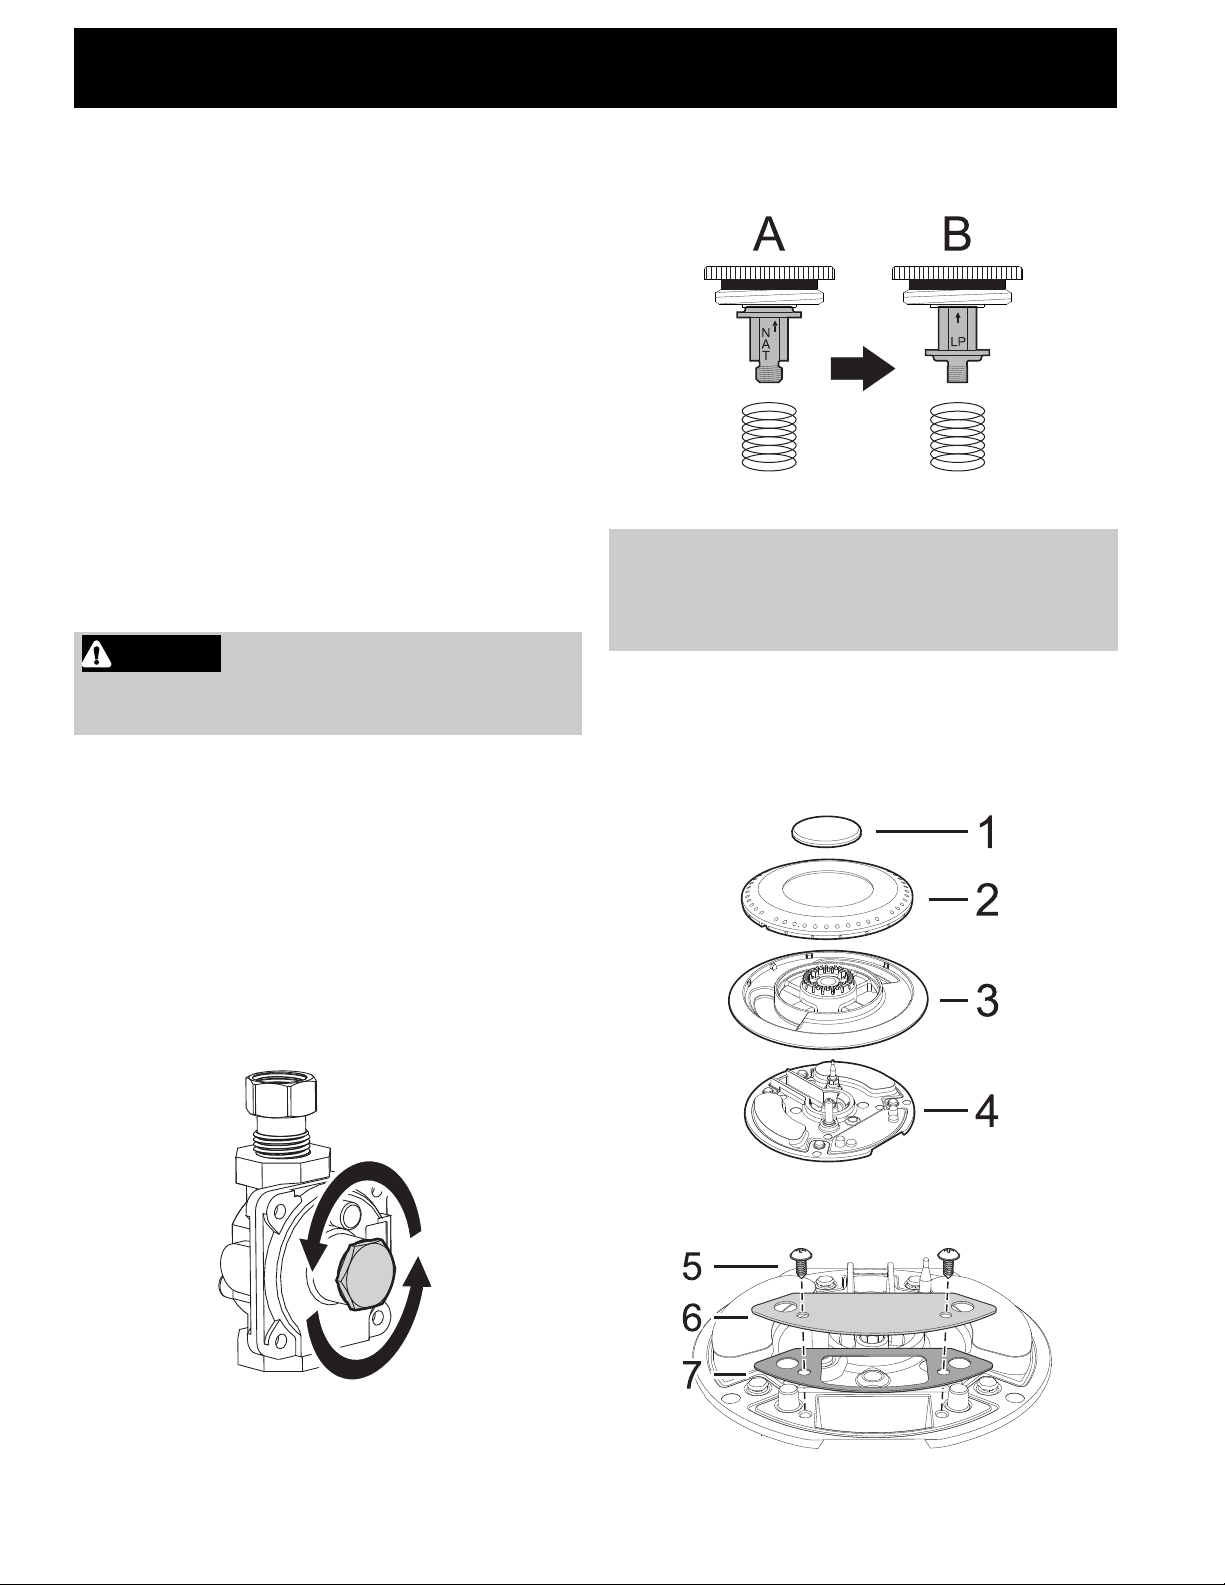
Setting the pressure regulator for Propane Gas
1. Unscrew regulator cap.
2. Unscrew the plastic regulator stem from the regu-
lator cap. Configuration “A” is for Natural Gas.
3. Invert the plastic regulator stem to achieve the
configuration “B” for Propane Gas and screw it in
tightly.
4. Screw the regulator stem and cap into place.
Replacing the burner nozzles
1. Remove the cooktop grates.
2. Remove the burner cover (1), the flame-spreader
crown (2) and the burner skirt (3) from the burner
base (4).
3. Remove the tightening screws (5), the cover
plate (6) and the gasket (7).
CAUTION Before proceeding with the gas
conversion, the gas supply must be turned off
before disconnecting the electrical power.
NOTE:
When converting for Propane Gas use, the pres-
sure supplied to the regulator must be between 11"
and 13" of the water column.
Loading ...
Loading ...
Loading ...