Loading ...
Loading ...
Loading ...

8. Installation Instructions
Important: Read all the safety instructions before
attempting to install this product.
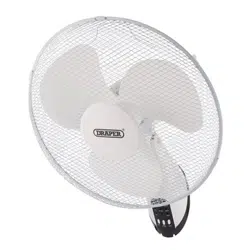
8.1 Installing the Fan Onto a Wall
Important: The fan requires an area of at least
W 600 x H 600 x D 650mm in order to operate
freely and without obstruction.
CAUTION! Check the immediate area around the
installation point to ensure that there are no
loose items that may become caught in or
otherwise aected by the fan in a manner that
may cause a hazard.
1. Place the wall mounting bracket (H) against the wall or
surface so that the three holes are against the wall and
the bracket extends upwards.
Important: Ensure that there is enough space above
the bracket to accommodate the fan once installed and
that a suitable power outlet is within reach of the plug.
2. Mark the position of the holes and drill using an
appropriate bit.
3. Insert the plastic wall plugs and screw the bracket
rmly into place.
4. Hook the fan’s base bracket (10) over the wall
mounting bracket.
The cable runs and eyes on the base of the fan can
be used to keep the power cable tidy.
Important: Ensure that the fan sits securely on the
bracket and cannot be pulled away from the wall
easily.
5. Additional xings (not supplied) can also be installed
through any unused cable eyes for extra support.
Important: DO NOT overtighten screws through the
cable eyes as you may damage the product. ALWAYS
use xings appropriate for the installation surface
material.
8.2 Setting the Fan Tilt Angle
WARNING! ALWAYS ensure that the fan is switched
o, disconnected from mains power and has
completely stopped before adjusting the tilt angle.
The vertical tilt angle of the fan can be adjusted by gently
pushing the fan head upwards or downwards. The fan
clicks as it locks into each position.
– 12 –
EN
Important: Before using this product, read and
understand all the safety instructions listed in this
manual. ALWAYS ensure that the fan is securely installed
and that both grilles are tted correctly before use.
The fan must be plugged into an active mains power
supply for use.
9.1 Control Panel Overview
(18) Fan o button
(19) Fan on/speed button
(20) Fan oscillation button
(21) Low speed indicator
(22) Medium speed indicator
(23) High speed indicator
(24) Mode indicator
(25) 30min timer indicator
(26) 60min timer indicator
(27) 120min timer indicator
(28) 240min timer indicator
9 . Operating Instructions
– 13 –
EN
9.2 Power and Speed Selection
To switch the fan on, press the on/speed button (19).
The fan is equipped with three speed settings:
• Low
• Medium
• High
The fan retains the speed setting active at the time it
was switched o and starts up at this speed.
To advance to the next speed setting, press the on/speed
button again.
To switch o the fan, press the o button (18).
Power and speed selection can be performed using
both the control panel and the remote control.
9.3 Oscillation
The fan head will oscillate left and right if enabled.
To enable oscillation, press the oscillation button (20).
To disable oscillation, press the oscillation button again.
CAUTION! Before enabling oscillation, ensure
that the rotation movement of the fan will not
bring the blades into close proximity with loose
or obstructive objects that may get caught in
the blades or cause a hazard.
Oscillation can be enabled and disabled using both the
control panel and the remote control.
(19)
(18)
(26)
(27)
(28)
(20)
(21)
(22)
(23)
(25)
(24)
Fig. 12
Fig. 13
Fig. 10
(H)
Fig. 11
(10)
Loading ...
Loading ...
Loading ...