Use & Care Guide
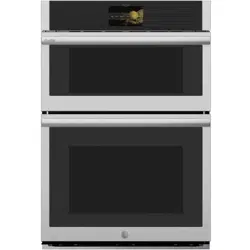
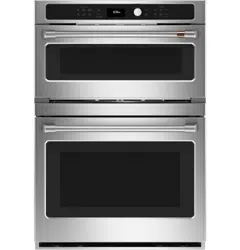
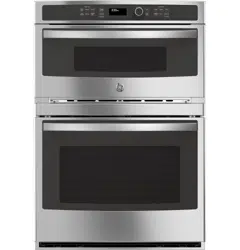
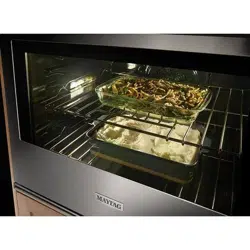
27”/30” Electric/Microwave Combination Wave-Touch™ Wall Oven
318205319 Rev. B (1003)
2
Finding Information
©2009 Electrolux Home Products, Inc. All rights reserved. Printed in the USA
Table of contents
Thank you for choosing Electrolux, the new
premium brand in home appliances. This Use &
Care Guide is part of our commitment to customer
satisfaction and product quality throughout the
service life of your new appliance.
We view your purchase as the beginning of a
relationship. To ensure our ability to continue
serving you, please use this page to record
important product information.
Keep a record for quick
reference
Please read & save this guide
Questions?
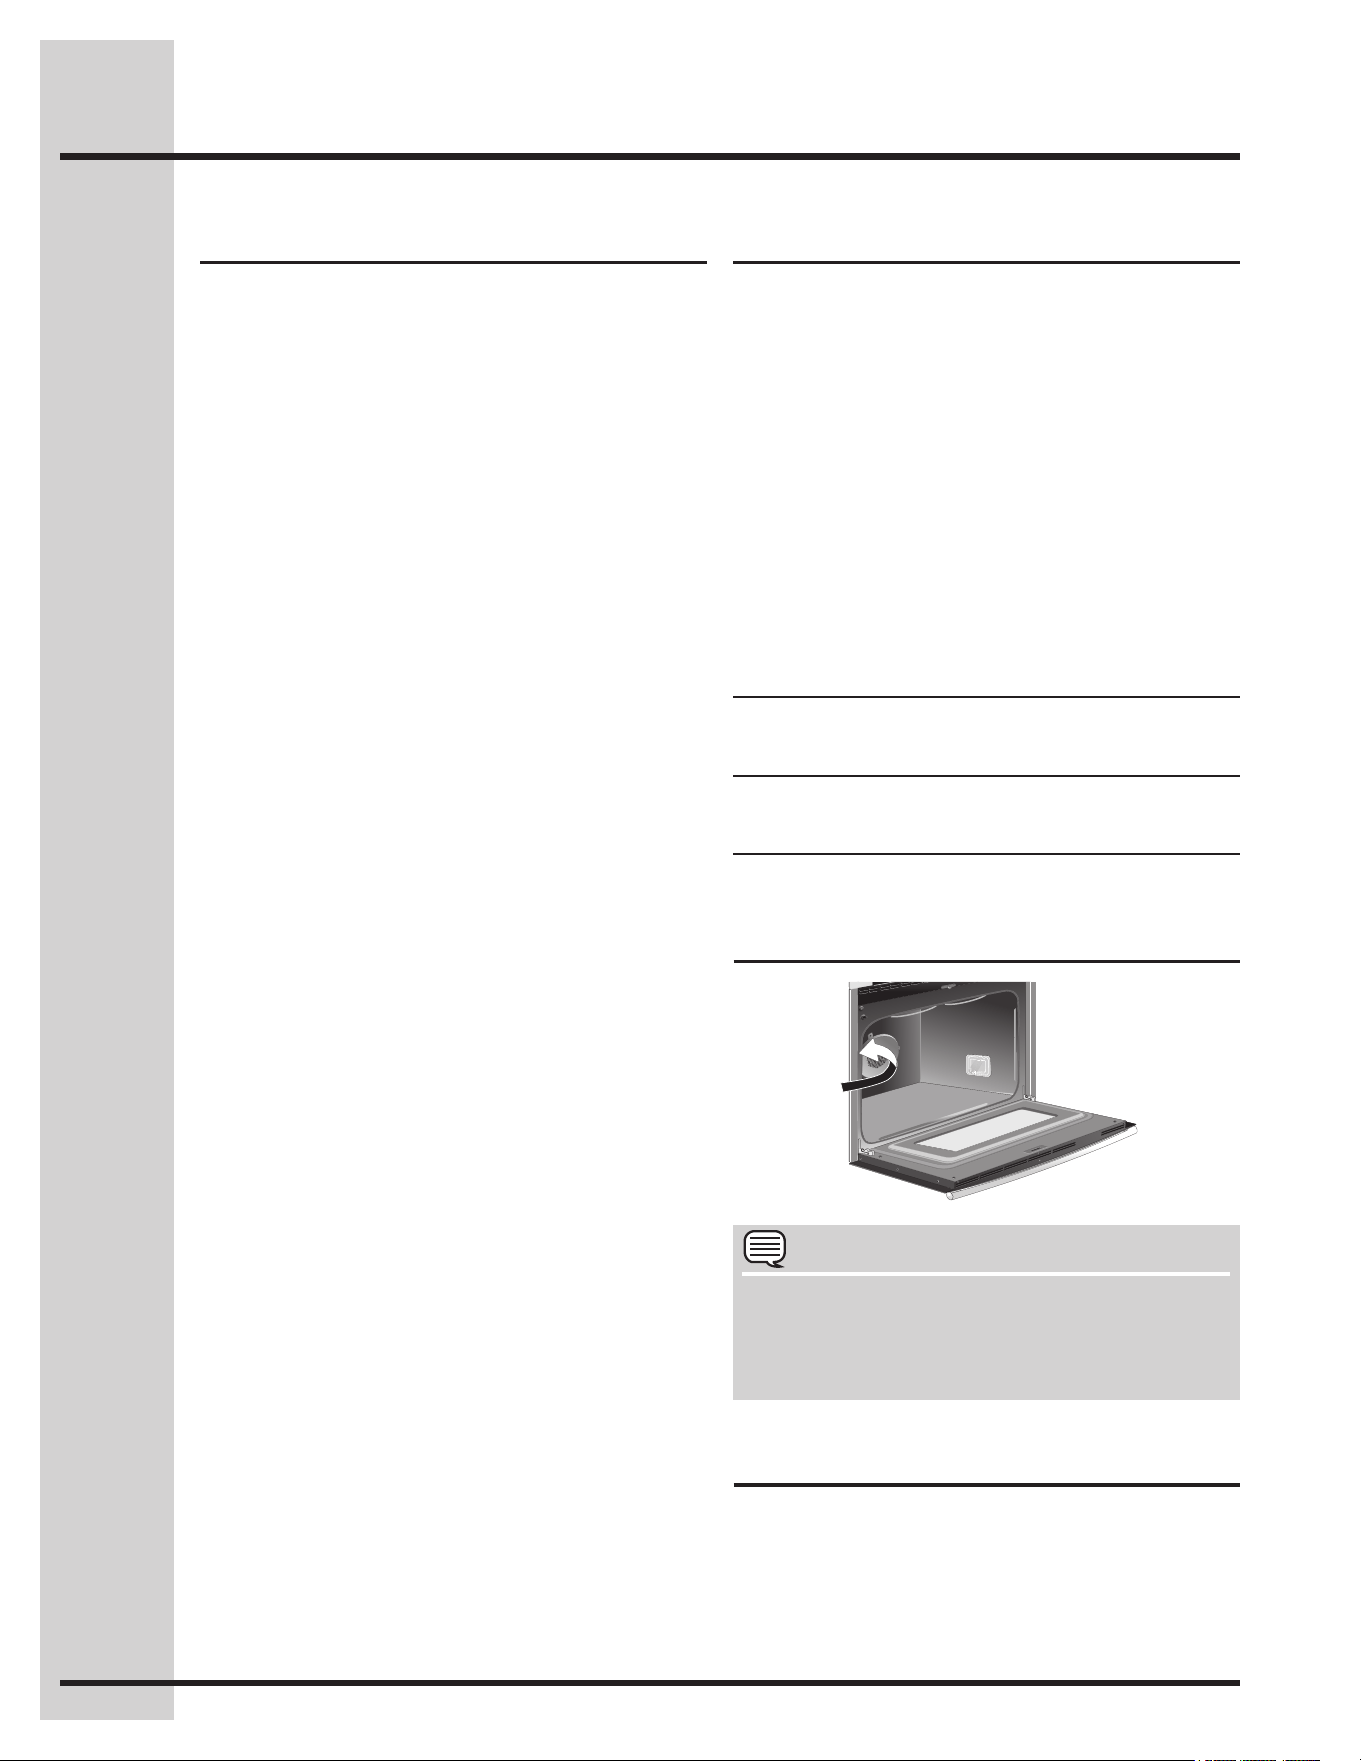
Serial plate location
For toll-free telephone support in the U.S. and
Canada:
1-877-4ELECTROLUX (1-877-435-3287)
NOTE
Registering your product with Electrolux enhances
our ability to serve you. You can register online at
www.electroluxappliances.com or by dropping
your Product Registration Card in the mail.
Finding information ....................................................2
Safety .......................................................................3-8
Information You Need To Know ............................9-11
Features................................................................12-15
Getting Started .....................................................16-17
• Powerup,controldisplaymodes&timers ..........16
• Controllock&ovenlights ....................................17
Settings for Best Results ....................................18-19
Setting Microwave Controls ...............................20-29
• Timecooking .......................................................20
• Quicksensor ........................................................21
• Sensorcook .........................................................23
• Autocook .............................................................24
• Autoreheat ..........................................................26
• Melt,soften ..........................................................27
• Autodefrost .........................................................28
• Multistagecooking ..............................................29
Setting Lower Oven Controls .............................30-52
• Rapidpreheat ......................................................30
• Bake ....................................................................31
• Usingcooktime ...................................................32
• Usingcooktimewithendtime ...........................33
• Broil ................................................................34-35
• Convectionbake ..................................................36
• Usingconvectionconvert ....................................37
• Convectionroast .............................................38-39
• Probe ..............................................................40-41
• Convectionbroil ...................................................42
• Keepwarm ..........................................................43
• Slowcook ............................................................44
• PerfectTurkey™ ..................................................45
• Defrost .................................................................46
• Dehydrate .......................................................46-47
• Breadproof ..........................................................47
• Saving&recallingmyfavoriterecipes .................48
• Multistagecooking .........................................49-50
• SettingSabbathmode ....................................51-52
Setting Your Preferences ....................................53-57
• Settingclock ........................................................53
• Settingclockdisplay(CLO) .................................53
• Setting12or24hourmode(CLO) ......................54
• ChangingbetweenFºorCº(F-C)........................54
• Setting12hrenergysavingmode(ES) ................55
• Settingaudiomode(AUD) ...................................55
• Adjustingoventemperature(UPO) .....................56
• Factorydefaultreset(RST) .................................56
• Userpreferenceschart ........................................57
Lower Oven Self-Clean .......................................58-59
Lower Oven Care & Cleaning .............................60-64
• Cleaningrecommendations ............................60-61
• Ovendoorremoval .........................................62-63
• Changingovenlights ...........................................64
Microwave Care & Cleaning ....................................65
Solutions to Common Problems ........................66-68
Microwave Service Call Check ................................69
Warranty ....................................................................71
Purchase date
Electrolux model number
Electrolux serial number
For online support and Internet production information
visit http://www.electroluxappliances.com
3
What you need to know about safety instructions
Warning and Important Instructions appearing in this guide are not meant to cover all possible conditions
and situations that may occur. Common sense, caution and care must be exercised when installing,
maintaining or operating a microwave.
ALWAYS contact your dealer, distributor, service agent or manufacturer about problems or conditions
you do not understand.
WARNING — Hazards or unsafe practices
which COULD result in severe personal injury
or death.
CAUTION — Hazards or unsafe practices which
COULDresultinminorpersonalinjury.
PRECAUTIONS TO AVOID POSSIBLE
EXPOSURE TO EXCESSIVE
MICROWAVE ENERGY
Adhere to the following precautions:
DO NOT• attempt to operate the microwave oven with the door open since open-door operation
can result in harmful exposure to microwave energy. It is important not to defeat or tamper with the
safety interlocks.
DO NOT• placeanyobjectbetweentheovenfrontfaceandthedoororallowsoilorcleanerresidue
to accumulate on sealing surfaces.
DO NOT• operate the oven if it is damaged. It is particularly important that the oven door close properly
andthatthereisnodamagetothe:(1)door(bent),(2)hingesandlatches(brokenorloosened),(3)
door seals and sealing surfaces.
The oven should not be adjusted or repaired by anyone except properly qualified service•
personnel.
Recognize Safety Symbols, Words, Labels
Important Safety Instructions

4
When using electrical appliances, basic safety
precautions should be followed to reduce the risk
ofburns,electricshock,fire,injurytopersonsor
exposure to excessive microwave energy:
READ ALL•
instructions before using the
appliance.
READ AND FOLLOW•
the specific
“PRECAUTIONSTOAVOIDPOSSIBLE
EXPOSURETOEXCESSIVEMICROWAVE
ENERGY”.
Install or locate this appliance only in •
accordance with the provided installation
instructions.
Some products such as whole eggs and sealed •
containers-forexample,closedjars-areable
to explode and SHOULD NOT be HEATED in
this oven.
Use this appliance • ON LY
for its intended use as
describedinthismanual.Donotusecorrosive
chemicals or vapors in this appliance. This type
of oven is specifically designed to heat, cook
or dry food. It is not designed for industrial or
laboratory use.
As with any appliance, •
CLOSE SUPERVISION
is necessary when used by CHILDREN or
INFIRM PERSONS.
This appliance, including power cord, must be •
serviced ONLY by qualified service personnel.
Contact nearest Electrolux Authorized Servicer
forexamination,repairoradjustment.
DO NOT•
cover or block any vents or openings
on the oven.
DO NOT•
store or use this appliance outdoors.
DO NOT•
use this product near water—for
example, near a kitchen sink, in a wet
basement, near a swimming pool, or similar
locations.
Review the door cleaning instructions on page 61 •
(ovendoor)and65(microwavedoor)
.
To reduce the risk of fire in the oven cavity:
DO NOT• overcook food. Carefully attend
to appliance when paper, plastic or other
combustible materials are placed inside the
oven to facilitate cooking.
Remove wire twist-ties from paper or plastic •
bags before placing bag in oven.
If materials inside the oven ignite, keep oven •
door closed, turn oven off and disconnect
the power cord or shut off power at the fuse
or circuit breaker panel.
DO NOT• use the cavity for storage purposes.
DO NOT leave paper products, cooking utensils
or food in the cavity when not in use.
Liquids,suchaswater,coffeeorteaareableto
be overheated beyond the boiling point without
appearingtobeboiling.Visiblebubblingorboiling
whenthecontainerisremovedfromtheMicrowave
Ovenis
not always present. THISCOULDRESULT
INVERYHOTLIQUIDSSUDDENLYBOILING
OVERWHENASPOONOROTHERUTENSILIS
INSERTEDINTOTHELIQUID.
Toreducetheriskofinjurytopersons:
DO NOT•
overheat the liquid.
Stir the liquid both before and halfway through •
heating it.
Donotusestraight-sidedcontainerswith•
narrow necks. Use a wide-mouthed container.
After heating, allow the container to stand in the •
MicrowaveOvenatleastfor20secondsbefore
removing the container.
Use extreme care when inserting a spoon or •
other utensil into the container.
If the microwave oven light fails, consult a
Electrolux Authorized Servicer.
Important Safety Instructions
5
• Remove all tape and packaging before using
the appliance.Destroythecartonandplastic
bagsafterunpackingtheappliance.Neverallow
children to play with packaging material.
• Proper Installation—Be sure your appliance
is properly installed and grounded by a
qualiedtechnicianinaccordancewiththe
National Fuel Gas Code ANSI Z223- latest
edition, or in Canada CAN/CGA B149.1
and CAN/GGA B149.2, and the National
Electrical Code ANSI/NFPA No.70-latest
edition, or in Canada CSA Standard C22.1,
Canadian Electrical Code, Part 1, and local
code requirements. Install only per installation
instructions provided in the literature package for
this appliance.
Askyourdealertorecommendaqualied
technician and an authorized repair service.
Knowhowtodisconnectthepowertothe
appliance at the circuit breaker or fuse box in
case of an emergency.
• User servicing—Do not repair or replace
anypartoftheapplianceunlessspecically
recommended in the manuals. All other
servicingshouldbedoneonlybyaqualied
technician. This may reduce the risk of personal
injuryanddamagetotheappliance.
• Never modify or alter the construction of an
appliance by removing leveling legs, panels,
wire covers, anti-tip brackets/screws, or any
other part of the product.
Read all of the following safety instructions
before using this appliance:
Safety items throughout this manual are labeled
withaWARNINGorCAUTIONbasedontherisk
type as described below:
Recognize safety symbols, words and
labels
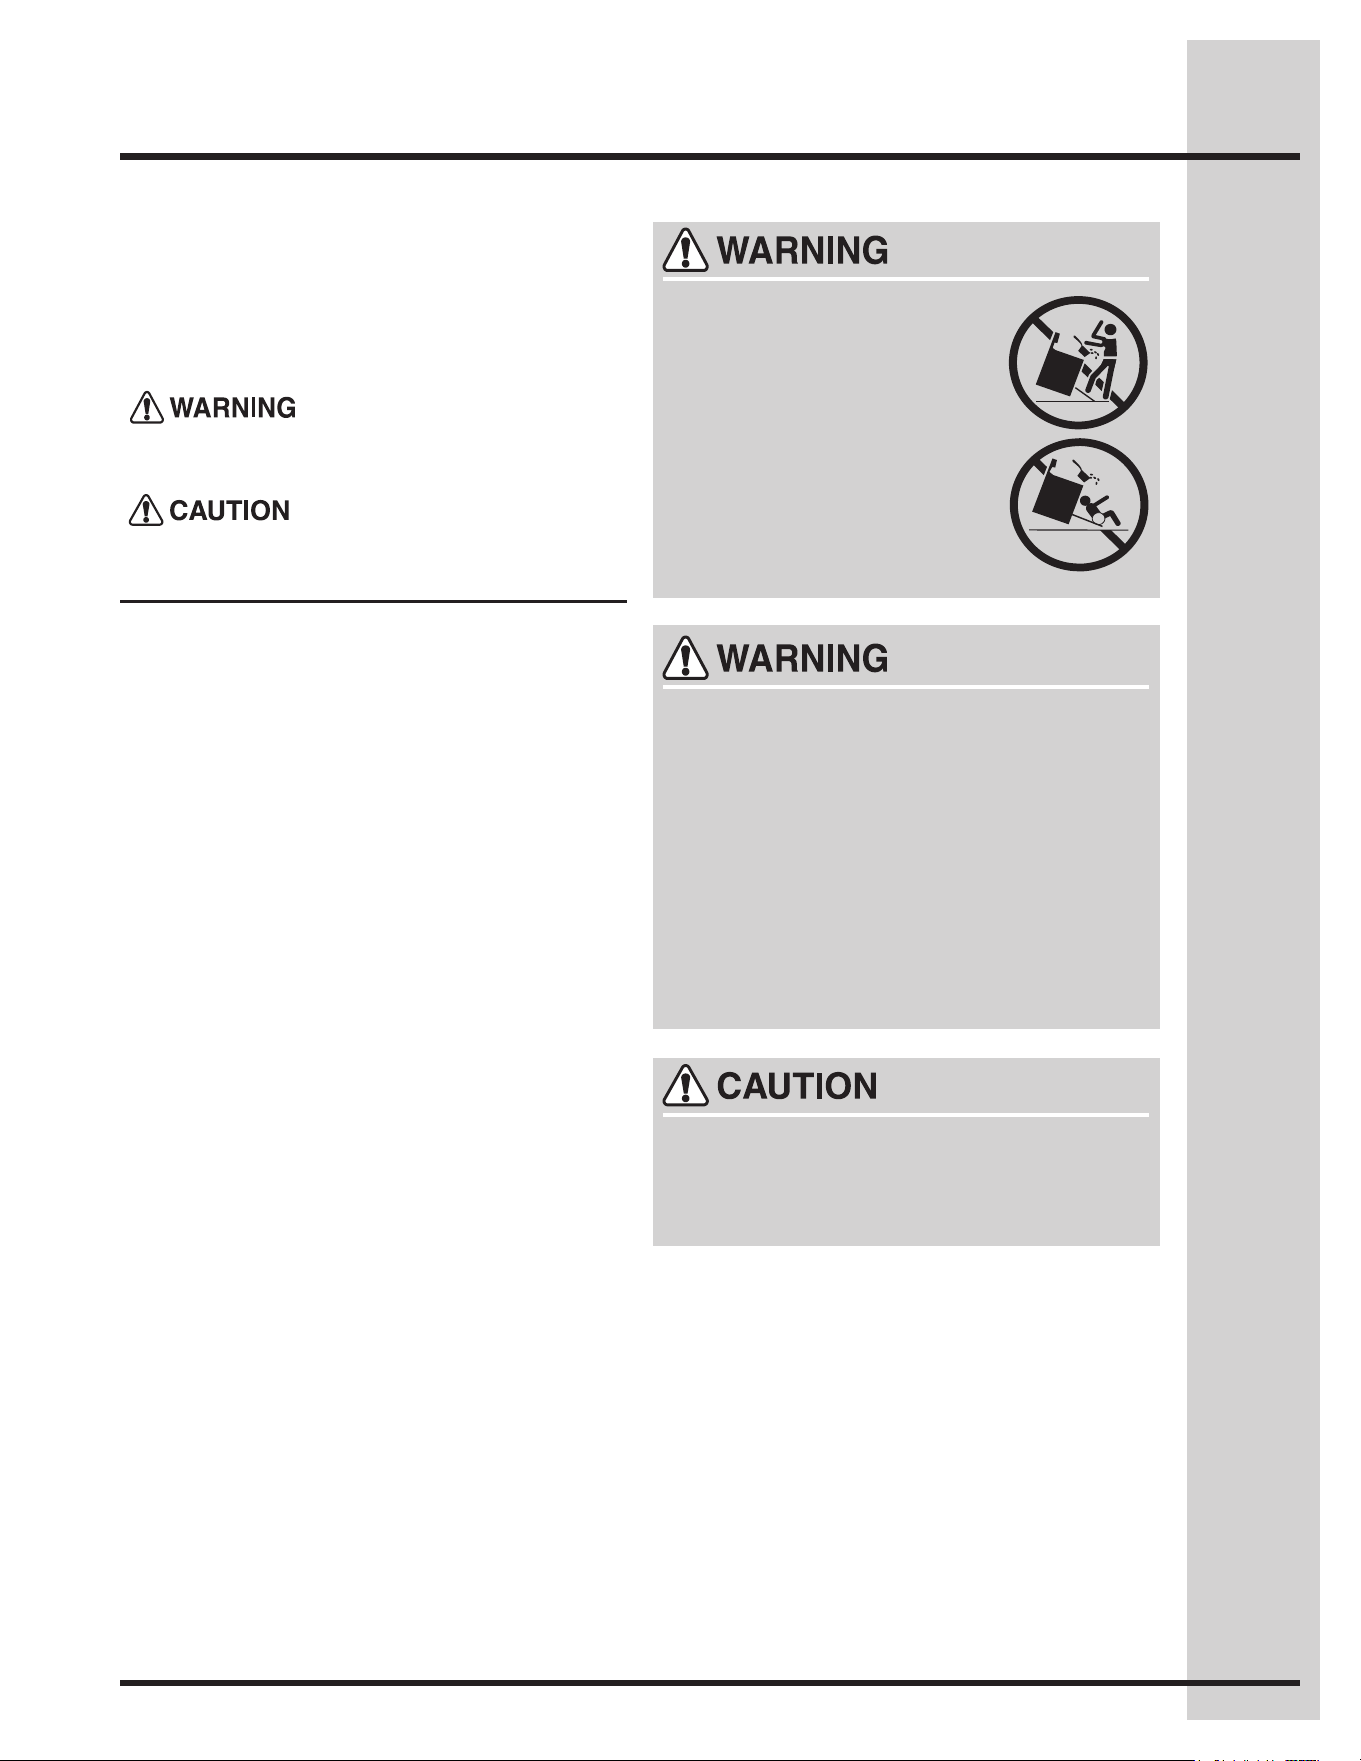
Do not store items of interest to children in
the cabinets above the unit. Children climbing
on the appliance to reach items could be
seriouslyinjured.
This symbol alerts you to situations that may
causebodilyinjuryorpropertydamage.
This symbol alerts you to situations that may cause
serious body harm, death or property damage.
• Allappliancecantip.
• Injurytopersonscouldresult.
• Installanti-tipdevicepacked
with appliance.
• SeeInstallationInstructions.
To reduce the risk of tipping,
the unit must be secured by
properly installed anti-tip bracket
provided with the unit. Refer to
the installation instructions for
proper anti-tip installation.
• Never Use Your Appliance for Warming or
Heating the Room.
• Do not use the oven or microwave oven for
storage.
• Stepping, leaning or sitting on the doors of
this appliance can result in serious injuries
and also cause damage to the unit.Donot
allow children to climb or play around the unit.
The weight of a child on an open door may
cause the appliance to tip, resulting in serious
burnsorotherinjury.
Important Safety Instructions

6
Important instructions for using your
oven
• Use care when opening an oven door—Stand
to the side of the unit when opening the door of a
hotoven.Lethotairorsteamescapebeforeyou
remove or replace food in the oven.
• Keep oven vent ducts unobstructed. The
oven vents are located under the control panel
and in between the ovens. Touching the surfaces
in this area when the oven is operating may
cause severe burns. Also, do not place plastic
or heat-sensitive items on or near the oven vent.
These items could melt or ignite.
• Placement of oven racks. Always place oven
racks in desired location while oven is cool.
If rack must be moved while oven is hot use
extreme caution. Use potholders and grasp the
rackwithbothhandstoreposition.Donotlet
potholders contact the hot heating elements
in the oven. Remove all utensils from the rack
before moving.
• Do not use the broiler pan without its insert.
The broiler pan and its insert allow dripping fat to
drain and be kept away from the high heat of the
broiler.
• Do not cover the broiler insert with aluminum
foil. Exposed fat and grease could ignite.
• Storage in or on Appliance—Flammable
materials should not be stored in an oven.
This includes paper, plastic and cloth items, such
as cookbooks, plasticware and towels, as well
asammableliquids.Donotstoreexplosives,
such as aerosol cans, on or near the appliance.
• Do not leave children alone—Children should
not be left alone or unattended in the area
where appliance is in use. They should never
be allowed to sit or stand on any part of the
appliance.
• DO NOT TOUCH HEATING ELEMENTS OR
INTERIOR SURFACES OF THE OVENS OR
ANY AREAS NEAR THESE ZONE.ALLoven
heating elements may be hot even though they
are dark in color. Areas near surface zones may
becomehotenoughtocauseburns.Duringand
after use, do not touch, or let clothing or other
ammablematerialstouchtheseareasuntilthey
havehadsufcienttimetocool.Amongthese
areas are the oven vent openings and surfaces
near these openings, oven door and window.
• Wearproperapparel—Loose-ttingor
hanging garments should never be worn
while using the appliance. Donotletclothing
orotherammablematerialscontacthot
surfaces.
• Donotusewaterorourongreaseres—
Smothertherewithapanlid,oruse
baking soda, a dry chemical or foam-type
extinguisher.
• When heating fat or grease, watch it closely.
Fatorgreasemaycatchreifallowedto
become too hot.
• Use only dry potholders - Moist or damp
potholders on hot surfaces may result in
burns from steam.Donotletpotholderstouch
hotheatingelements.Donotuseatowelor
other bulky cloth instead of a potholder.
• Do not heat unopened food containers -
Buildup of pressure may cause container to
burst and result in injury.
Do not attempt to operate the unit during a
power failure. If the power fails, always turn
off the unit. If the unit is not turned off and the
power resumes, the unit will begin to operate
again.Oncethepowerresumes,resettheclock
and oven function.
IMPORTANT
• Remove the oven door from any unused
appliance if it is to be stored or discarded.
• Protective liners—Donotusealuminumfoilto
line the oven bottom, except as suggested in
the manual. Improper installation of these liners
mayresultinariskofelectricalshock,orre.
Important Safety Instructions

7
Important instructions for cleaning your
appliance
• Clean the appliance regularly to keep all
partsfreeofgreasethatcouldcatchre.
Pay particular attention to the area underneath
eachsurfaceelement.Donotallowgreaseto
accumulate.
• Kitchen cleaners and aerosols—Always
follow the manufacturer’s recommended
directions for use.Beawarethatexcess
residue from cleaners and aerosols may ignite
causingdamageandinjury.
• Clean ventilating hoods frequently—Grease
should not be allowed to accumulate on
thehoodorlter. Follow manufacturer’s
instructions for cleaning.
Important safety notice
TheCaliforniaSafeDrinkingWaterandToxic
EnforcementActrequirestheGovernorofCalifornia
to publish a list of substances known to the state
to cause cancer, birth defects or other reproductive
harm, and requires businesses to warn customers of
potential exposure to such substances.
Self cleaning ovens
• Clean in the self-cleaning cycle only the parts
listed in this Use & Care Manual.Beforeself
cleaning the oven, remove the broiler pan and
any utensils or foods from the oven.
• Do not use oven cleaners—Nocommercialoven
cleaner or oven liner protective coating of any kind
should be used in or around any part of the oven.
• Do not clean door gasket—The door gasket is
essential for a good seal. Care should be taken
not to rub, damage or move the gasket.
• Thehealthofsomebirdsisextremelysensitive
to the fumes given off during the self-cleaning
cycleofanyoven.Movebirdstoanotherwell-
ventilated room.
• Cold temperatures can damage the electronic
control.Whenusingtheappliancefortherst
time, or when the appliance has not been used
for an extended period of time, be certain the
unithasbeenintemperaturesabove32°F(0°C)
for at least 3 hours before turning on the power
to the appliance.
SAVETHESEINSTRUCTIONSFOR
FUTUREREFERENCES
Important Safety Instructions

8
Federal Communications Commission Radio Frequency
Interference Statement (U.S.A. Only)
ThisequipmentgeneratesandusesISMfrequencyenergyandifnotinstalledandusedproperly,thatis
in strict accordance with the manufacturer's instructions, may cause interference to radio and television
reception.IthasbeentypetestedandfoundtocomplywithlimitsforISMEquipmentpursuanttopart
18 of FCC Rules, which are designed to provide reasonable protection against such interference in a
residential installation.
However, there is no guarantee that interference will not occur in a particular installation. If this
equipment does cause interference to radio or television reception, which can be determined by turning
the equipment off and on, the user is encouraged to try to correct the interference by one or more of the
following:
Reorient the receiving antenna of the radio or television.•
Relocate the microwave oven with respect to the receiver.•
Movethemicrowaveovenawayfromthereceiver.•
Plug the microwave oven into a different outlet so that the microwave oven and the receiver are on •
different branch circuits.
The manufacturer is not responsible for any radio or television interference caused by unauthorized
modification to this microwave oven. It is the responsibility of the user to correct such interference.
Important Safety Instructions

9
About safety
Check foods to see that they are cooked to •
theUnitedStatesDepartmentofAgriculture’s
recommended temperatures.
Temp Food
160˚F For fresh pork, ground meat, boneless
white poultry, fish, seafood, egg
dishes and frozen prepared food.
165˚F Fo r l e f tov e r, r e a d y - to - r e h e a t
refrigerated, and deli and carry-out
“fresh”food.
170˚F White meat of poultry.
180˚F Darkmeatofpoultry.
To test for doneness, insert a meat thermometer
in a thick or dense area away from fat or bone.
NEVER leave the thermometer in the food during
cooking, unless it is approved for microwave use.
ALWAYSusepotholderstopreventburnswhen•
handling utensils that are in contact with hot
food. Enough heat from the food can transfer
through utensils to cause skin burns.
Avoid steam burns by directing steam away •
from the face and hands. Slowly lift the farthest
edge of a dish’s covering and carefully open
popcorn and oven cooking bags away from the
face.
Stay near the oven while it’s in use and check •
cooking progress frequently so that there is no
chance of overcooking food.
NEVERusethecavityforstoringcookbooksor•
other items.
Select, store and handle food carefully to •
preserve its high quality and minimize the
spread of foodborne bacteria.
Keepwaveguidecoverclean.Foodresiduecan•
cause arcing and/or fires.
Use care when removing items from the oven •
so that the utensil, your clothes or accessories
do not touch the safety door latches.
Keepaluminumfoilusedforshieldingatleast•
1 inch away from walls, ceiling and door.
Information You Need To Know
About your oven
ThisUseandCareGuideisvaluable:readit
carefully and always save it for reference.
A good microwave cookbook is a valuable asset.
Check it for microwave cooking principles,
techniques, hints and recipes.
NEVERusetheMicrowaveOvenwithoutthe
turntable and support nor turn the turntable
over so that a large dish could be placed in the
oven. The turntable will turn both clockwise and
counterclockwise.
ALWAYShavefoodintheMicrowaveOvenwhen
it is on to absorb the microwave energy.
WhenusingtheMicrowaveOvenatpowerlevels
below 100%, you may hear the magnetron cycling
on and off. It is normal for the exterior of the oven
to be warm to the touch when cooking or reheating.
Condensation is a normal part of microwave
cooking. Room humidity and the moisture in
food will influence the amount of moisture that
condensesintheoven.Generally,coveredfoods
will not cause as much condensation as uncovered
ones.Ventilationopeningsmustnotbeblocked.
TheMicrowaveOvenisforfoodpreparationonly.It
should not be used to dry clothes or newspapers.
YourMicrowaveOvenisrated900wattsby
using the IEC Test Procedure. In using recipes or
package directions, check food a minute or two
before the minimum time and add time accordingly.
10
About food
Food Do Don't
Eggs,
sausages,
nuts, seeds,
fruits &
vegetables
Puncture egg yolks before cooking to •
prevent“explosion”.
Pierce skins of potatoes, apples, squash, •
hot dogs and sausages so that steam
escapes.
Cook eggs in shells.•
Reheat whole eggs.•
Drynutsorseedsinshells.•
Popcorn Use specially bagged popcorn for •
microwave cooking.
Listenwhilepoppingcornforthe •
popping to slow to 1 or 2 seconds or use
special popcorn pad.
Pop popcorn in regular brown bags •
or glass bowls.
Exceed maximum time on popcorn •
package.
Baby food Transfer baby food to small dish and heat •
carefully, stirring often. Check temperature
before serving.
Put nipples on bottles after heating and •
shakethoroughly.“Wrist”testbefore
feeding.
Heat disposable bottles.•
Heat bottles with nipples on.•
Heatbabyfoodinoriginaljars.•
General Cut baked goods with filling after heating •
to release steam and avoid burns.
Stir liquids briskly before and after heating •
toavoid“eruption”.
Use deep bowl, when cooking liquids or •
cereals, to prevent boilovers.
Heatorcookinclosedglassjarsorair•
tight containers.
Can in the microwave as harmful •
bacteria may not be destroyed.
Deepfatfry.•
Drywood,gourds,herbsorwetpapers.•
About microwave cooking
Arrange food carefully. Place thickest areas •
towards outside of dish.
Watch cooking time. Cook for the shortest •
amount of time indicated and add more as
needed. Food severely overcooked can smoke
or ignite.
Cover foods while cooking. Check recipe or •
cookbook for suggestions: paper towels, wax
paper, microwave plastic wrap or a lid. Covers
prevent spattering and help foods to cook
evenly.
Shield with small flat pieces of aluminum foil •
any thin areas of meat or poultry to prevent
overcooking before dense, thick areas are
cooked thoroughly.
Stir foods from outside to center of dish once or •
twice during cooking, if possible.
Turn foods over once during microwaving to •
speed cooking of such foods as chicken and
hamburgers.Largeitemslikeroastsmustbe
turned over at least once.
Rearrange foods such as meatballs halfway •
through cooking both from top to bottom and
from the center of the dish to the outside.
Add standing time. Remove food from oven •
and stir, if possible. Cover for standing time
which allows the food to finish cooking without
overcooking.
Checkfordoneness.Lookforsignsindicating•
that cooking temperatures have been reached.
Donenesssignsinclude:•
- Foodsteamsthroughout,notjustatedge.
- Center bottom of dish is very hot to the
touch.
- Poultrythighjointsmoveeasily.
- Meatandpoultryshownopinkness.
- Fish is opaque and flakes easily with a fork.
Information You Need To Know

11
Information You Need To Know
About utensils and coverings
The following coverings are ideal:
Paper towels are good for covering foods for •
reheating and absorbing fat while cooking
bacon.
Wax paper can be used for cooking and •
reheating.
Plastic wrap that is specially marked for •
microwave use can be used for cooking and
reheating.DONOTallowplasticwraptotouch
food.Ventsosteamcanescape.
Lidsthataremicrowave-safeareagoodchoice•
because heat is kept near the food to hasten
cooking.
Ovencookingbagsaregoodforlargemeatsor•
foodsthatneedtenderizing.DONOTusemetal
twist ties. Remember to slit bag so steam can
escape.
How to use aluminum foil in your Microwave
Oven:
Small flat pieces of aluminum foil placed •
smoothly on the food can be used to shield
areas that are either defrosting or cooking too
quickly.
Foil should not come closer than one inch to •
any surface of the oven.
Should you have questions about utensils or
coverings, check a good microwave cookbook or
follow recipe suggestions.
Accessories
There are many microwave accessories available
for purchase. Evaluate carefully before you
purchase so that they meet your needs. A
microwave-safe thermometer will assist you in
determining correct doneness and assure you that
foods have been cooked to safe temperatures.
Electrolux is not responsible for any damage to the
oven when accessories are used.
It is not necessary to buy all new cookware.
Manypiecesalreadyinyourkitchencanbeused
successfullyinyournewMicrowaveOven.Make
sure the utensil does not touch the interior walls
during cooking.
Use these utensils for safe microwave cooking
and reheating:
glassceramic(Pyroceram•
®
),
such as Corningware
®
.
heat-resistantglass(Pyrex•
®
)
microwave-safe plastics•
paper plates•
microwave-safe pottery, •
stoneware and porcelain
browningdish(Donotexceed•
recommended preheating time. Follow
manufacturer'sdirections.)
These items can be used for short time
reheating of foods that have little fat or sugar
in them:
• wood,straw,wicker
DO NOT USE
metal pans and bakeware•
dishes with metallic trim•
non-heat-resistant glass•
non-microwave-safe plastics •
(margarinetubs)
recycled paper products•
brown paper bags•
food storage bags•
metal twist-ties•
Should you wish to check if a dish is safe for
microwaving, place the empty dish in the oven and
microwaveonHIGHfor30seconds.Adishwhich
becomes very hot should not be used.

12
Features
8
5
9
1
8. Rapid preheat
9. Convection convert
10. Cleaning
2
3
4
6
7
10
Wave-Touch™ oven features & options
1. Standard cooking
•Bake
•Broil
•Perfect-Convect
3
™convectionbake
•Perfect-Convect
3
™convectionroast
•Perfect-Convect
3
™convectionbroil
•Keepwarm
•Slowcook
2. Specialized cooking
•PerfectTurkey™
•Defrost
•Dehydrate
•Breadproof
3. Favorite settings
4. PerfectProgram™multistagecooking
5. Cook options
6. Cooking time
•Cooktime
•Endtime
7. Probe
Minimum & maximum control settings
Feature Min. temp Max. temp
Bake 170°F / 76°C 550°F / 288°C
BreadProof 85°F/30°C) 100°F / 38°C
Broil 300°F / 148°C 550°F / 288°C
ConvBake 170°F / 76°C 550°F / 288°C
Conv Roast 170°F / 76°C 550°F / 288°C
ConvBroil 300°F / 148°C 550°F / 288°C
KeepWarm 150°F/66°C 190°F/88°C
Slow Cook Lo(225°F/108°C) Hi(275°F/135°C)
Dehydrate 100°F / 38°C 225°F / 108°C
Perfect Turkey 170°F / 76°C 550°F / 288°C
13
Features
11
12
13
14
15
16
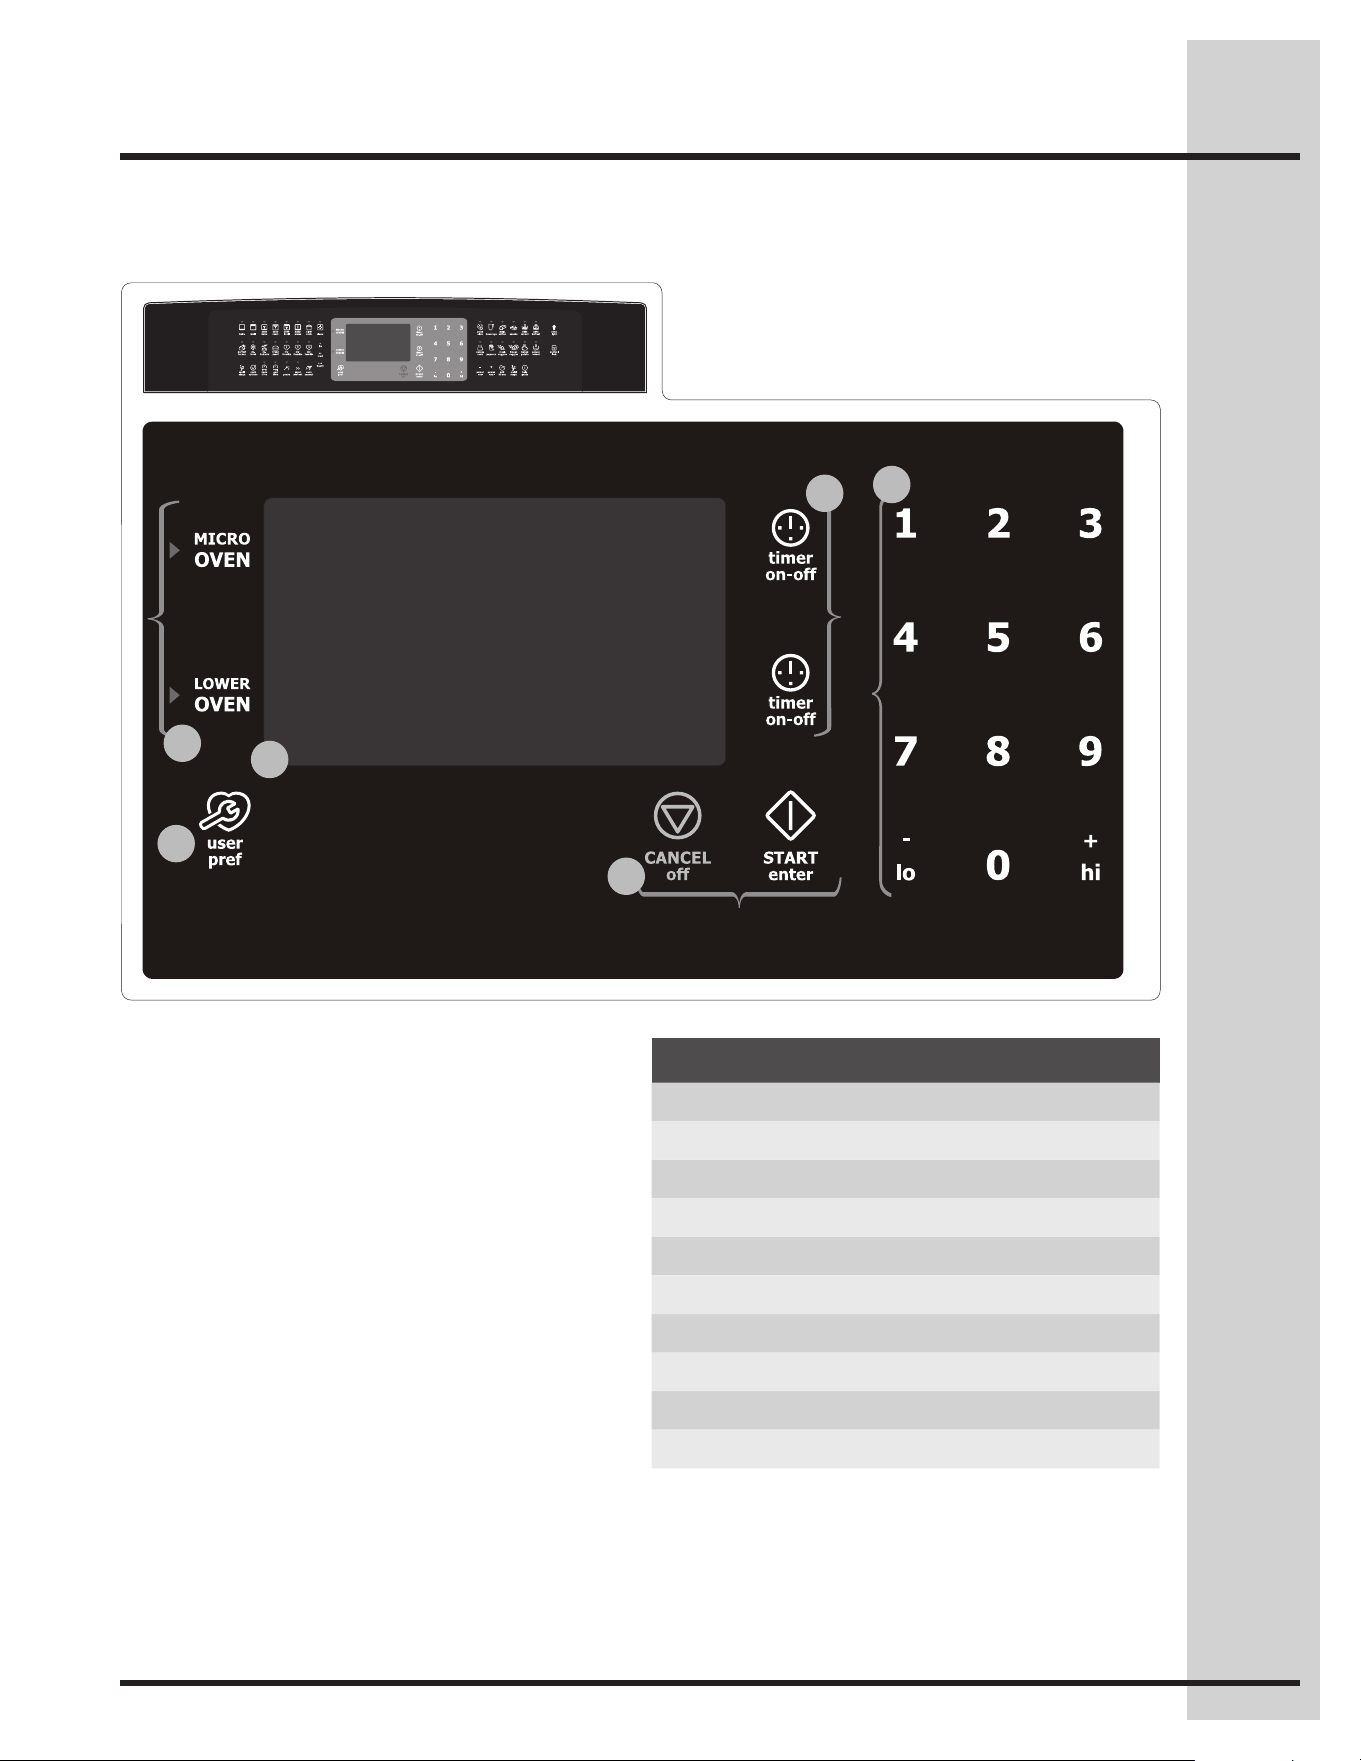
Wave-Touch™ control display & keys
11. Perfect-Pair™ovenkeypads
•Microwaveupperoven
•Sure-2-t™Loweroven
12. User preferences
The following options are available under User
Preferences:
•Clocksetting
•Clockdisplaysetting
•12hr/24hr
•Fahrenheit/Celsius
•12Hrenergysavemodeon/off
•Audiomode
•Temperatureadjustment(UPOoffset)
•Factorydefaultreset
13.Ovendisplay
14. Timers
15.Cancel&Startkeypads
16. Numerickeypads
Minimum & maximum time settings
Feature Min. time Max. time
Timer 1 1 min 11 hr 59 min
Timer 2 1 min 11 hr 59 min
Clock 12 hr 1:00 hr 11 hr 59 min
Clock 24 hr 0:00 hr 23 hr 59 min
Cook time 12 hr 1 min 11 hr 59 min
Cook time 24 hr 1 min 11 hr 59 min
End time 12 hr 1:00 hr 12 hr 59 min
End time 24 hr 0:00 hr 23 hr 59 min
Clean duration Lite(2hr) Heavy(4hr)
14
Features
17
18
24
19
20 21 22
23
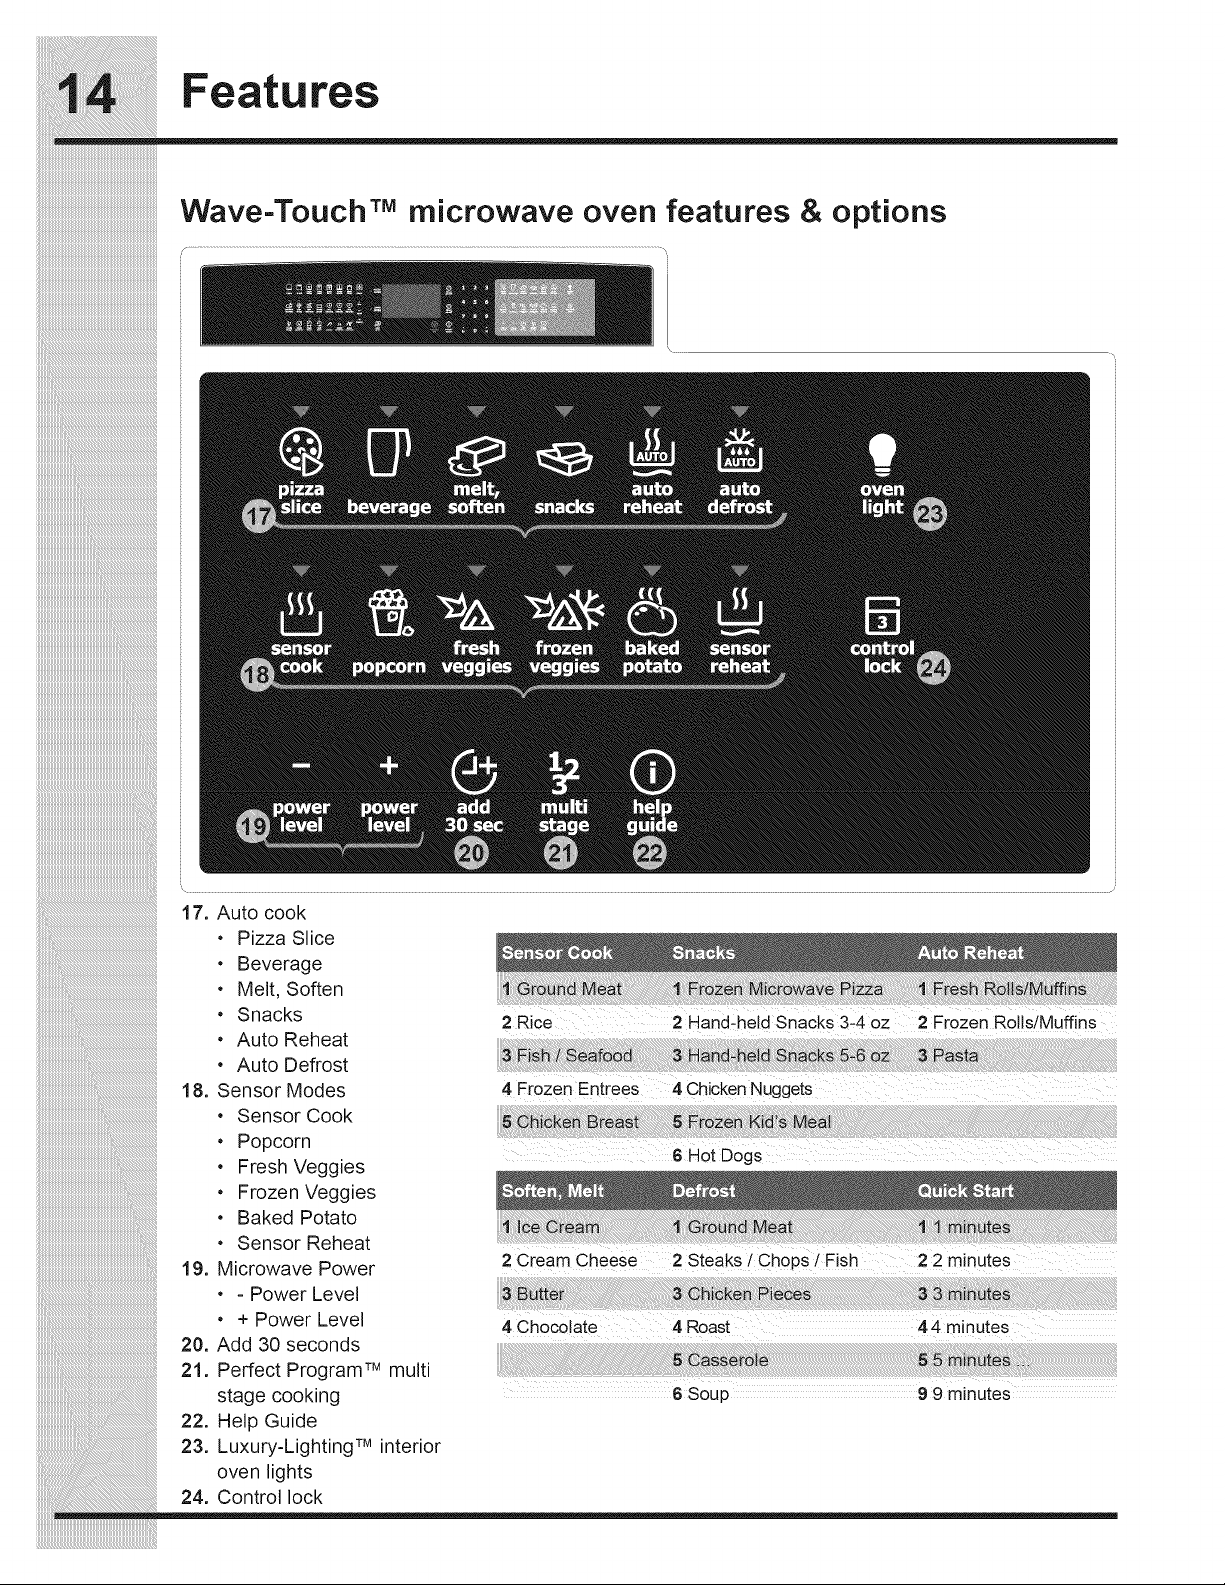
Wave-Touch™ microwave oven features & options
17. Auto cook
• PizzaSlice
• Beverage
• Melt,Soften
• Snacks
• AutoReheat
• AutoDefrost
18. SensorModes
• SensorCook
• Popcorn
• FreshVeggies
• FrozenVeggies
BakedPotato•
Sensor Reheat•
19. MicrowavePower
-PowerLevel•
+PowerLevel•
20. Add 30 seconds
21. PerfectProgram™multi
stage cooking
22. HelpGuide
23. Luxury-Lighting™interior
oven lights
24. Control lock
Sensor Cook Snacks Auto Reheat
1 GroundMeat 1 FrozenMicrowavePizza 1 FreshRolls/Mufns
2 Rice 2 Hand-held Snacks 3-4 oz 2 FrozenRolls/Mufns
3 Fish / Seafood 3 Hand-held Snacks 5-6 oz 3 Pasta
4 Frozen Entrees 4 ChickenNuggets
5 ChickenBreast 5FrozenKid’sMeal
6HotDogs
Soften, Melt Defrost Quick Start
1 Ice Cream 1 GroundMeat 1 1 minutes
2 Cream Cheese 2 Steaks / Chops / Fish 2 2 minutes
3 Butter 3 Chicken Pieces 3 3 minutes
4 Chocolate 4 Roast 4 4 minutes
5 Casserole 5 5 minutes ...
6 Soup 9 9 minutes
15
Features
13
4
21
20
19
16
17
18
12
11
10
15
9
8
8
7
6
5
5
2
3
1
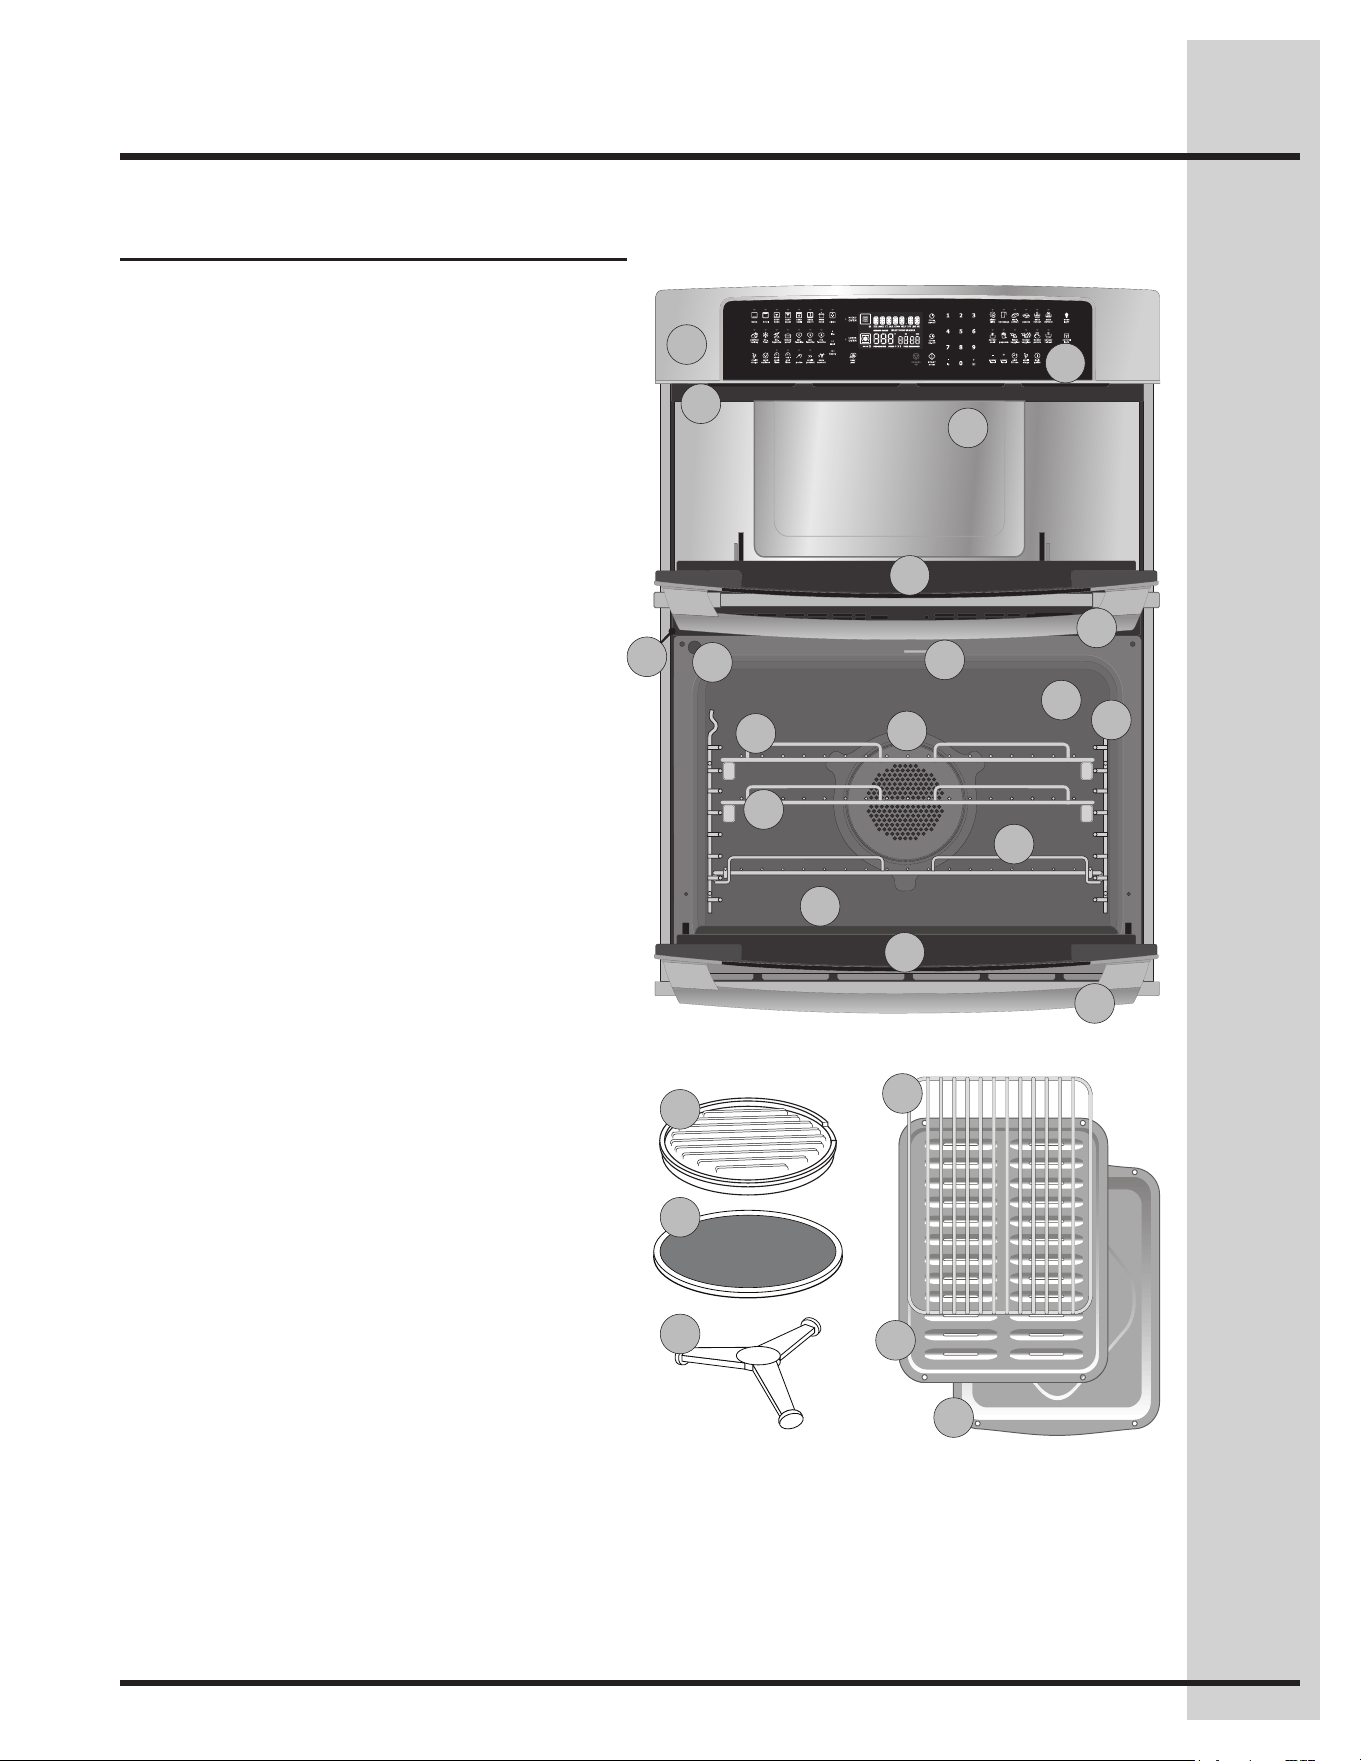
Wave-Touch™ oven features
Your appliance features include:
1. Wave-Touch™activatedglasscontrolpanel.
One simple touch and the control panel activates,
showing the virtually endless cooking options. After
you make your choices, all but the option selected
will fade away, returning to an elegant display.
2. Stainless steel micro-wave upper oven interior.
Our up to 1.5. cu. ft. large microwaves will hold
nearly any dish.
3. Micro-waveovenventilation.
4. Full-width Luxury-Hold™doorwithtinted
window glass.
Our oven door stays put at whatever angle you place it.
5. Large1-piecemetalupper&lowerovendoor
handles.
6. Sure-2-t™cobaltblueself-cleaninglower
oven interior with theatre style halogen
Luxury-Design™lightingsystem.
Coordinate an entire meal — our oven features 4.2 cu.
ft. of cooking space with three adjustable baking racks.
Our ramp-up designer halogen lighting is as beautiful
as it is functional.
7. Perfect-Convect
3®
convection fan system.
Our convection technology features a third convection
element for consistently even results, up to 30% faster
cooking times and even more baking options.
8. Extendable Luxury-Glide
®
telescoping
interiorovenrack(s).
With a ball-bearing system, oven racks are so
smooth they extend effortlessly.
9. 1 regular interior oven rack.
10. Hidden Bake Element.
The lower bake element is hidden beneath a smooth
surface, allowing convenient, easy cleanup.
11. Color coordinated or stainless steel oven
exteriorpanels&trim.
12.Ladderovenracksupportswithovenrack
sensors.
13. Automatic interior oven door light switch.
14. Self-cleaning lower oven ventilation.
15. Self-clean oven door latch.
16. Microwavepopcorn/bacontray.
17. Removable turntable.
Place the turntable on the turntable support
securely. The turntable will rotate clockwise or
counterclockwise. Only remove for clearing.
18. Removable turntable support.
Carefully place the turntable support in the center of
the oven oor.
19. Convection roasting rack.
20.Broilerpaninsert.
21.Broilerpan.
14
4
16
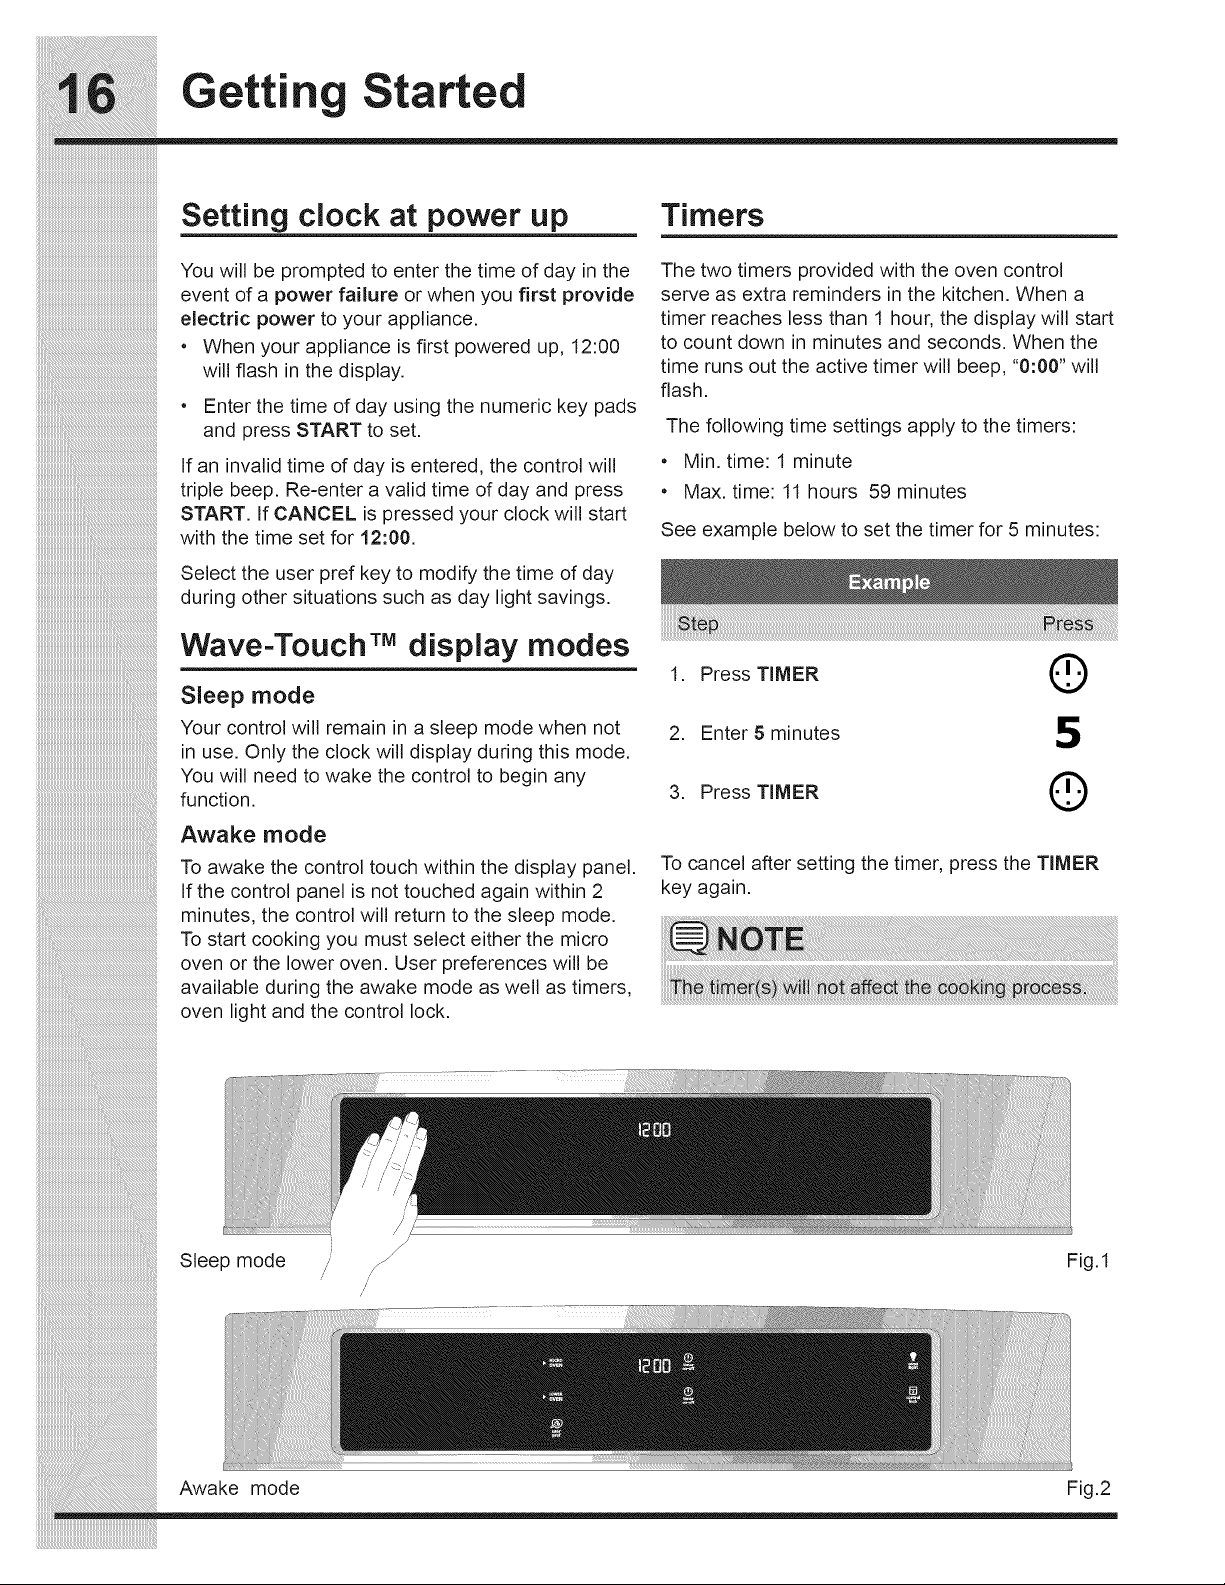
Timers
Getting Started
Setting clock at power up
You will be prompted to enter the time of day in the
event of a power failure or when you rstprovide
electric power to your appliance.
• Whenyourapplianceisrstpoweredup,12:00
willashinthedisplay.
• Enterthetimeofdayusingthenumerickeypads
and press START to set.
If an invalid time of day is entered, the control will
triple beep. Re-enter a valid time of day and press
START. If CANCEL is pressed your clock will start
with the time set for 12:00.
Select the user pref key to modify the time of day
during other situations such as day light savings.
See example below to set the timer for 5 minutes:
Sleep mode
Your control will remain in a sleep mode when not
inuse.Onlytheclockwilldisplayduringthismode.
You will need to wake the control to begin any
function.
Awake mode
To awake the control touch within the display panel.
If the control panel is not touched again within 2
minutes, the control will return to the sleep mode.
To start cooking you must select either the micro
oven or the lower oven. User preferences will be
available during the awake mode as well as timers,
oven light and the control lock.
NOTE
Thetimer(s)willnotaffectthecookingprocess.
Sleep mode Fig.1
The two timers provided with the oven control
serve as extra reminders in the kitchen. When a
timer reaches less than 1 hour, the display will start
to count down in minutes and seconds. When the
time runs out the active timer will beep, “0:00”will
ash.
The following time settings apply to the timers:
• Min.time:1minute
• Max.time:11hours59minutes
To cancel after setting the timer, press the TIMER
key again.
Awake mode Fig.2
Wave-Touch™ display modes
Example
Step Press
1. Press TIMER
2. Enter 5 minutes
3. Press TIMER
17
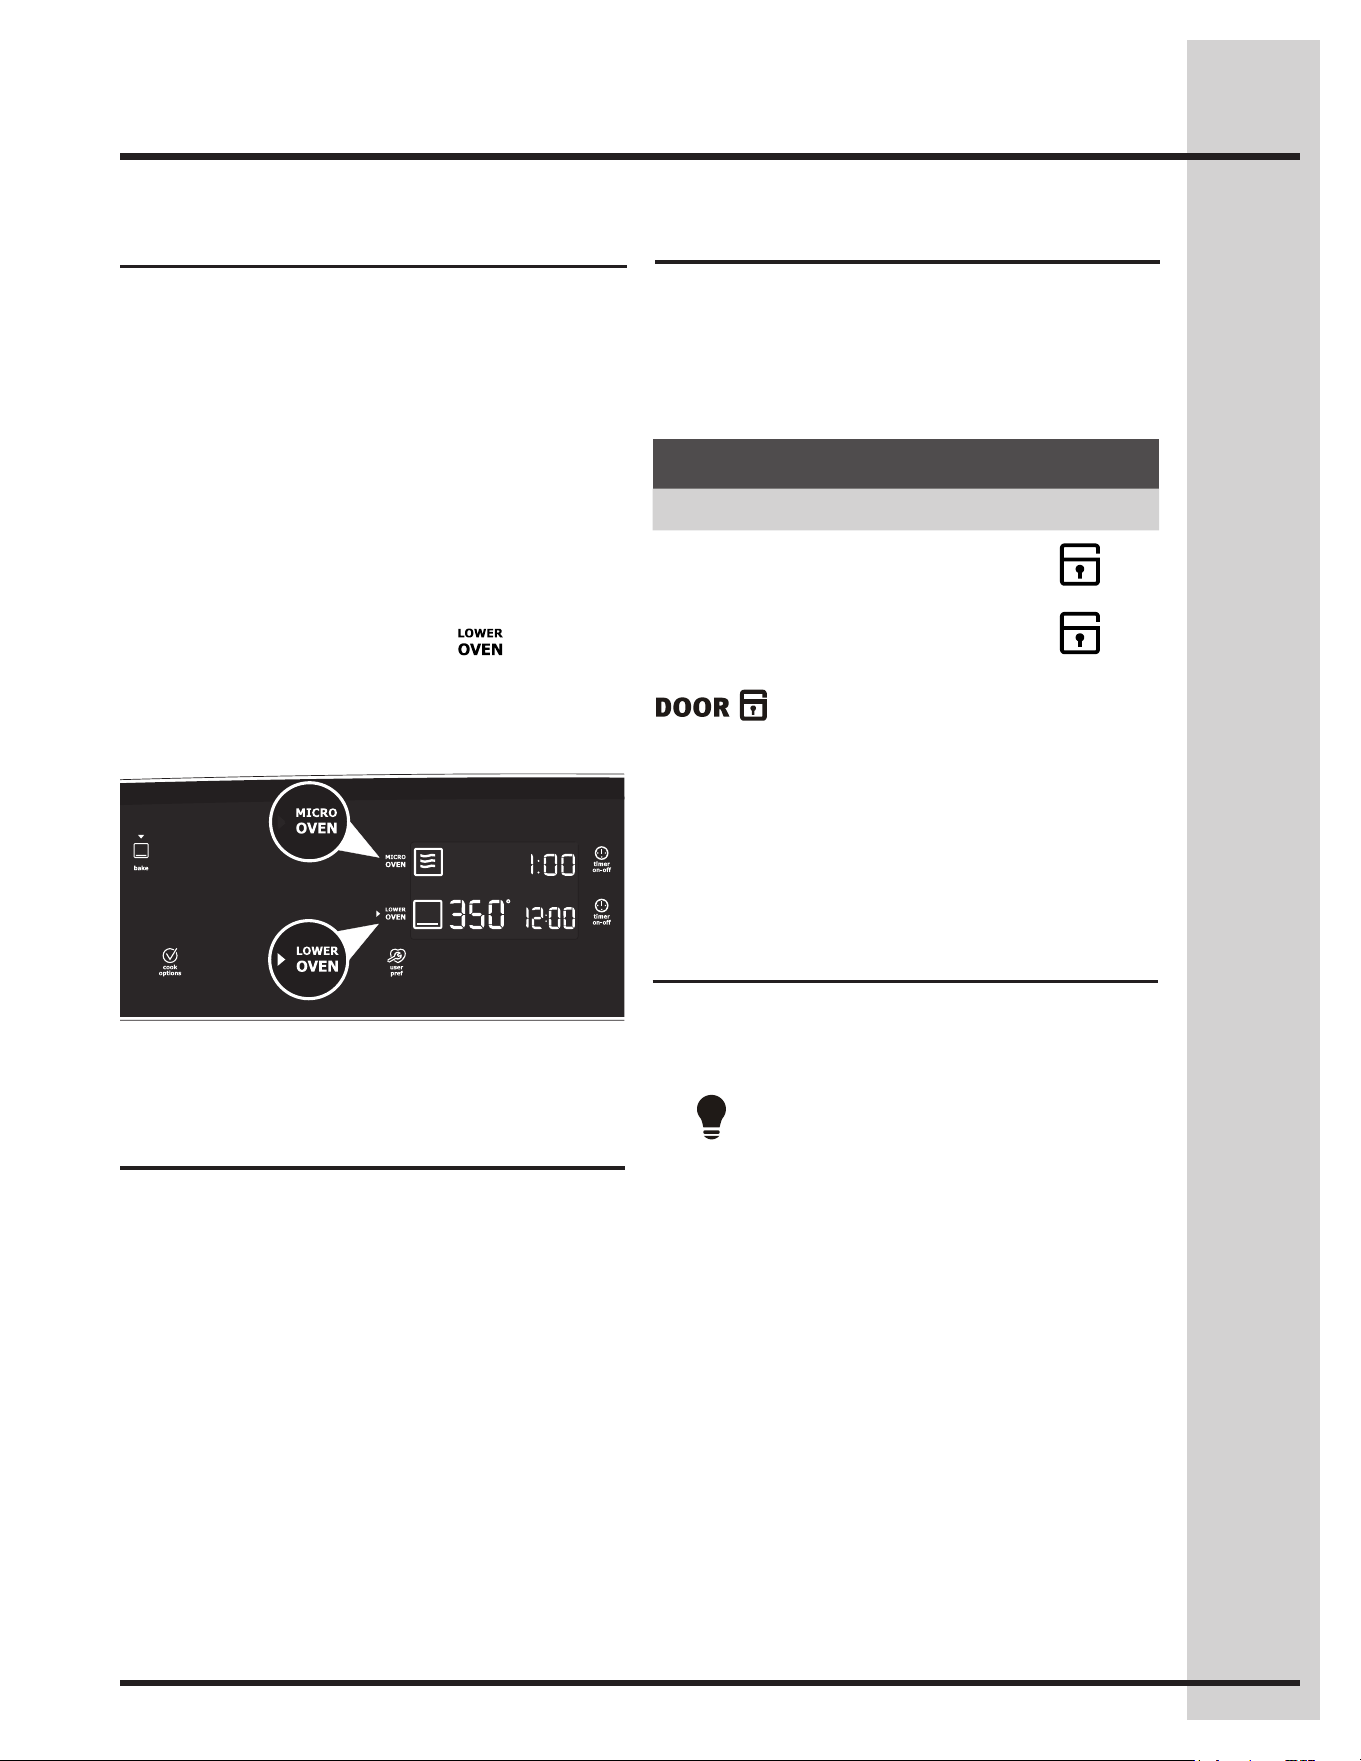
Control lock
The control lock will lock both oven controls and
the lower oven door.
Control lock is available only in the awake mode.
See example below to lock the ovens.
Getting Started
The key controls the interior lower oven lights.
This model includes 2 halogen lights in the lower
oven.
TheovenlightswillautomaticallyturnON
whenever the lower oven door is opened. The
lights will remain on until the door has been shut.
To replace the lower over interior light bulbs
see“Changingtheovenlights”intheCareand
Cleaning section.
willashinthedisplayuntilthedoor
hasnishedlocking.
Oncethedoorhasbeen
lockedthedoorlockindicatorwillturnon.LOCKED
will then display.
Donotattempttoopentheovendoorwhilethe
doorlockindicatorisashing.
Changing settings
Software controls the micro and lower ovens
so that both may be set to operate at the same
time with unique settings. It is very important to
understand that before setting or modifying either
oven,youmustrstselect which oven you desire
to set or modify.
The display will provide which oven is currently
selected for setting/changes by displaying a small
red triangle indicator next to the micro or lower
oven text.
If the micro oven text symbol displays the red
triangle indicator but you wish to set or change the
settings for the lower oven, press once to
change the oven selection -Fig.1-. Then make the
setting/changes. You may toggle between either
oven and make setting changes at any time except
when you are currently setting a cooking mode.
Fig.1
Interior Luxury-Lighting™
YourapplianceincludesinteriorovenLuxury-
Lighting™thatgraduallybrightensanddimsthe
lights for the lower oven.
Preheat Temperature Display
Onceacookingfeaturehasbeenstartedinthe
lower oven, the control will display the actual oven
temperaturewhilepreheating.Oncetheoven
reaches the oven set temperature only the oven set
temperature will display.
Example
Step Press
To lock, press and hold CONTROL
LOCK for 3 seconds.
3sec
To unlock, press and hold CONTROL
LOCK for 3 seconds.
3sec
The preheat temperature display is available with
the following cooking modes:
• Bake
• ConvBake
18
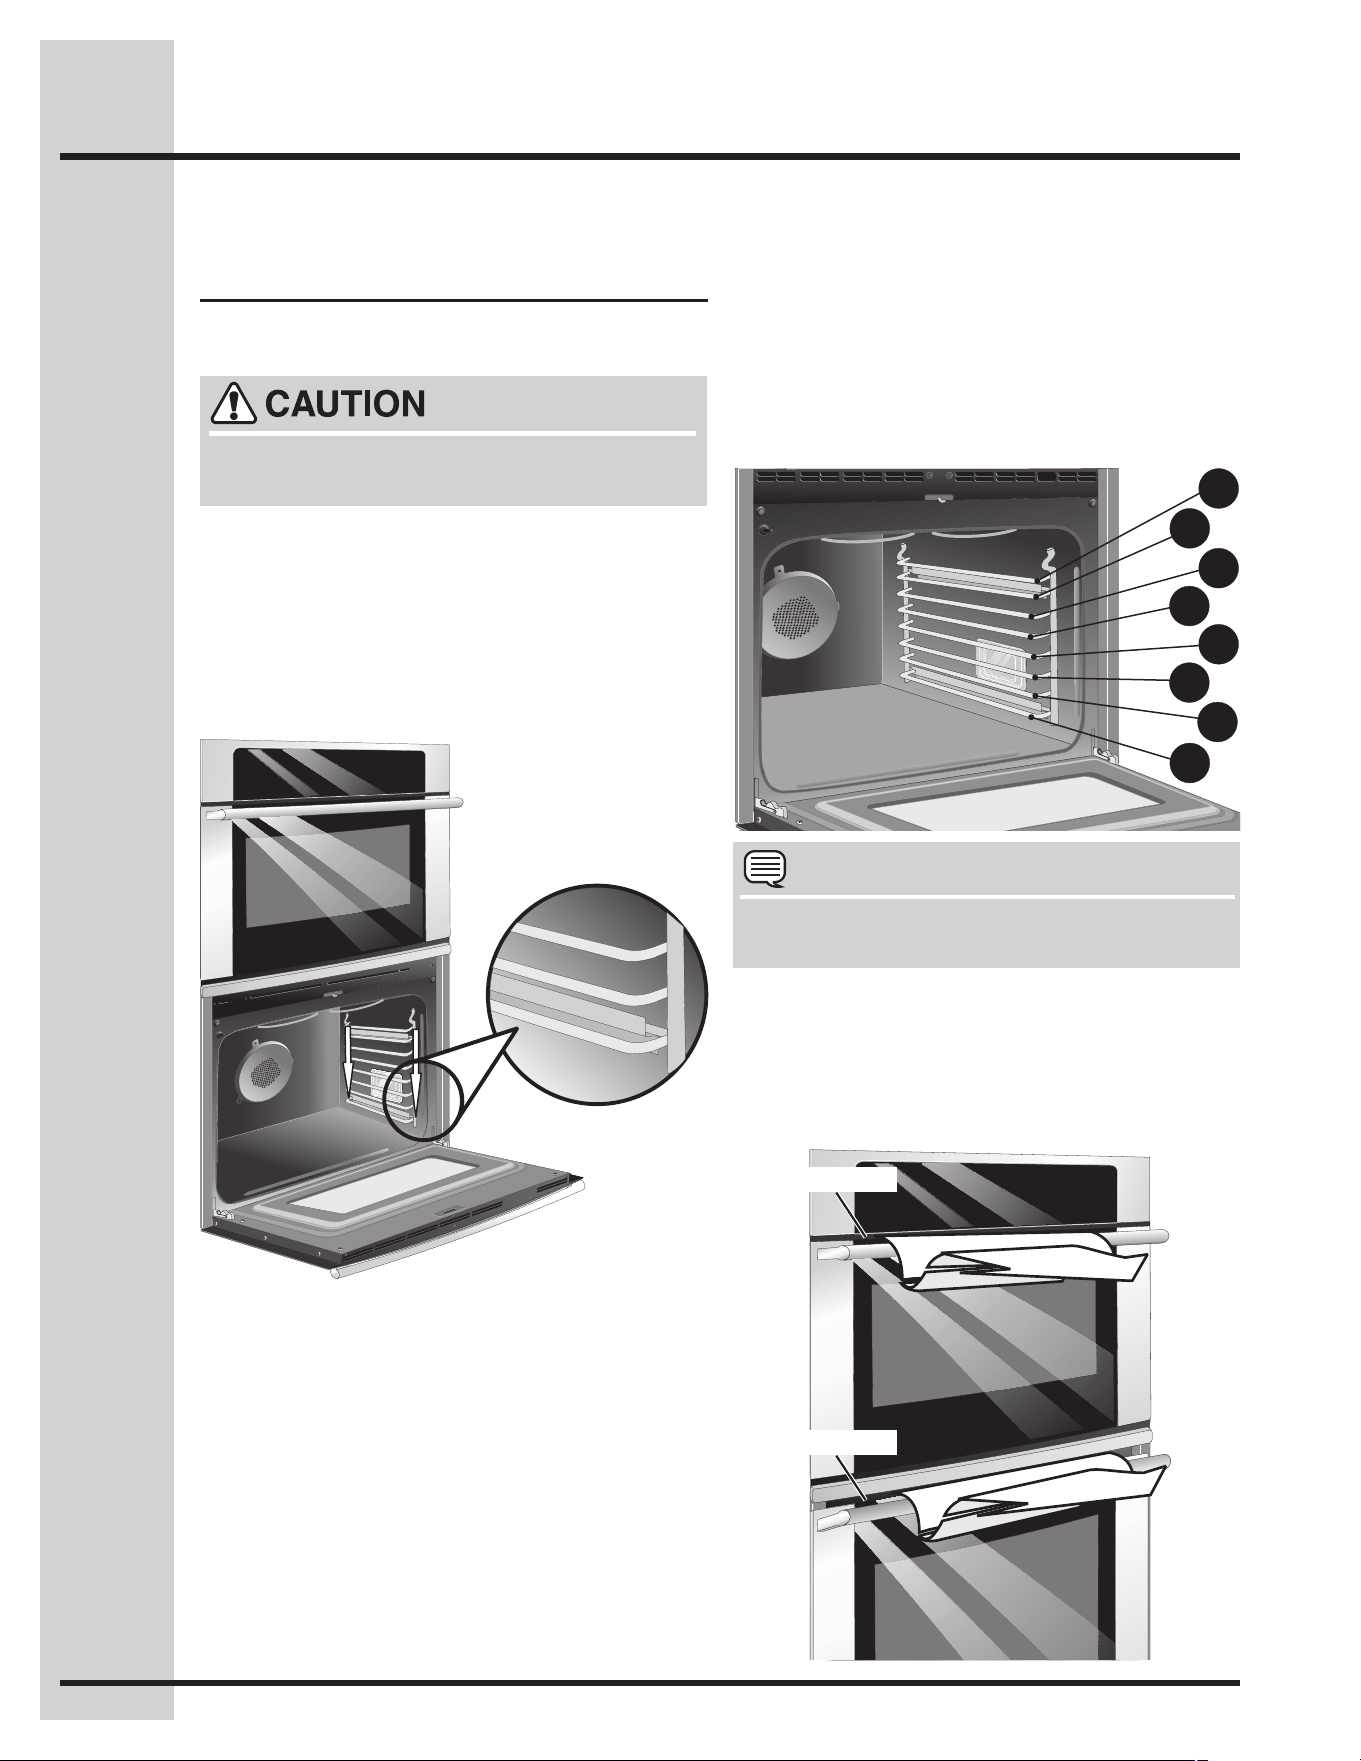
Setting for Best Results
Lower oven rack supports &
oven vents
NOTE
Position 1 can only be used with a regular “non-
sliding”rack.
Always install oven rack support before turning
on the oven (when the oven is cool).
Rack positions
Installing Oven Rack Supports
Oven Vents Location
The ovens are vented above their door. When
the oven is on, warm air is released through the
vents. This venting is necessary for proper air
circulation in the oven and good baking results.
Oven Vent
Oven Vent
Warm Air
Warm Air
Oven Rack Positions
This oven is equipped with ladder rack supports with
8 positions to accommodate precisely every mode
of cooking.
To install oven rack support, insert the supports by
pushing them downward into the two brackets on
each side of the oven interior, as shown below.
To remove the oven rack support for a self-clean
cycle, pull up the support to disengage them from
the brackets. If the rack supports are not removed,
the self-clean cycle won’t start.
1
2
3
4
5
6
7
8
19
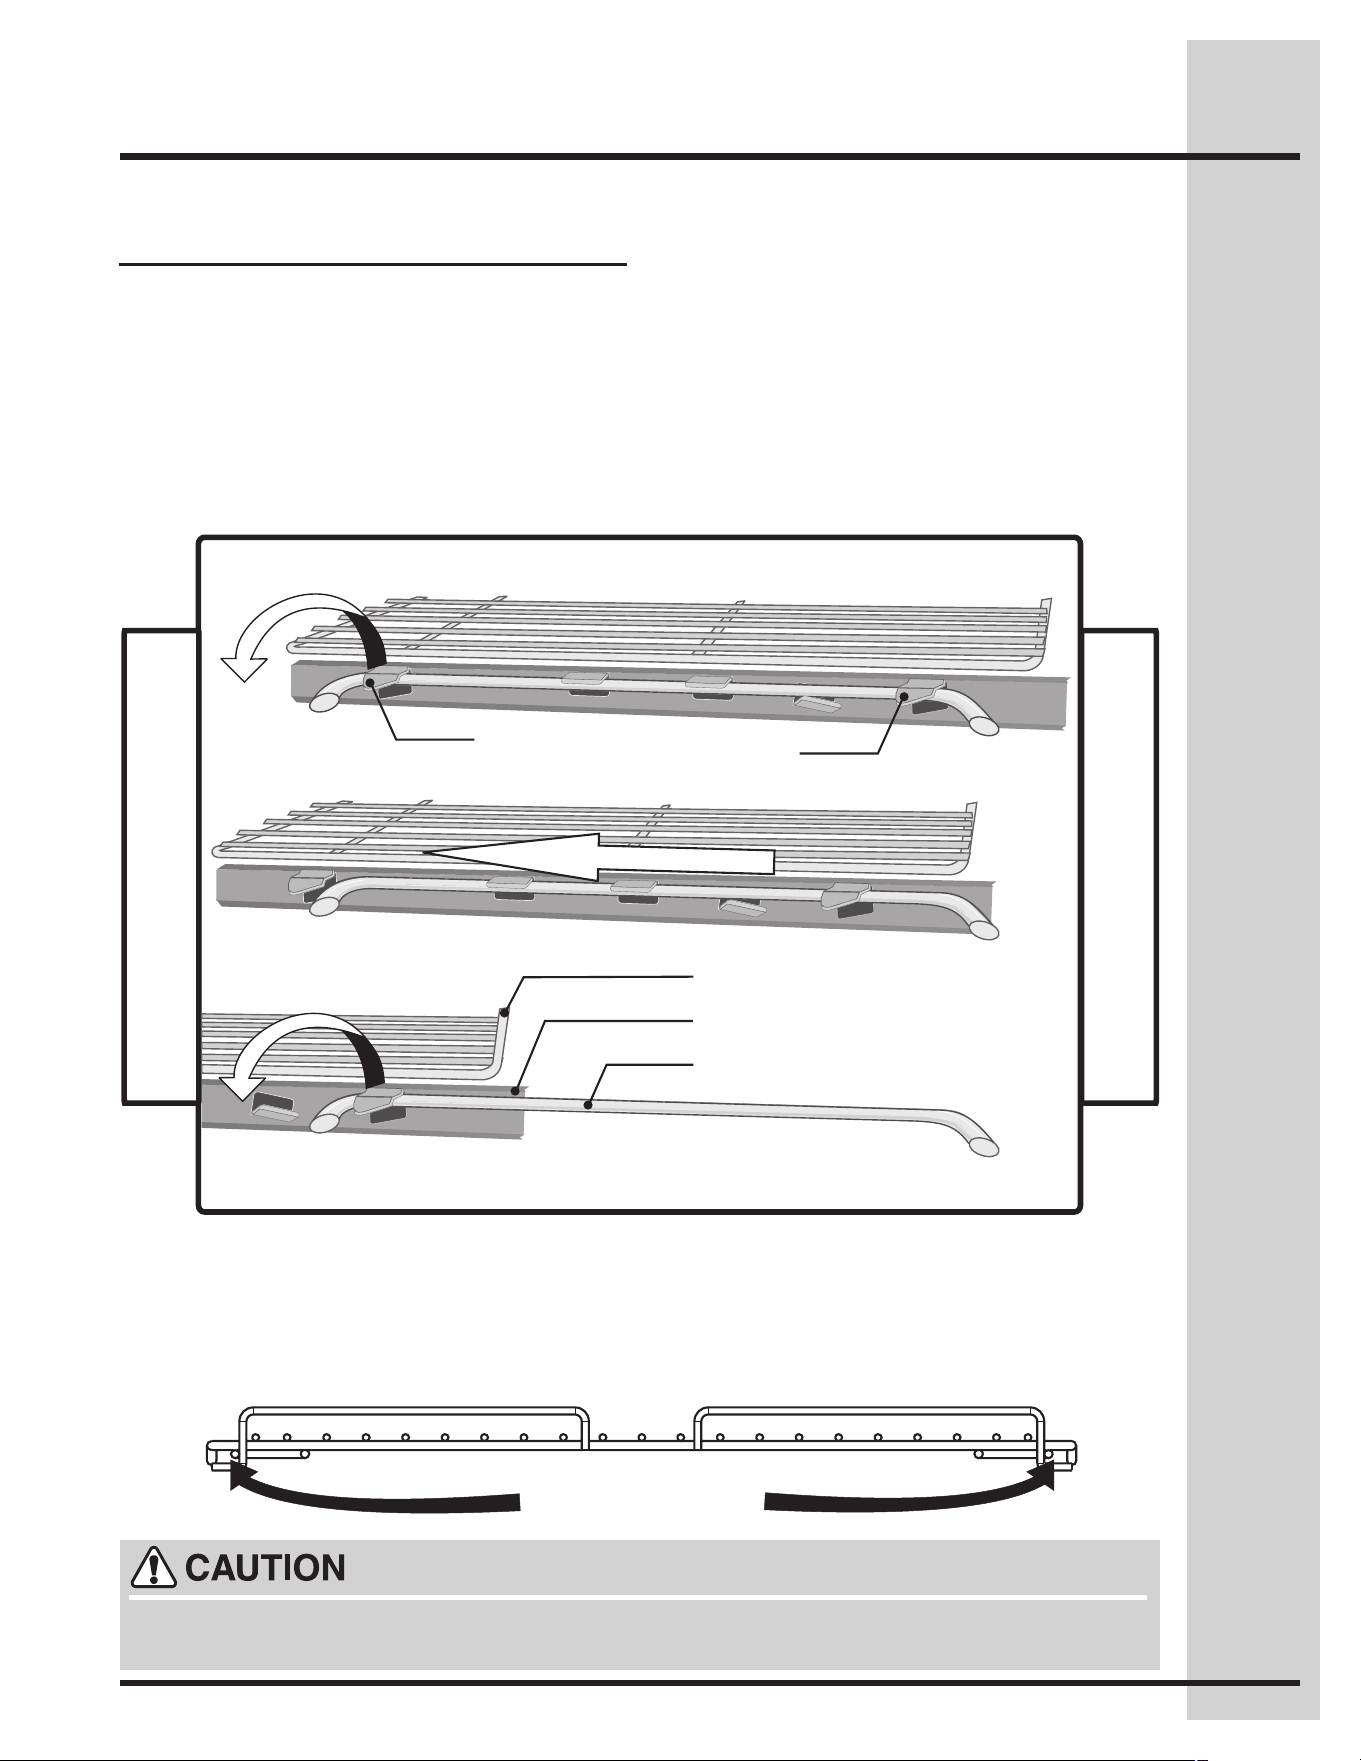
Setting for Best Results
Lower oven racks
Alwaysarrangetheovenrackswhentheoveniscool(priortooperatingtheoven).
Always use oven mitts when using the oven.
Removing Sliding Oven Racks
1. With the rack in its closed position; grasp the
rack and the sliders at once.
2. Slightly lift the rack and sliders and pull it to
cleartherstbracket.
3. Pull the rack and sliders until the second
bracket stops the rack.
4.Lifttherackandslidersandcarefullyremove
them from the oven.
OvenRack
OvenRackSlider
OvenRackSupport
TOWARDFRONTOFOVEN
TOWARDBACKOFOVEN
Replacing Sliding Oven Racks
To replace the oven racks, follow the instructions
above in reverse order.
1stBracket
2ndBracket
Removing Non-Sliding Oven Racks
Simply pull the rack and slightly tilt it upward when
the rack hits its stop position.
Removing Non-Sliding Oven Racks
Insert the rack into the oven rack supports by insert-
ingtherackopeningsintotheracksupports.Be
sure the rack is at the same position on each oven
rack support on both sides.
Insert the openings
into the rack support
Refer to the care and cleaning section for
directions on how to clean the racks.
20
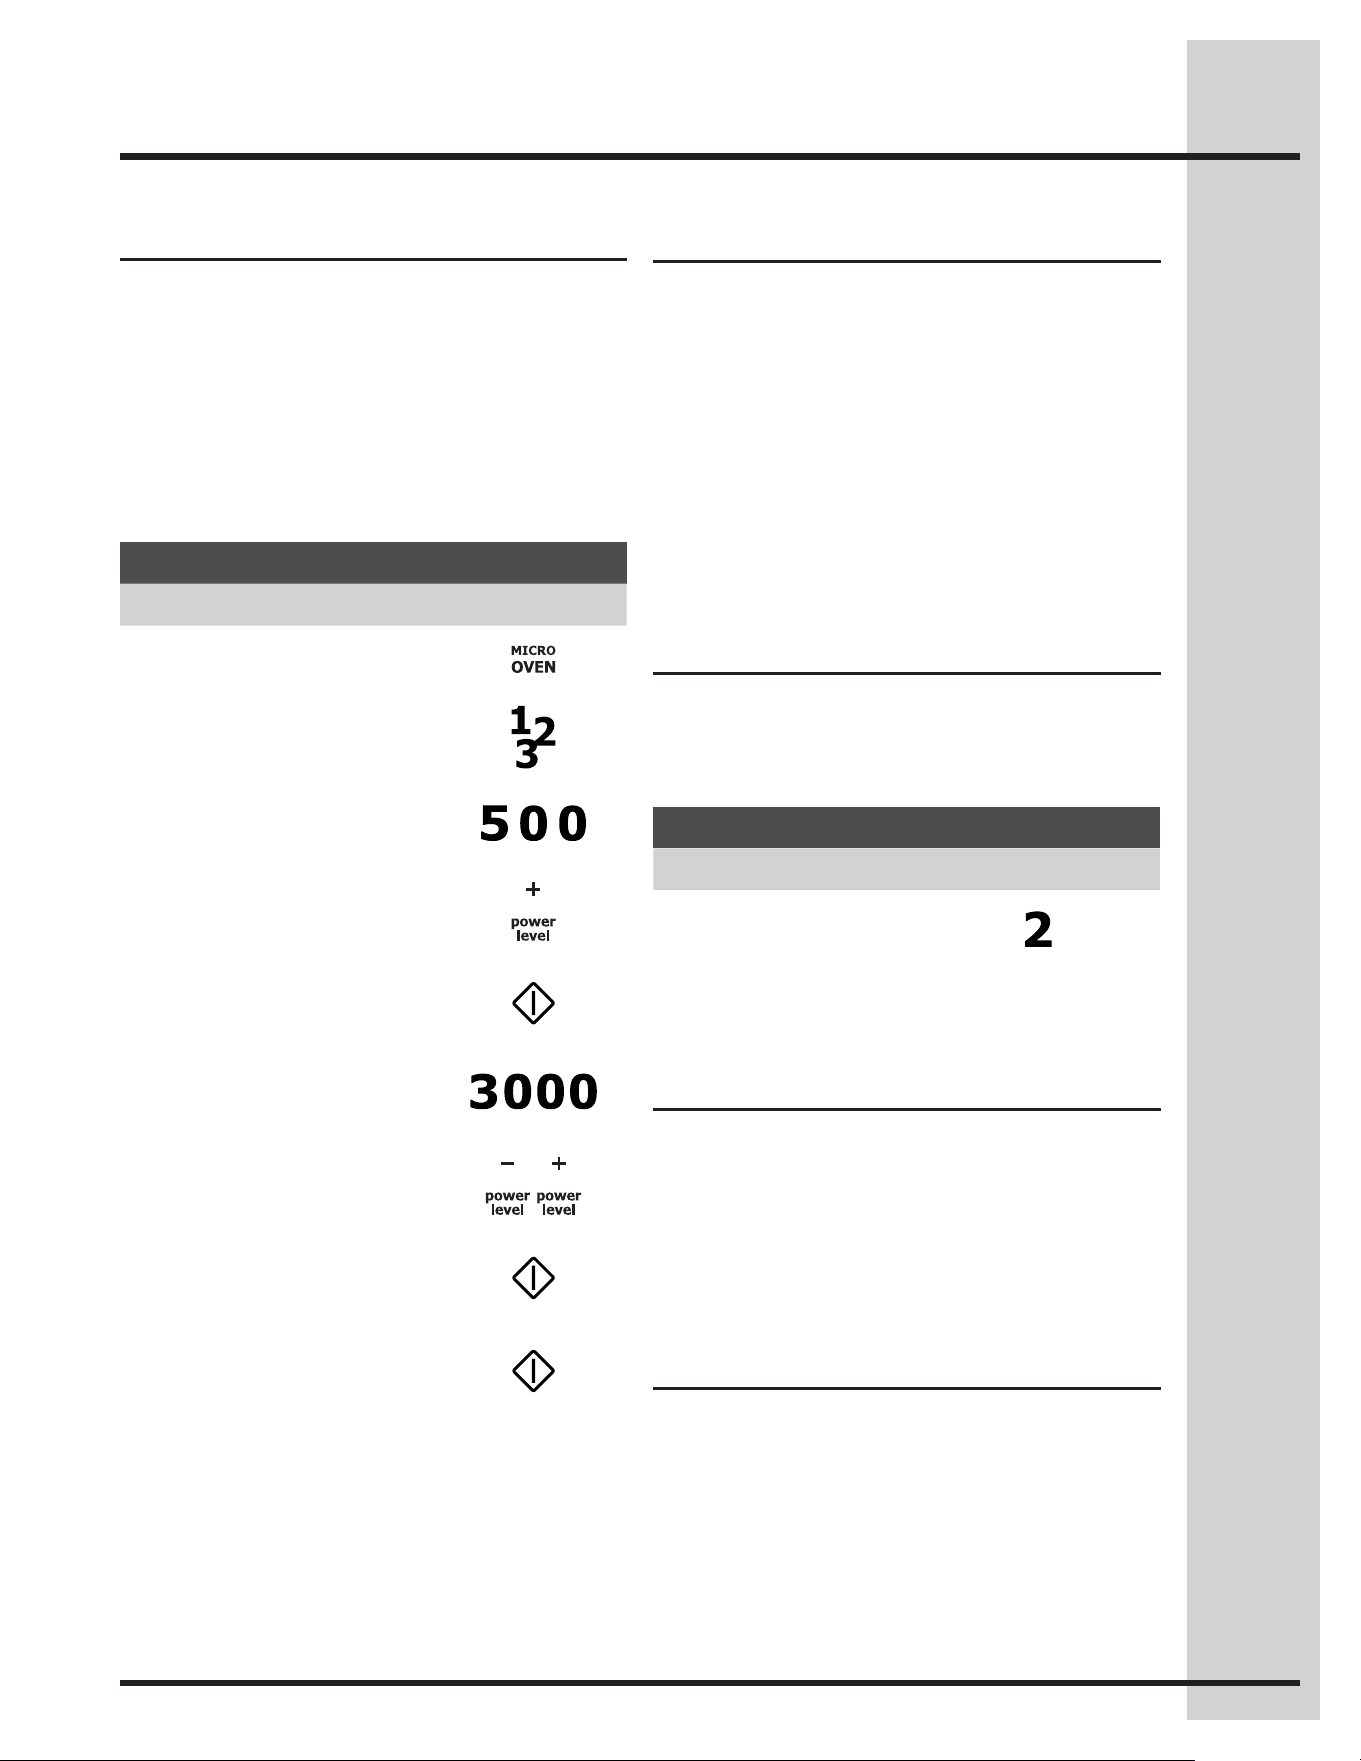
• Supposeyouwanttodefrostfor5minutesat
30%.
Example
Step Press
1. Press MICRO OVEN
2. Enter defrosting time.
3. Press power level - or +.
or
4. Press the numeric pad 3 to
select power level 30.
5. Press START
Manual defrost
If the food that you wish to defrost is not listed on
theAutoDefrostchartorisaboveorbelowthe
limitsinthe“Amount”columnontheDefrostchart,
you need to defrost manually.
You can defrost any frozen food, either raw or
previously cooked, by using Power level 30. Follow
the exact procedure found under Time cooking.
Estimate defrosting time and lower your power
level to 30%.
For either raw or previously cooked frozen food
the rule of thumb is approximately 5 minutes per
pound. For example, defrost 5 minutes for 1 pound
of frozen spaghetti sauce.
Always stop the oven periodically to remove or
separate the portions that are defrosted. If food is
not defrosted at the end of the estimated defrosting
time, program the oven in 1 minute increments on
power level 30 until totally defrosted.
When using plastic containers from the freezer,
defrost only long enough to remove from the plastic
in order to place in a microwave-safe dish.
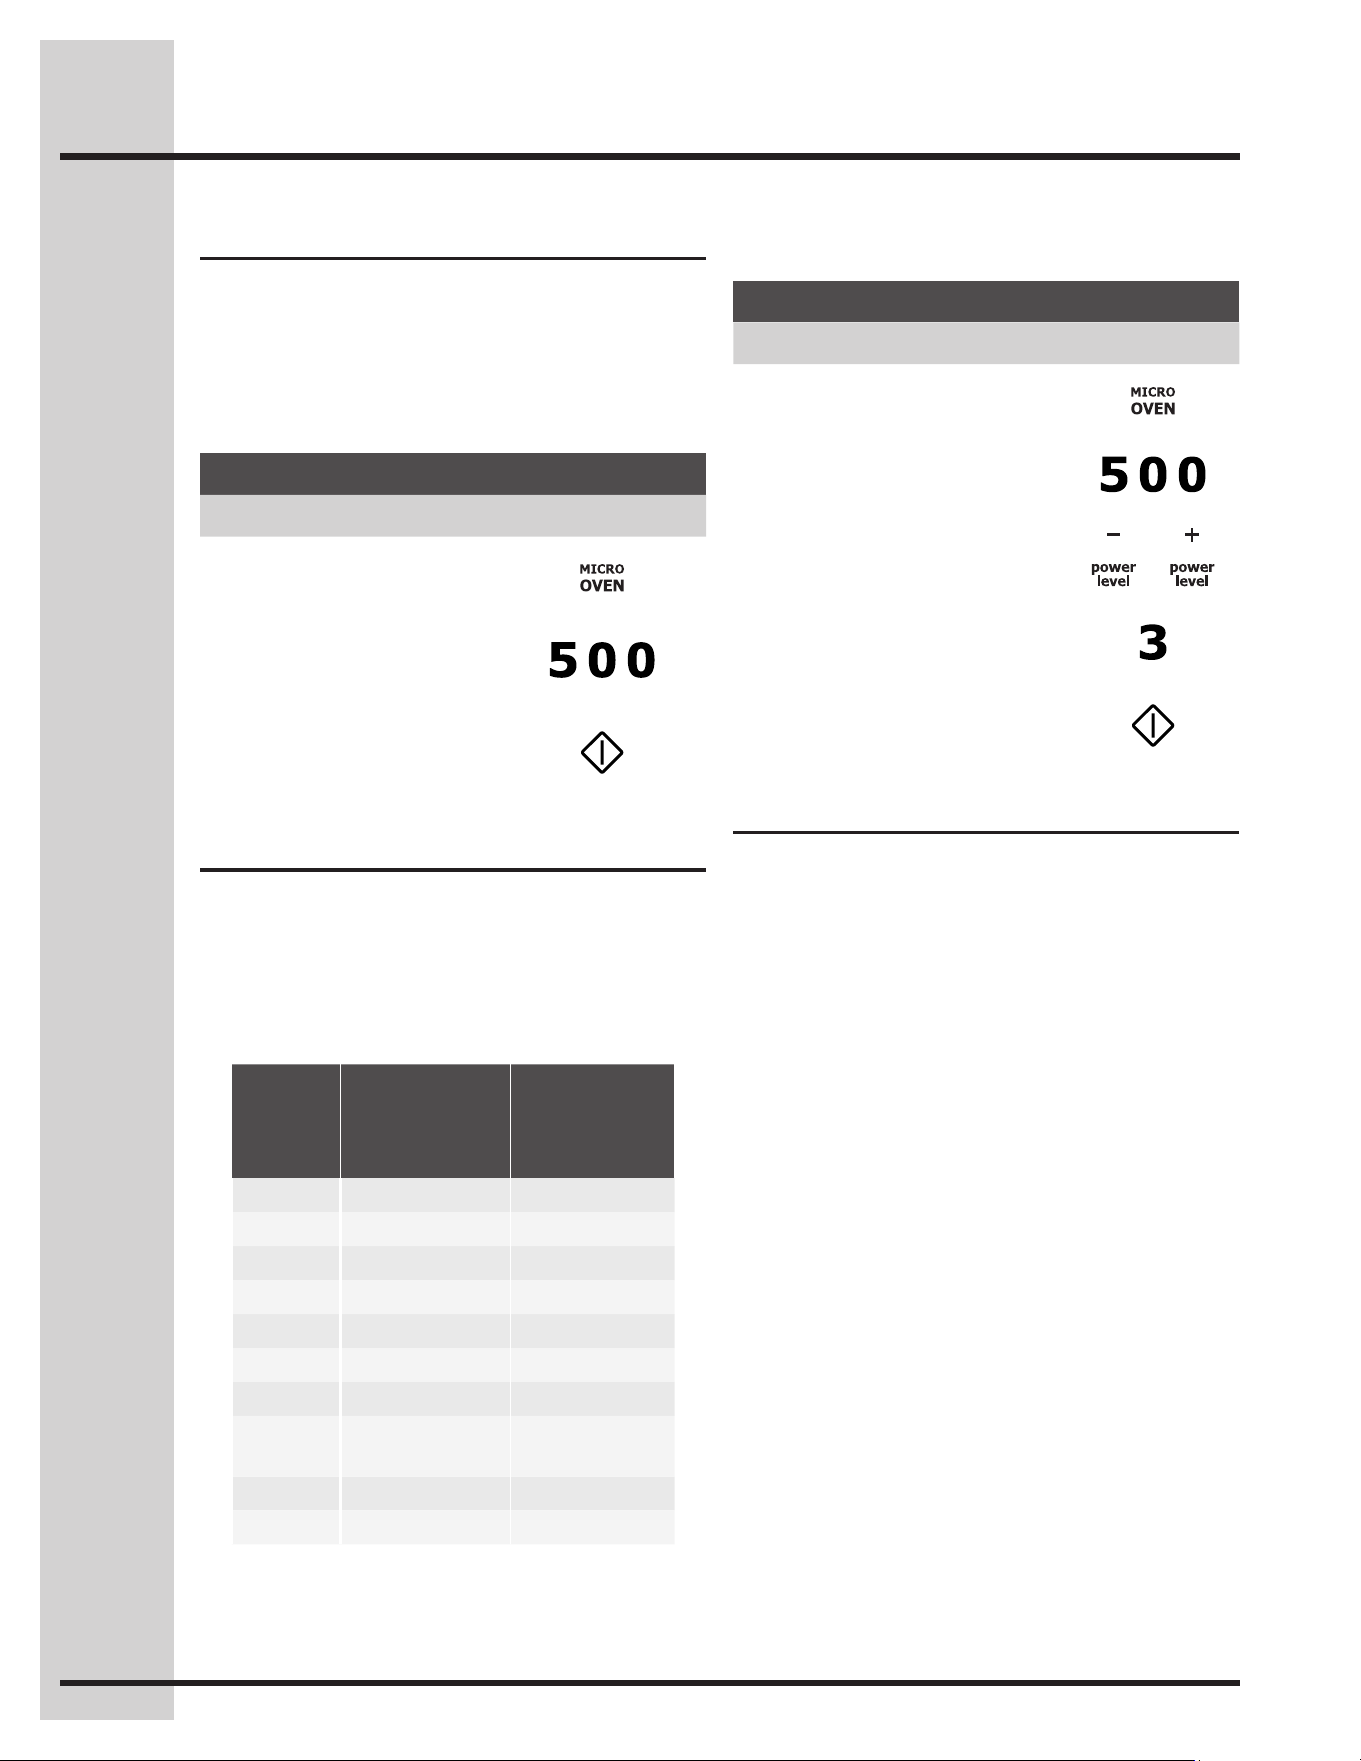
Time cooking
YourMicrowaveOvencanbeprogrammedfor
99minutes59seconds(99.59).Alwaysenterthe
seconds after the minutes, even if they are both
zeros.
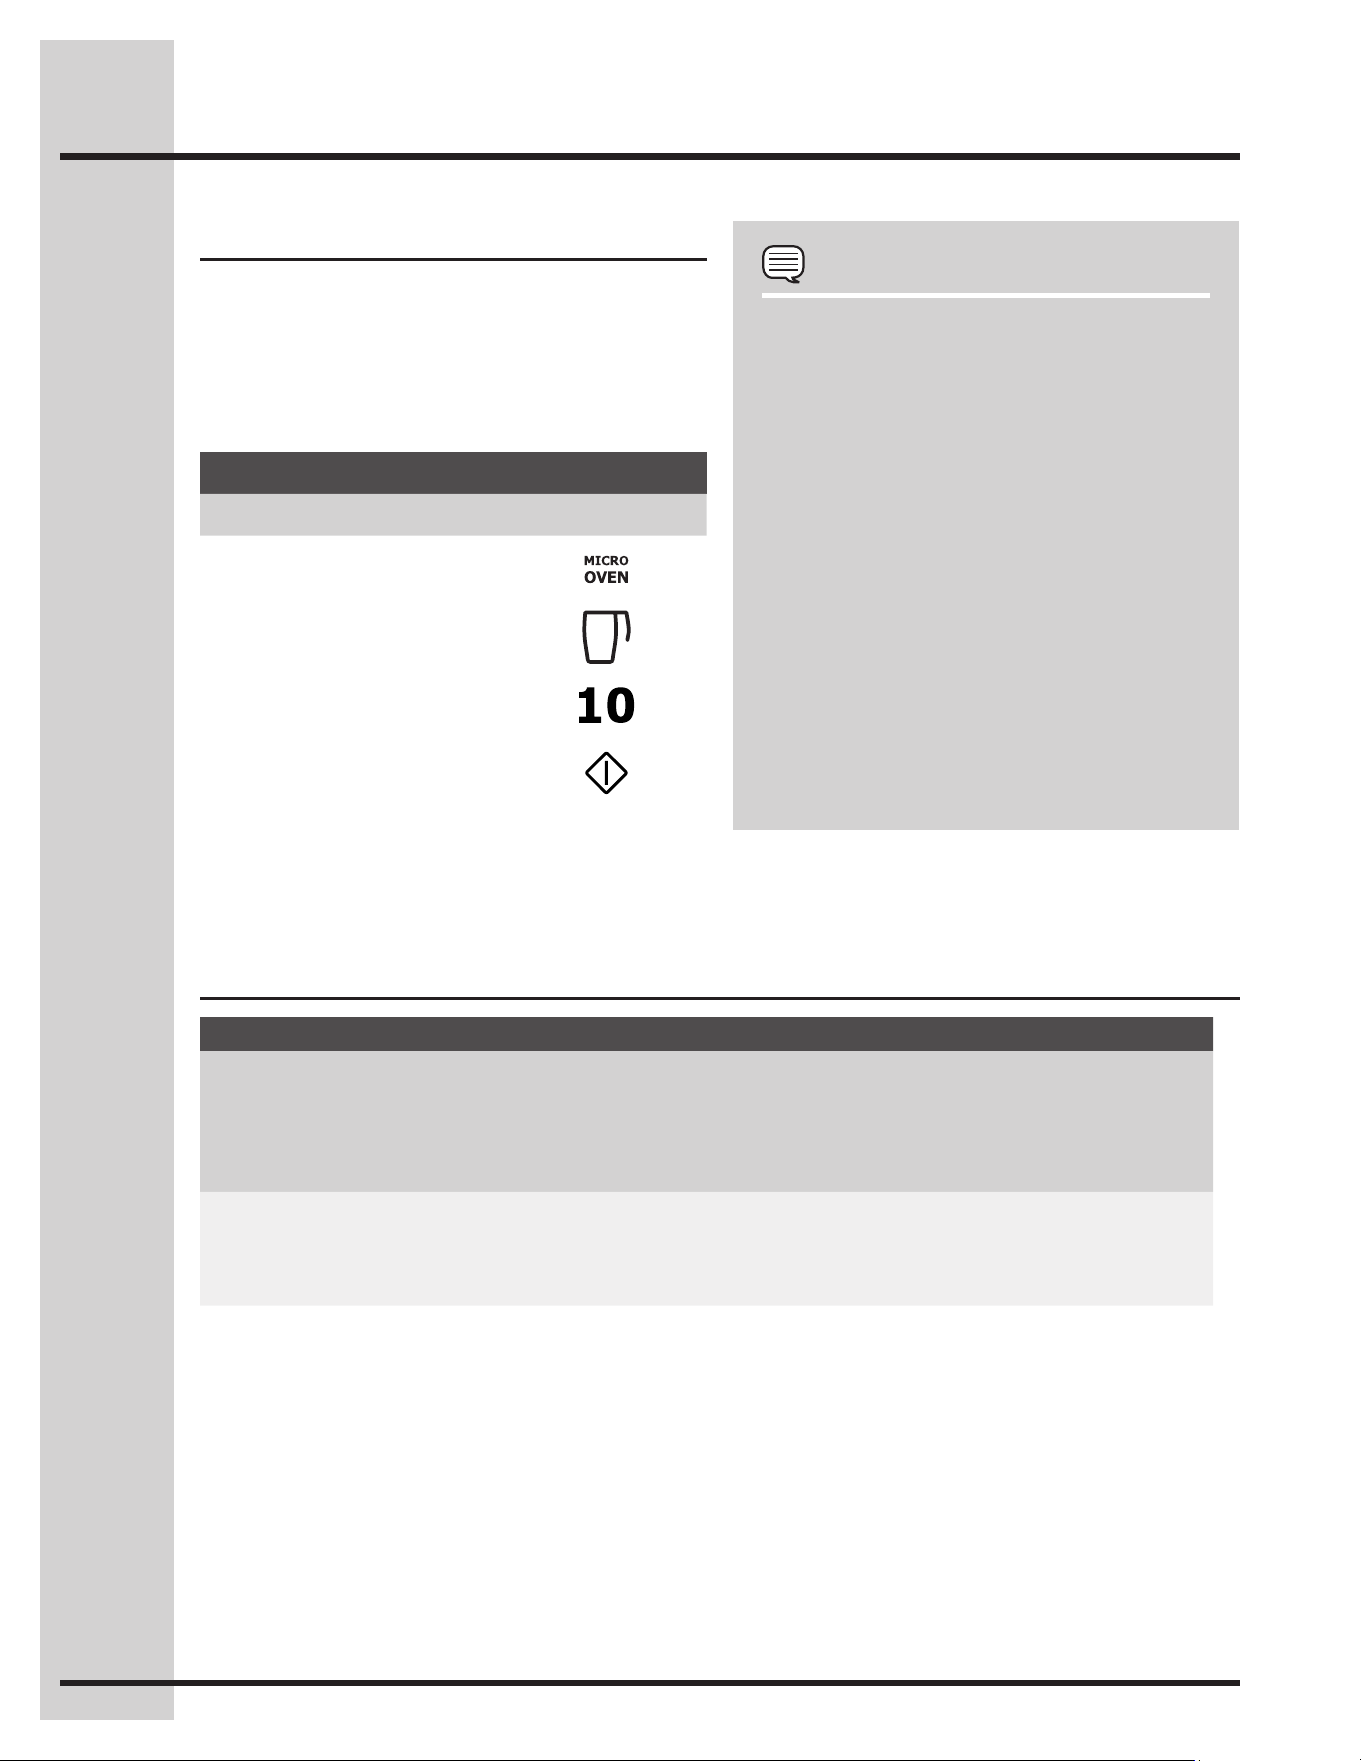
• Supposeyouwanttocookfor5minutesat
100%.
Example
Step Press
1. Press MICRO OVEN
2. Enter cooking time.
3. Press START
To set power level
There are ten preset power levels.
Using lower power levels increases the cooking
time which is recommended for foods such as
cheese, milk and long slow cooking of meats.
Consult cookbook or recipes for specific
recommendations.
Numeric
pad
Power level
Common
words for
power
levels
0 100 High
9 90
8 80
7 70 MediumHigh
6 60
5 50 Medium
4 40
3 30
MedLow/
Defrost
2 20
1 10 Low
Power level can be set by using the power level +
or -. You can also press the corresponding numeric
pad after pressing either power level + or -.
Setting Microwave Controls
21
Sensor Modes
The sensor is a semi-conductor device that detects
thevapor(moistureandhumidity)emittedfromthe
foodasitheats.Thesensoradjuststhecooking
times and power level for various foods and
quantities.
Using Sensor Modes:
After oven is plugged in, wait 2 minutes before 1.
usingSensorModes.
Besuretheexteriorofthecookingcontainer2.
and the interior of the oven are dry. Wipe off
any moisture with a dry cloth or paper towel.
The oven works with foods at normal storage 3.
temperature. For example, popcorn would be at
room temperature.
AnySensorModesselectioncanbe4.
programmedwithMoreorlesstimeadjustment.
Moreorlessfoodthanthequantitylistedinthe5.
chart should be cooked following the guidelines
in any microwave cookbook.
Duringthefirstpartofanysensorcookingor6.
reheating, SENSING will appear on the display.
Donotopentheovendoorduringthispartof
the cycle. The measurement of vapor will be
interrupted. If this occurs, an error message
will appear. To continue cooking, press the
CANCEL/off pad and cook manually.
When the sensor detects the vapor emitted
from the food, remainder of cooking time will
appear.Doormaybeopenedwhenremaining
cooking time appears on the display. At this
time, you may stir or season food, as desired.
Except for popcorn, if the sensor does not 7.
detect vapor properly when cooking other
foods, ERROR will be displayed.
Check food for temperature after cooking. If 8.
additional time is needed, continue to cook
manually.
Each food has a cooking hint. Touch 9. help
guide pad when the HELP indicator is lighted in
the display.
Covering Foods:
Some foods cook better when covered. Use the
cover recommended in the food charts.
Casserole lid.1.
Plastic wrap: Use plastic wrap recommended for 2.
microwave cooking. Cover dish loosely; allow
approximately 1/2 inch to remain uncovered to
allow steam to escape. Plastic wrap should not
touch food.
Wax paper: Cover dish completely; fold excess 3.
wrap under dish to secure. If dish is wider than
paper, overlap two pieces at least one inch
to cover.
Becarefulwhenremovinganycoveringtoallow
steam to escape away from you.
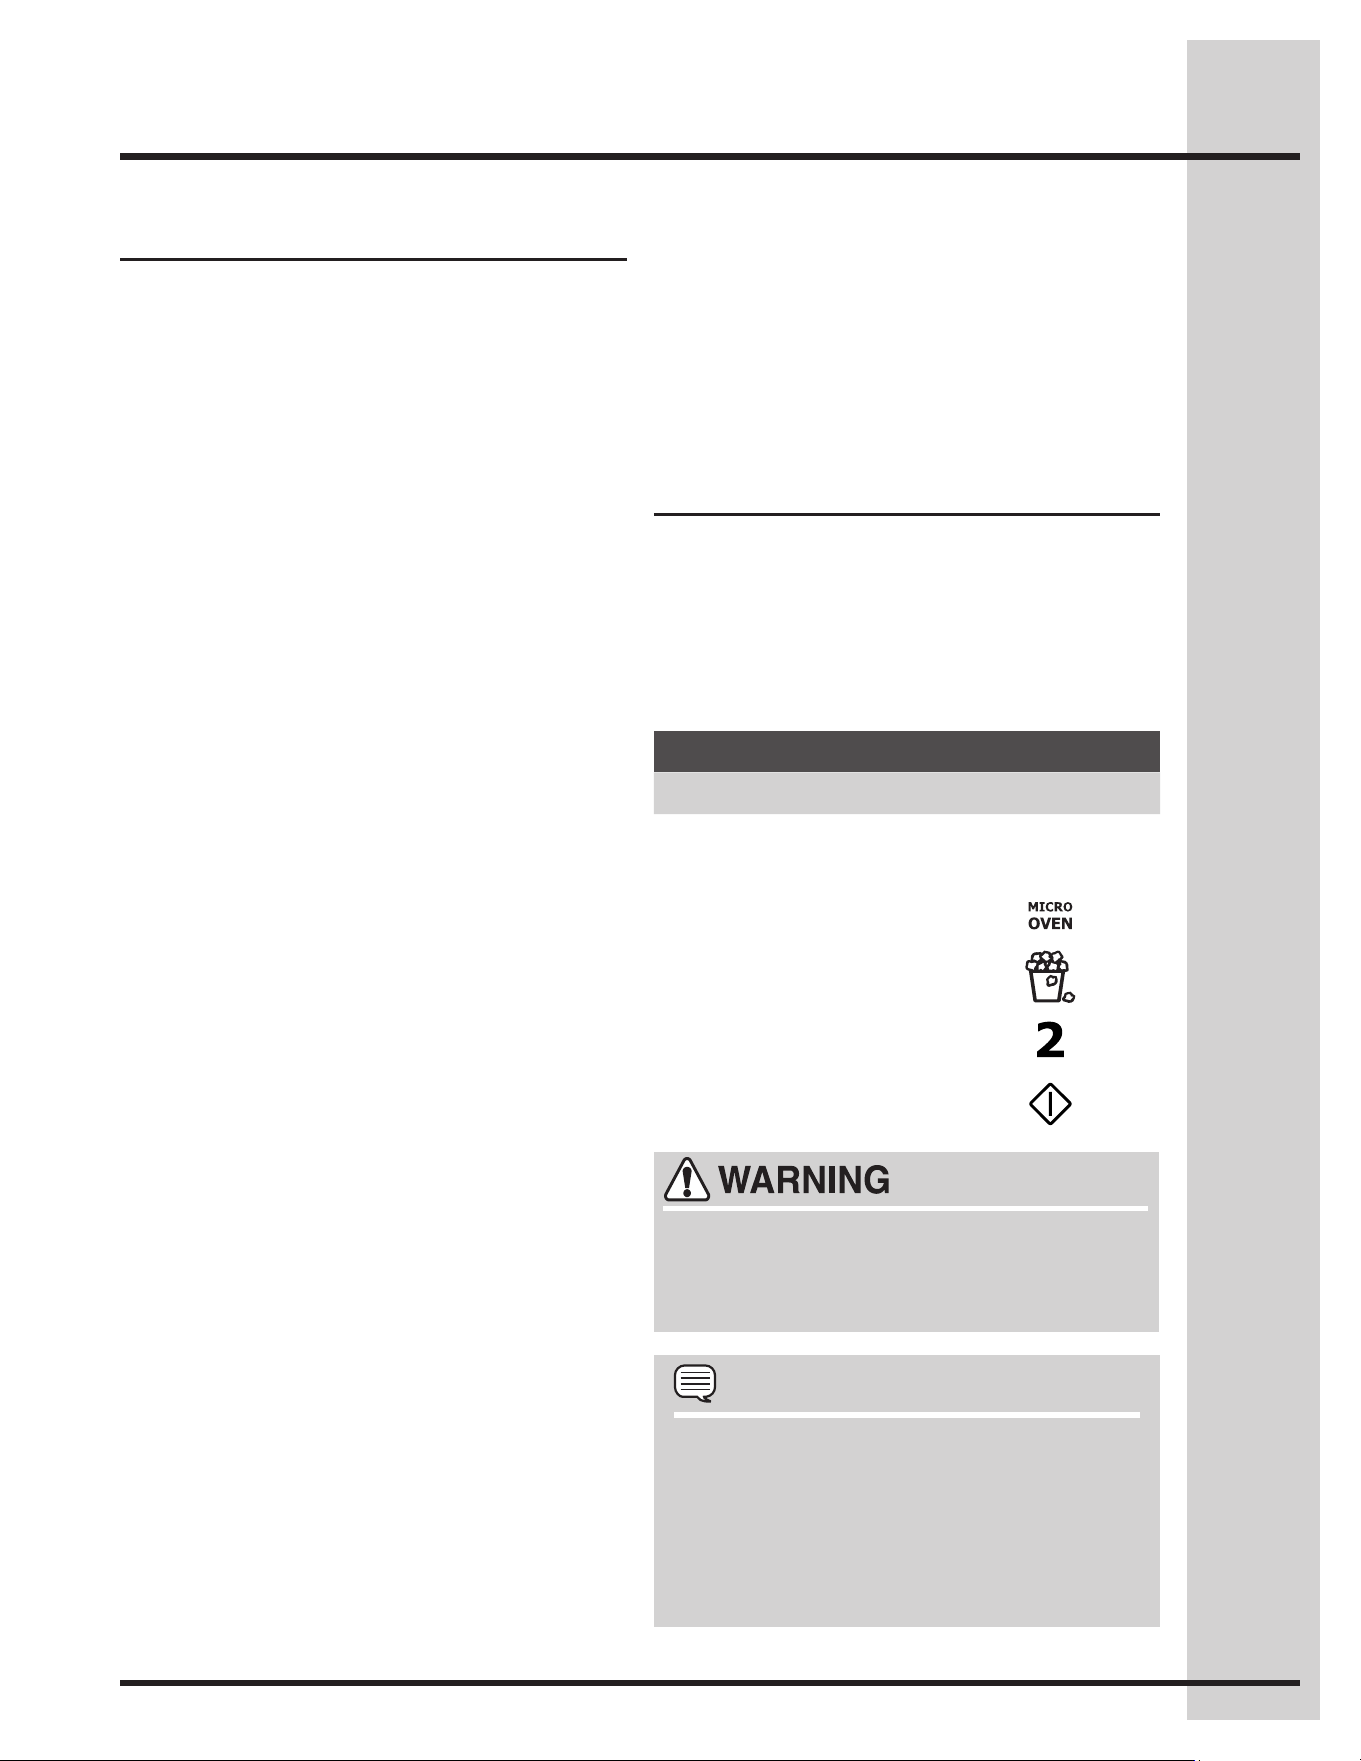
Quick Sensor
You can cook or reheat many foods by touching
aQuickSensorpad(fresh veggies, frozen
veggies, popcorn, baked potato and sensor
reheat).Youdon'tneedtocalculatecookingtime
or power level.
• Supposeyouwanttopopa3.5oz.bagof
popcorn.
Example
Step Press
Use the popcorn/bacon tray provided with your
unit to cook popcorn quickly and efficiently.
1. Press MICRO OVEN.
2. Press popcorn.
3. Press 2 for regular size.
4. Press START
Donotplacemicrowavepopcorndirectlyonthe
metal turntable as metal on metal may produce
sparking. Always use the popcorn/bacon tray
provided with the unit to cook popcorn.
NOTES
QuickSensorcanbeprogrammedwithMore1.
orlesstimeadjustment.
The final result will vary according to the food 2.
condition (e.g. initial temperature, shape,
quality). Check food for temperature after
heating. If additional time is needed, continue
to heat manually.
Setting Microwave Controls

22
Quick Sensor chart
Food Amount Procedure
FreshVeggies:
Soft
Broccoli
Brusselssprouts
Cabbage
Cauliflower(flowerets)
Cauliflower(whole)
Spinach
Zucchini
Bakedapples
Hard
Carrots, sliced
Corn on cob
Greenbeans
Winter squash
- diced
- halves
0.25 - 2.0 lb
0.25 - 2.0 lb
0.25 - 2.0 lb
0.25 - 2.0 lb
1 medium
0.25 - 1.0 lb
0.25 - 2.0 lb
2 - 4 medium
0.25 - 2.0 lb
2 - 4 pcs.
0.25 - 2.0 lb
0.25 - 2.0 lb
1 - 2
Wash and place in casserole. Add no water if vegetables
havejustbeenwashed.Coverwithlidfortendervegetables.
Use plastic wrap for tender-crisp vegetables. Touch fresh
veggies pad. Select 1 for soft veggies. After cooking, stir,
ifpossible.Letstand,covered,for2to5minutes.
Place in casserole. Add 1-4 tbsp. water. Cover with lid for
tender vegetables. Use plastic wrap cover for tender-crisp
vegetables. Touch fresh veggies pad. Select 2 for hard
veggies.Aftercooking,stir,ifpossible.Letstand,covered,
for 2 to 5 minutes.
FrozenVeggies 0.25 - 1.25 lb Add no water. Cover with lid or plastic wrap. After cooking,
stir and let stand, covered, for 3 minutes.
Popcorn Regular
3.0 - 3.5 oz bag
Snack 1.5-
1.75 oz bag
Use only popcorn packaged for the microwave. Try several
brandstodecidewhichyoulike.Donottrytopopunpopped
kernels. Use the popcorn/bacon tray provided with your unit
to cook popcorn quickly and efficiently. Select 1 for snack
size and 2 for regular size. This sensor works well with most
brands of microwave popcorn. You may wish to try several
and choose your favorite. Pop only one bag at a time. Unfold
the bag and place in oven according to directions.
BakedPotato 1 - 8 med. Pierce with fork in several places. Place on paper towel on
turntable. After cooking, remove from oven and let stand
wrapped in foil for 5 to 10 minutes.
Sensor Reheat 4 - 36 oz Place in dish or casserole slightly larger than amount to be
reheated. Flatten, if possible. Cover with lid, plastic wrap
or wax paper. Use covers such as plastic wrap or lids with
larger quantities of more dense foods such as stews. After
reheating, stir well, if possible. Re-cover and allow to stand
2 to 3 minutes. Foods should be very hot. If not, continue
to heat with variable power and time.
Setting Microwave Controls

23
Sensor Cook
You can cook many foods by touching the sensor
cook pad and the food number. You don’t need to
calculate cooking time or power level.
• Supposeyouwanttocookgroundmeat.
Example
Step Press
1. Press MICRO OVEN
2. Press sensor cook
3. Press 1 for ground meat
4. Press START
NOTES
SensorCookcanbeprogrammedwithMore1.
orlesstimeadjustment.
The final result will vary according to the food 2.
condition (e.g. initial temperature, shape,
quality). Check food for temperature after
heating. If additional time is needed, continue
to heat manually.
Stay near the oven while it’s in use and check 3.
cooking progress frequently so that there is
no chance of overcooking food.
Sensor Cook chart
Food Amount Procedure
GroundMeat1. 0.25 - 2.0 lb Use this setting to cook ground beef or turkey as patties or in a
casserole to be added to other ingredients. Place patties on a
microwave-safe rack and cover with wax paper. Place ground meat in
a casserole and cover with wax paper or plastic wrap. After cooking,
let stand, covered, for 2 to 3 minutes.
Rice2. 0.5 - 2.0 cups
Place rice into a deep casserole dish and add double quantity of
water. Cover with lid or plastic wrap. After cooking, stir, cover and let
stand 3 to 5 minutes or until all liquid has been absorbed.
Rice Water Size of casserole dish
.5 cup 1 cup 1.5 quart
1 cup 2 cups 2 quart
1.5 cups 3 cups 2.5 or 3 quart
2 cups 4 cups 3 quart or larger
Fish/Seafood3. 0.25 - 2.0 lb Arrange in ring around shallow glass dish (roll fillet with edges
underneath). Cover with plastic wrap. After cooking, let stand,
covered, 3 minutes.
Frozen Entrees4. 6 - 17 oz Use this pad for frozen, convenience foods. It will give satisfactory
results for most brands. You may wish to try several and choose your
favorite. Remove package from outer wrapping and follow package
directions for covering. After cooking, let stand, covered for 1 to 3
minutes.
Chicken 5.
Breast
0.5 - 2.0 lb Cover with vented plastic wrap. After cooking, let stand, covered 3
to5minutes.Chickenshouldbe160˚F.
Setting Microwave Controls
24
Your oven has convenient pads to assist with
meal preparation. The Auto Cook settings will
automatically compute the correct cooking time
and microwave power level for foods shown in the
following charts.
• Supposeyouwanttoheat1cupofwater
Auto Cook chart
Food Amount Default Procedure
1. Pizza 1 - 6 slices
(6-8oz)
1 slice Use this setting to reheat refrigerated leftover pizza, 1 slice is
approximately 1/8th of a 12-inch pizza or 1/12th of a 16-inch
pizza. If possible, place on paper towel on a microwave-safe
rack. Touch pizza pad, enter number of slices, and touch
START.
2.Beverage 0.5 - 2.0 cups 1 cup This setting is good for restoring a cool beverage to a bet-
ter drinking temperature. Stir liquid briskly before and after
heating to avoid "eruption". The beverage setting must be
entered in 0.1 cup measurements.
Setting Microwave Controls
Example
Step Press
1. Press MICRO OVEN
2. Press beverage
3. Enter cups by touching
the number pads 1 and 0.
4. Press START
NOTES
All Auto Cook settings can be programmed 1.
withMoreorLesstimeadjustment.Touch
the power level pad once or twice before
touching START pad. See More or less
adjustment.
Mostfoodhasacookinghint.Touch2. help
guide pad when it is lighted in the display.
Should you attempt to enter more or less 3.
than the allowed amount, an error beep
will sound.
More or less than the quantity listed in
the chart should be cooked following the
guidelines in any microwave cookbook.
The final cooking result will vary according 4.
tothefoodcondition(e.g.initialtemperature,
shape,quality).Checkfoodfortemperature
after cooking. If additional time is needed,
continue to cook manually.
Auto Cook

25
Food Amount Default Procedure
Snacks
Microwave1.
Pizza
1(6-8oz) N/A Use for frozen microwave pizza. Remove from package and
unwrap. Follow package directions for use of package and/
or silver crisping disc. Touch snacks pad and the number
1. Touch START.
Hand-held 2.
Snacks
3 - 4 oz N/A Use for frozen French fries, cheese sticks, appetizers etc.
Remove from outer package. Follow package directions for
howtowraporcover.Becarefulwhenremovingfromthe
oven as snack may be very hot. Touch snacks pad and the
number 2. Touch START.
Hand-held 3.
Snacks
5 - 6 oz N/A Use for frozen French fries, cheese sticks, appetizers etc.
Remove from outer package. Follow package directions for
howtowraporcover.Becarefulwhenremovingfromthe
oven as snack may be very hot. Touch snacks pad and the
number 3. Touch START.
Chicken 4.
Nuggets
0.3 - 1.0 lb 0.4 lb Place frozen chicken nuggets on a flat plate allowing space
between each, cover food with paper towel. Touch snacks
pad and the number 4. Enter weight and touch START. After
cooking, open door, rearrange, close door and touch START.
Letstand,covered,for1to3minutes.
Frozen 5.
Kid'sMeal
6 - 8 oz N/A Use this pad for frozen, convenience foods. It will give
satisfactory results for most brands. You may wish to try
several and choose your favorite. Remove package from
outer wrapping and follow package directions for covering.
Touch snacks pad and the number 5. Touch START. After
cooking, let stand, covered for 1 to 3 minutes.
HotDogs6. 1 - 6 1 Place hot dog in bun. Wrap each with paper towel or napkin.
Touch snacks pad and the number 6. Enter the quantity of
hot dogs and touch START.
Auto Cook chart (cont.)
Setting Microwave Controls
26
Auto Reheat
Auto Reheat chart
Food Amount Default Procedure
1. Fresh Rolls/
Muffins
1 - 10 1 Usethispadtowarmrolls,muffins,biscuits,bagelsetc.Large
items should be considered as 2 or 3 regular size. Arrange on
plate; cover with paper towel. For refrigerated rolls or muffins, it
may be necessary to double the entered amount to ensure the
proper serving temperature. For example, enter quantity of 2 for
1 refrigerated muffin. Touch desired number to select quantity
and touch START.
2. Frozen Rolls/
Muffins
1 - 10 1 Use this pad to warm frozen rolls, muffins, biscuits, bagels, etc.
Largeitemsshouldbeconsideredas2or3regularsize.Arrange
on plate, cover with paper towel. Touch desired number to select
quantity and touch START.
3. Pasta 1 - 6 cups 1 cup Use this pad to reheat refrigerated canned or homemade pasta
withsauce.Forroomtemperaturepastas,useLessoption.Pasta
without sauce double the quantity per setting. For example,
measure 2 cups of cooked noodles and program for 1 cup.
Cover with lid or plastic wrap. Touch auto reheat pad and touch
number 3. Enter the desired number of cups and touch START.
After cooking, let stand, covered, 2 to 3 minutes.
The reheat settings automatically computes the
correct warming and heating time and microwave
power level for foods shown in the chart below.
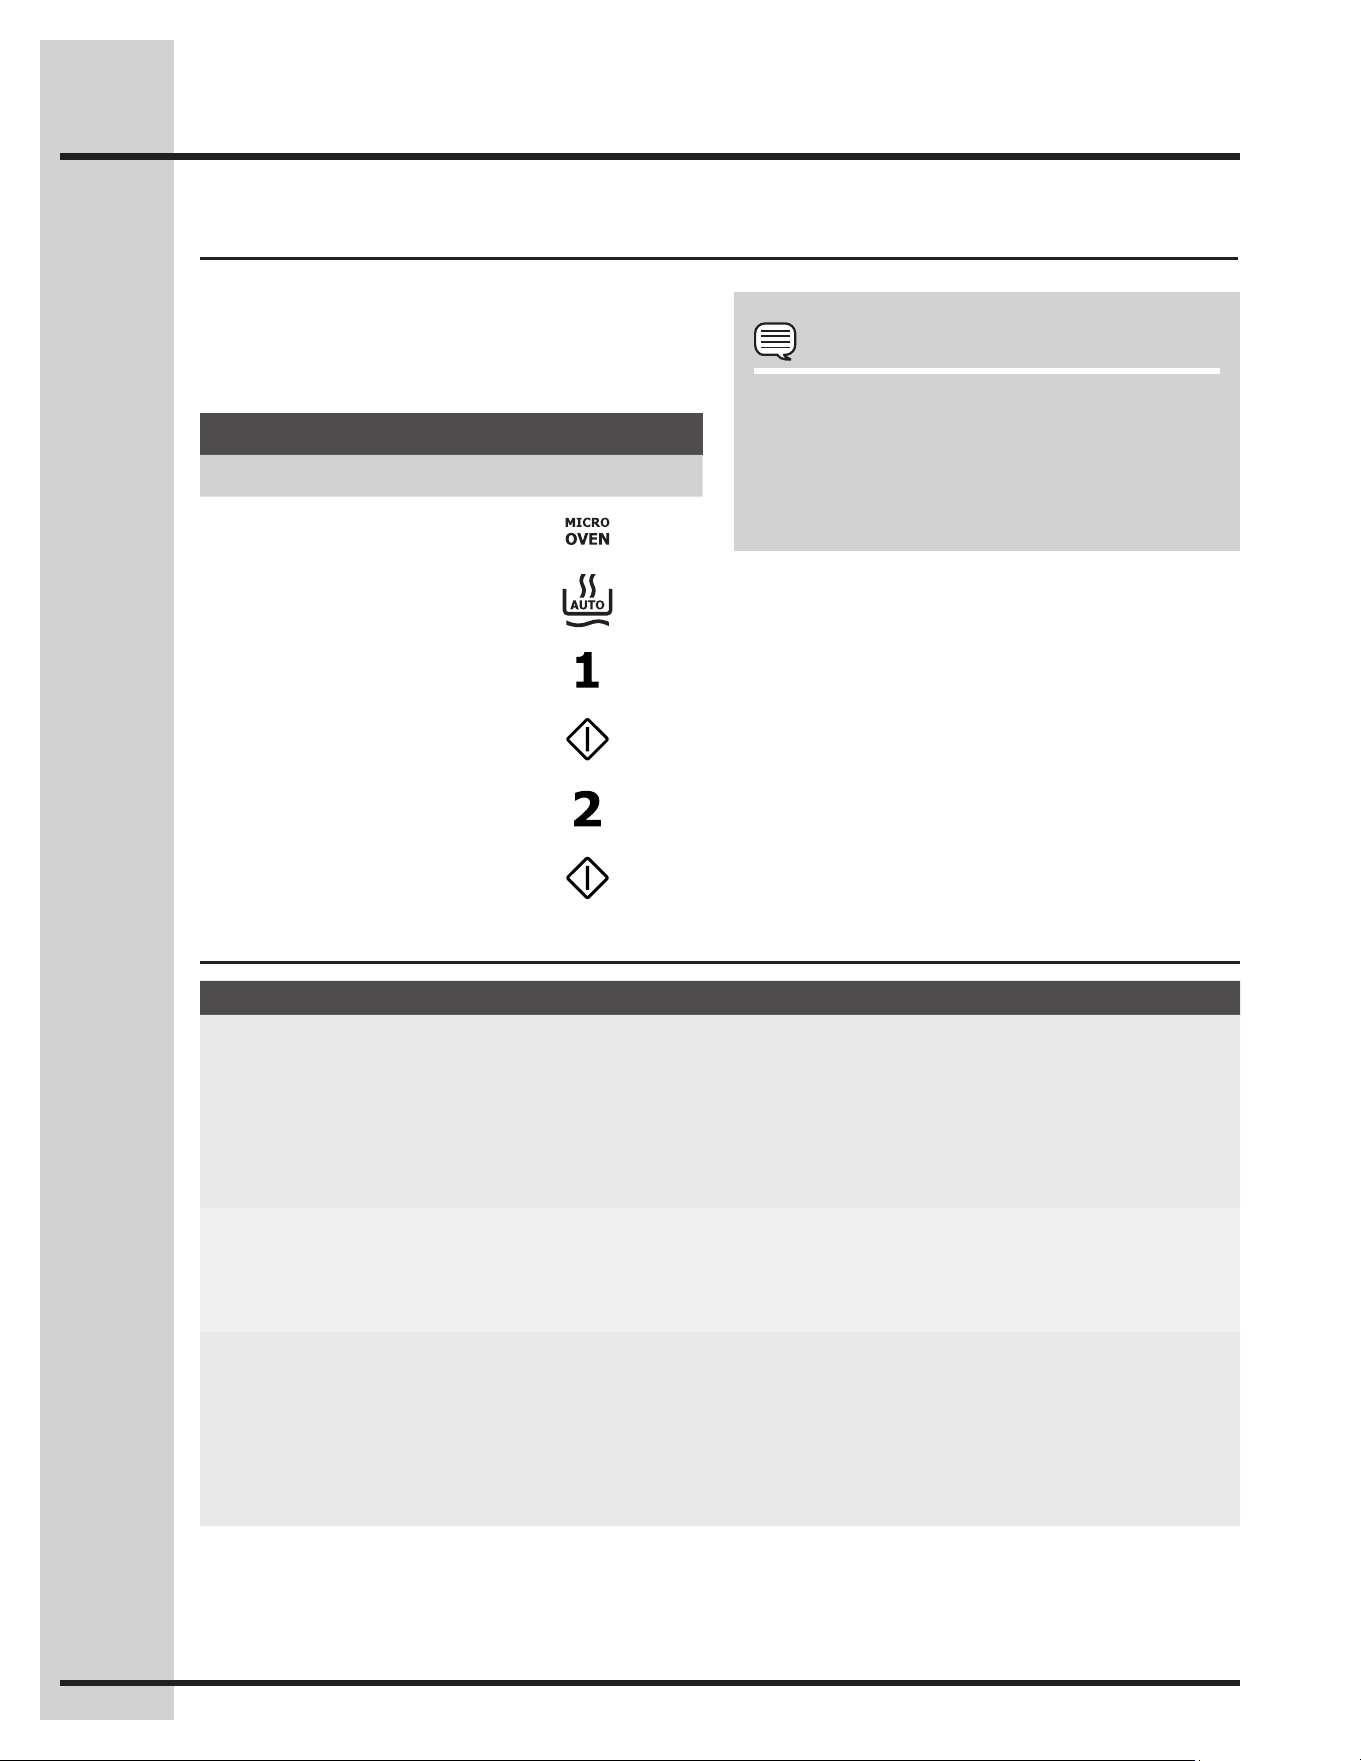
•Supposeyouwanttoheat2freshrollsormuffins.
Example
Step Press
1. Press MICRO OVEN
2. Press auto reheat.
3. Press number 1 for
fresh rolls or muffins.
4. Press START
5. Select desired number
to select quantity.
6. Press START
NOTES
1. To reheat different foods or foods above
or below the quantity allowed, use manual
operation.
2. Reheat settings can be programmed with
Moreorlesstimeadjustment.
Setting Microwave Controls
27
Melt, soften automatically compute the correct
heating time and microwave power level for softening
and melting foods shown in the chart.
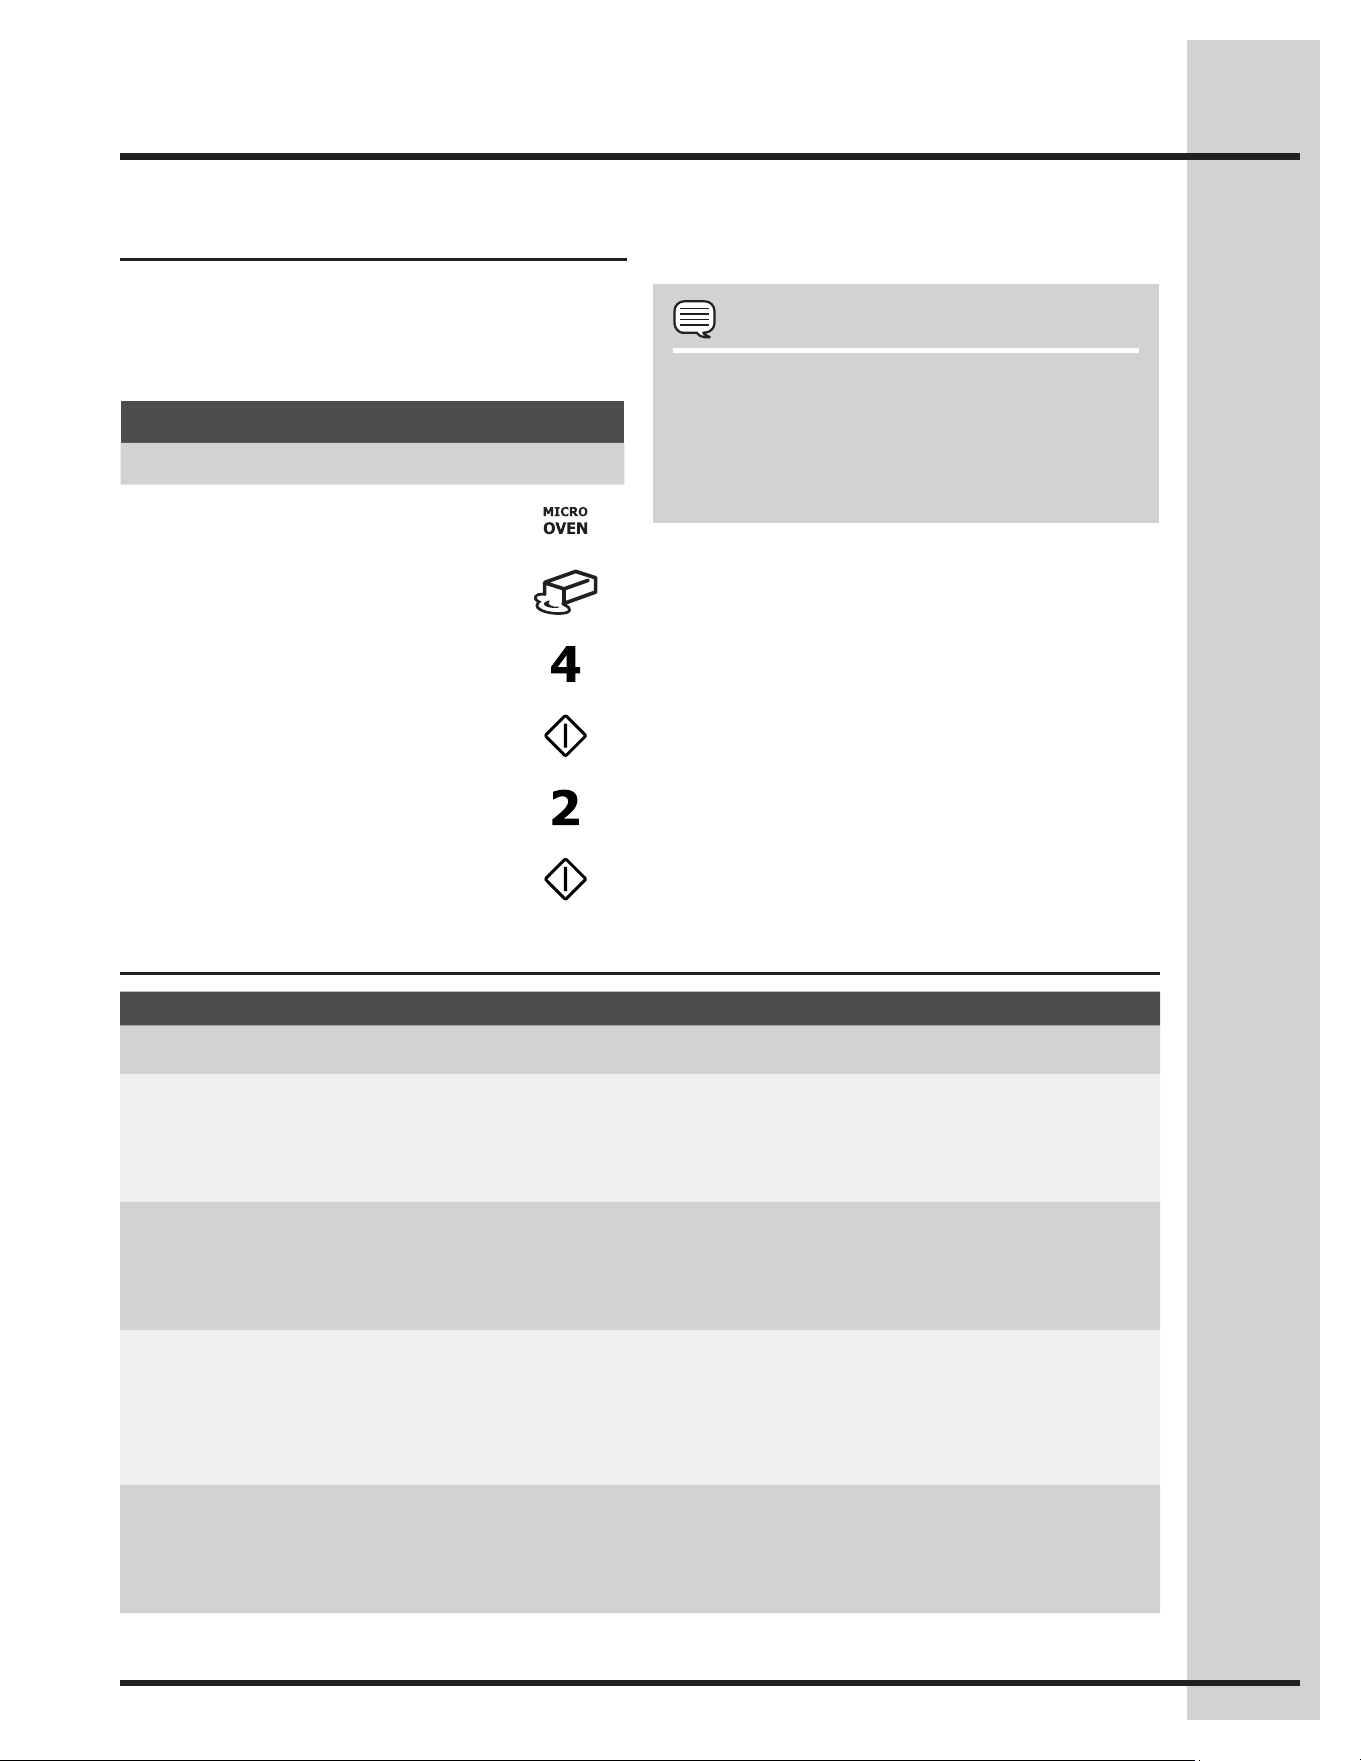
• Supposeyouwanttomelt1squareofchocolate.
Example
Step Press
1. Press MICRO OVEN
2. Press melt, soften pad.
3. Select desired food by pressing
number pad. Ex: Press number 4
for chocolate.
4. Press START
5. Press number 2 pad to select 1
square.
6. Press START
Melt, Soften chart
Food Amount Default Procedure
Melt,Soften DONOTCOVER.
Ice Cream1. 1 pint
1/2 gallon
1 pint Press Melt, Soften, press 1 for ice cream, press START, press
1 for one pint.
Press Melt, Soften, press 1 for ice cream, press START, press
2 for half a gallon.
Cream 2.
Cheese
3 oz
8 oz
3 oz Press Melt, Soften, press 2 for cream cheese, press START,
press 1 for 3 oz.
Press Melt, Soften, press 2 for cream cheese, press START,
press 2 for 8 oz.
Butter3.
2 tbsp
1/2 cup
2 tbps
Use a Pyrex measuring cup. Cover with plastic wrap.
Press Melt, Soften, press 3 for butter, press START, press 1
for 2 tbsp.
Press Melt, Soften, press 3 for butter, press START, press 2
for 1/2 cup.
Chocolate4. 1 cup chips
1 square
1 cup chips Press Melt, Soften, press 4 for chocolate, press START, press
1 for 1 cup of chips.
Press Melt, Soften, press 4 for chocolate, press START, press
2 for 1 square.
Setting Microwave Controls
Melt, Soften
NOTES
To soften or melt other food or foods except 1.
thequantitylistedintheQuicksettingsChart,
use manual operation.
QuickSettingscanbeprogrammedwithMore2.
orlesstimeadjustment.
28
Auto Defrost
Auto Defrost chart
Food
Amount Default Procedure
GroundMeat1.
0.5 - 3.0 lb 0.5 lb
Remove any thawed pieces after each stage. Let stand,
covered, for 5 to 10 minutes.
Steaks/Chops/2.
Fish
0.5 - 4.0 lb 0.5 lb
After each stage, rearrange and if there are warm or thawed
portions, shield with small flat pieces of aluminum foil. Remove
anymeatorfishthatisalmostdefrosted.Letstand,covered,
for 10 to 20 minutes.
Chicken Pieces3.
0.5 - 3.0 lb 0.5 lb
After each stage, rearrange pieces or remove portions should
theybecomewarmor thawed.Letstand,covered,for10to
20 minutes.
Roast4.
2.0 - 4.0 lb 2.0 lb
Start defrosting with fat side down. After each stage, turn roast
overandshieldthewarmportionswithaluminumfoil.Letstand,
covered, for 30 to 60 minutes.
Casserole5.
2 - 6 cups 2 cups
After audible signal, stir if possible. At end, stir well and let
stand, covered, for 5 to 10 minutes.
Soup6.
1 - 6 cups 1 cup
After audible signal, stir if possible. At end, stir well and let
stand, covered, for 5 to 10 minutes.
Auto Defrost automatically defrosts all the foods
found in the Auto Defrost chart below.
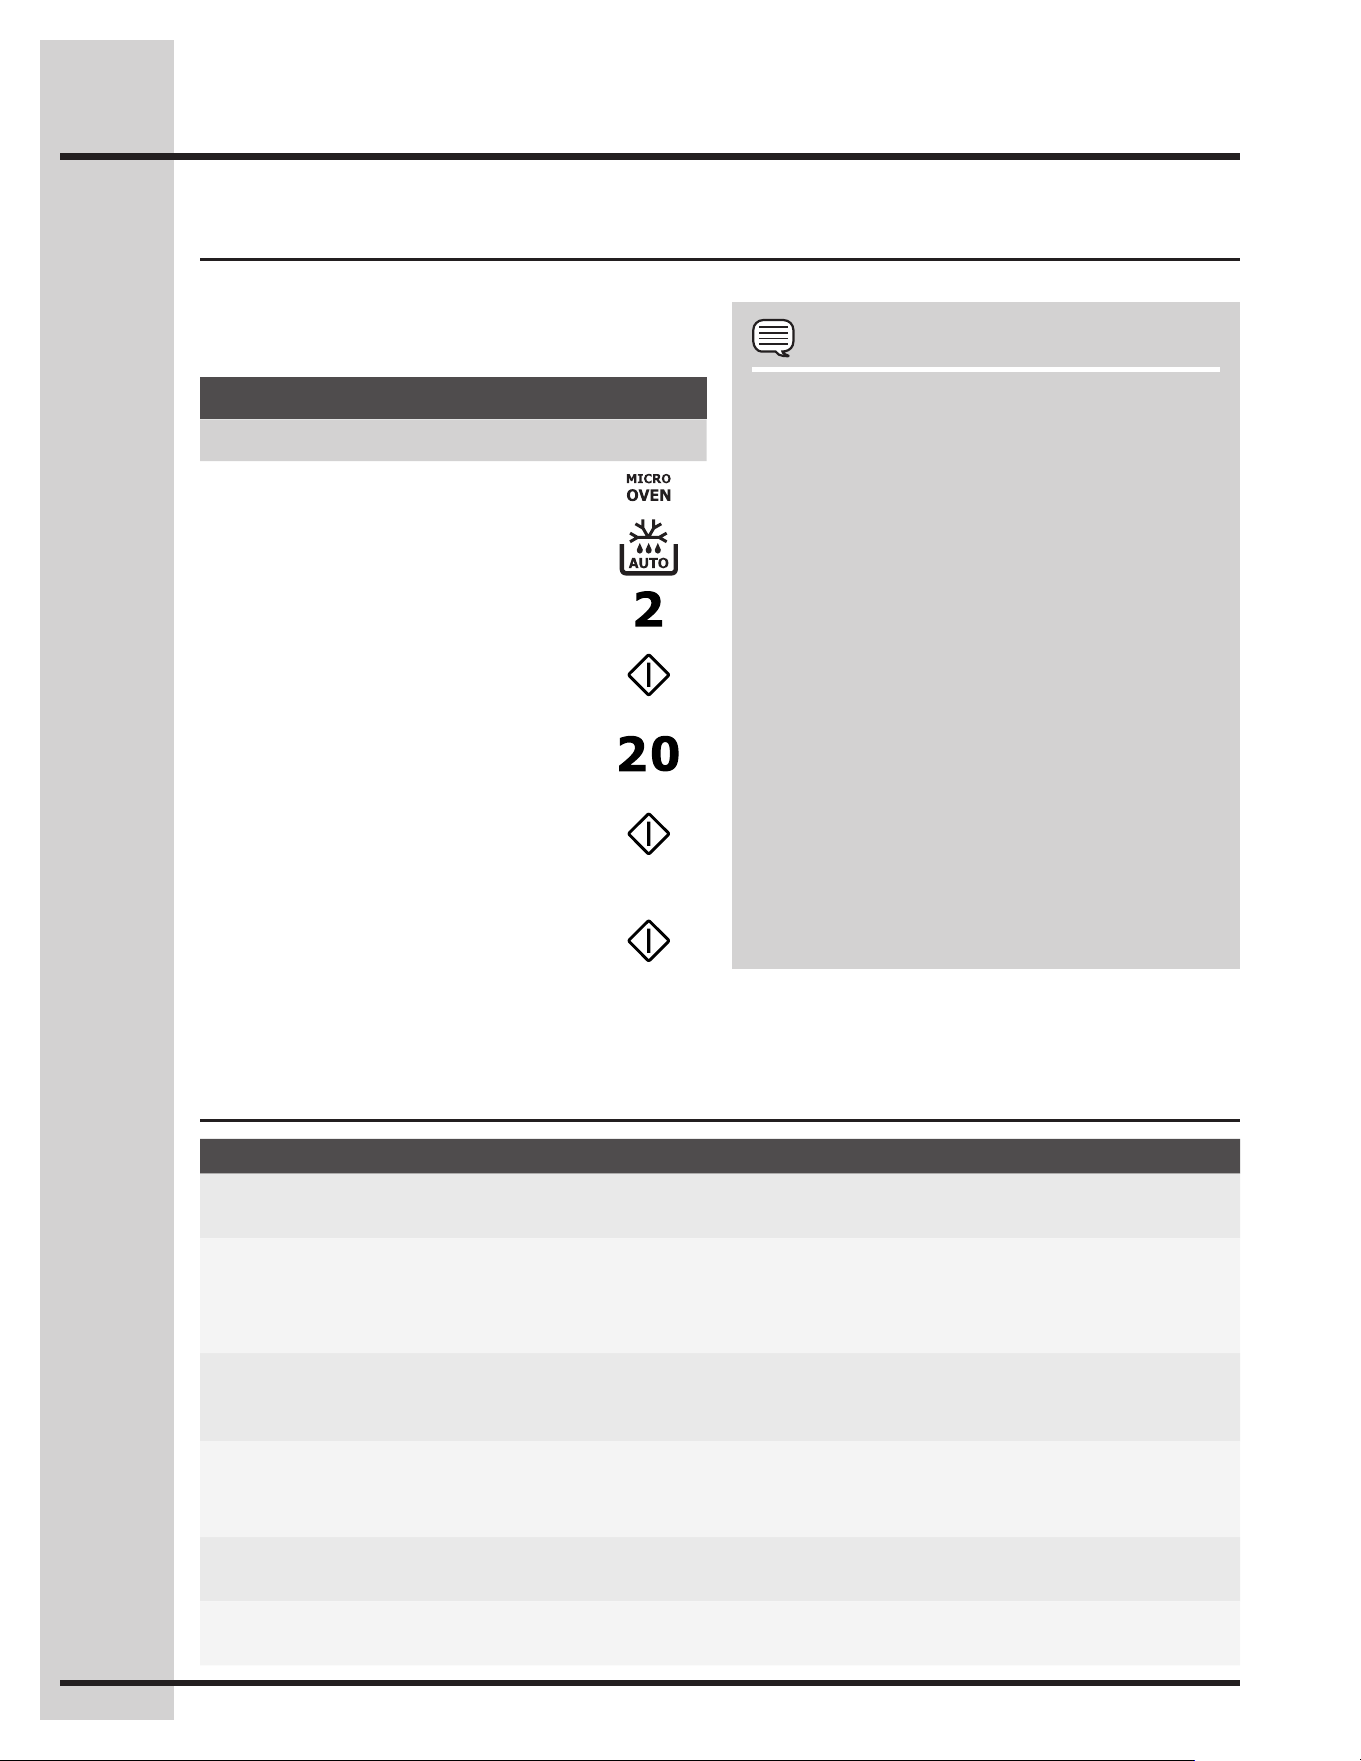
• Suppose you want to defrost a 2.0 pound steak.
Example
Step Press
1. Press MICRO OVEN
2. Press auto defrost pad.
3. Press number 2 for steak.
4. Press START.
5. Enter weight by touching the
number pads 2 and 0.
Ex: 2.0 lb steak.
6. Press START.
7. The oven will stop so the food can
bechecked.Openthedoor.Turn
steak over and shield any warm
portions. Close the door. Press
START pad.
After defrost cycle ends, let stand, covered.
NOTES
To defrost other food or foods above or below 1.
the weights allowed on the Defrost chart, use
timeand30%power.SeeManualdefrost.
Auto 2. DefrostcanbeprogrammedwithMore
or less time adjustment. Touch the power
level + or - pad once or twice before touching
START pad.
Touch 3. help guide pad when it is lighted in the
display for a helpful hint.
Should you attempt to enter more or less than 4.
the amount as indicated in the chart below, an
error beep will sound.
Check foods when oven signals. After final 5.
stage,smallsectionsmaystillbeicy.Letstand
tocontinuethawing.Donotdefrostuntilallice
crystals are thawed.
Shielding prevents cooking from occurring 6.
before the center of the food is defrosted. Use
small smooth strips of aluminum foil to cover
edges and thinner sections of the food.
Setting Microwave Controls
29
Setting Microwave Controls
More or less time adjustment
Should you discover that you like any of the Sensor
Modes,AutoCook,QuickSettings,AutoReheator
Auto Defrost slightly more done, touch the power
level + pad after touching your choice of pads or
before touching START pad. The display will show
MORE.
Should you discover that you like any of the Sensor
Modes, Auto Cooks, Quick Settings, Auto Reheat
orAutoDefrostslightlylessdone,touchthepower
level - pad after touching your choice of pads or
before touching START pad. The display will show
LESS.
Quick Start
quick start is a short-cut method to set time for 1-9
minutes at power level 100.
• Suppose you want to heat a cup of soup for
two minutes.
Example
Step Press
Press number 2 pad and
wait for 4 seconds.
The oven will start after 5 seconds and will signal
then turn off automatically when finished.
Add 30 Seconds
add 30 seconds provides a convenient way to extend
cooking time by 30 seconds while the oven timer is
counting down. It will add 30 seconds to the time
shown each time the pad is touched.
This pad may also be used as a quick start for
30 seconds ofcooking.NoneedtotouchSTART,
the oven will start immediately.
Help Guide
Mostsettinghasacookinghint.Ifyouwishtocheck,
touch help guide whenever the pad is lighted in
theInteractiveDisplayfortheseandothermanual
operation hints.
Multi Stage cooking
Your oven can be programmed for up to 3 automatic
cooking sequences, switching from one power level
setting to another automatically.
Sometimes cooking directions tell you to start on one
power level and then change to a different power
level. Your oven can do this automatically.
• Supposeyouwanttocookroastbeeffor5minutes
at 100% and then continue to cook for 30 minutes
at 50%.
Example
Step Press
1. Press MICRO OVEN.
2. Press multi stage.
3. Enter cooking time for first
stage.
4. Press power level + to get
to 100.
5. Press START toconrm
rststage.
6. Enter cooking time for
second stage.
7. Press power level + or -
until you get to 50.
8. Press START toconrm
second stage.
9. Press START a third time
toconrmthatyoudonot
want a third stage*.
* You can program a third stage at this step.
30
Setting Lower Oven Controls
About rapid preheat
Use the rapid preheat option on single rack
baking to quickly bring the lower oven to baking
temperature.
The rapid preheat option may be set with the
following cooking features:
• Bake
• Convbake
The following temperature settings apply to the
rapid preheat feature:
• Auto-suggest(default)setting: 350°F/176°C
• Min.rapidpreheatsetting: 170°F / 76°C
• Max.rapidpreheatsetting: 550°F / 288°C
Setting rapid preheat
NOTE
YoumaypressCANCELatanytimewhen
setting the control or during the cooking process.
See example below to set a rapid preheat
with bake to start immediately using default
temperature.
When START is pressed the oven will preheat
quickly.ThecontrolwilldisplayPRE-HEATING
duringthistime.WhilePREHEATINGthe
Convection fan may operate.
After a few minutes a beep will sound and PRE-
HEATINGwillnolongerdisplay.Placeprepared
food on a single oven rack. The oven will continue
to bake at the set temperature until bake is
canceled.
• Single oven rack cooking ONLY.
• Useinovenrackpositions2or3.
For best results
To add or change any cook settings after this
feature has started:
• SelecttheLOWERoven.Maketemperature
changes using the + or - keys. Each press of +
or -willadjustthetemperatureby5°F(or2°C).
• Ifchangingcookingtimes,selectthecook time
or end time keys needed to make the changes.
Example
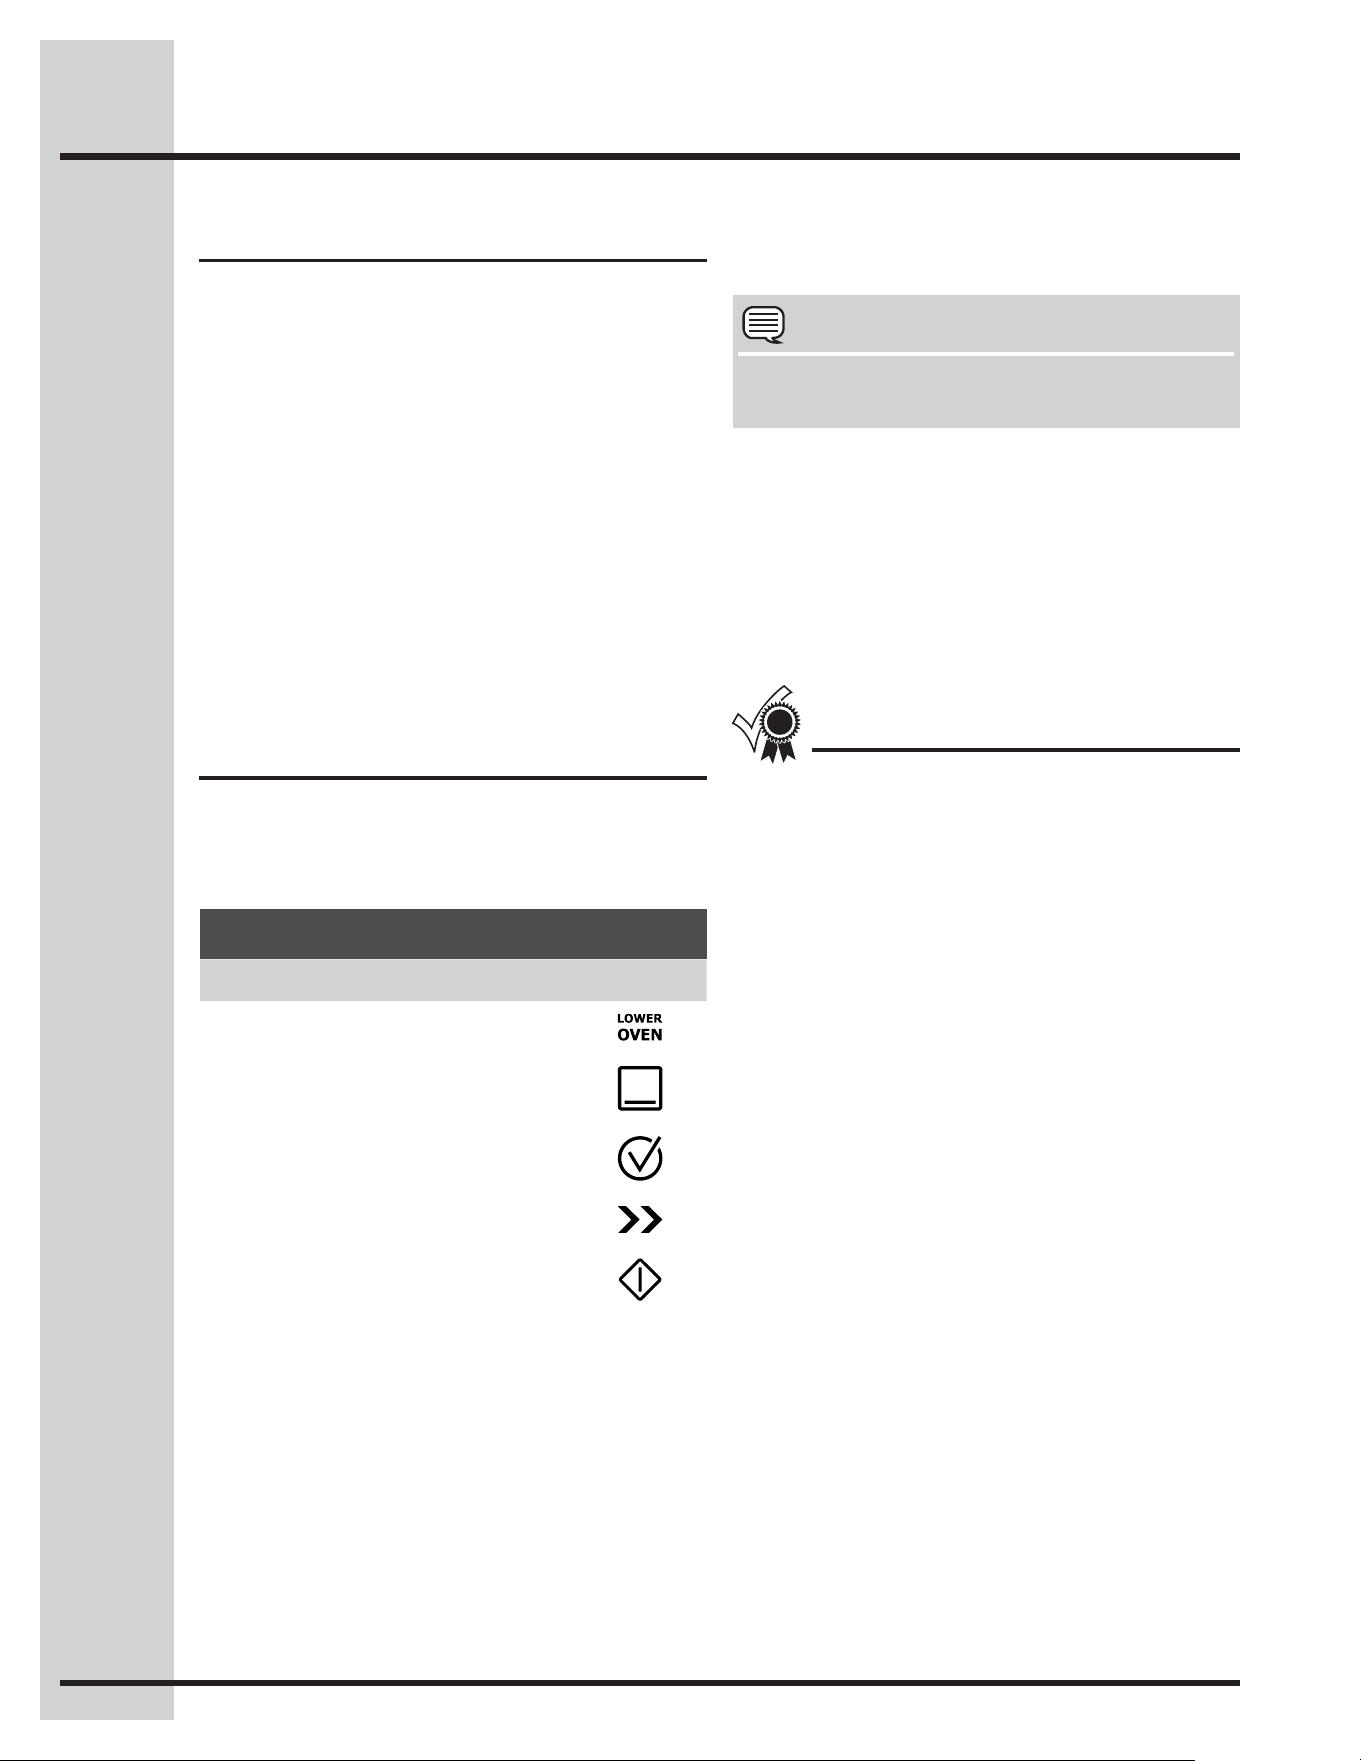
Step Press
1. Press LOWER OVEN
2. Press BAKE
3. Press COOK OPTIONS
4. Press RAPID PREHEAT
5. Press START
31
Setting Oven Lower Controls
See example below to set a bake to start
immediately using the default temperature.
OnceSTARTispressedtheovenwillbeginheating.
TheovendisplayshowsPRE-HEATING.While
PREHEATINGtheConvectionfanmayoperate.
After the oven reaches set temperature, PRE-
HEATINGwillturnoffandabeepwillindicatethe
oven is ready. The oven will continue to maintain this
temperature until the cooking feature is canceled.
If your recipe requires a different baking
temperaturethantheauto-suggested(default)
temperature(examplebelowshowsloweroven
temperaturesetfor425°F/218°C):
Setting bake for lower oven
Use the bake feature to cook most food items that
require normal cooking temperatures.
Bakemaybesetwiththefollowingoptions:
• Rapidpreheat
• Cooktime
• Cooktimewithendtime
• Probe
The following temperature settings apply to the
bake feature:
• Auto-suggest(default)setting: 350°F/176°C
• Min.bakesetting: 170°F / 77°C
• Max.bakesetting: 550°F / 288°C
• Useonlyonerackatposition5andcenterthe
pans as much as possible.
• Ifusingtworacks,placetheovenracksin
position 3 and 7.
• Whenplacingmultiplefooditemsintheoven
allow2-4”(5-10cm)ofspacebetweenthefood
itemsforproperaircirculation(seeguresfor
moredetails).
• Darkordullpansabsorbmoreheatthanshiny
bakeware resulting in dark or overbrowning
of foods. It may be necessary to reduce the
oven temperature or cook time to prevent
overbrowningofsomefoods.Darkpans
are recommended for pies. Shiny pans are
recommendedforcakes,cookiesandmufns.
For best results
NOTE
YoumaypressCANCELanytimewhensetting
the control or during the cooking process.
About baking in lower oven
To add or change any cook settings after this
feature has started:
• SelecttheLOWER OVEN.Maketemperature
changes using the + or - keys. Each press of +
or -willadjustthetemperatureby5°F(or2°C).
It is also possible to press LOWER OVEN, BAKE,
usethenumericpadsandconrmwithSTART.
• Ifchangingcookingtimes,selectthecook time
or end time keys needed to make the changes.
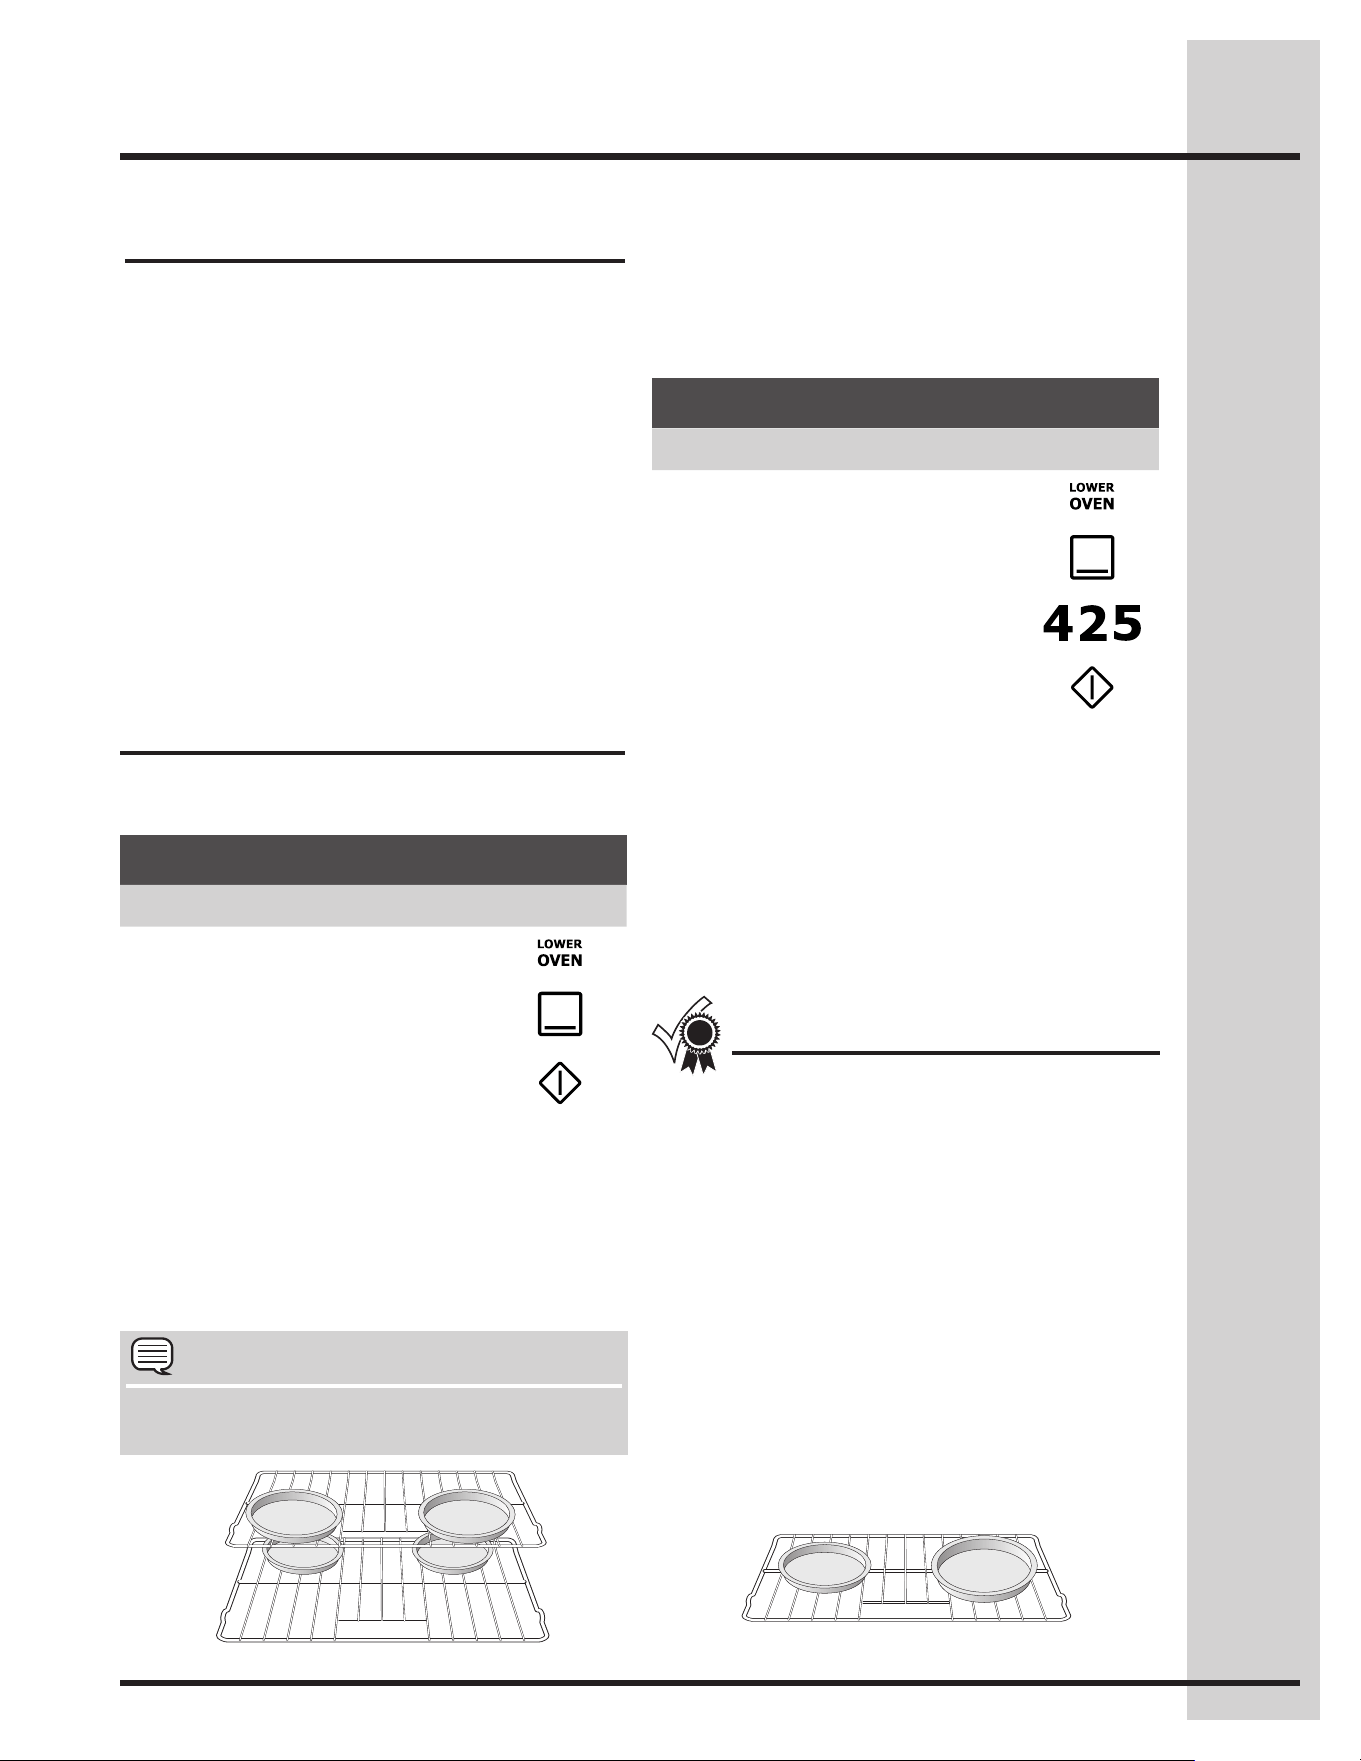
Example
Step Press
1. Press LOWER OVEN
2. Press BAKE
3. Press START
Example
Step Press
1. Press LOWER OVEN
2. Press BAKE
3. Enter 425°F
4. Press START
Pan position for two rack baking.
Pan position for one rack baking.
32
Setting Lower Oven Controls
Using cook time in lower oven
Addingacooktimewhenbakingisbenecialwhen
areciperequiresaspecictemperatureandperiod
of time to cook. Following the recipe cook time
helps insure the best possible results.
Cook time may be set with the following features:
• Bake
• Convbake
• Convroast
• Slowcook
• Defrost
• Dehydrate
• Breadproof
• Keepwarm
NOTE
• YoumaypressCANCELanytimewhen
setting the control or during the cooking
process.
See example below to set the lower oven for bake,
starting immediately with preheating to the auto-
suggest(default)settingof350°F(176°C)andthen
to automatically turn off after 30 minutes:
OnceSTARTispressedtheovenwillcookand
after 30 minutes automatically shut-off.
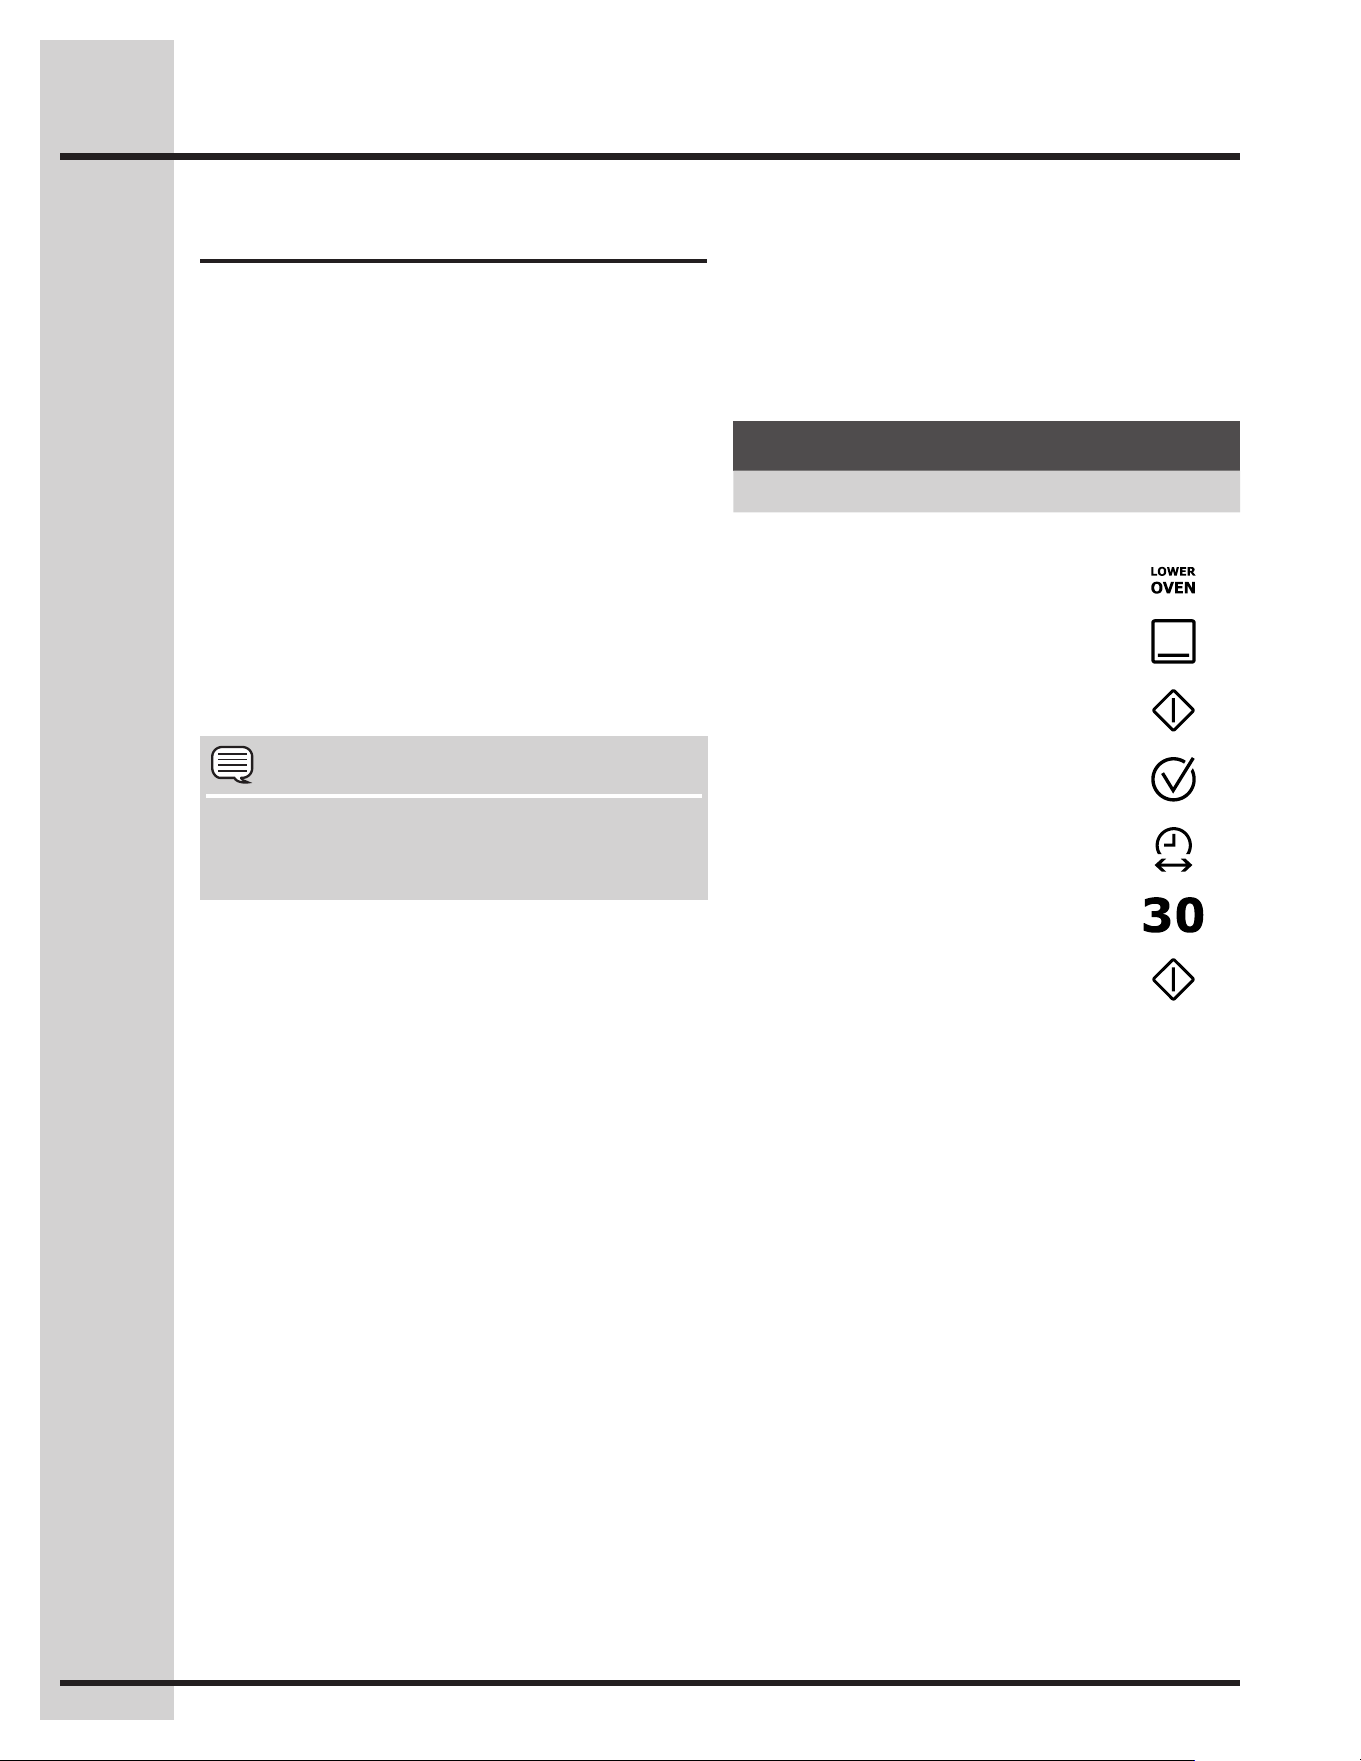
Example
Step Press
Preheat the oven if necessary
1. Press LOWER OVEN
2. Press BAKE
3. Press START
4. Press COOK OPTIONS
5. Press COOK TIME
6. Enter 30 minutes
7. Press START
33
Setting Lower Oven Controls
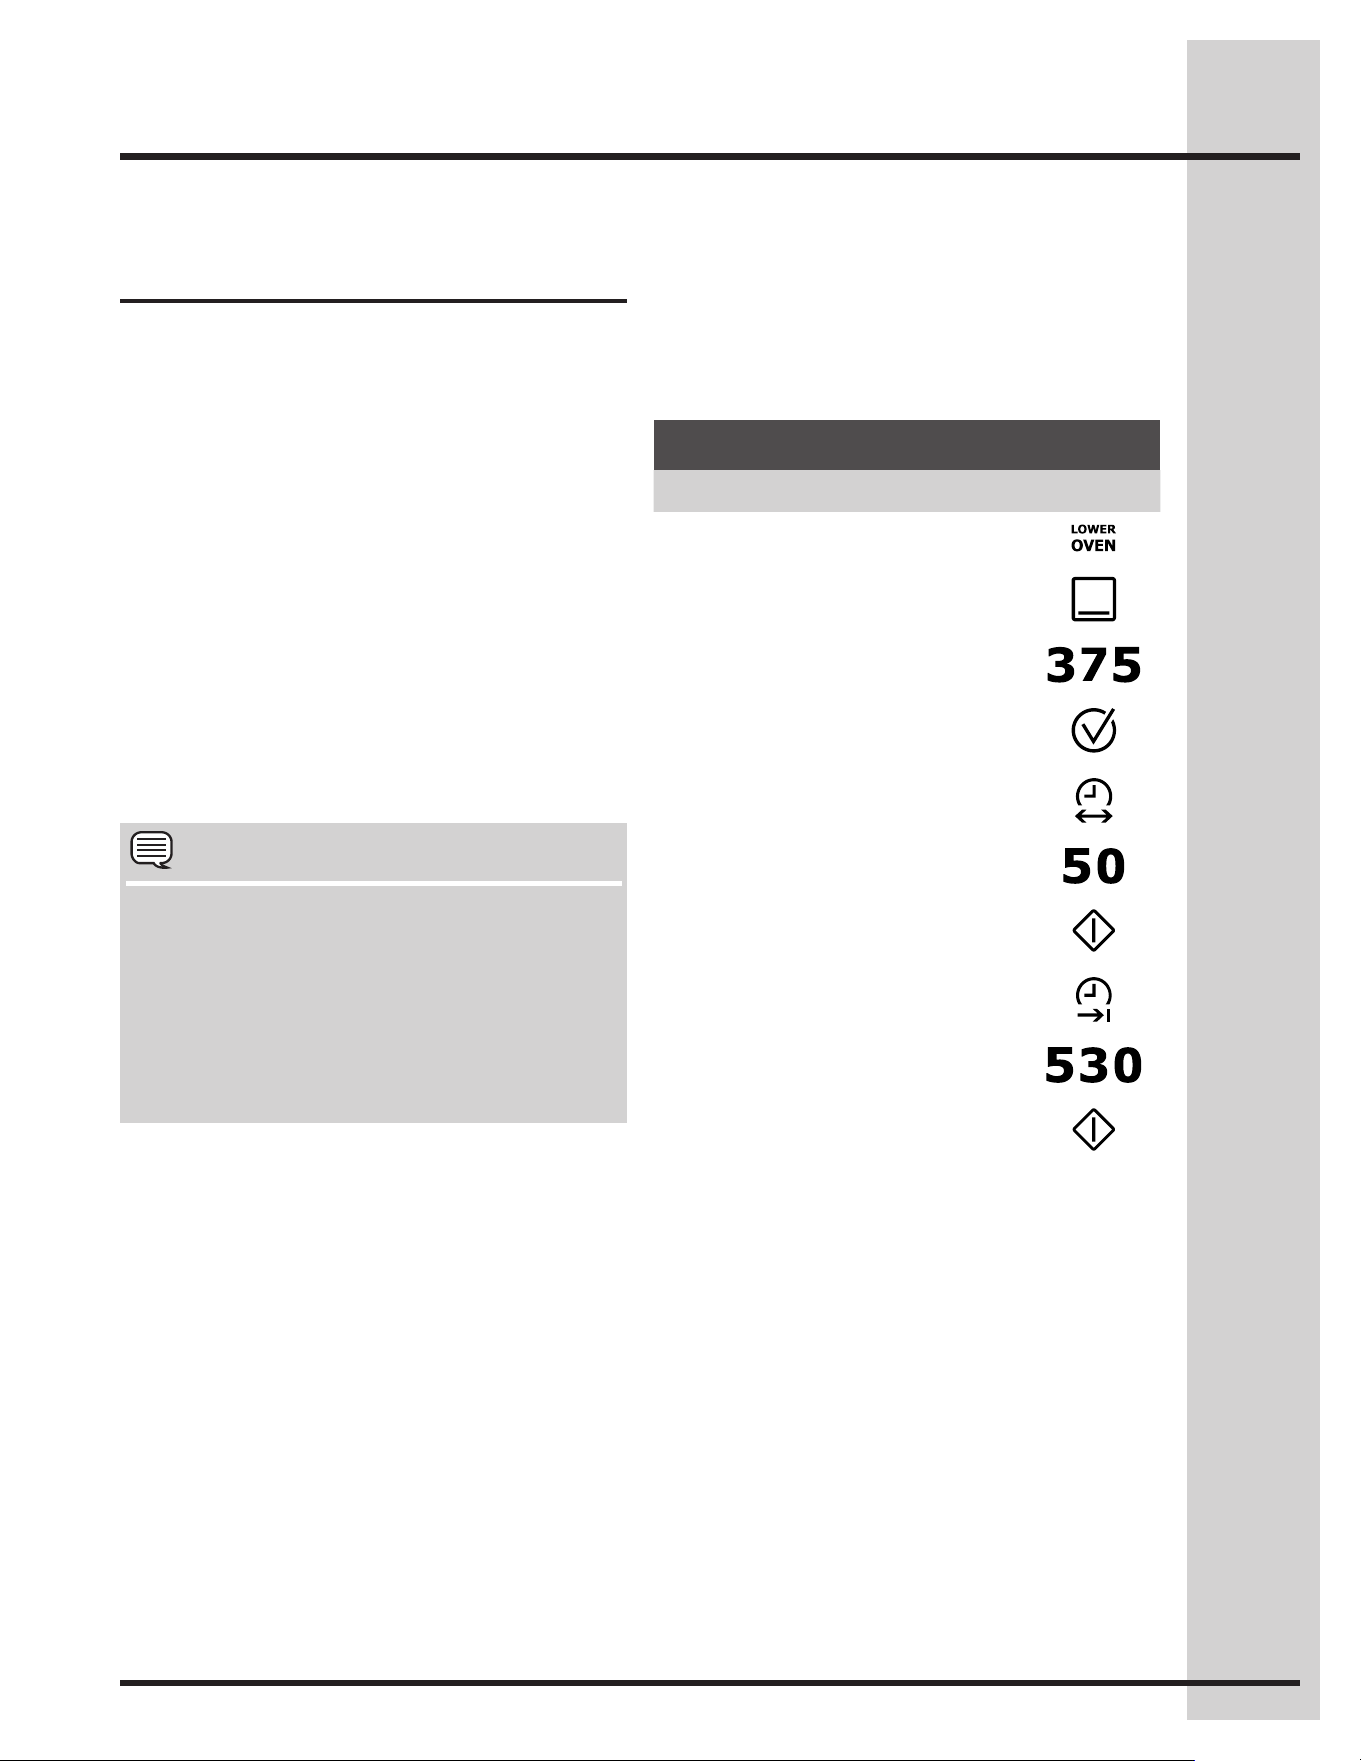
Using cook time with end
time in lower oven
Addingacooktimealongwithaspecicendtime
givesthesamebenetsasthecooktimeoption
in addition to controlling exactly when the cooking
process will begin and end.
Cook time and end time may be set with the
following features:
• Bake
• Convectionbake
• Convectionroast
• Slowcook
• Clean(delayedCleanusesendtimeonly)
• Defrost
• Dehydrate
• Breadproof
• Keepwarm
See example below to set the lower oven with pre-
heatingforbakeat375°F(176°C)for50minutes
and to automatically shut-off at 5:30:
NOTE
• WhensettingtheENDTIMEoptionbesure
the correct time of day is set.
• YoumaypressCANCELanytimewhen
setting the control or during the cooking
process.
• YoumayalsochoosetouseCOOK TIME with
no END TIME.
OnceSTARTispressed,theovenwillcalculatethe
start time at which the oven will begin heating.
The oven will continue to maintain this temperature
for the selected time or until the cooking feature is
canceled.
Example
Step Press
1. Press LOWER OVEN
2. Press BAKE
3. Enter 375°F
4. Press COOK OPTIONS
5. Press COOK TIME
6. Enter 50 minutes
7. Press START
8. Press END TIME
9. Enter 5:30
10. Press START
34
Setting Lower Oven Controls
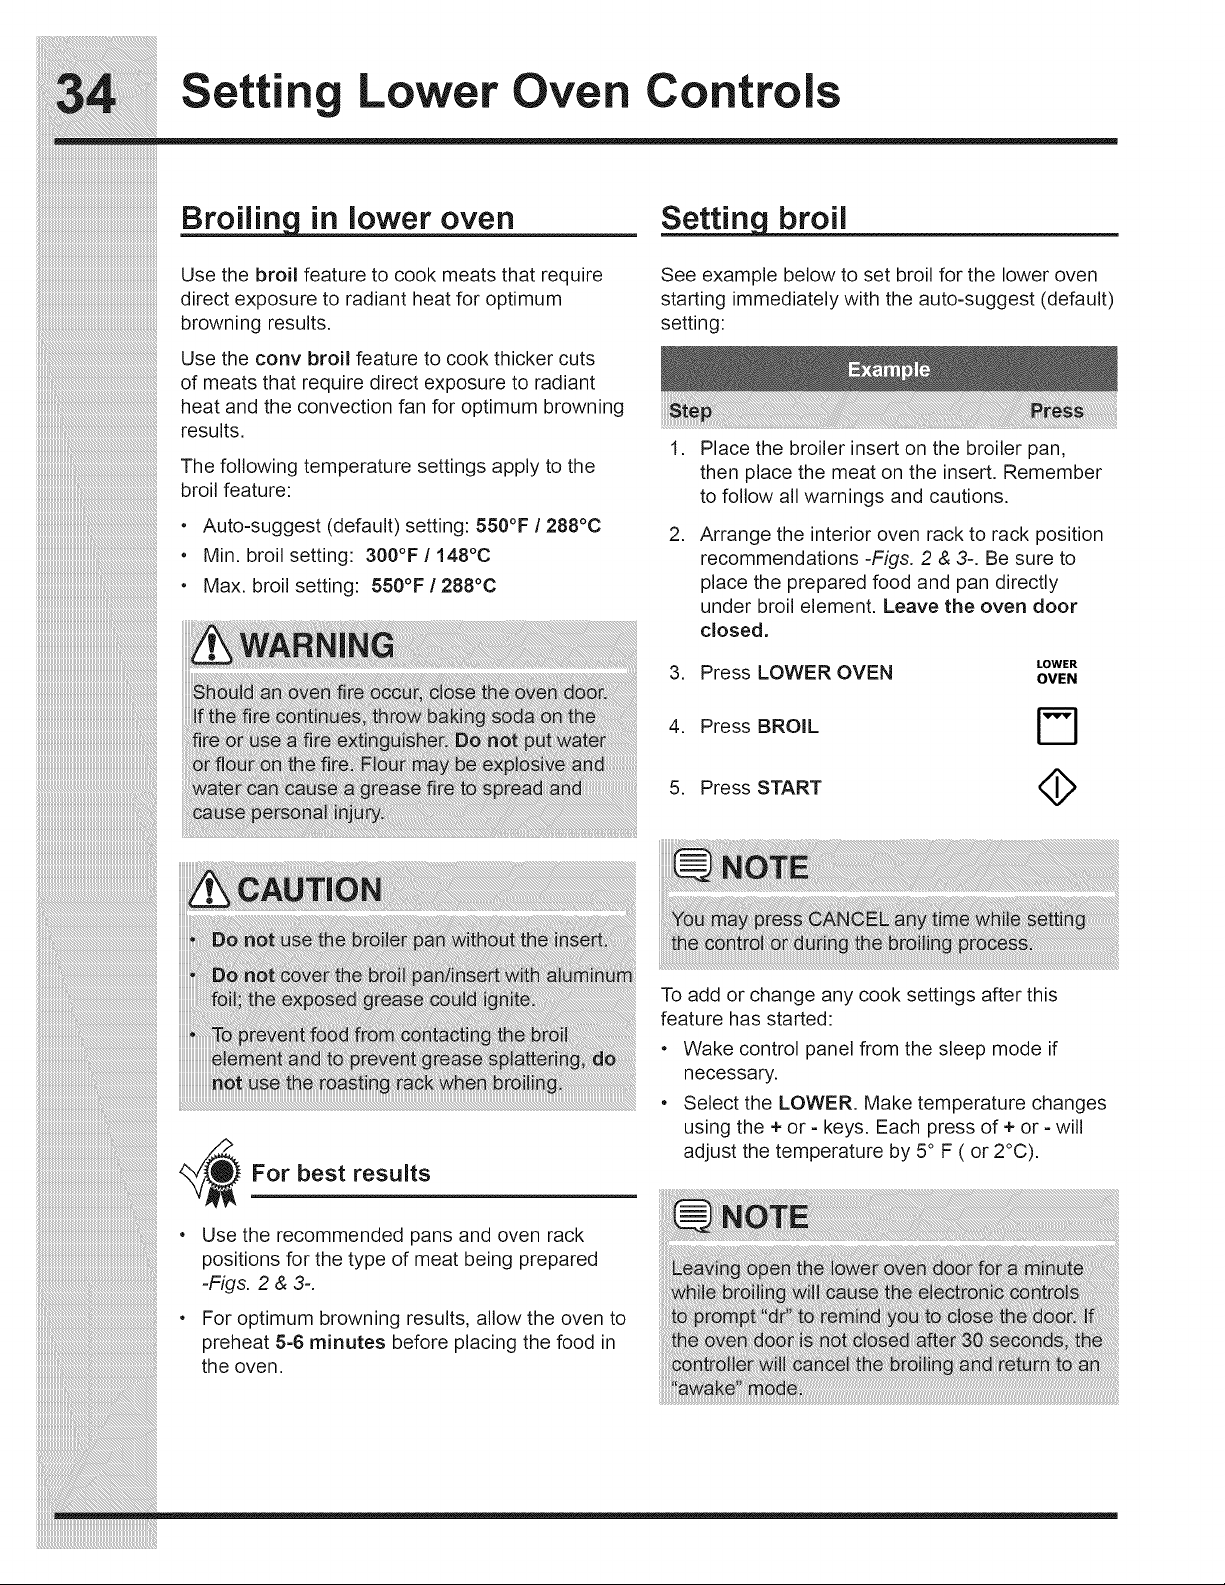
Broiling in lower oven
See example below to set broil for the lower oven
startingimmediatelywiththeauto-suggest(default)
setting:
Use the broil feature to cook meats that require
direct exposure to radiant heat for optimum
browning results.
Use the conv broil feature to cook thicker cuts
of meats that require direct exposure to radiant
heat and the convection fan for optimum browning
results.
The following temperature settings apply to the
broil feature:
• Auto-suggest(default)setting: 550°F / 288°C
• Min.broilsetting: 300°F / 148°C
• Max.broilsetting: 550°F / 288°C
Setting broil
• Do not use the broiler pan without the insert.
• Do not cover the broil pan/insert with aluminum
foil; the exposed grease could ignite.
• Topreventfoodfromcontactingthebroil
element and to prevent grease splattering, do
not use the roasting rack when broiling.
Example
Example
NOTE
NOTE
YoumaypressCANCELanytimewhilesetting
the control or during the broiling process.
Leavingopenthelowerovendoorforaminute
while broiling will cause the electronic controls
toprompt“dr”toremindyoutoclosethedoor.If
the oven door is not closed after 30 seconds, the
controller will cancel the broiling and return to an
“awake”mode.
• Usetherecommendedpansandovenrack
positions for the type of meat being prepared
-Figs. 2 & 3-.
• Foroptimumbrowningresults,allowtheovento
preheat 5-6 minutes before placing the food in
the oven.
For best results
Shouldanovenreoccur,closetheovendoor.
Iftherecontinues,throwbakingsodaonthe
reoruseareextinguisher.Do not put water
orouronthere.Flourmaybeexplosiveand
watercancauseagreaseretospreadand
causepersonalinjury.
To add or change any cook settings after this
feature has started:
• Wakecontrolpanelfromthesleepmodeif
necessary.
• SelecttheLOWER.Maketemperaturechanges
using the + or - keys. Each press of + or - will
adjustthetemperatureby5°F(or2°C).
Example
Step Press
1. Place the broiler insert on the broiler pan,
then place the meat on the insert. Remember
to follow all warnings and cautions.
2. Arrange the interior oven rack to rack position
recommendations -Figs. 2 & 3-.Besureto
place the prepared food and pan directly
under broil element. Leave the oven door
closed.
3. Press LOWER OVEN
4. Press BROIL
5. Press START
35
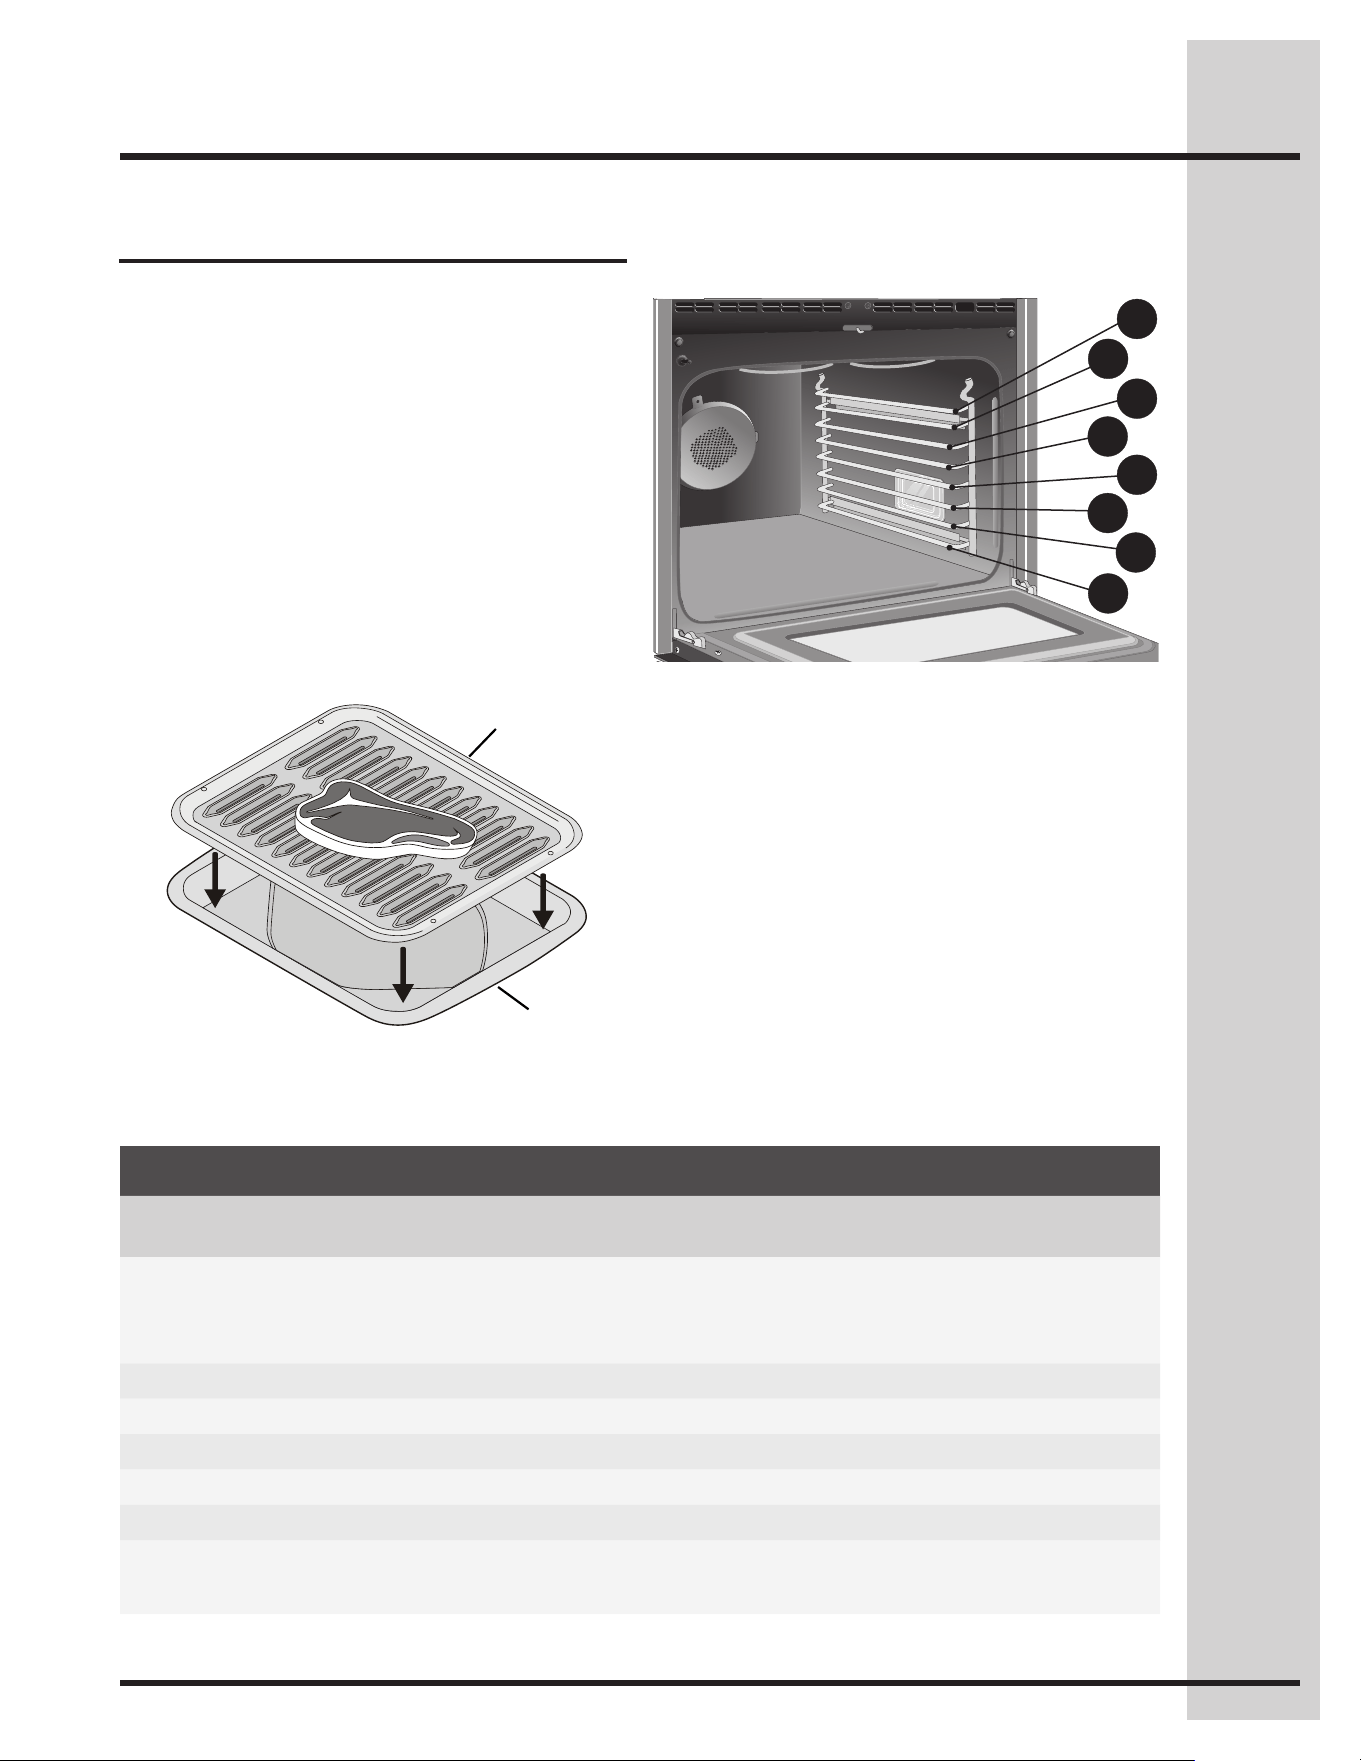
Setting Lower Oven Controls
Setting broil
Recommended broiling times
Use the broiling table -Fig. 3- for approximate
recommended broiling times for the types of meats
listed. Increase or decrease broiling times, or move
the broiling pan to a different rack position to suit
for doneness.
If the food you are broiling is not listed in the table,
follow the instructions provided in your recipe and
watch the item closely.
Thebroilpaninsert(ifequipped)containsslotsthat
allows grease from the meat to drain into the broil
pan. Place prepared meat on broil pan insert and
then place onto broiler pan as shown -Fig. 1-.
Fig. 3
Fig. 1
Fig. 2
Fig. 3
Insert
Broilpan
Broiling Table
Food Rack position Temp Cook time in minutes Doneness
1st side 2nd side
Steak1”thick 7th 550°F 6 4 Rare
7th 550°F 7 5 Medium
7th 550°F 8 7 Well
Porkchops3/4”thick 7th 550°F 8 6 Well
Chicken-bone in 5th 450°F 20 10 Well
Chicken-boneless 7th 450°F 8 6 Well
Fish 7th 500°F 13 0 Well
Shrimp 5th 550°F 5 0 Well
Hamburger1”thick 7th 550°F 9 7 Medium
5th 550°F 10 8 Well
1
2
3
4
5
6
7
8
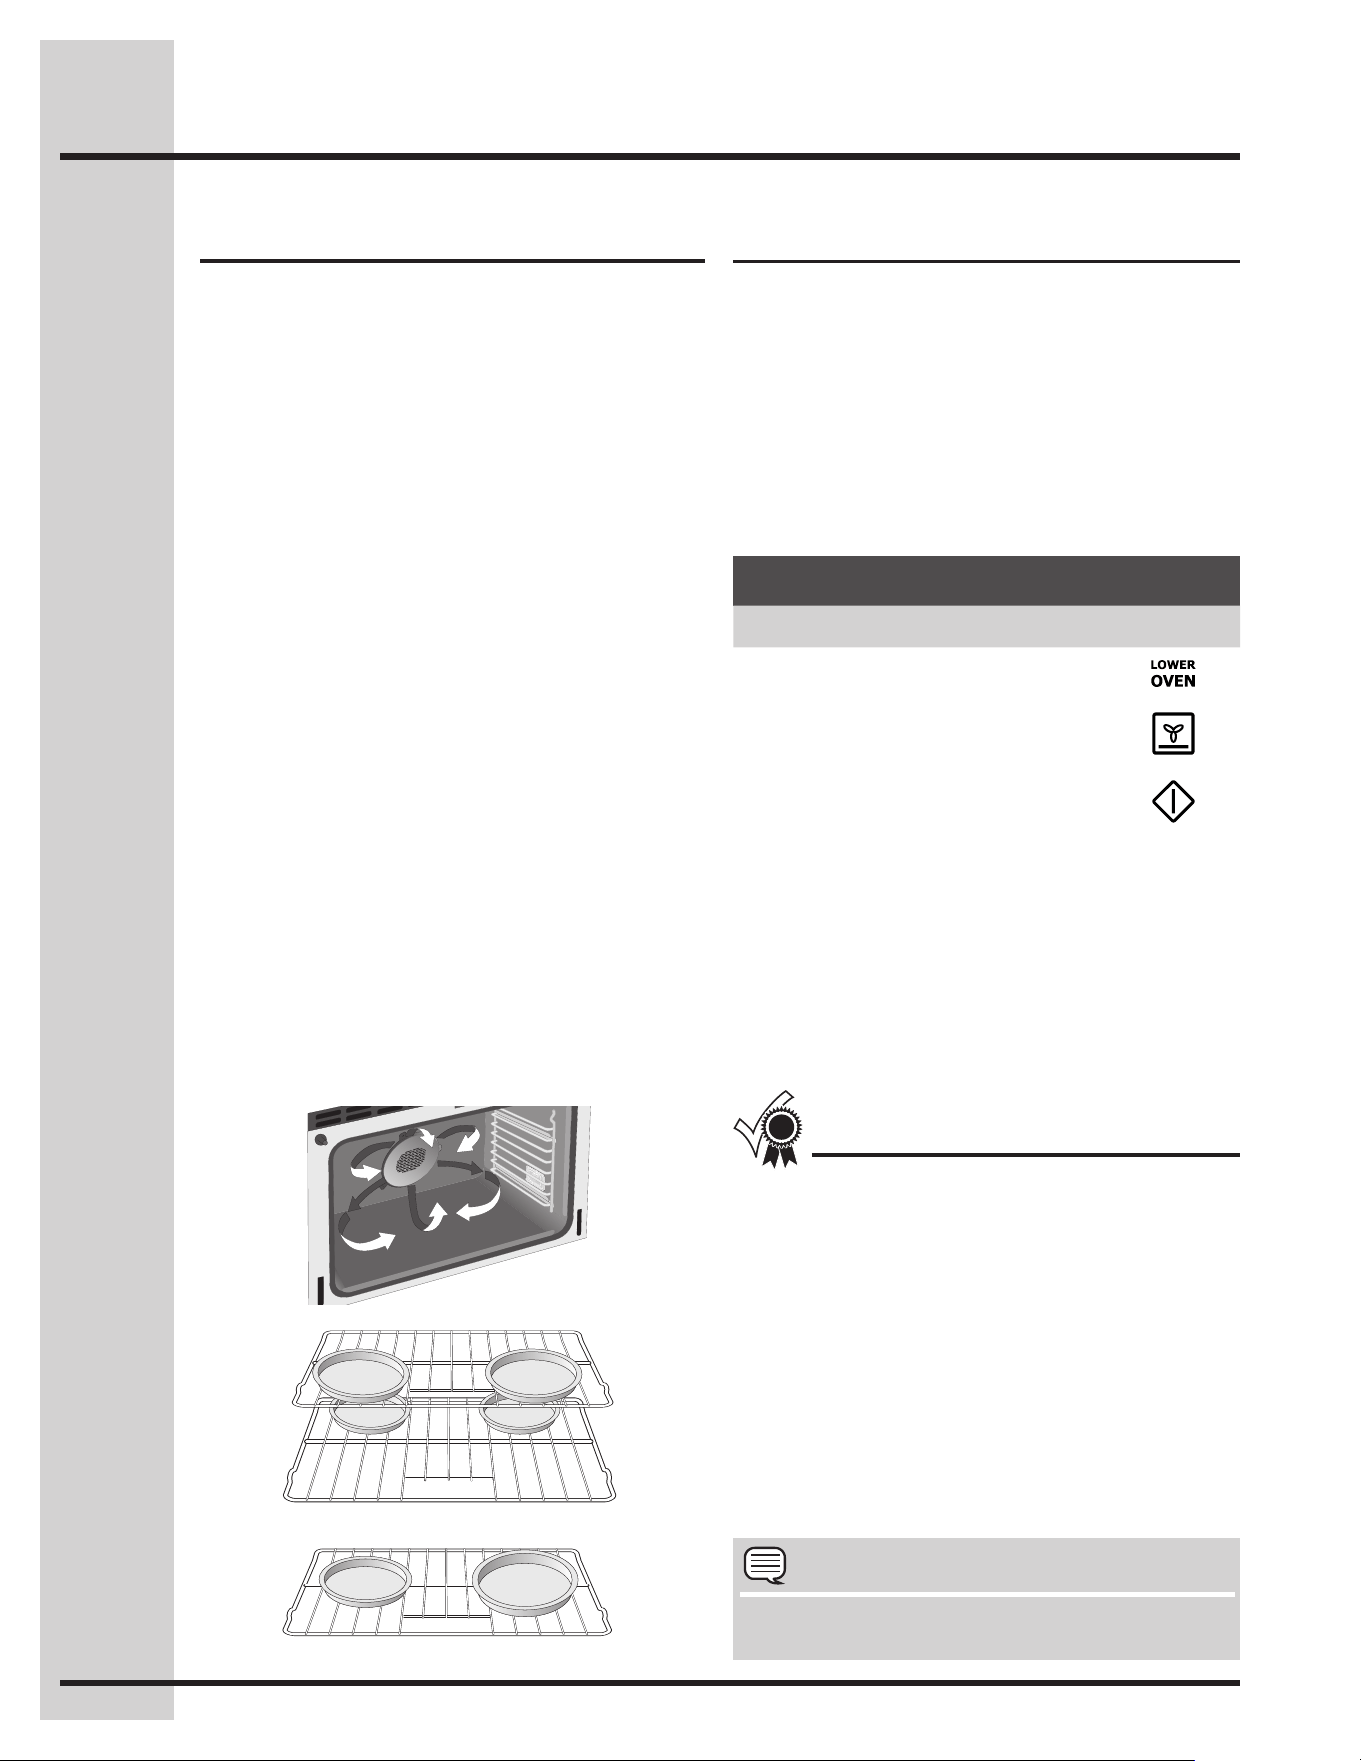
36
ConvectionbakeispartofthePerfect-Convect³™
system. Convection bake uses a fan to circulate
the oven heat evenly and continuously. The
improved heat distribution allows for even cooking
withexcellentresults.Multiplerackcookingmay
slightly increase cook times for some foods, but the
overall result is time saved.
About convection bake Setting convection bake
Benetsofconvectionbake:
• Superiormultipleovenrackperformance.
• Somefoodscookup25to30%faster,saving
time and energy.
• Nospecialpansorbakewarerequired.
See the example below to set conv bake, starting
immediatelywiththeauto-suggest(default)setting
of350°F(176°C):
OnceSTART is pressed the oven will begin heating.
The oven display shows PRE-HEATING during this
time.
After the oven reaches set temperature, PRE-
HEATING will turn off and a beep will indicate the
oven is ready. The oven will continue to maintain this
temperature until the cooking feature is canceled.
Conv bake may be set with the following options:
• Convconvert
• Cooktimeorcooktimewithendtime
• Probe
• Rapidpreheat
The following temperature settings apply to the
conv bake feature:
• Auto-suggest(default)setting: 350°F/176°C
• Min.bakesetting: 170°F / 76°C
• Max.bakesetting: 550°F / 288°C
• YoumaypressCANCELanytimewhen
setting the control or when cooking.
NOTE
• Whenbakingwithasinglerackuserack
positions 5. When using 2 racks use rack
positions3&7.Whenusing3racksuserack
positions2,5&8.
• Cookiesandbiscuitsshouldbebakedonpans
with no sides or very low side to allow heated air
to circulate around the food.
• Foodbakedonpanswithadarknishwillcook
faster.
• Whenplacingmultiplefooditemsintheoven
allow2-4”(5-10cm)ofspacebetweenthefood
items for proper air circulation.
For best results
TheconvbakefeatureshouldONLYbeusedwhen
your recipe instructions have been written for use
with convection baking.
If your recipe instructions are for normal baking
and you wish to use convection bake, follow the
Convection Convert option instructions. The
convectionconvertoptionwillautomaticallyadjust
the oven temperature so that convection baking
may provide the best possible results.
Example
Step Press
1. Press LOWER OVEN
2. Press CONV BAKE
3. Press START
Setting Lower Oven Controls
Pan position for two rack baking.
Pan position for one rack baking.
37
• Whenbakingwithasinglerackuserack
positions 5. When using 2 racks use rack
positions3&7.Whenusing3racksuserack
positions2,5&8.
• Cookiesandbiscuitsshouldbebakedonpans
with no sides or very low side to allow heated air
to circulate around the food.
• Foodbakedonpanswithadarknishwillcook
faster.
• Whenplacingmultiplefooditemsintheoven
allow2-4”(5-10cm)ofspacebetweenthefood
items for proper air circulation.
The conv convert option allows you to convert any
normal baking recipe using the convection bake
feature. The control uses the normal recipe settings
andadjuststoalowertemperatureforconvection
baking.ConvconvertmustbeusedwithCONV
BAKEfeature.
Using convection convert Setting convection convert
Benetsofconvbakeusingconv
convert option:
• Superiormultipleovenrackperformance.
• Somefoodscookup25to30%faster,saving
time and energy.
• Nospecialpansorbakewarerequired.
For best results
• YoumaypressCANCELanytimewhen
setting the control or during the cooking
process.
NOTE
OnceSTART is pressed the oven display shows
PRE-HEATING. After the oven reaches the
converted set temperature, PRE-HEATING will turn
off and a beep will indicate the oven is ready.
The added conv convert option will automatically
lower the set temperature you set from the bake
recipetoanadjustedconvbaketemperature.
When conv convert is used with cook time, “CF”
(CheckFood)willdisplaywhenthecooktimeis
75% complete. The control will also beep at regular
intervalsuntilbakinghasnished.
See the example below to set conv bake, starting
immediatelywiththeauto-suggest(default)setting
of350°F(176°C)andaddingtheconvconvert
option.
To add or change any cook settings after this
feature has started:
• SelecttheLOWERoven.Maketemperature
changes using the + or - keys. Each press of +
or -willadjustthetemperatureby5°F(or2°C).
• Ifchangingcookingtimes,selectthecook time
or end time keys needed to make the changes.
Example
Step Press
1. Press LOWER OVEN
2. Press CONV BAKE
3. Press COOK OPTIONS
4. Press CONV CONVERT
5. Press START
Setting Lower Oven Controls
38
About convection roast Setting convection roast
How convection roast works
ConvectionroastispartofthePerfect-Convect³™
system. Convection roast combines a cook cycle
with the convection fan and element to rapidly roast
meats and poultry. Heated air circulates around the
meatfromallsides,sealinginjuicesandavors.
Meatscookedwiththisfeaturearecrispybrown
on the outside while staying moist on the inside.
In addition, there is no need to reduce the oven
temperature when using convection roast.
Convection roast may be set with the following
options:
• Probe
• Cooktimeorcooktimewithendtime
The following temperature settings apply to
convection roast:
• Factoryauto-startdefault: 350°F/176°C
• Minimum: 170°F / 76°C
• Maximum: 550°F / 288°C
Benetsofconvectionroast:
• Superiormultipleovenrackperformance.
• Somefoodscookup25to30%faster,saving
time and energy.
• Nospecialpansorbakewarerequired.
See example below to set convection roast to start
immediatelywiththeauto-suggest(default)setting:
• Preheatingisnotnecessaryformostmeatsand
poultry.
• Placefooditemsusingtherecommendedrack
positions for the type of food being prepared.
• Whenplacingmultiplefooditemsintheoven
allow2-4”(5-10cm)ofspacebetweenthefood
items for proper air circulation.
• Besuretocarefullyfollowyourrecipe’s
temperature and time recommendations or
refer to the convection roast chart for additional
information -p. 39, Fig. 2-.
For best results
NOTE
• YoumaypressCANCELanytimewhensetting
the control or during the cooking process.
OnceSTARTispressedtheovenwillbegin
heating.
To add or change any cook settings after this
feature has started:
• SelecttheLOWERoven.Maketemperature
changes using the + or - keys. Each press of +
or -willadjustthetemperatureby5°F(or2°C).
• Ifchangingcookingtimes,selectthecook time
or end time keys needed to make the changes.
Example
Step Press
1. Press LOWER OVEN
2. Press CONV ROAST
3. Press START
Setting Lower Oven Controls
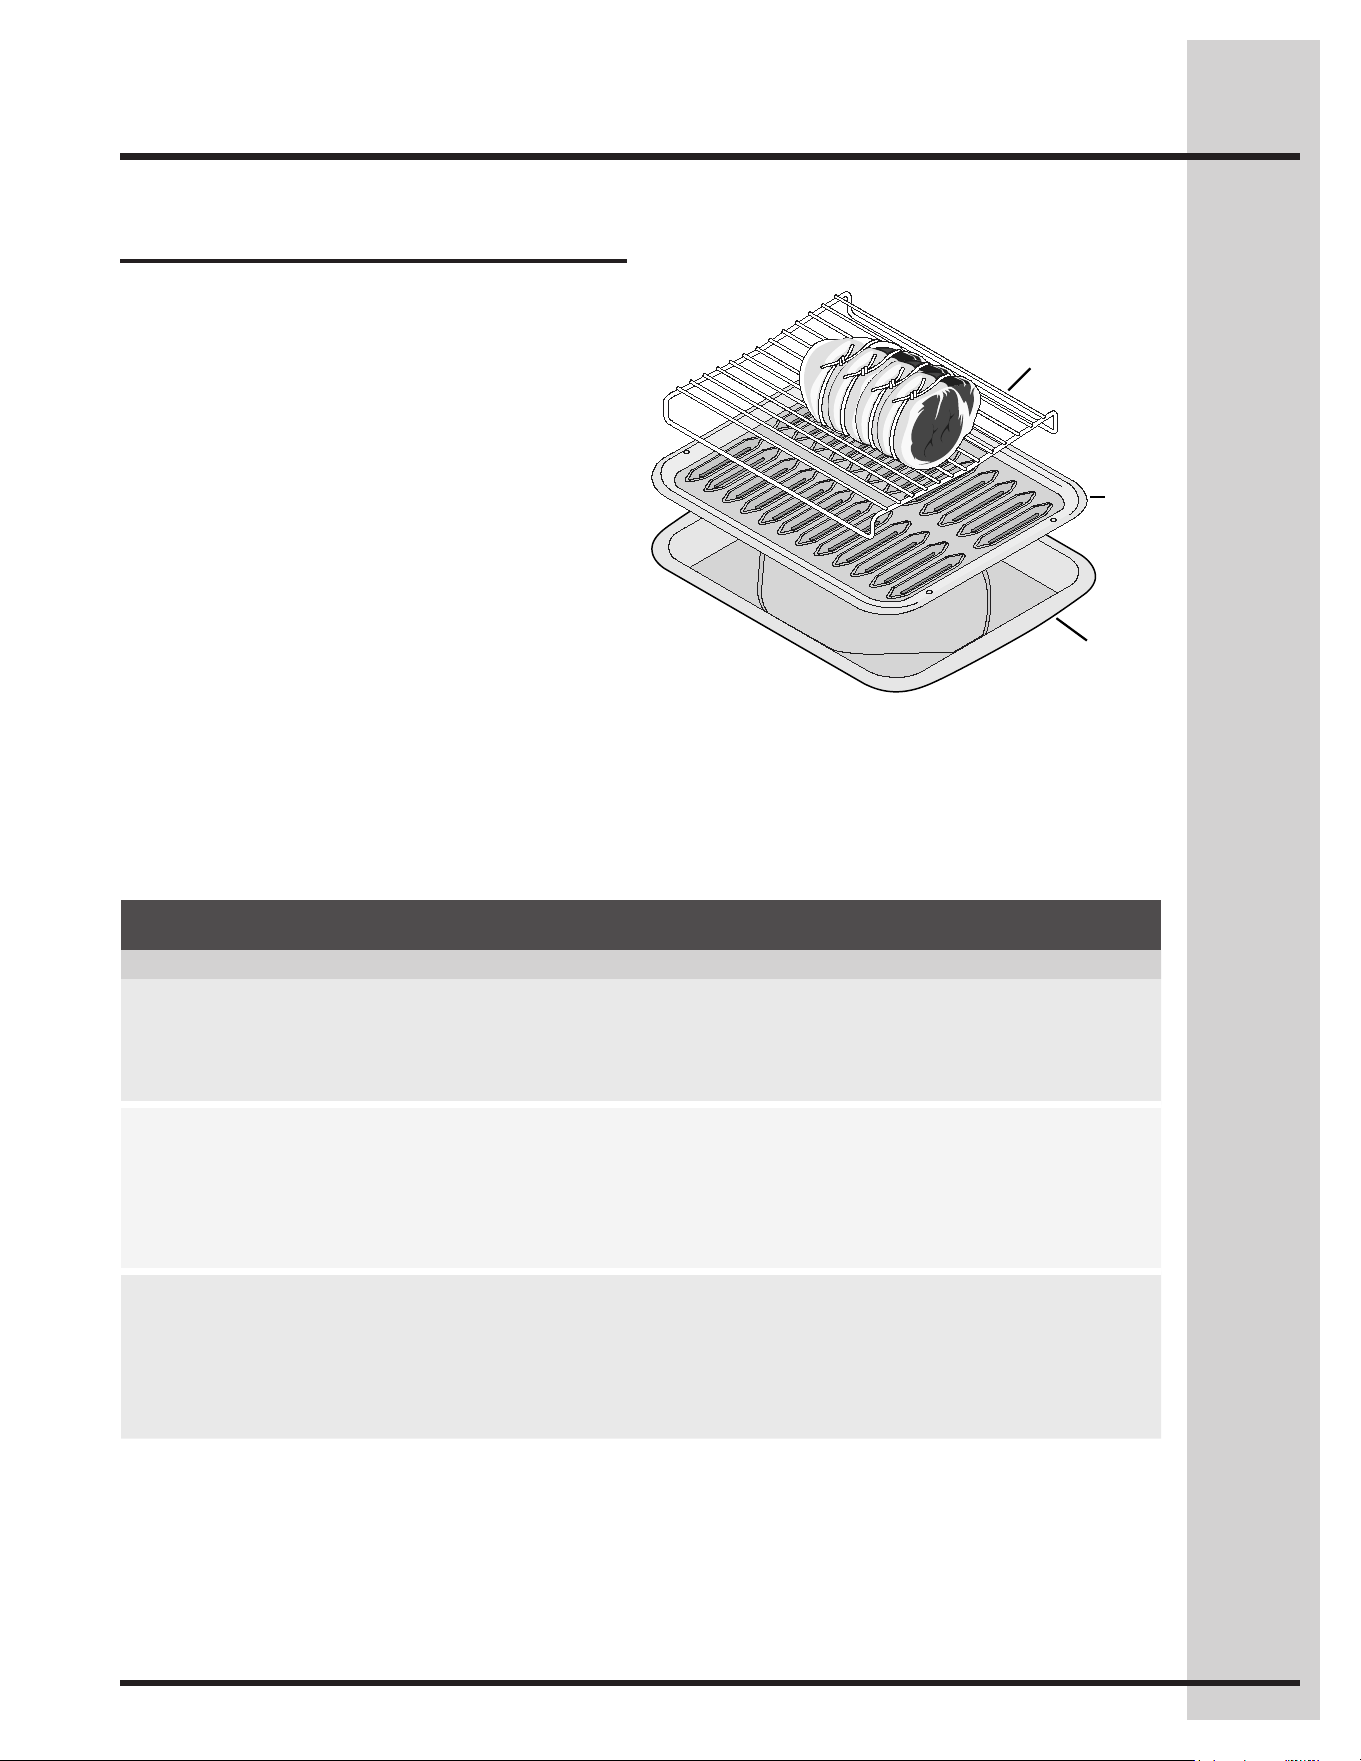
39
* For beef: med rare 145°F, med 160°F, well done 170°F
** Stuffed turkey requires additional roasting time. Shield legs and breast with foil to
prevent overbrowning and drying of the skin.
Fig. 2
Roasting recommendations
Fig. 1
Roasting rack instructions
When preparing meats for convection roasting, you
may use the broiler pan, insert and the roasting
rack supplied with your appliance. The broiler pan
will catch grease spills and the insert will help
preventgreasesplatters.Theroastingracktson
top of the insert allowing the heated air to circulate
under the food for even cooking and helps to
increase browning on the underside.
1. Place oven rack on bottom or next to the
bottom oven rack position.
2. Place the insert on the broiler pan.
3. Makesuretheroastingrackissecurelyseated
on top of the insert. Do not use the broiler pan
without the insert. Do not cover the insert with
aluminum foil.
4. Positionfood(fatsideup)ontheroastingrack.
-Fig. 1-
5. Place prepared food on oven rack in the oven.
Roasting rack
Insert
Broilpan
Convection Roasting Chart
Meat Weight Oven temp Internal temp Minute per lb.
Beef
Standing rib roast 4 to 6 lbs. 350°F * 25-30
Rib eye roast 4 to 6 lbs. 350°F * 25-30
Tenderloin roast 2 to 3 lbs. 400°F * 15-25
Poultry
Turkey, whole** 12 to 16 lbs. 325°F 180°F 8-10
Turkey, whole** 16 to 20 lbs. 325°F 180°F 10-15
Turkey, whole** 20 to 24 lbs. 325°F 180°F 12-16
Chicken 3 to 4 lbs. 350°F - 375°F 180°F 12-16
Pork
Ham roast, fresh 4 to 6 lbs. 325°F 160°F 30-40
Shoulder blade roast 4 to 6 lbs. 325°F 160°F 20-30
Loin 3 to 4 lbs. 325°F 160°F 20-25
Pre-cooked ham 5 to 7 lbs. 325°F 160°F 30-40
Setting Lower Oven Controls
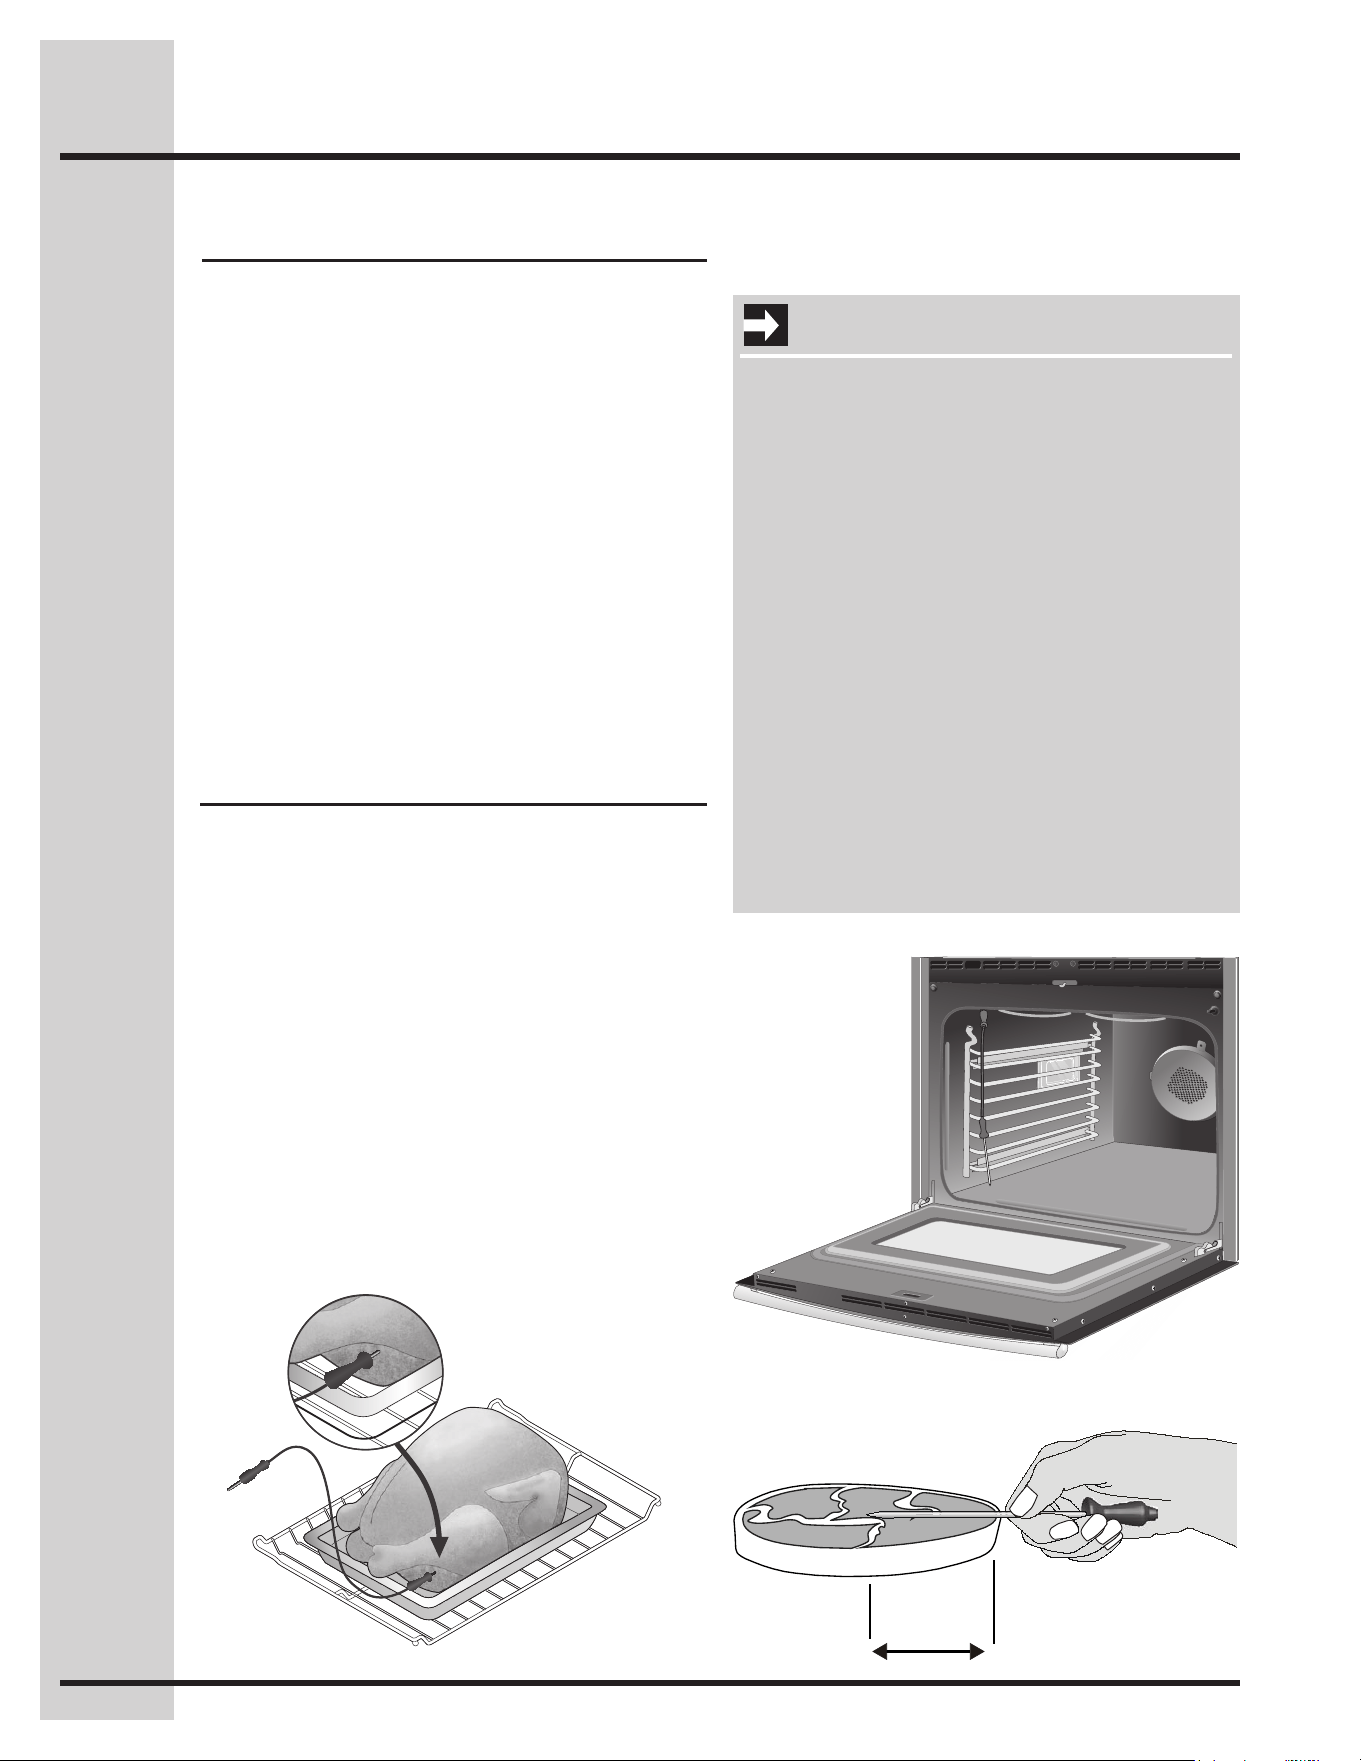
40
Proper probe placement
• Alwaysinserttheprobesothatthetiprestsin
thecenterofthethickestpartofthemeat.Do
not allow the probe to touch bone, fat, gristle or
the pan.
• Forbone-inhamorlamb,inserttheprobeinto
thecenterofthelowestlargemuscleorjoint.
For dishes such as meat loaf or casseroles,
insert the probe into the center of the food. To
ndthecenterofthefoodvisuallymeasurewith
the probe -Fig. 3-. Whencookingsh,insertthe
probejustabovethegill.
• Forwholepoultryorturkey,inserttheprobeinto
the thickest part of the inner thigh, below the leg
-Fig. 1-.
Checking the internal temperature of your food is
the most effective way of insuring that your food
has been properly cooked. When cooking meat
such as roasts, hams or poultry you can use the
probe to check the internal temperature without any
guesswork.
Your oven will automatically change from cooking
to keep warm once the probe has reached the set
temperature.
The following temperature settings apply to the
probe function:
• Default: 170°F/76°C
• Minimum: 130°F / 54°C
• Maximum: 210°F / 98°C
About the probe function
Fig. 1
Setting the probe
Fig. 2
IMPORTANT
• Useonlytheprobesuppliedwithyour
appliance; any other may result in damage to
the probe or the appliance.
• Besuretheprobeisfully inserted into the
probe receptacle. The probe will not work
properly until correctly connected.
• Handletheprobecarefullywheninsertingand
removing it from the food and the receptacle.
• Donotusetongstopullthecablewhen
inserting or removing it from the food or the
receptacle.
• Defrostyourfoodcompletelybeforeinserting
the probe to avoid damaging probe.
• Never leave or store the probe inside the
oven when not in use.
• Topreventthepossibilityofburns,carefully
unplug the probe using a pot holder.
Fig. 3
1/2
Setting Lower Oven Controls
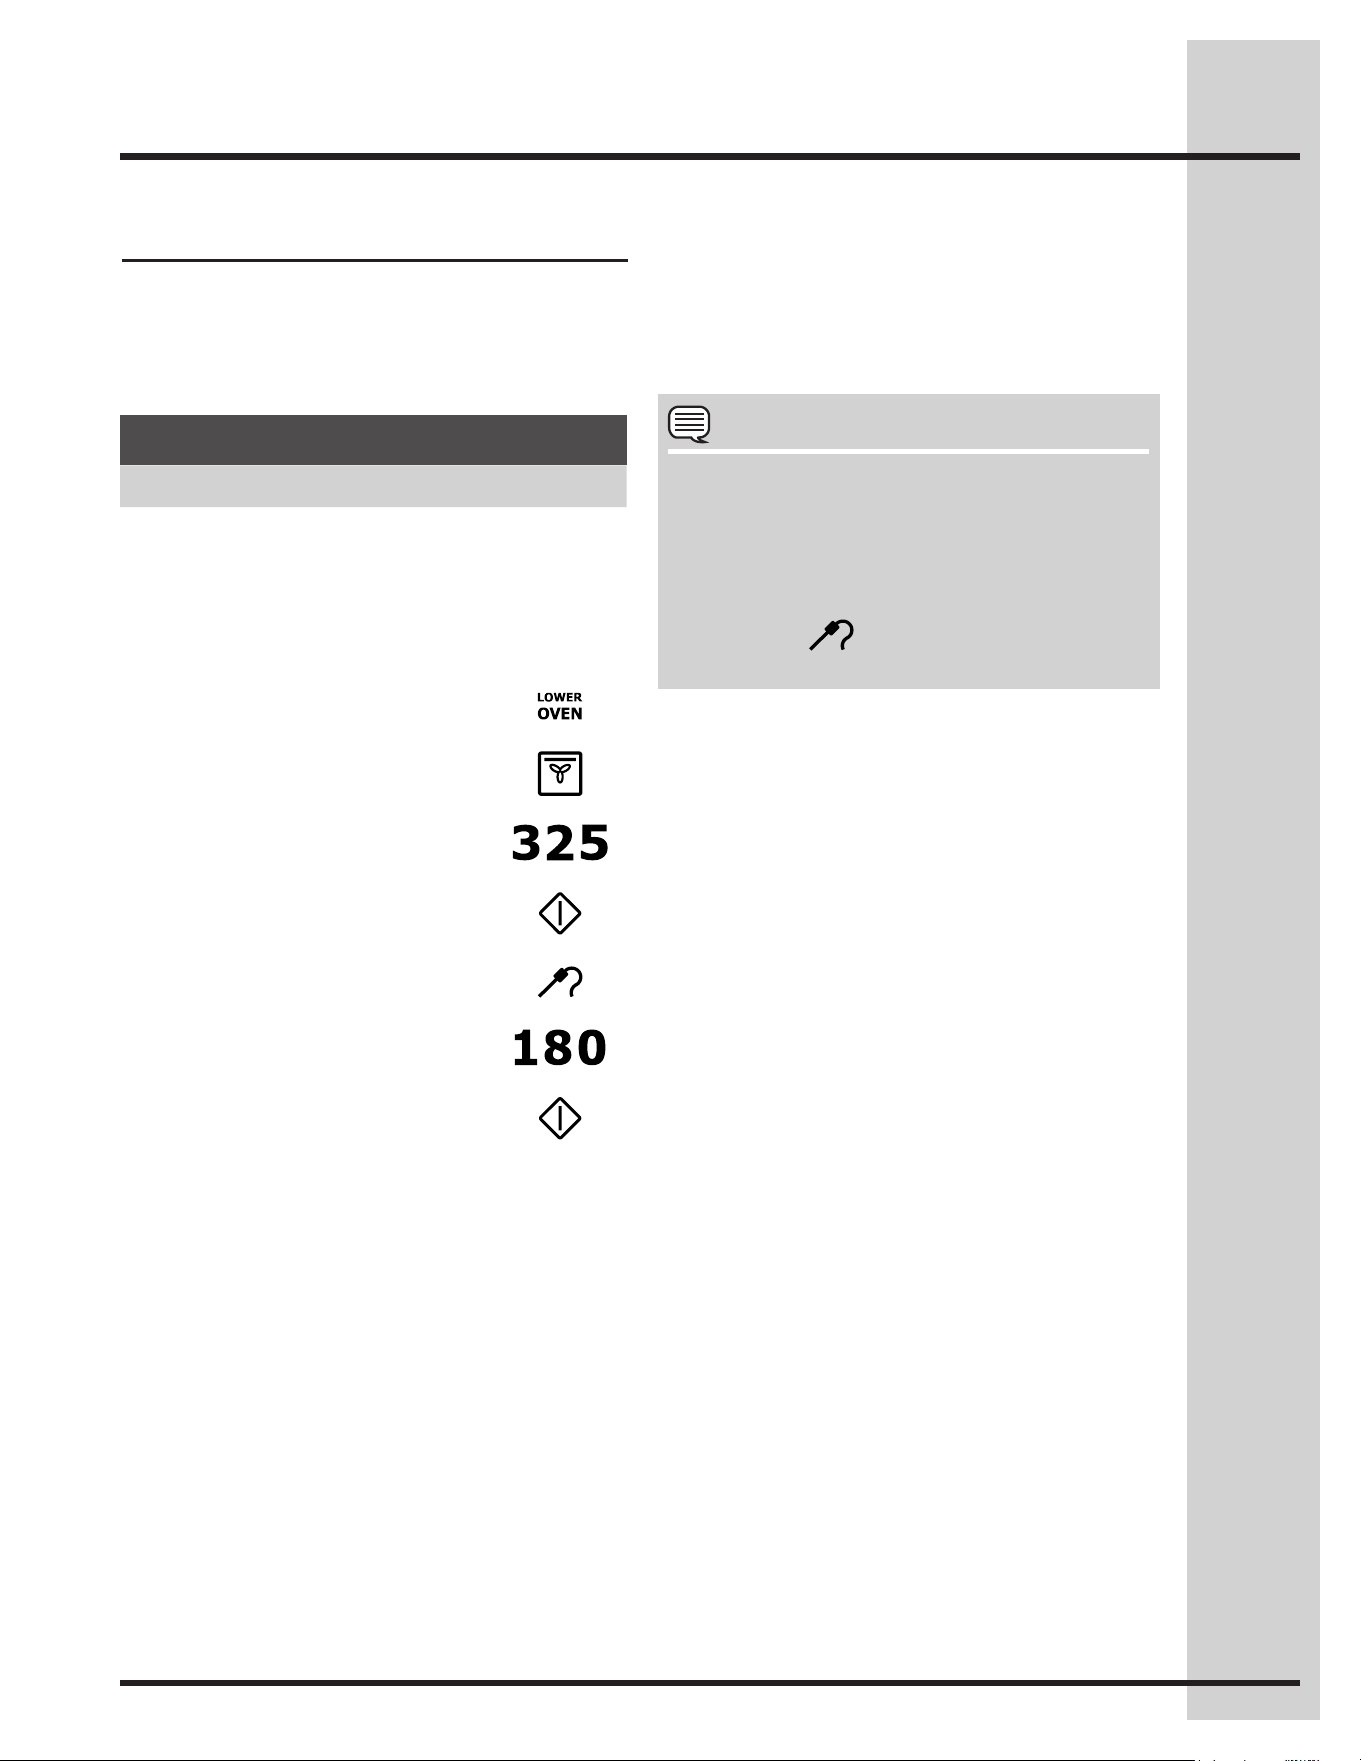
41
See the example below to set the probe target
temperature to 180°F/82°C when using the
convection roast feature with oven set temperature
for 325°F/162°C.
Setting the probe
* You may skip steps 7-9 if you choose to use the
default internal target temperature of 170°F for the
probe.
Bythedefault,yourovenwilladjusttothekeep
warm setting once the probe has reached the set
temperature.
NOTE
When the meat probe is connected to the •
receptacle and a cooking function is started,
the display will show the current temperature
reported by the meat probe.
Any time during the cooking process you •
may press to see or modify the target
temperature.
Example
Step Press
1. Insert the probe into the food and place the
food into the oven -Fig. 1-.
2. Plug the probe COMPLETELY into the probe
receptacle inside the oven -Fig. 2-
and close
the oven door.
3. Press LOWER OVEN
4. Press CONV ROAST
5. Enter 325
6. Press START
7. Press PROBE
8. Enter 180
9. Press START
Setting Lower Oven Controls
42
About convection broiling
See example below to set conv broil for the lower
oven to start immediately with the auto-suggest
(default)setting.
Convection broiling is part of the Perfect-
Convect³™system.Usetheconvbroilfeature
to cook thicker cuts of meats that require direct
exposure to radiant heat and the convection fan for
optimum browning results. This cooking feature is
only available for the lower oven.
The following temperature settings apply to the
conv broil feature:
• Auto-suggest(default)setting: 550°F / 288°C
• Min.convectionbroilsetting: 300°F / 148°C
• Max.convectionbroilsetting: 550°F / 288°C
Setting convection broil
• Do not use the broiler pan without the insert.
Do not cover the the broil pan or insert with
aluminum foil; the exposed grease could
ignite.
• Topreventfoodfromcontactingthebroil
element and to prevent grease splattering, do
not use the roasting rack when broiling.
Example
NOTE
YoumaypressCANCELanytimewhensetting
the control or during the cooking process.
Shouldanovenreoccur,leavetheoven
doorclosedandturntheovenOFF.Ifthere
continues,throwbakingsodaonthereoruse
areextinguisher.Do not putwaterorour
onthere.Flourmaybeexplosiveandwater
cancauseagreaseretospreadandcause
personalinjury.
For best results
• Usetherecommendedpansandrackpositions.
-refer to setting broil section-
• Foroptimumresultspreheatovenfor5-6
minutes.
To add or change any cook settings after this
feature has started:
• SelecttheLOWERoven.Maketemperature
changes using the + or - keys. Each press of +
or -willadjustthetemperatureby5°F(or2°C).
Example
Step Press
1. Place the broiler insert on the broiler pan,
then place the meat on the insert. Remember
to follow all warnings and cautions.
2. Arrange the interior oven rack -refer to setting
broil section- for position recommendations.
Besuretoplacethepreparedfoodandpan
directly under broil element. Close the oven
door.
3. Press LOWER OVEN
4. Press CONV BROIL
5. Press START
Setting Lower Oven Controls
43
About keep warm Setting keep warm
Use the keep warm feature to keep hot foods
warm.Keepwarmmaybesetwiththefollowing
options:
• Cooktime
• Cooktimewithendtime
The following temperature settings apply to the
keep warm feature:
• Auto-suggest(default)setting: 170°F / 76°C
• Min.keepwarmsetting: 150°F / 66°C
• Max.keepwarmsetting: 190°F / 88°C
See example below to set keep warm for the lower
oven to start immediately with the auto-suggest
(default)setting.
• FOOD POISONING HAZARD. Do not let
food sit for more than one hour before
or after cooking. Doing so may cause
bacteria to grow which can result in food
poisoning or sickness.
• Topreventfoodfromcontactingthebroil
element and to prevent grease splattering, do
not use the roasting rack when broiling.
Example
NOTE
YoumaypressCANCELanytimewhensetting
the control or during the cooking process.
To add or change any cook settings after this
feature has started:
• SelecttheLOWERoven.Maketemperature
changes using the + or - keys. Each press of +
or -willadjustthetemperatureby5°F(or2°C).
Example
Step Press
1. Press LOWER OVEN
2. Press KEEP WARM
3. Press START
Setting Lower Oven Controls
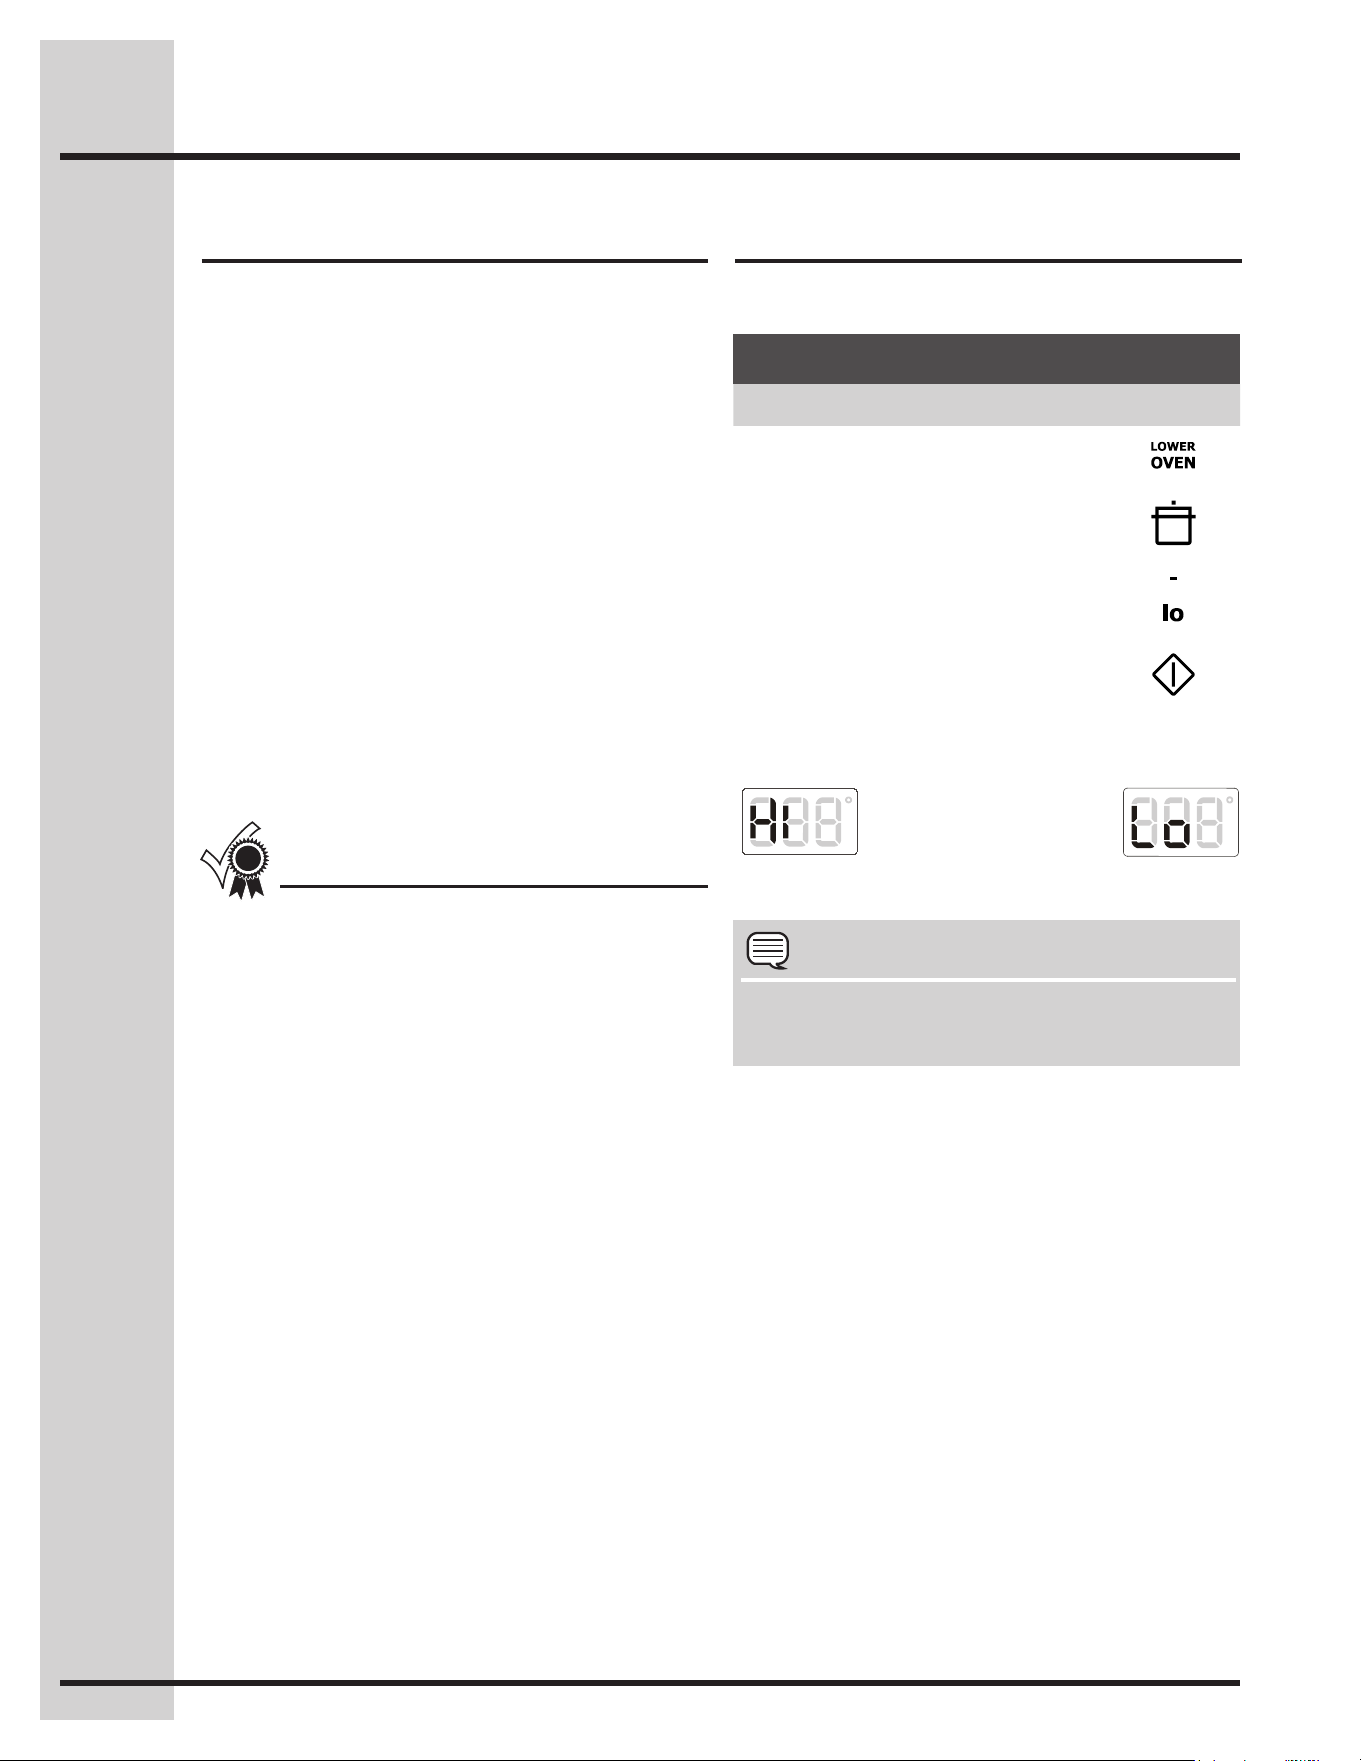
44
About slow cook
Setting slow cook
SeetheexamplebelowtosetaslowcookonLo.
The slow cook feature may be used to cook foods
more slowly at lower oven temperatures. The
cooking results will be like that of a Slow Cooker or
Crock-Pot. This feature is ideal for roasting beef,
pork&poultry.Slowcookingmeatsmayresultin
the exterior of meats becoming dark but not burnt;
this is normal. Slow cook may only be set in the
lower oven.
Slow cook may be set with the following options:
• Cooktime
• Cooktimewithendtime
The following temperature settings apply to the
slow cook feature:
• HI:275°F/134°C(default)forcooking4to5hours
• Lo:225°F/108°Cforcooking8to9hours
• Completelythawallfrozenfoodsbeforecooking.
• Positionmultiplerackstoaccommodatesize
of cooking utensils when cooking multiple food
item.
• Addanycreamorcheesesaucesduringthelast
hour of cooking.
• Donotopentheovendooroftenorleavethe
door open when checking foods. The more heat
that is lost, the longer the food will need to cook.
• Coverthefoodstokeepthemmoistorusea
loose or vented type cover to allow foods to turn
crisp or brown.
• Roastsmaybeleftuncoveredsobrowningcan
occur. Cook times will vary depending on the
weight,fatcontent,bone&theshapeofthe
roast.
• Preheatingtheovenwillnotbenecessary.
For best results
Fig.1 Fig. 2
*Press +hi to choose the Hi option -Fig. 1-.
Example
NOTE
YoumaypressCANCELanytimewhensetting
the control or during the cooking process.
To add or change any cook settings after this
feature has started:
• SelecttheLOWER oven. Toggle between the
high and low settings by using the + or - keys.
• Ifchangingcookingtimes,selectthecook time
or end time keys needed to make the changes.
Example
Step Press
1. Press LOWER OVEN
2. Press SLOW COOK
3. Press -lotochoosetheLo
option -Fig. 2-.*
4. Press START
Setting Lower Oven Controls
45
See the example below to use perfect turkey at the
default setting of 325°F and the probe at the default
settingof180°F(82°C).
* Stuffed turkey requires additional roasting time. Shield legs and breast with foil to prevent overbrowning
and drying of the skin.
Example
NOTE
• YoumaypressCANCELanytimewhen
setting the control or during the cooking
process.
• When the meat probe is connected to the
receptacle and perfect turkey is started, the
display will show the current temperature
reported by the meat probe.
• Any time during the cooking process you
may press to see or modify the target
temperature.
• Itisnotrecommendedtomodifytheperfect
turkey settings once cooking has started.
Doingsomaynotprovidethebestresults.
Heated air circulates around the turkey from all
sides,sealinginjuicesandavors.Poultrycooked
with this feature are crispy brown on the outside
while staying moist on the inside.
Perfect turkey combines a cook cycle with the
convection fan. The probe is used to monitor the
exact internal temperature of the turkey while
cooking.Oncetheturkeyhasreachedtheset
temperature, the oven will stop cooking and
change to keep warm.
Beforesettingtheperfectturkeyfeature,orifyou
would like to change the probe target temperature,
be sure to carefully read and follow setting the
probe instructions.
About Perfect Turkey™ Setting Perfect Turkey™
Example
Step Press
1. Insert the probe into the thickest part of the
meat and place the turkey in the oven -see
setting the probe section-
2. Plug the probe into the probe receptacle
inside the lower oven.
3. Press LOWER OVEN
4. Press PERFECT TURKEY
Probeindicatorwillashand
Perfect Turkey will not start
until the probe has been
plugged in.
5. Press START
Perfect Turkey Chart
Meat Weight Oven temp Internal temp Minute per lb.
Poultry
Turkey, whole** 12 to 16 lbs. 325°F 180°F 8-10
Turkey, whole** 16 to 20 lbs. 325°F 180°F 10-15
Turkey, whole** 20 to 24 lbs. 325°F 180°F 12-16
Chicken 3 to 4 lbs. 350°F - 375°F 180°F 12-16
Setting Lower Oven Controls
46
About dehydrate
The dehydrate feature dries with heat from the
elements. The heat is circulated throughout the
oven by the convection fan. Use dehydrate to dry
and/or preserve foods such as fruits, vegetables,
herbs and very thin slices of meat. The Convection
fan may operate while dehydrating.
The following temperature settings apply to the
dehydrate feature:
• Auto-suggest(default)setting: 120°F / 48°C
• Min.dehydratesetting: 100°F / 38°C
• Max.dehydratesetting: 225°F / 108°C
Dehydratemaybesetwiththefollowingoptions:
• Cooktime
• Cooktimewithendtime
See the example below to set dehydrate at the
default temperature of 120°F.
To add or change any cook settings after this
feature has started:
• SelecttheLOWERoven.Maketemperature
changes using the + or - keys. Each press of +
or -willadjustthetemperatureby5°F(or2°C).
• Ifchangingcookingtimes,selectthecook time
or end time keys needed to make the changes.
About defrost
Setting defrost
Use the defrost feature to thaw small portions of
delicate items such as cream cakes, frozen cream
pies and cheesecake at room temperature. While
in the defrost mode, the convection fan will operate
to circulate room temperature air around the food
slowly, accelerating the natural defrosting of the
food without using heat.
Defrostmaybesetwiththefollowingoptions:
• Cooktime
• Cooktimewithendtime
See the example below to set defrost.
Example
NOTE
• YoumaypressCANCELanytimewhen
setting the control or during the cooking
process.
• Thisfeatureisnotmeantforthawingfrozen
meats, poultry, seafood or other foods that
need to be cooked before serving. Follow
USDArecommendationsforthawingfoods.
Onlyfrozenfoodsthatcanbedefrostedand
served without cooking should be used with
this feature.
Setting dehydrate
Example
Step Press
1. Place food in oven and press
LOWER OVEN
2. Press DEFROST
3. Press START
Example
Step Press
1. Press LOWER OVEN
2. Press DEHYDRATE
3. Press START
Setting Lower Oven Controls
47
Setting bread proof
See example below to set bread proof for 85°F /
30°C.
For best results
• Drymostfruitsandvegetablesat140°F.Dry
herbs at 100°F.
• Dryingtimesvarydependingonthemoisture
and sugar content of the food, the size of the
pieces, the amount being dried and the humidity
in the air.
• Treatfruitswithantioxidantstoavoiddiscoloration.
• Tightlywovencoolingrackscanbeusedtoallow
the air to circulate around the food; or use drying
racks to allow the air to circulate around the food
(thistypeofovenrackisnotsuppliedwiththis
appliance).
• Consultafoodpreservationbookorlibraryfor
information.
Example
NOTE
YoumaypressCANCELanytimewhensetting
the control or during the cooking process.
To add or change any cook settings after this
feature has started:
• SelecttheLOWERoven.Maketemperature
changes using the + or - keys. Each press of +
or -willadjustthetemperatureby5°F(or2°C).
• Ifchangingcookingtimes,selectthecook time
or end time keys needed to make the changes.
About bread proof
The bread proof feature maintains a warm
environment useful for rising yeast-leavened
products.
The following temperature settings apply to the
bread proof feature:
• Auto-suggest(default)setting: 100°F/38°C
• Min.breadproofsetting: 85°F/30°C
• Max.breadproofsetting: 100°F / 38°C
Breadproofmaybesetwiththefollowingoptions:
• Cooktime
• Cooktimewithendtime
For best results
• Lightlycoverthedough
• Placeabowlofhotwaterontherackbelow.
• Usetheovenlighttocheckprogress.Donot
open the oven door.
Setting dehydrate
Example
Step Press
1. Press LOWER OVEN
2. Press BREAD PROOF
3. Enter 85.
4. Press START
Setting Lower Oven Controls
48
Saving my favorite instructions
You need to delete a favorite before saving
another. Choose one of the favorite keys you no
longer wish to keep and store the new cooking
instructions using the deleting instructions.
About my favorite
You may store up to 3 of your most frequently used
heat settings and cooking times, for the lower oven.
These keys will light in the display when they are
available for setting or recalling.
Each key will allow you to store a cooking feature,
oven set temperature and a cook time, for the
lower oven.
The example below shows how to save a favorite
cooking instruction.
The example below shows how to recall a favorite
cooking instruction.
The example below shows how to delete a favorite
cooking instruction.
You will hear a beep and a red light will display
above the selected favorite to indicate that your
favorite recipe has been stored.
*If you wish to store the cooking instructions but not
start the oven.
Recalling a favorite
Deleting a favorite
Example
Step Press
1. Press LOWER OVEN
2. Input the cooking instructions using the
control keypads and any additional options
you wish to save and later recall.
3. Press START
4. Press and hold the available
MY FAVORITE for 3 seconds.
5. Press CANCEL/off*
Example
Step Press
1. Press LOWER OVEN
2. Choose MY FAVORITE
3. Press START
Example
Step Press
1. Press LOWER OVEN
2. Press and hold the available
MY FAVORITE for 3 seconds.
The favorite key will disappear
from the control panel.
Setting Lower Oven Controls
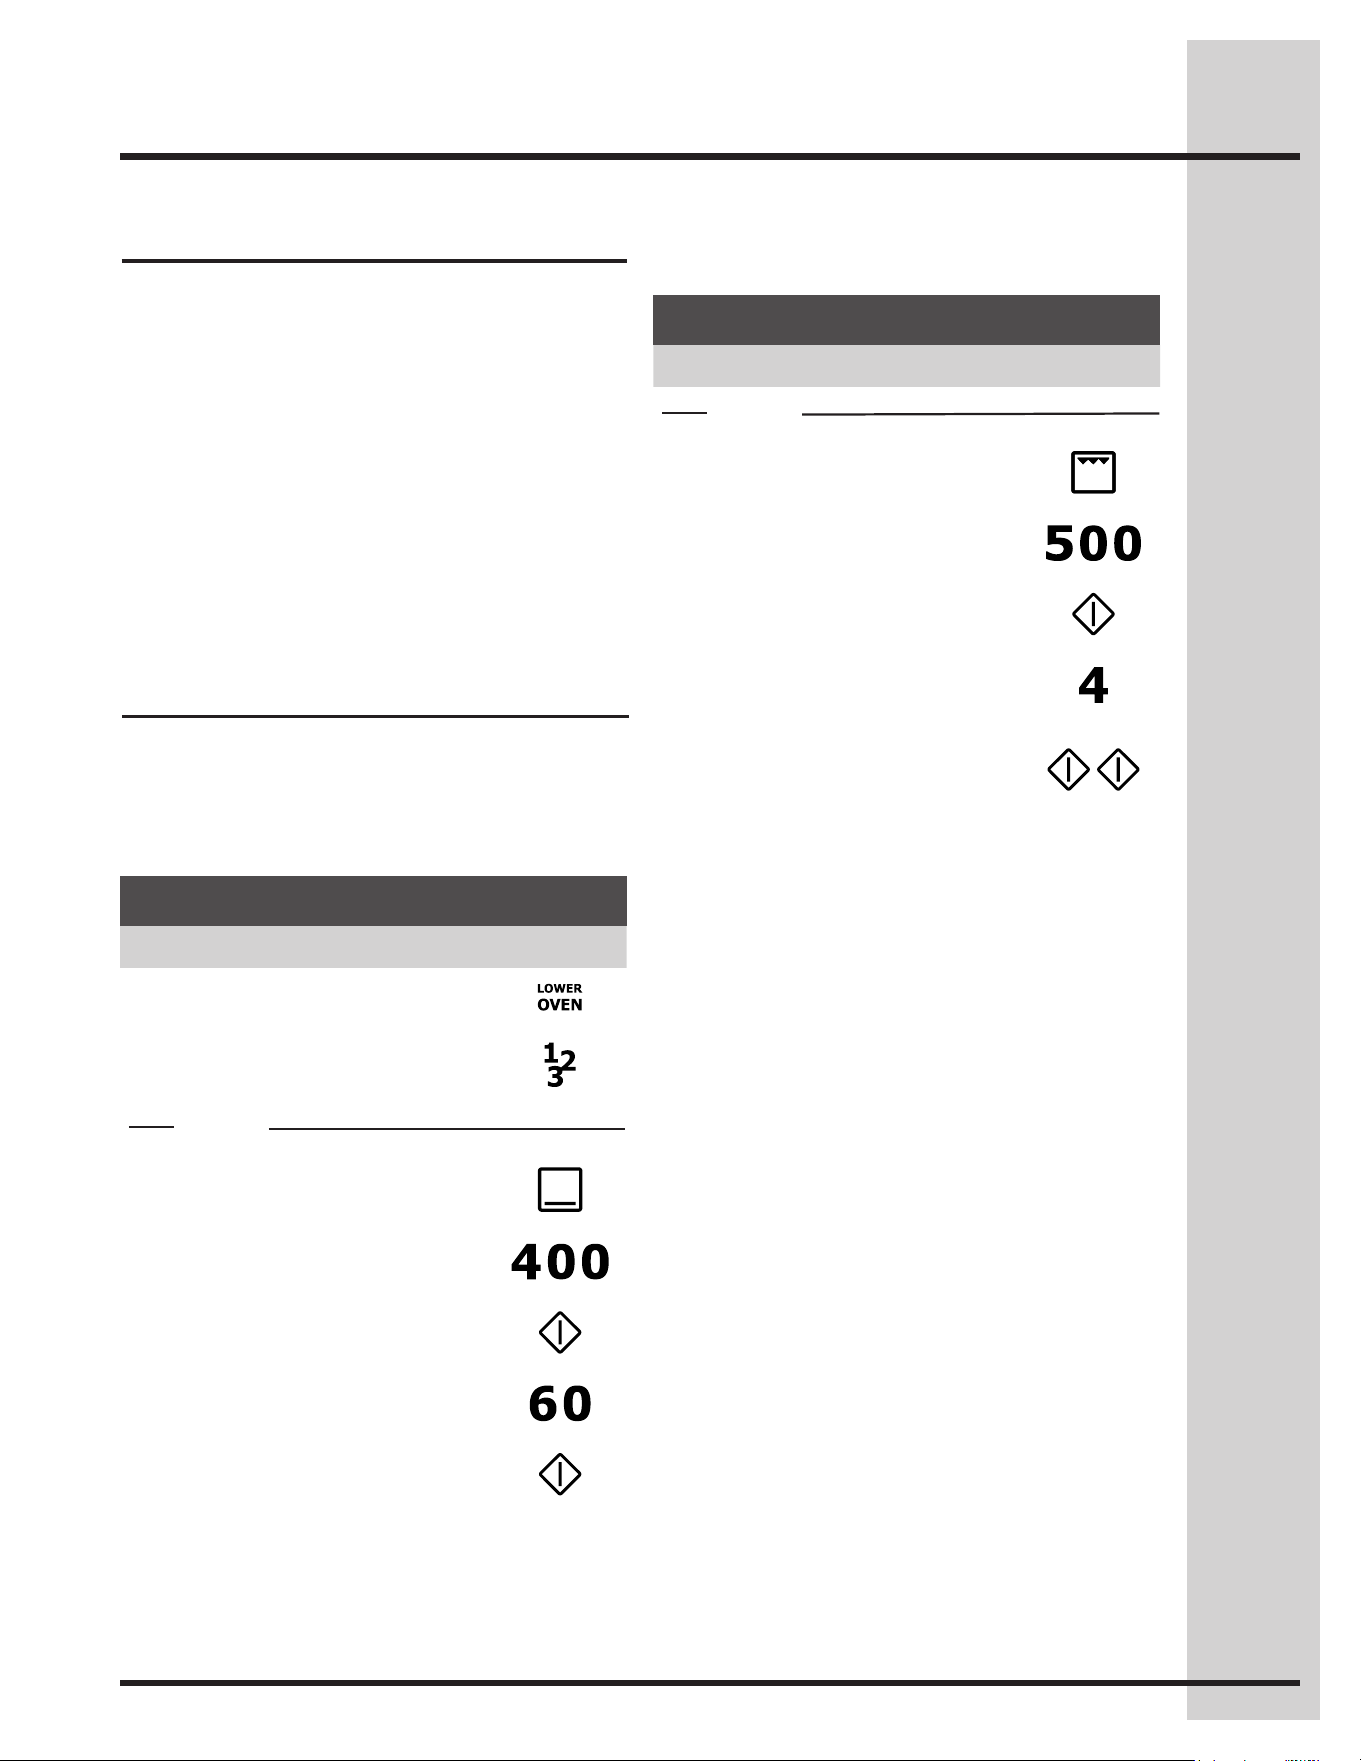
49
Multistagewillallowyoutoprogramupto3stages
of cooking. Each stage may be programmed with a
cooking feature, set temperature and a cook time.
Multistageisidealwhenyouwanttoaddakeep
warm after a cooking function.
The following functions may be set with multi stage:
• Bake/convbake
• Broil/convbroil(10minutesmax.)
• Convroast
• Keepwarm
Setting multi stage
See the example to program a multi stage feature
for a casserole. For stage 1, bake at 400°F for 1
hr. For stage 2, to brown, broil for at 500°F for 4
minutes.
Perfect Program™ multi stage
Example for 2 stages
Step Press
1. Press LOWER OVEN
2. Press MULTI STAGE
Stage 1
3. Press BAKE
4. Enter 400°F
5. Press START
6. Enter 60 minutes
7. Press START
Example for 2 stages
Step Press
Stage 2
8. Press BROIL
9. Enter 500°F
10. Press START
11. Enter 4 minutes
12. Press START/enter a total
of 2 times to program only 2
stages and begin cooking.
Setting Lower Oven Controls
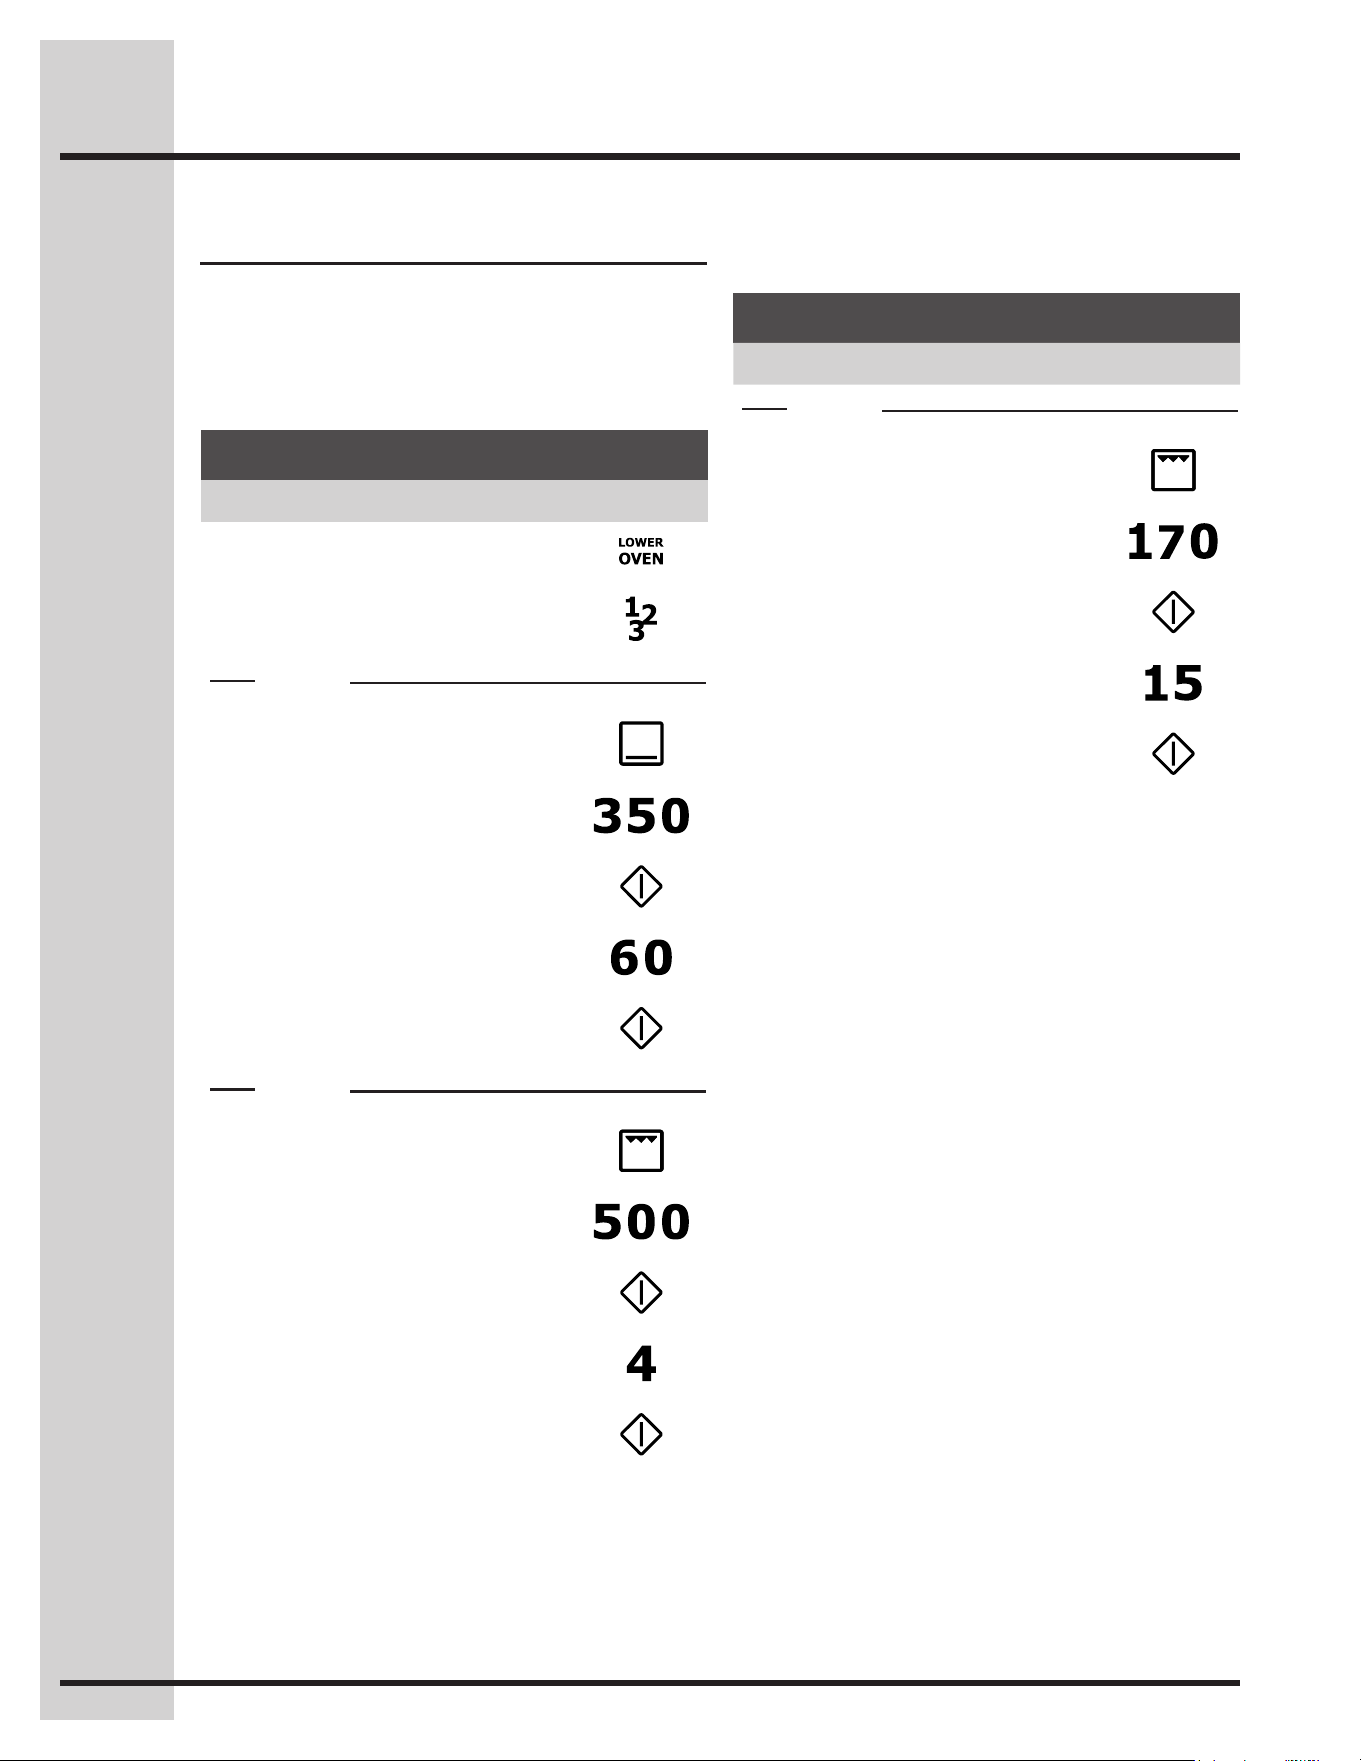
50
Setting multi stage
See the example to program a multi stage feature
for a casserole. For stage 1, bake at 350°F for 1
hr. For stage 2, to brown, broil for at 500°F for 4
minutes. For stage 3, keep warm for 15 minutes.
Example for 3 stages
Step Press
1. Press LOWER OVEN
2. Press MULTI STAGE
Stage 1
3. Press BAKE
4. Enter 350°F
5. Press START
6. Enter 60 minutes
7. Press START
Stage 2
8. Press BROIL
9. Enter 500°F
10. Press START
11. Enter 4 minutes
12. Press START
Example for 3 stages
Step Press
Stage 3
13. Press KEEP WARM
14. Enter 170°F
15. Press START
16. Enter 15 minutes
17. Press START
Setting Lower Oven Controls
51
Sabbath mode
The lower oven of this appliance provides special
settings for use when observing the Jewish
Sabbath/Holidays. This mode will turn off all
audible tones or visual display changes normally
provided by the oven control. BAKE is the only
cooking features available while in the Sabbath
mode.
YoumustrstsettheBAKE feature and
temperature(s)neededfortheloweroven,the
COOK TIME option if needed before setting the
Sabbath mode. Any settings made prior to setting
the Sabbath mode will be visible in the displays.
The Sabbath mode will override the factory preset
12 Hour Energy Saving mode and the appliance
will stay on until the cooking features are cancelled.
If any of the cooking features are cancelled when
the appliance is in the Sabbath mode, no audible
or visual indicators will be available to verify the
cancellation.
If the oven interior lights are needed, be sure to
activate them prior to setting the Sabbath mode.
OncetheovenlightisturnedONandtheSabbath
mode is active, the oven light will remain on until
the Sabbath mode is turned off and the oven lights
are turned off. The oven door will not activate the
oven interior lights when the oven door is opened
or closed.
For further assistance, guidelines
for proper usage and a complete list
of models with the Sabbath feature,
please visit the web at http:\\www.
star-k.org.
Fig. 1
It is recommended that any oven temperature
modicationmadewithinanactiveSabbathmode
be followed with 2 presses of the START key. This
willinsuretheovenremainsONevenifanattempt
is made to set the oven temperature outside of its
temperature range. If the oven temperature is set
outside of the temperature range, the oven will
default to the nearest available temperature. Try to
set the desired oven temperature again.
Should a power failure or interruption occur during
theSabbath/Holidays,theappliancewillshutOFF.
When power is restored the appliance will not turn
backonautomaticallytotheoriginalBAKEfeature
settings. SF will appear in all the control display
panels indicating a Sabbath mode failure. - Figs. 1-
After a power failure, the food may be safely
removed from the oven while still in the Sabbath
mode.
Setting Lower Oven Controls
Example
NOTE
NoSabbathmodeisavailableformicrowaveoven.
When Sabbath mode is enabled, the microwave
controls will lock and it will not be possible to turn
itON.IfthemicrowaveisactivewhenSabbathis
set, it will turn off and lock.
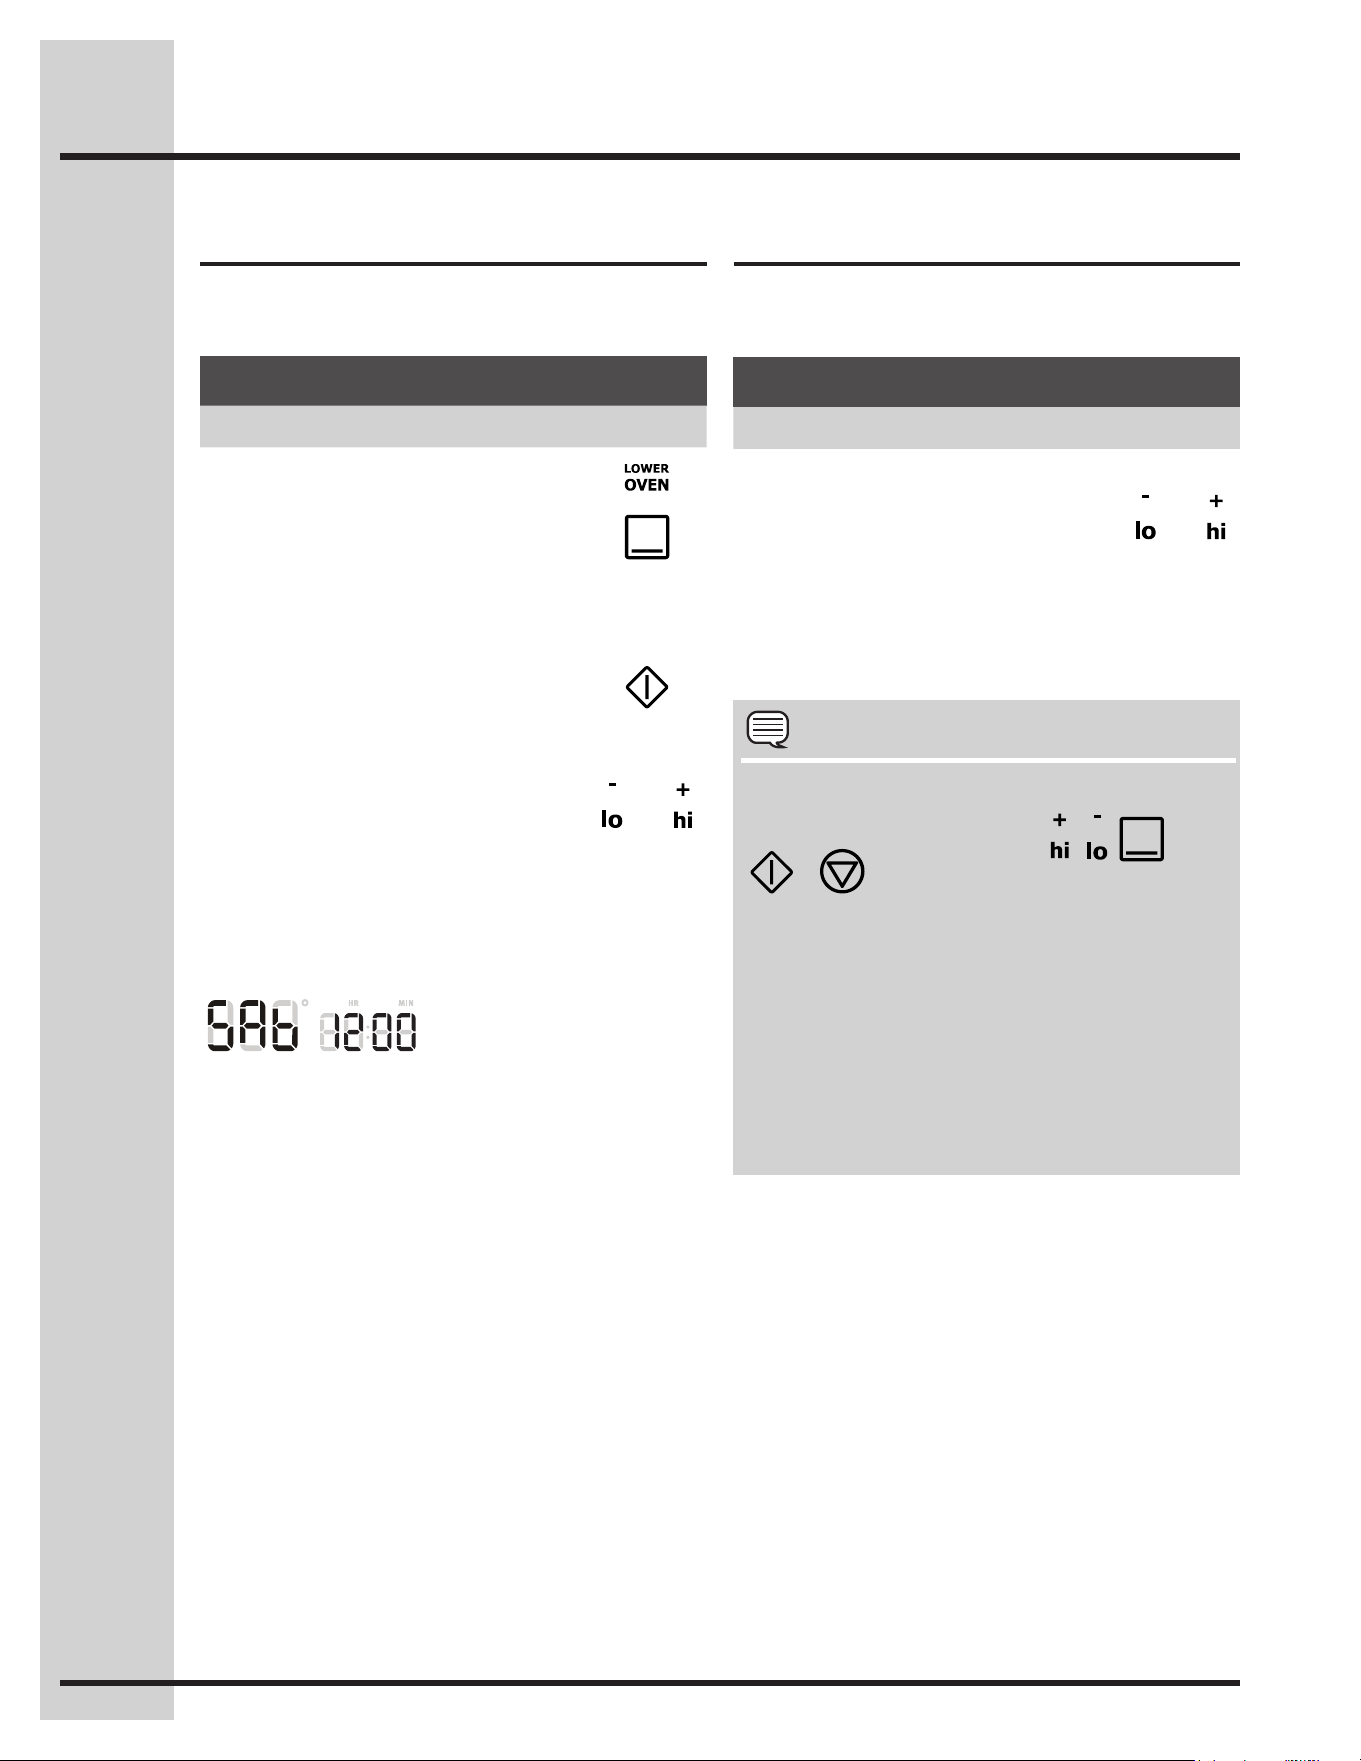
52
Canceling Sabbath mode
The example below shows how to cancel the
Sabbath mode.
Fig. 1
Example
NOTES
The only keys available once the appliance is
set for the Sabbath mode are , , ,
& .
You may change the oven temperature and
any cooktop settings once baking has started
(Jewishholidaysonly).Chooseovenandpress
BAKE, use the + or - keys to set the oven
temperature and press START twice. Each
press of + or -willadjustthetemperatureby5°
F(or2°C).Rememberthatthe oven control
will no longer beep or display any further
changes once the oven is set in the Sabbath
mode.
The example below shows setting the oven to
observetheSabbath(andJewishholidays).
OnceproperlysetinSabbathmode,SAb -Fig.
1- will show in the oven display until the Sabbath
mode is cancelled.
Setting Sabbath mode
Example
Step Press
1. Press LOWER OVEN
2. Press BAKE.
Besuretomakeanyadditionalovensetting
changes before going to step 3
3. Press START
4. To enter Sabbath mode, press
and hold simultaneously both
the LO and HI keys together for 3
seconds(abeepwillsound)and
release.
&
Example
Step Press
1. Press and hold both the LO
and HI keys together for 3
seconds(abeepwillsound)
and release.
&
2. All cooking features previously set will
automatically cancel once Sabbath mode has
ended.
Setting Lower Oven Controls
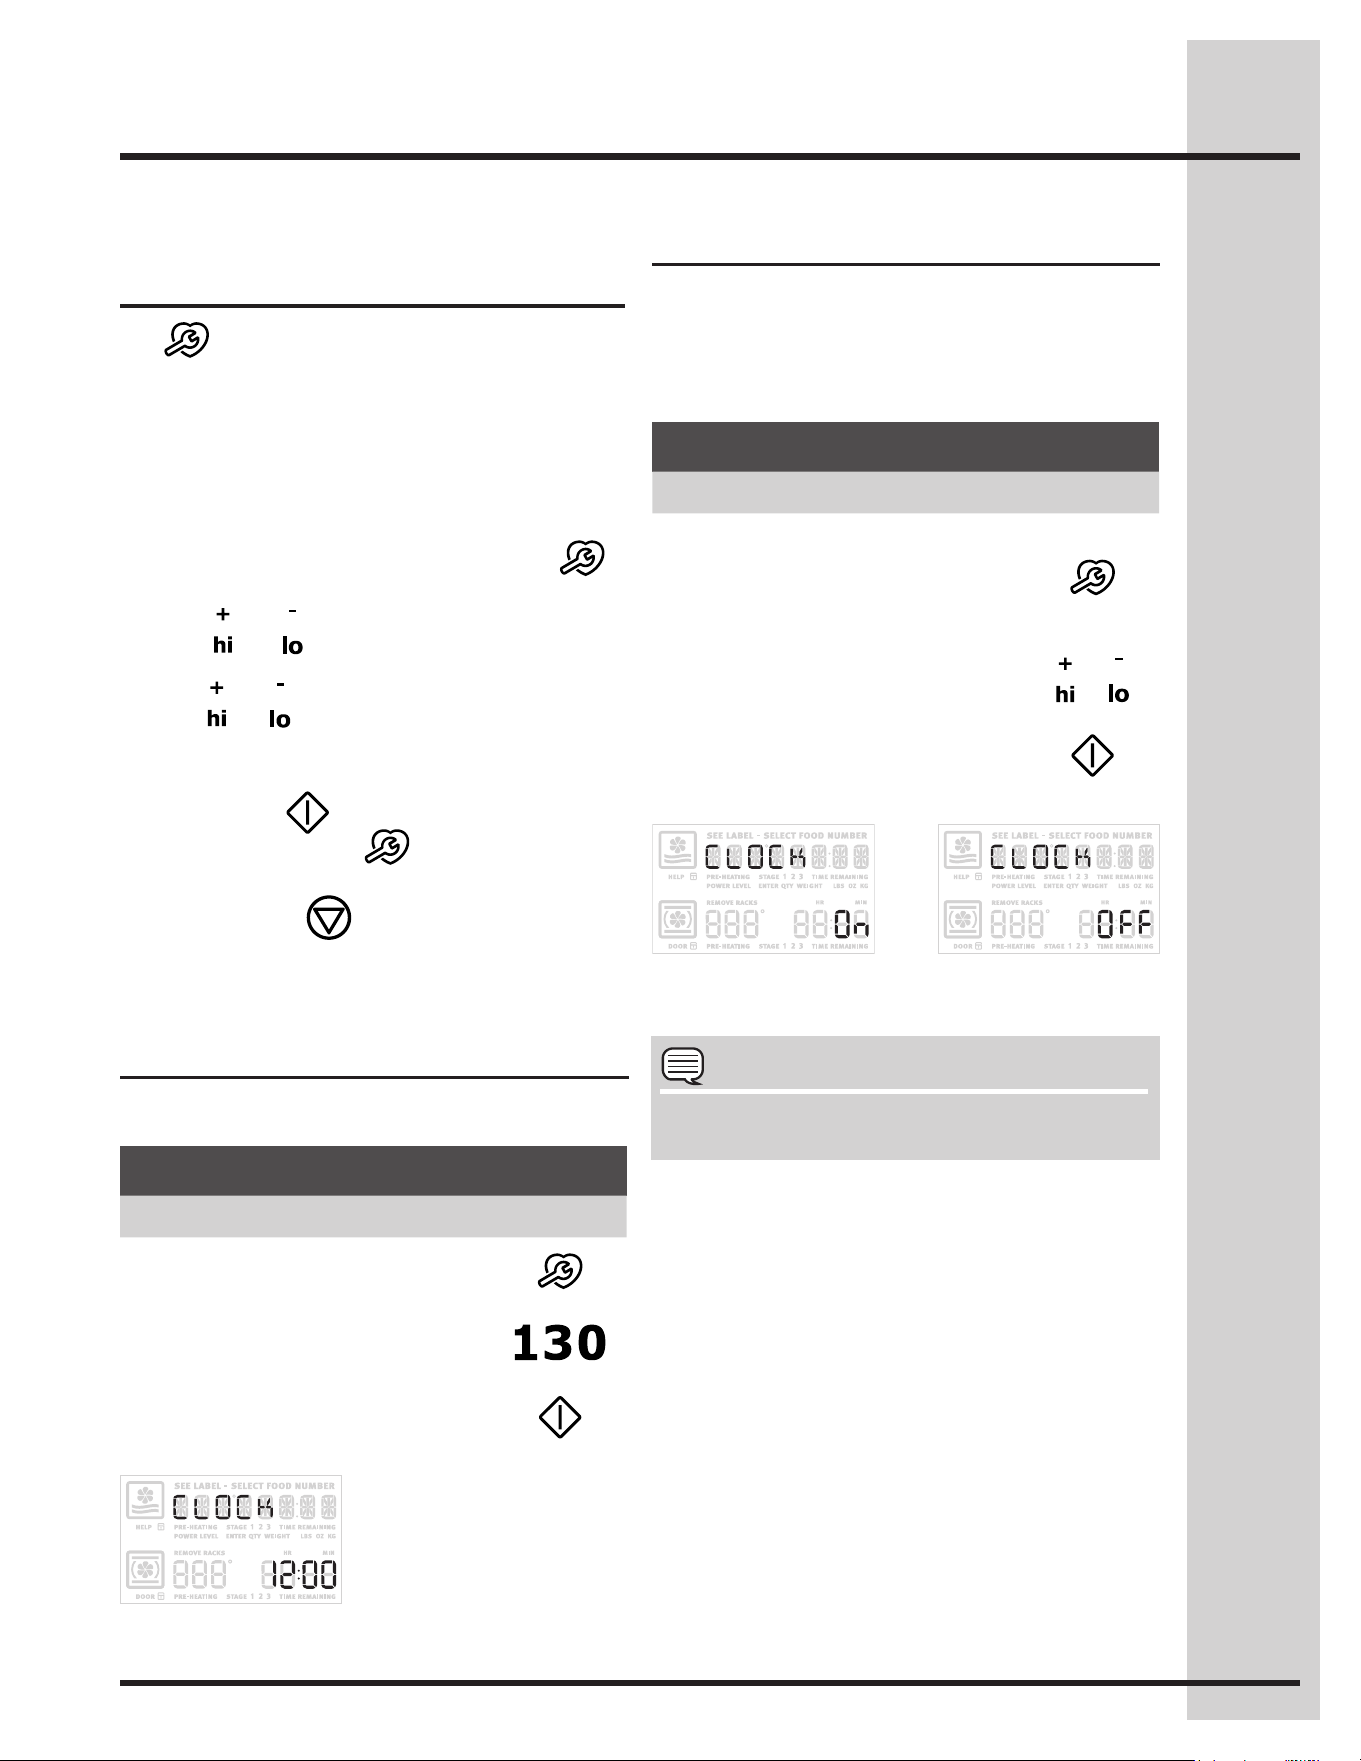
53
Setting clock display
Setting Your Preferences
Wave-Touch™
user preferences
The key controls options for preferences. The
display will show a digital abbreviation and a value
for every preference each time a key is pressed
one at a time.
Please read the following instructions before
changing the user preferences functions:
• PressandcontinuetopressUSER PREF
to navigate through the preferences.
• Press or to toggle between options for
each preference.
• Press or to increase or decrease numeric
values. You may also use the numeric keys to
input precise values.
• PressSTART to accept a new option entry
or press USER PREF to advance to the
next preference.
• PressCANCEL to exit the preferences
mode .
NOTE
User preference options are not available while
cooking or when using the kitchen timer.
Setting clock
See the example below to set the clock to 1:30.
The clock display mode allows you to turn the
clock display on or off.
See the example below to change the clock display
toOFF.
Fig. 2 Fig. 3
Fig. 1
Example
Step Press
1. Press USER PREF.
2. Enter 1:30 or use +hi/-lo to
advance to 1:30.
3. Press START to accept or
press CANCELtoreject.
Example
Step Press
1. Press and continue to press
USER PREF until you reach
the preset clock display
mode -Fig. 2-.
2. Use the +hi &-lo to toggle to
the CLO off option -Fig. 3-.
or
3. Press START to accept or
press CANCELtoreject.
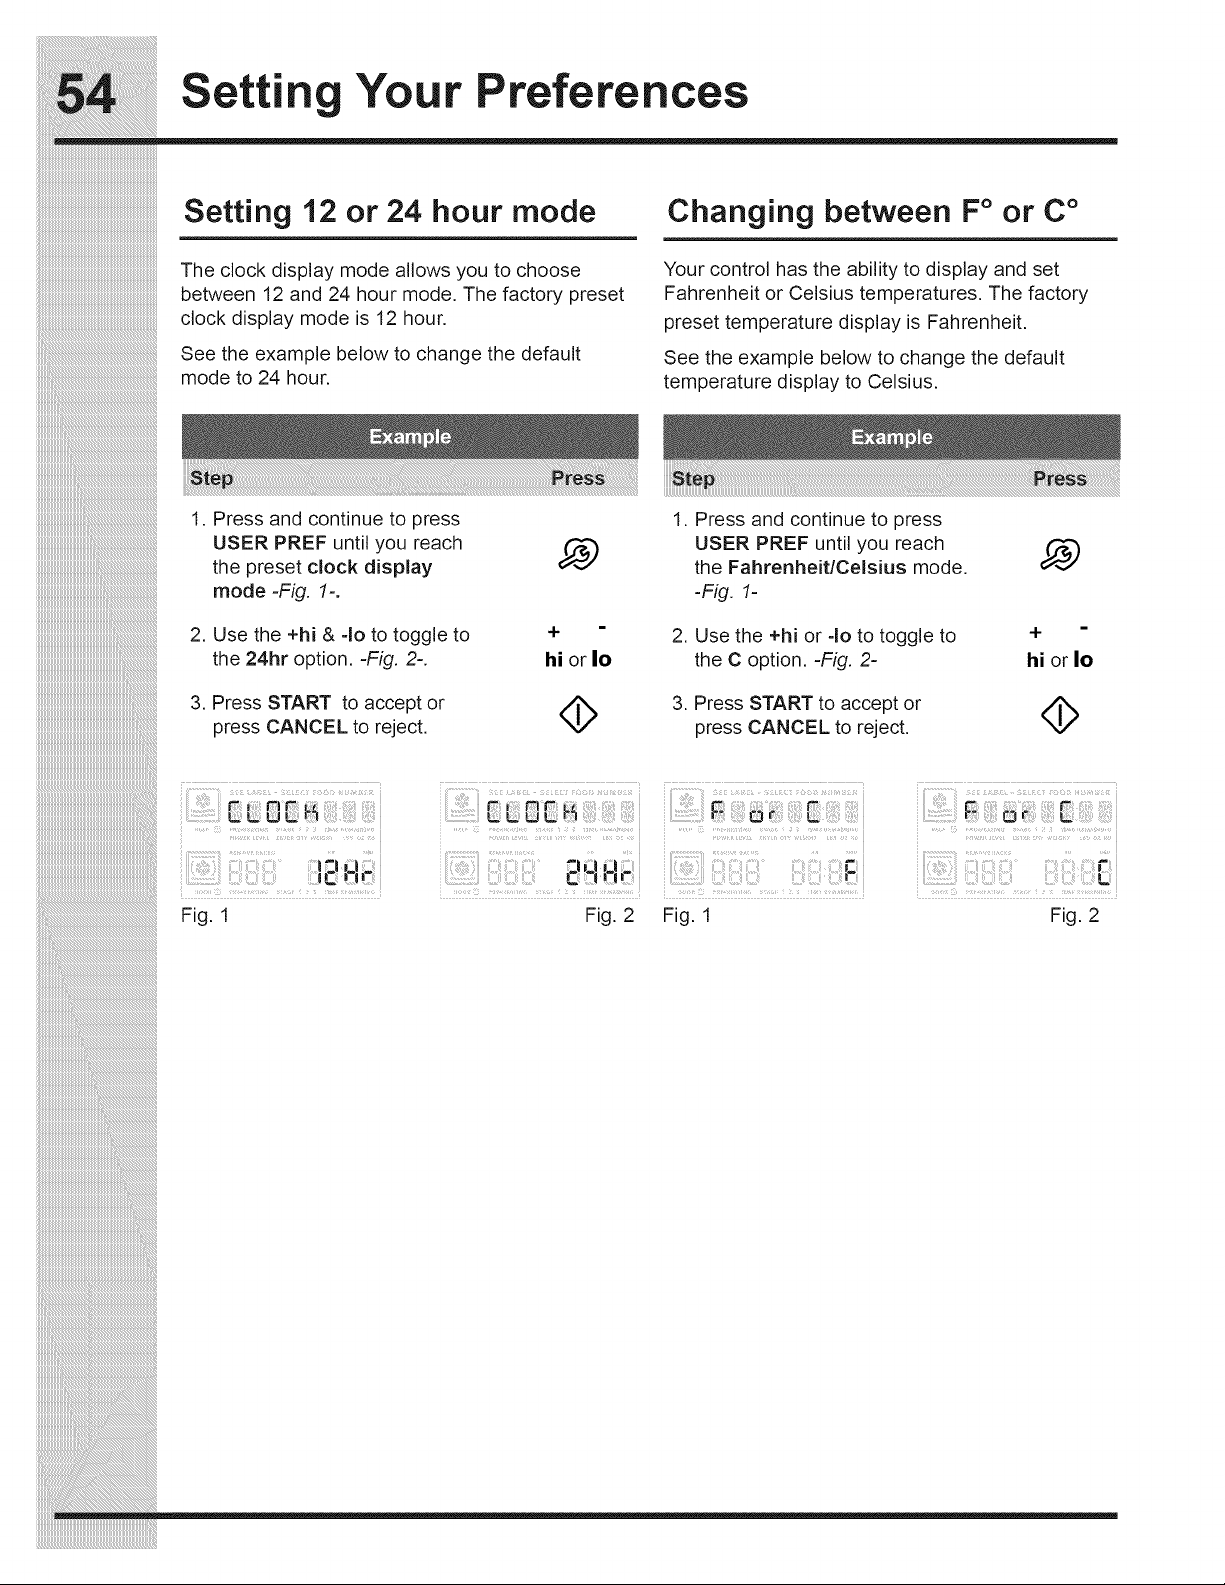
54
Setting Your Preferences
The clock display mode allows you to choose
between 12 and 24 hour mode. The factory preset
clock display mode is 12 hour.
See the example below to change the default
mode to 24 hour.
Fig. 1 Fig. 2
Setting 12 or 24 hour mode Changing between F° or C°
Your control has the ability to display and set
Fahrenheit or Celsius temperatures. The factory
preset temperature display is Fahrenheit.
See the example below to change the default
temperature display to Celsius.
Fig. 1 Fig. 2
Example
Step Press
1. Press and continue to press
USER PREF until you reach
the preset clock display
mode -Fig. 1-.
2. Use the +hi &-lo to toggle to
the 24hr option. -Fig. 2-.
or
3. Press START to accept or
press CANCEL toreject.
Example
Step Press
1. Press and continue to press
USER PREF until you reach
the Fahrenheit/Celsius mode.
-Fig. 1-
2. Use the +hi or -lo to toggle to
the C option. -Fig. 2-
or
3. Press START to accept or
press CANCELtoreject.
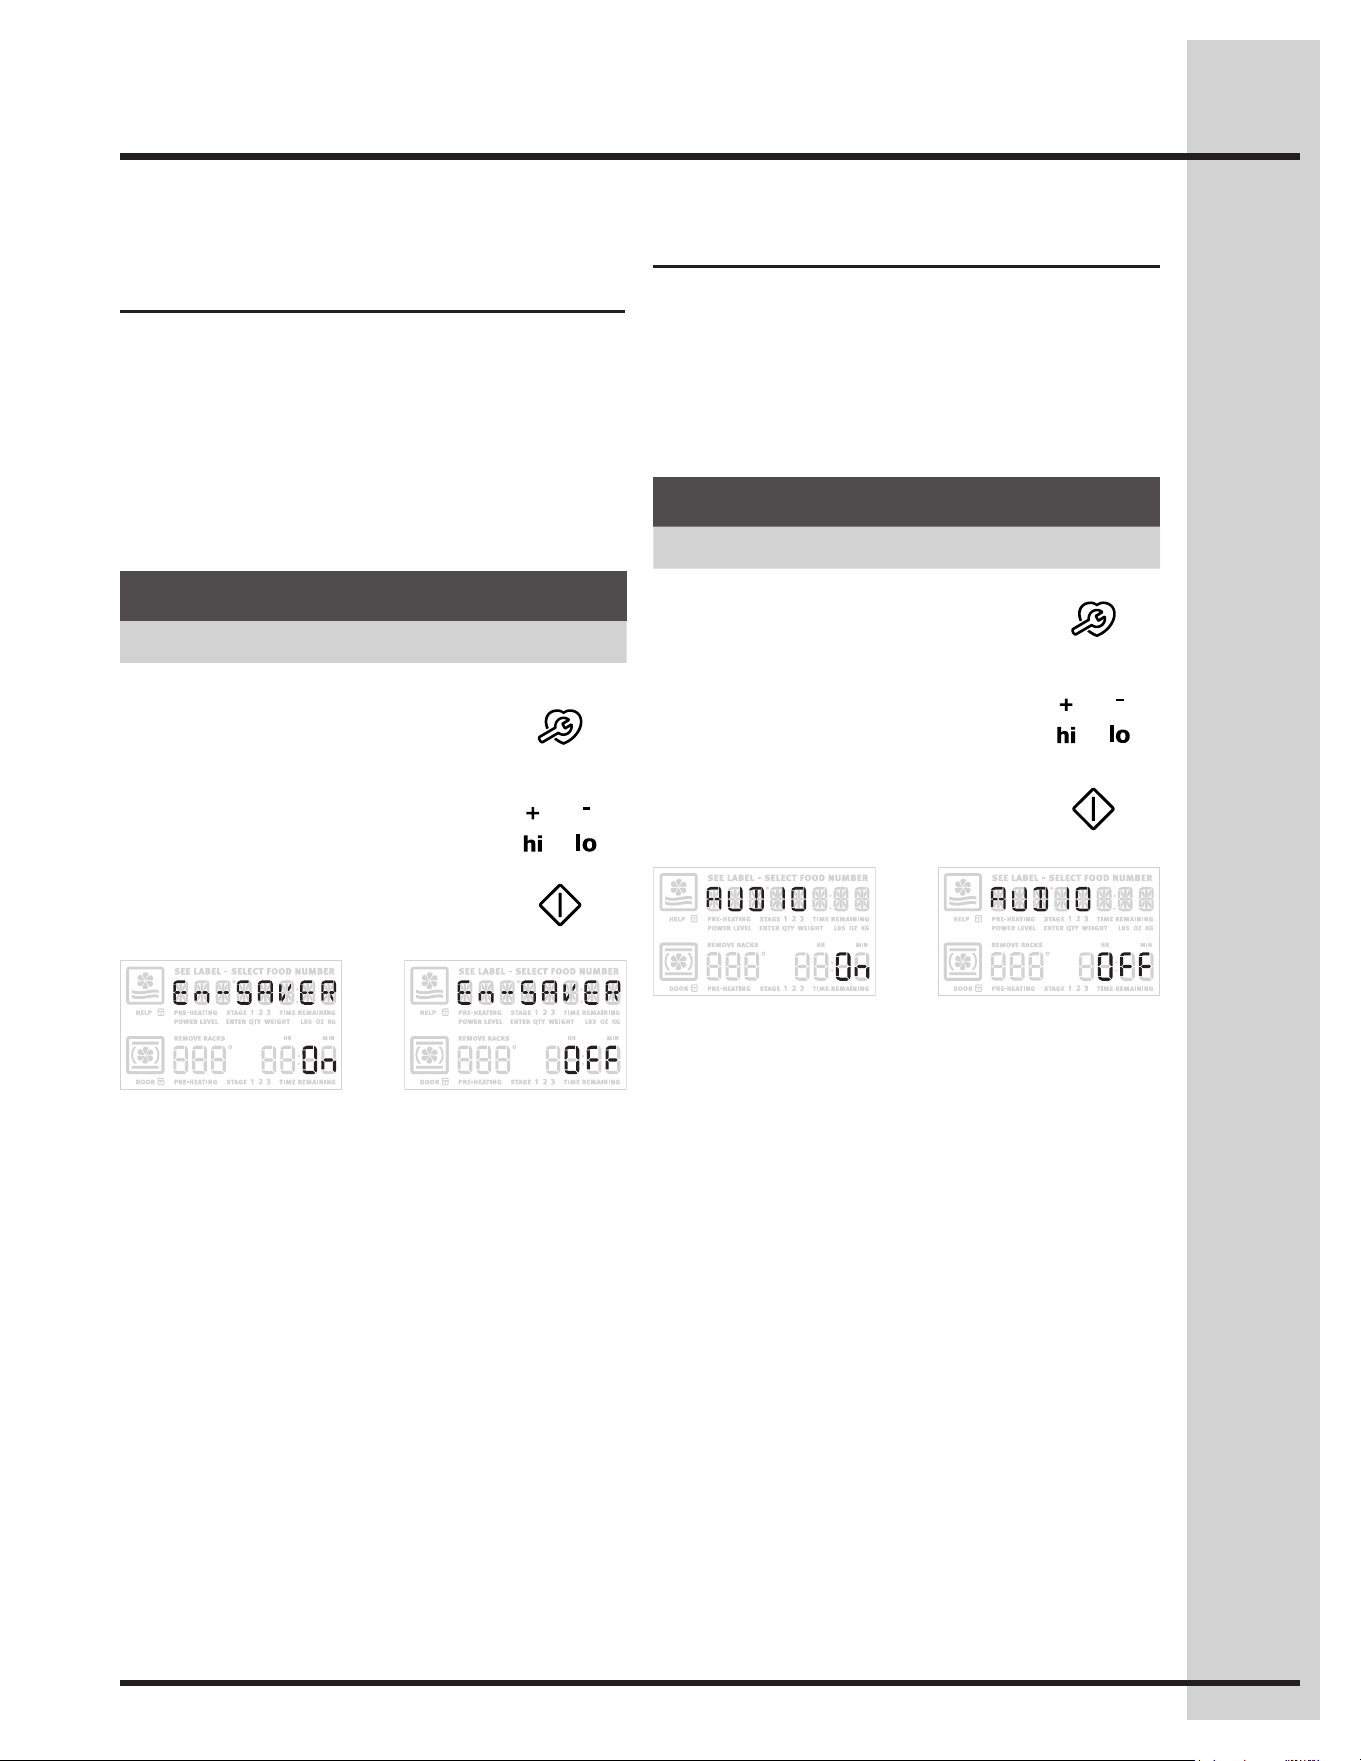
55
Setting Your Preferences
Setting 12hr energy saving
mode
The oven control has a factory preset built-in 12
hour energy saving feature that will shut off the
appliance if the oven has been heating for more
than 11 hours and 59 minutes. The oven can be
programmed to override this feature for continuous
baking.
See the example below to turn off 12 hour energy
saving mode.
Fig. 1 Fig. 2
Setting audio mode
The audio mode allows you to control the audio for
the oven control. You may turn the audio off and
later return to operating with all the normal audible
sounds and alerts.
See the example below when changing the audible
settings.
Fig. 1 Fig. 2
Example
Step Press
1. Press and continue to press
USER PREF until you reach
the preset 12hr energy
saving mode -Fig. 1-.
2. Use the +hi &-lo to toggle to
the off option -Fig. 2-.
or
3. Press START to accept or
press CANCEL toreject.
Example
Step Press
1. Press and continue to press
USER PREF until you reach
the pre-set audio mode.
2. Use the +hi or -lo to choose
the off option -Fig. 1- or the on
option -Fig. 2-.
or
3. Press START to accept or
press CANCELtoreject.
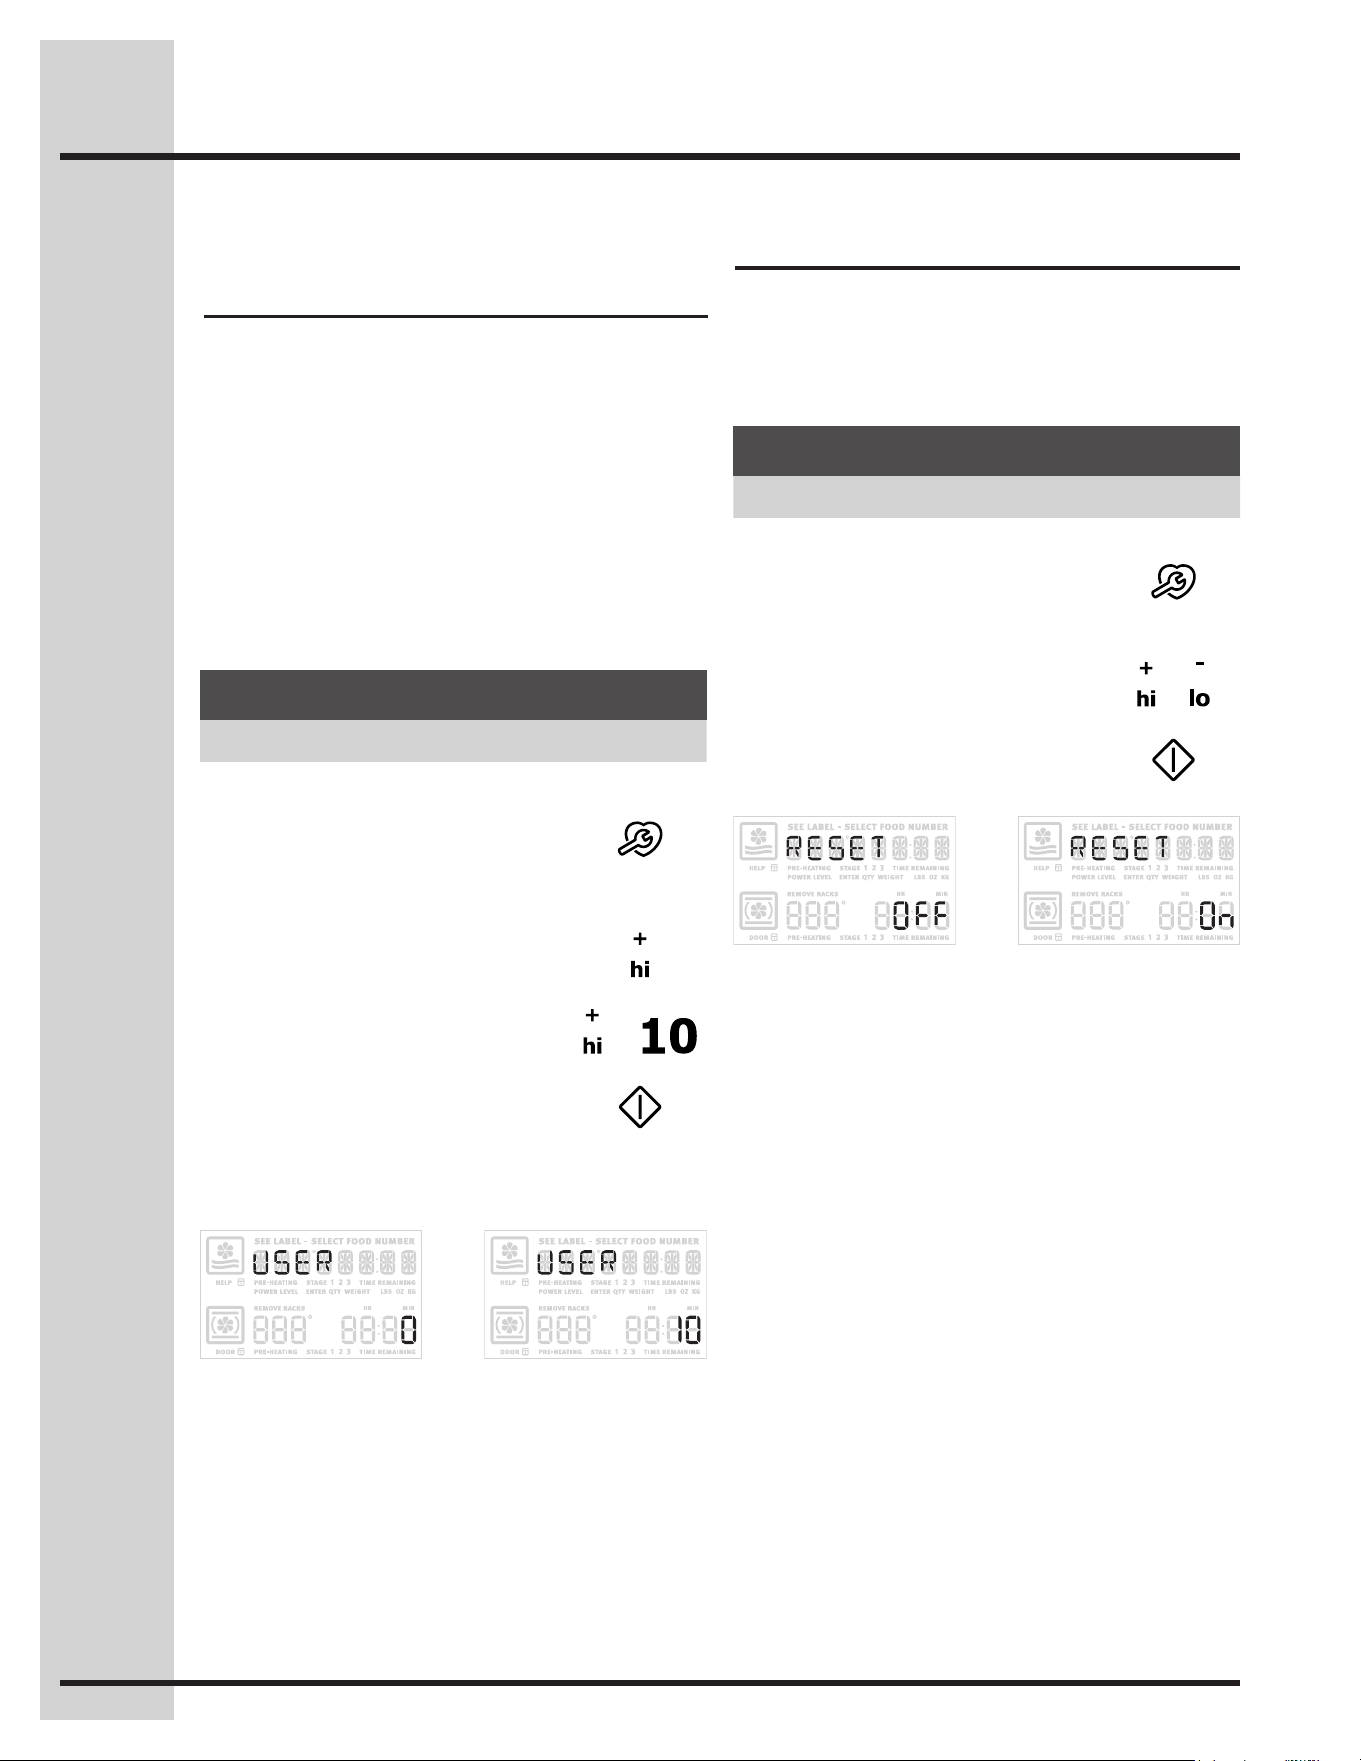
56
Setting Your Preferences
Adjusting oven temperature
User preference offset
Your appliance has been factory calibrated and
tested to ensure an accurate baking temperature.
Fortherstfewuses,followyourrecipetimesand
temperature recommendations carefully.
If you feel your oven is too hot or too cool from your
baking experience, the oven temperature may be
adjustedtoyourliking.Thetemperaturemaybe
increasedupto+35°F(+19°C)ordecreaseddown
to-35°F(-19°C)fromnormal.
See the example below to increase the
temperature in the lower oven.
To set the temperature lower
use the lo- key.
Example
Step Press
1. Press and continue to press
USER PREF until you reach
the user preference offset
mode
-Figs. 1-.
2. Press +hi toadjustthe
temperature higher. -Fig. 2-
3. Use +hi to advance to 10
-Fig. 2-.
or
4. Press START to accept or
press CANCEL toreject.
Factory default reset
You may choose to restore your factory settings.
This will erase all settings or favorites that you
have saved.
See the example below reset your control.
Fig. 1
Fig. 1
Fig. 2
Fig. 2
Example
Step Press
1. Press and continue to press
USER PREF until you reach
the factory default reset mode.
-Fig. 1-
2. Use the +hi or -lo to toggle to
the on option to reset -Fig. 1-.
or
3. Press START to accept or
press CANCEL toreject.
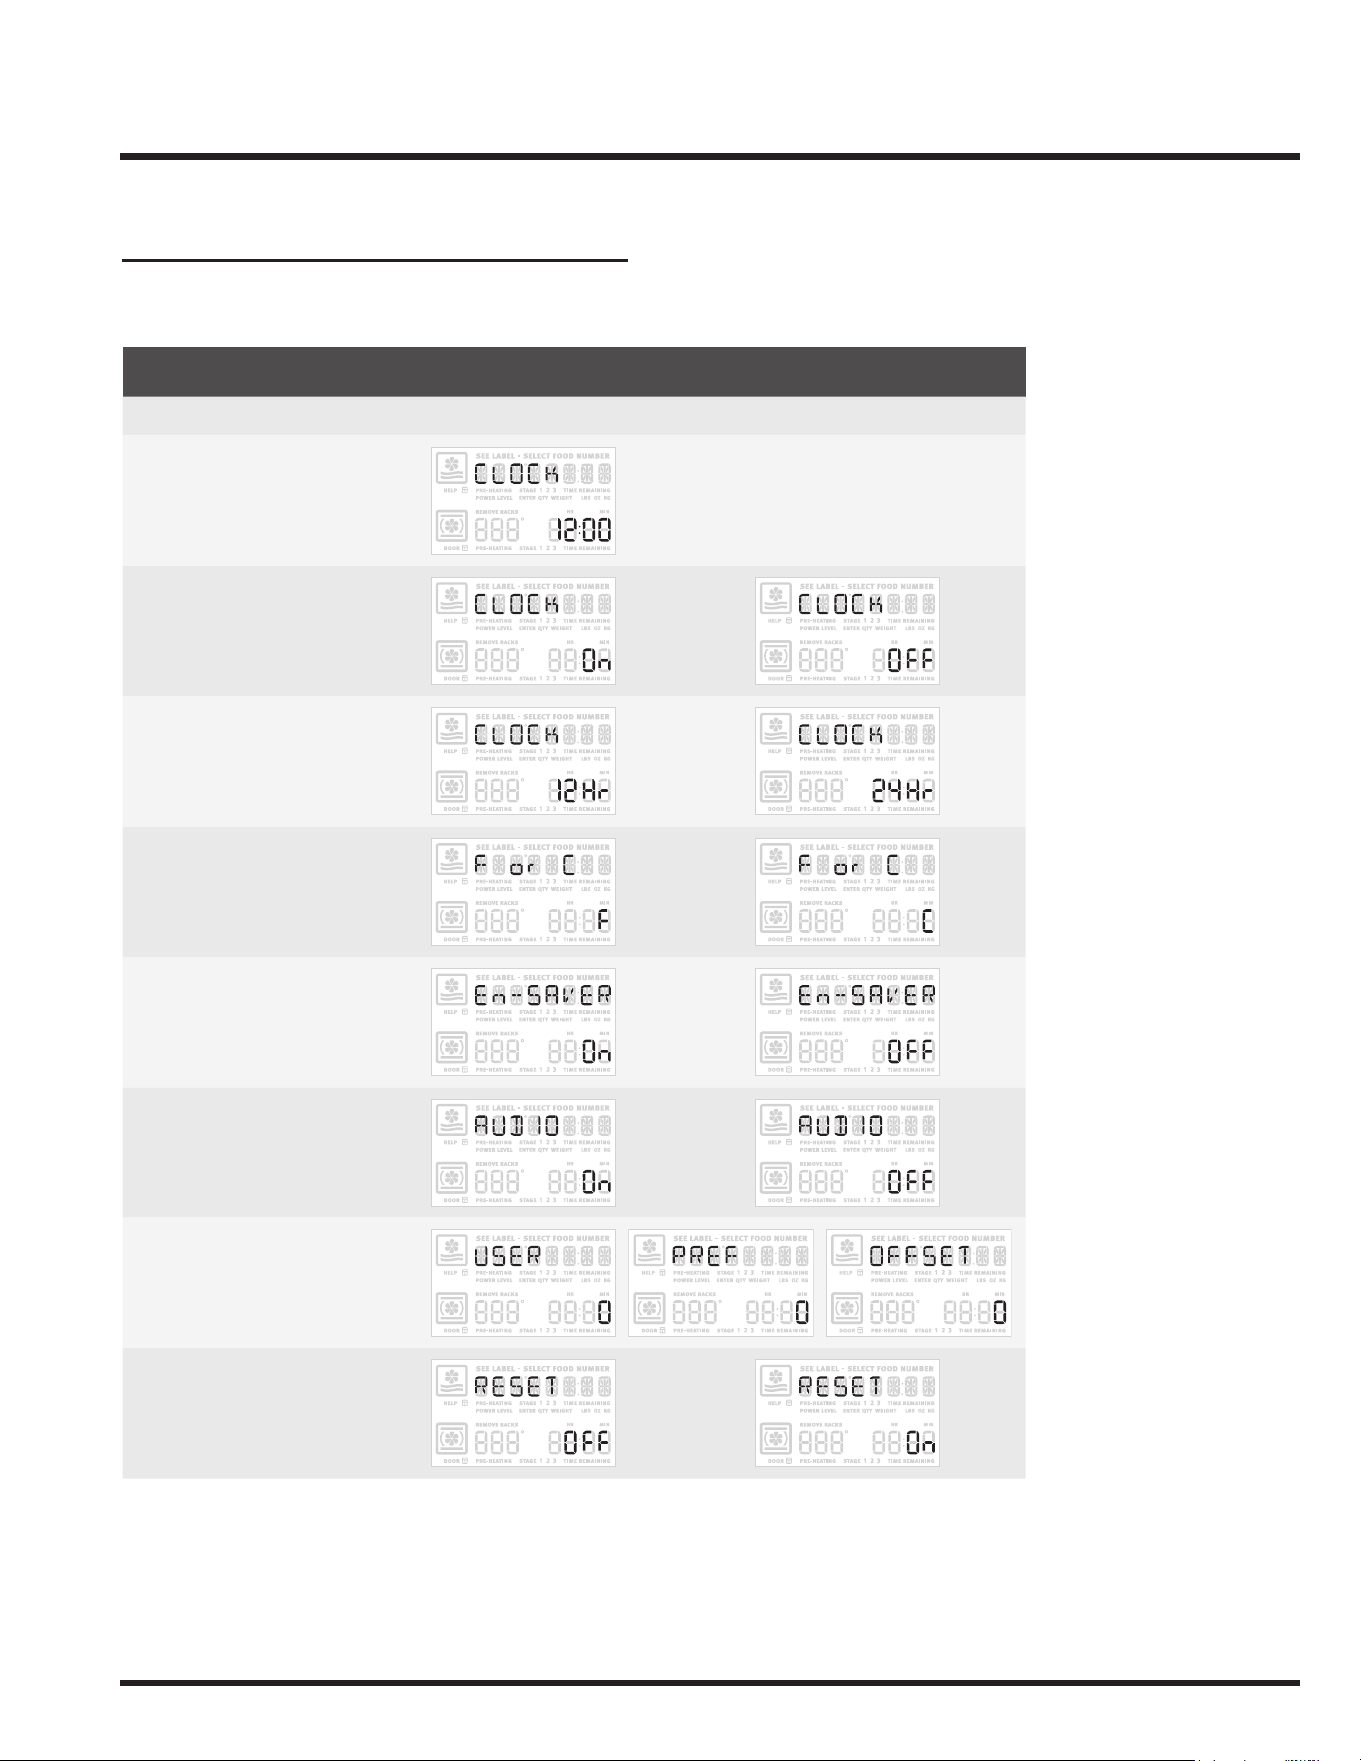
57
Setting Your Preferences
User preferences chart
The following chart will help you navigate through
the user preferences.
User Preferences Options
Preference 1st option 2nd option*
Setting clock
Clock display
12 or 24 hour mode
F° or C°
12hr energy save mode
Audio mode
UserProgrammableOffset
Reset to factory
pre-sets
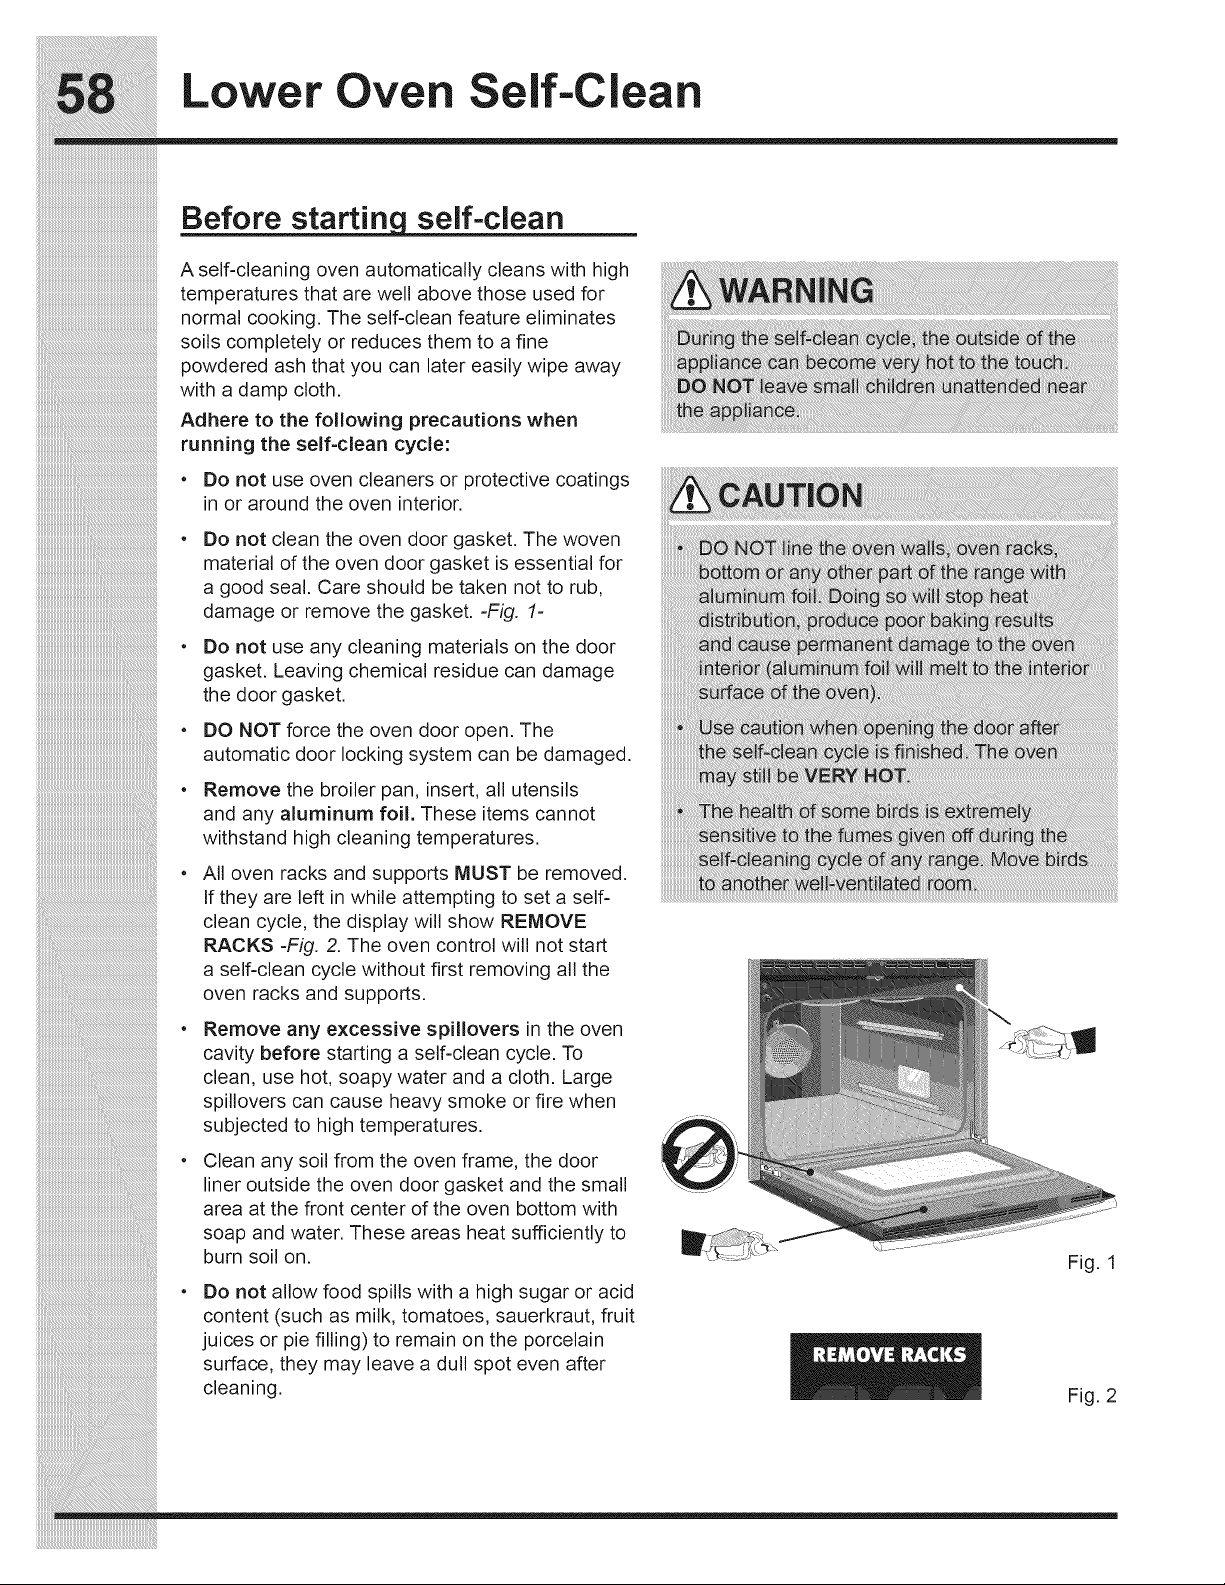
58
Lower Oven Self-Clean
• DONOTlinetheovenwalls,ovenracks,
bottom or any other part of the range with
aluminumfoil.Doingsowillstopheat
distribution, produce poor baking results
and cause permanent damage to the oven
interior(aluminumfoilwillmelttotheinterior
surfaceoftheoven).
• Usecautionwhenopeningthedoorafter
theself-cleancycleisnished.Theoven
may still be VERY HOT.
• Thehealthofsomebirdsisextremely
sensitive to the fumes given off during the
self-cleaningcycleofanyrange.Movebirds
to another well-ventilated room.
A self-cleaning oven automatically cleans with high
temperatures that are well above those used for
normal cooking. The self-clean feature eliminates
soilscompletelyorreducesthemtoane
powdered ash that you can later easily wipe away
with a damp cloth.
Adhere to the following precautions when
running the self-clean cycle:
• Do not use oven cleaners or protective coatings
in or around the oven interior.
• Do not clean the oven door gasket. The woven
material of the oven door gasket is essential for
a good seal. Care should be taken not to rub,
damage or remove the gasket. -Fig. 1-
• Do not use any cleaning materials on the door
gasket. Leavingchemicalresiduecandamage
the door gasket.
• DO NOT force the oven door open. The
automatic door locking system can be damaged.
• Remove the broiler pan, insert, all utensils
and any aluminum foil. These items cannot
withstand high cleaning temperatures.
• AllovenracksandsupportsMUST be removed.
If they are left in while attempting to set a self-
clean cycle, the display will show REMOVE
RACKS -Fig. 2. The oven control will not start
aself-cleancyclewithoutrstremovingallthe
oven racks and supports.
• Remove any excessive spillovers in the oven
cavity before starting a self-clean cycle. To
clean,usehot,soapywaterandacloth.Large
spilloverscancauseheavysmokeorrewhen
subjectedtohightemperatures.
• Cleananysoilfromtheovenframe,thedoor
liner outside the oven door gasket and the small
area at the front center of the oven bottom with
soapandwater.Theseareasheatsufcientlyto
burn soil on.
• Do not allow food spills with a high sugar or acid
content(suchasmilk,tomatoes,sauerkraut,fruit
juicesorpielling)toremainontheporcelain
surface, they may leave a dull spot even after
cleaning.
Before starting self-clean
Fig. 1
Duringtheself-cleancycle,theoutsideofthe
appliance can become very hot to the touch.
DO NOT leave small children unattended near
the appliance.
Fig. 2
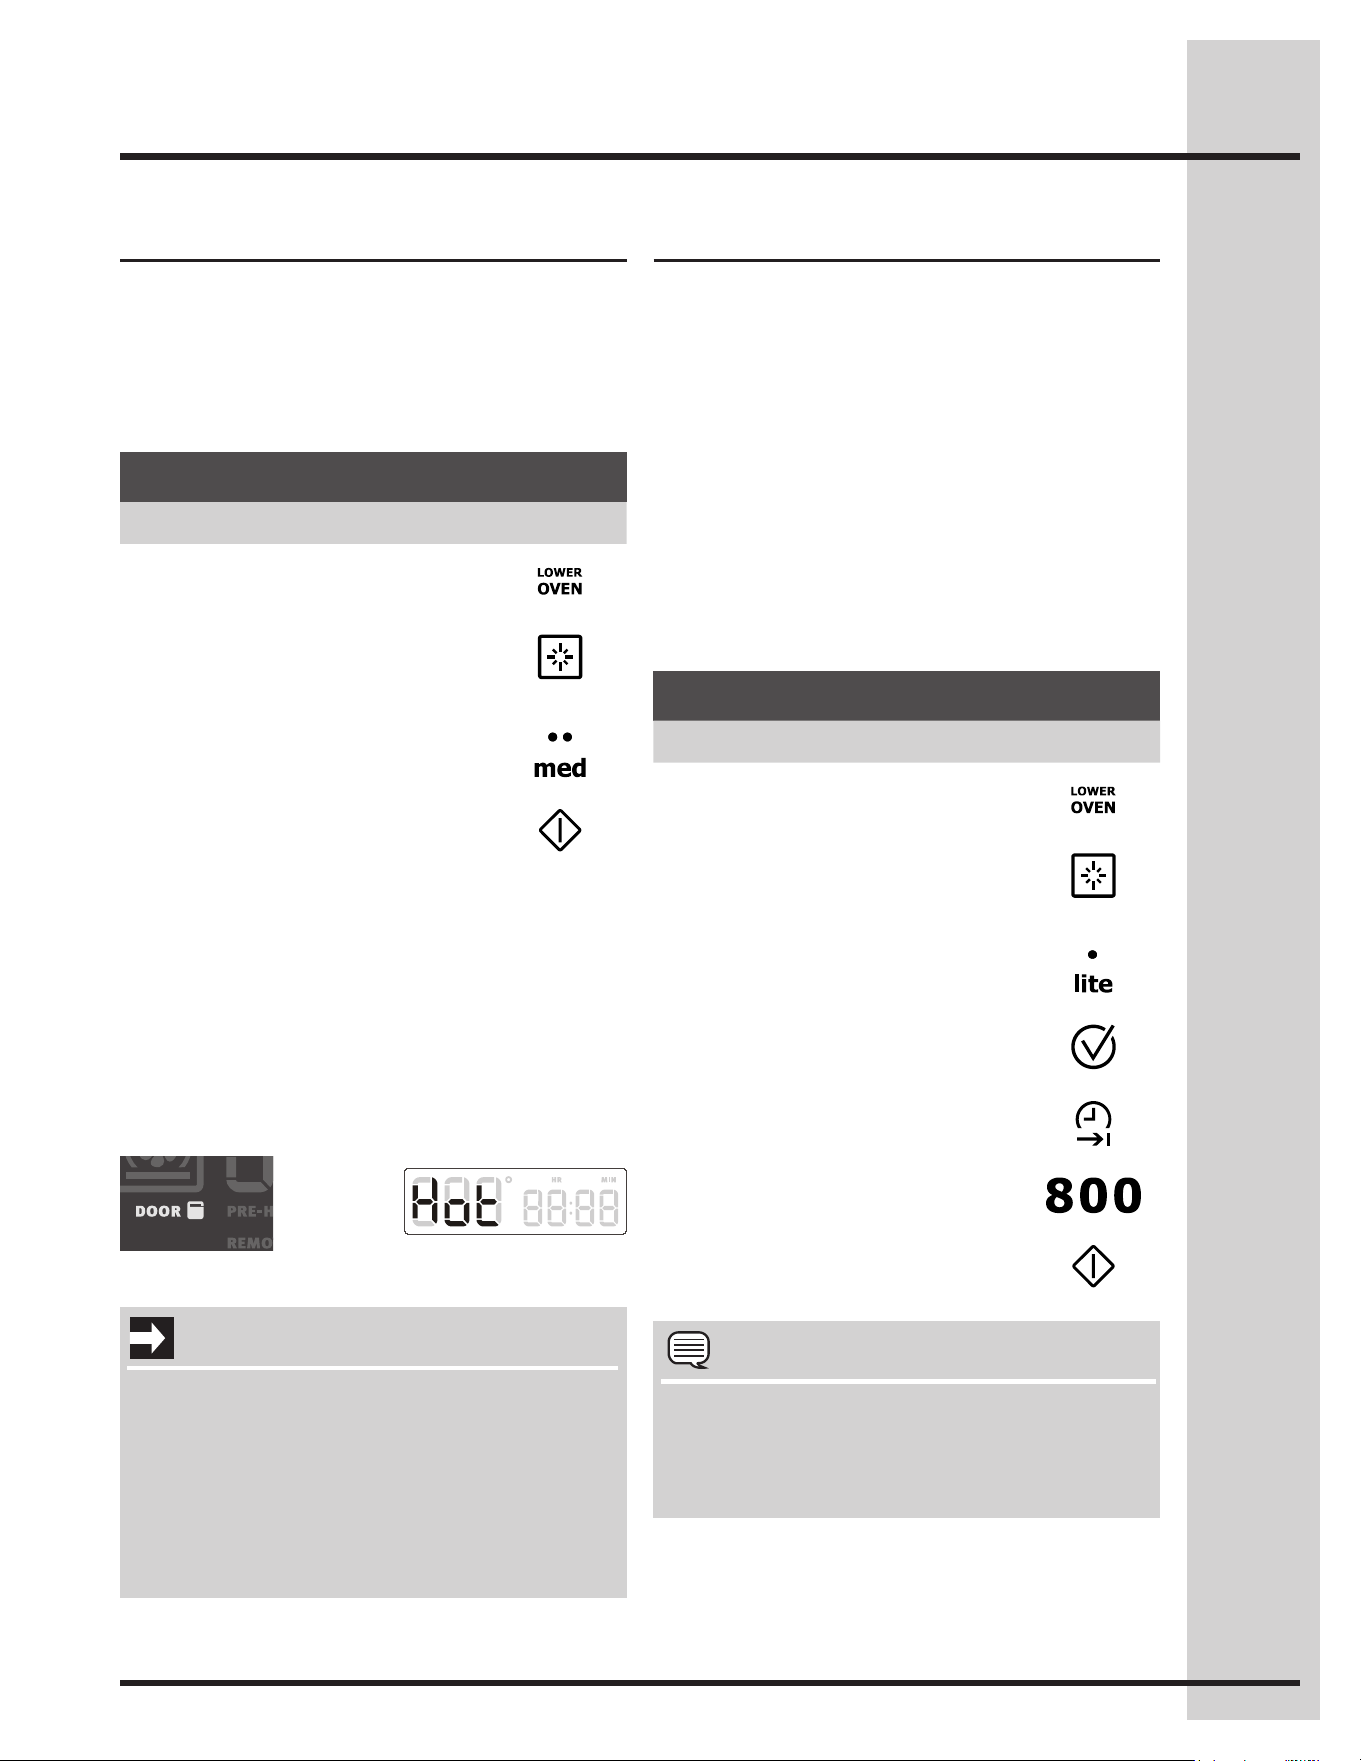
59
Lower Oven Self-Clean
Setting self-clean
The clean feature provides 3 different choices for
self-cleaning the lower oven. Set the clean for lite
(2hrs),med(3hrs)orheavysoils(4hrs).The
example below shows setting the lower oven for
self-cleantobeginimmediatelyusingamedium(3
hour)setting:
Setting delayed self-clean
You may wish to set your appliance to perform a
self-cleancyclesometimelater(upto12hours
later).TheEND TIME key will determine when the
cleaning will stop.
You will need to set the END TIME out far enough
to allow for the type of clean cycle you choose
(2-3-4hours).Remembertoadd30-40additional
minutes for the oven to cool enough and the oven
door to unlock.
The example below shows setting the lower oven
foralite(2hour)self-cleancycletoendat8:00
o’clock:
After pressing start, the motorized oven door latch
willautomaticallylockthedoor.TheDOORlock
iconwillash(Fig.1).Oncethedoorhaslocked
theDOORlockiconwillremainonthroughthe
entire self-clean cycle.
After self-clean, the oven may take about 30-40
minutes to cool and unlock. A Hotmessage(Fig.
2)willdisplayduringthisperiod.Duringcoolingthe
DOORlockiconwillashanddisappearindicating
that the door has unlocked.
IMPORTANT
• Aself-cleancyclewillnotstartiftheappliance
hastheCONTROLLOCKturnedon.
• Ifaself-cleancyclewasstartedbutdidnot
nishduetoapowerfailure,yourovenmay
not be completely cleaned. After power
has been restored and the oven door has
unlocked, set for another self-clean if needed.
Fig. 2
Fig. 1
Example
NOTES
• YoumaypressCANCELanytimeduringthe
cleaning process. After cancelling the self-
clean cycle, do not attempt to open the oven
dooruntiltheDOORlockiconturnsoff.
Example
Step Press
1. Remove racks and supports
and press LOWER OVEN
2. Press CLEAN
3. Select MED or
select lite or heavy
4. Press START
Example
Step Press
1. Remove racks and
press LOWER OVEN
2. Press CLEAN
3. Select LITE
4. Press COOK OPTIONS
5. Press END TIME
6. Enter 800
7. Press START
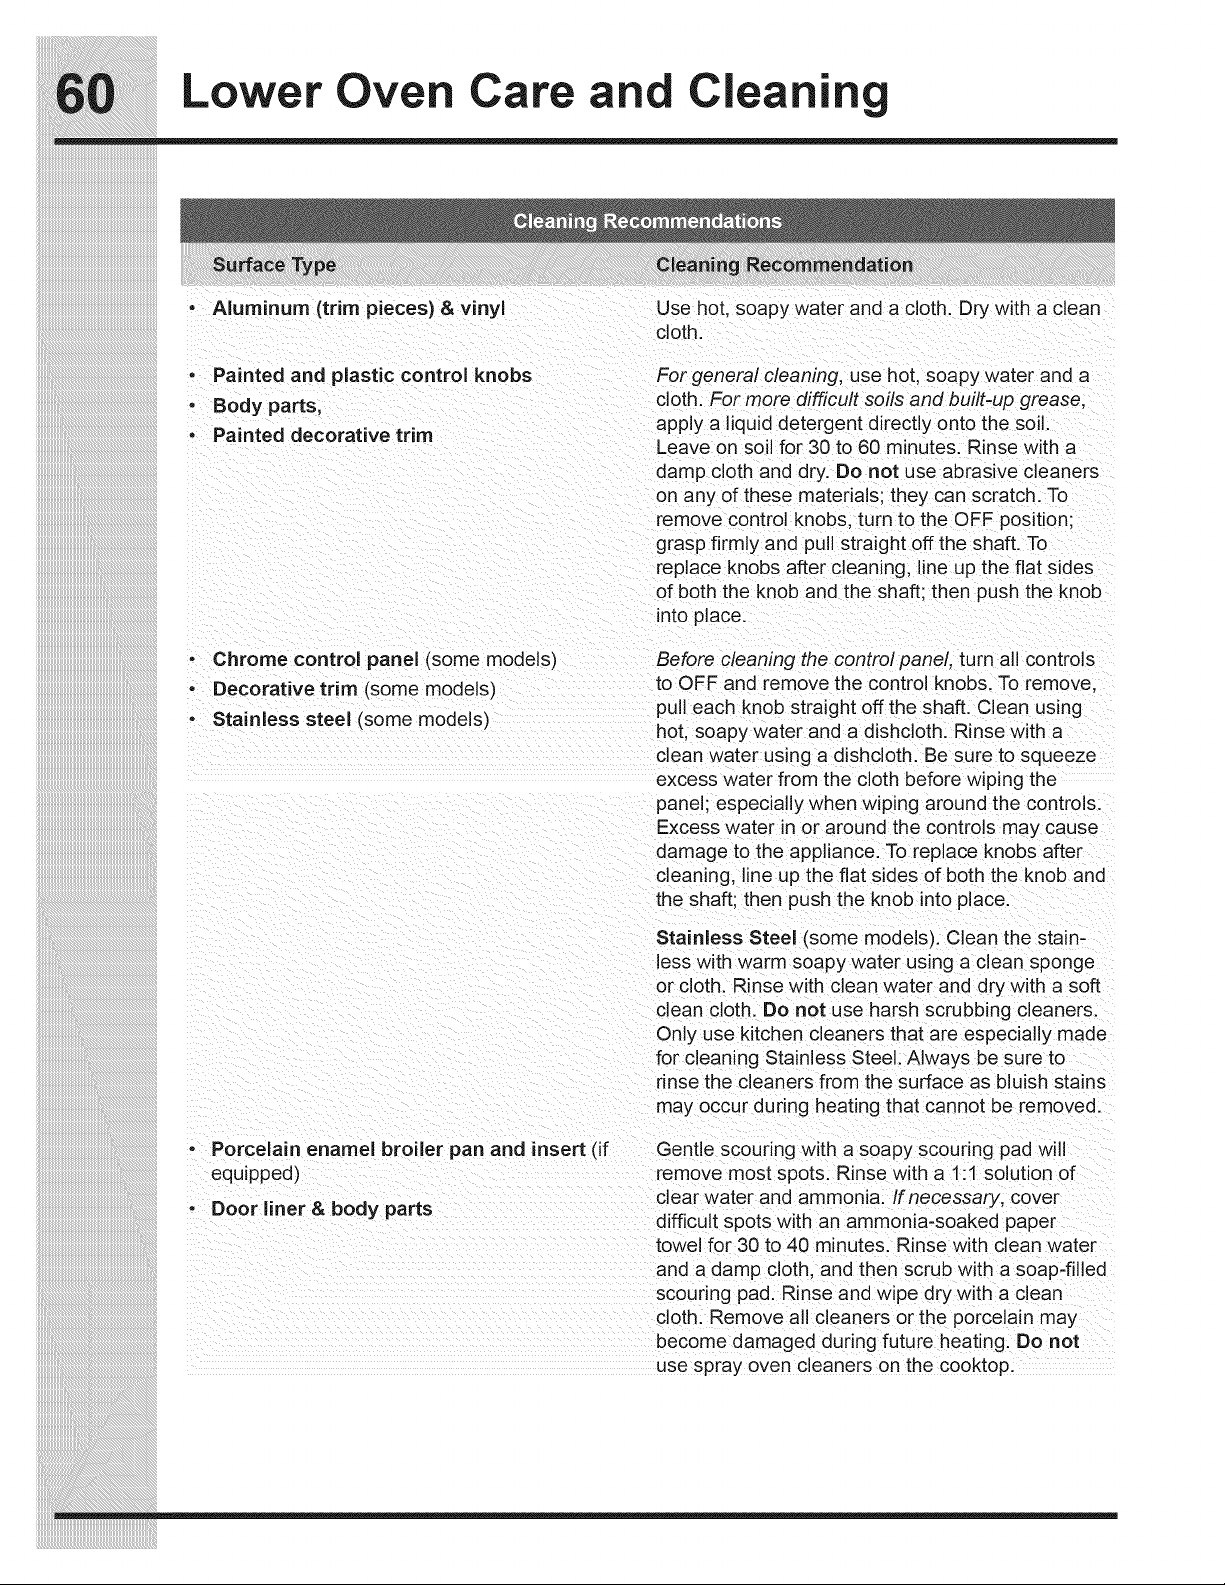
60
Lower Oven Care and Cleaning
Cleaning Recommendations
Surface Type Cleaning Recommendation
• Aluminum (trim pieces) & vinyl Usehot,soapywaterandacloth.Drywithaclean
cloth.
• Painted and plastic control knobs
• Body parts,
• Painted decorative trim
For general cleaning, use hot, soapy water and a
cloth. For more difcult soils and built-up grease,
apply a liquid detergent directly onto the soil.
Leaveonsoilfor30to60minutes.Rinsewitha
damp cloth and dry. Do not use abrasive cleaners
on any of these materials; they can scratch. To
removecontrolknobs,turntotheOFFposition;
grasprmlyandpullstraightofftheshaft.To
replaceknobsaftercleaning,lineuptheatsides
of both the knob and the shaft; then push the knob
into place.
• Chrome control panel (somemodels)
• Decorative trim(somemodels)
• Stainless steel (somemodels)
Before cleaning the control panel, turn all controls
toOFFandremovethecontrolknobs.Toremove,
pull each knob straight off the shaft. Clean using
hot, soapy water and a dishcloth. Rinse with a
cleanwaterusingadishcloth.Besuretosqueeze
excess water from the cloth before wiping the
panel; especially when wiping around the controls.
Excess water in or around the controls may cause
damage to the appliance. To replace knobs after
cleaning,lineuptheatsidesofboththeknoband
the shaft; then push the knob into place.
Stainless Steel(somemodels).Cleanthestain-
less with warm soapy water using a clean sponge
or cloth. Rinse with clean water and dry with a soft
clean cloth. Do not use harsh scrubbing cleaners.
Onlyusekitchencleanersthatareespeciallymade
for cleaning Stainless Steel. Always be sure to
rinse the cleaners from the surface as bluish stains
may occur during heating that cannot be removed.
• Porcelain enamel broiler pan and insert (if
equipped)
• Door liner & body parts
Gentlescouringwithasoapyscouringpadwill
remove most spots. Rinse with a 1:1 solution of
clear water and ammonia. If necessary, cover
difcultspotswithanammonia-soakedpaper
towel for 30 to 40 minutes. Rinse with clean water
andadampcloth,andthenscrubwithasoap-lled
scouring pad. Rinse and wipe dry with a clean
cloth. Remove all cleaners or the porcelain may
become damaged during future heating. Do not
use spray oven cleaners on the cooktop.

61
Lower Oven Care and Cleaning
Cleaning Recommendations
Surface Type Cleaning Recommendation
• Oven racks Oven racks must be removed. Clean by using
a mild, abrasive cleaner following manufacturer’s
instructions. Rinse with clean water and dry.
• Oven door Usesoap&watertothoroughlycleanthetop,
sides and front of the oven door. Rinse well. You
may use a glass cleaner on the outside glass
of the oven door. Do not immerse the door in
water. Do not spray or allow water or the glass
cleaner to enter the door vents.Donotuseoven
cleaners, cleaning powders or any harsh abrasive
cleaning materials on the outside of the oven door.
Do not clean the oven door gasket. The oven
door gasket is made of a woven material, on Self-
Cleaning models, which is essential for a good
seal. Care should be taken not to rub, damage or
remove this gasket.
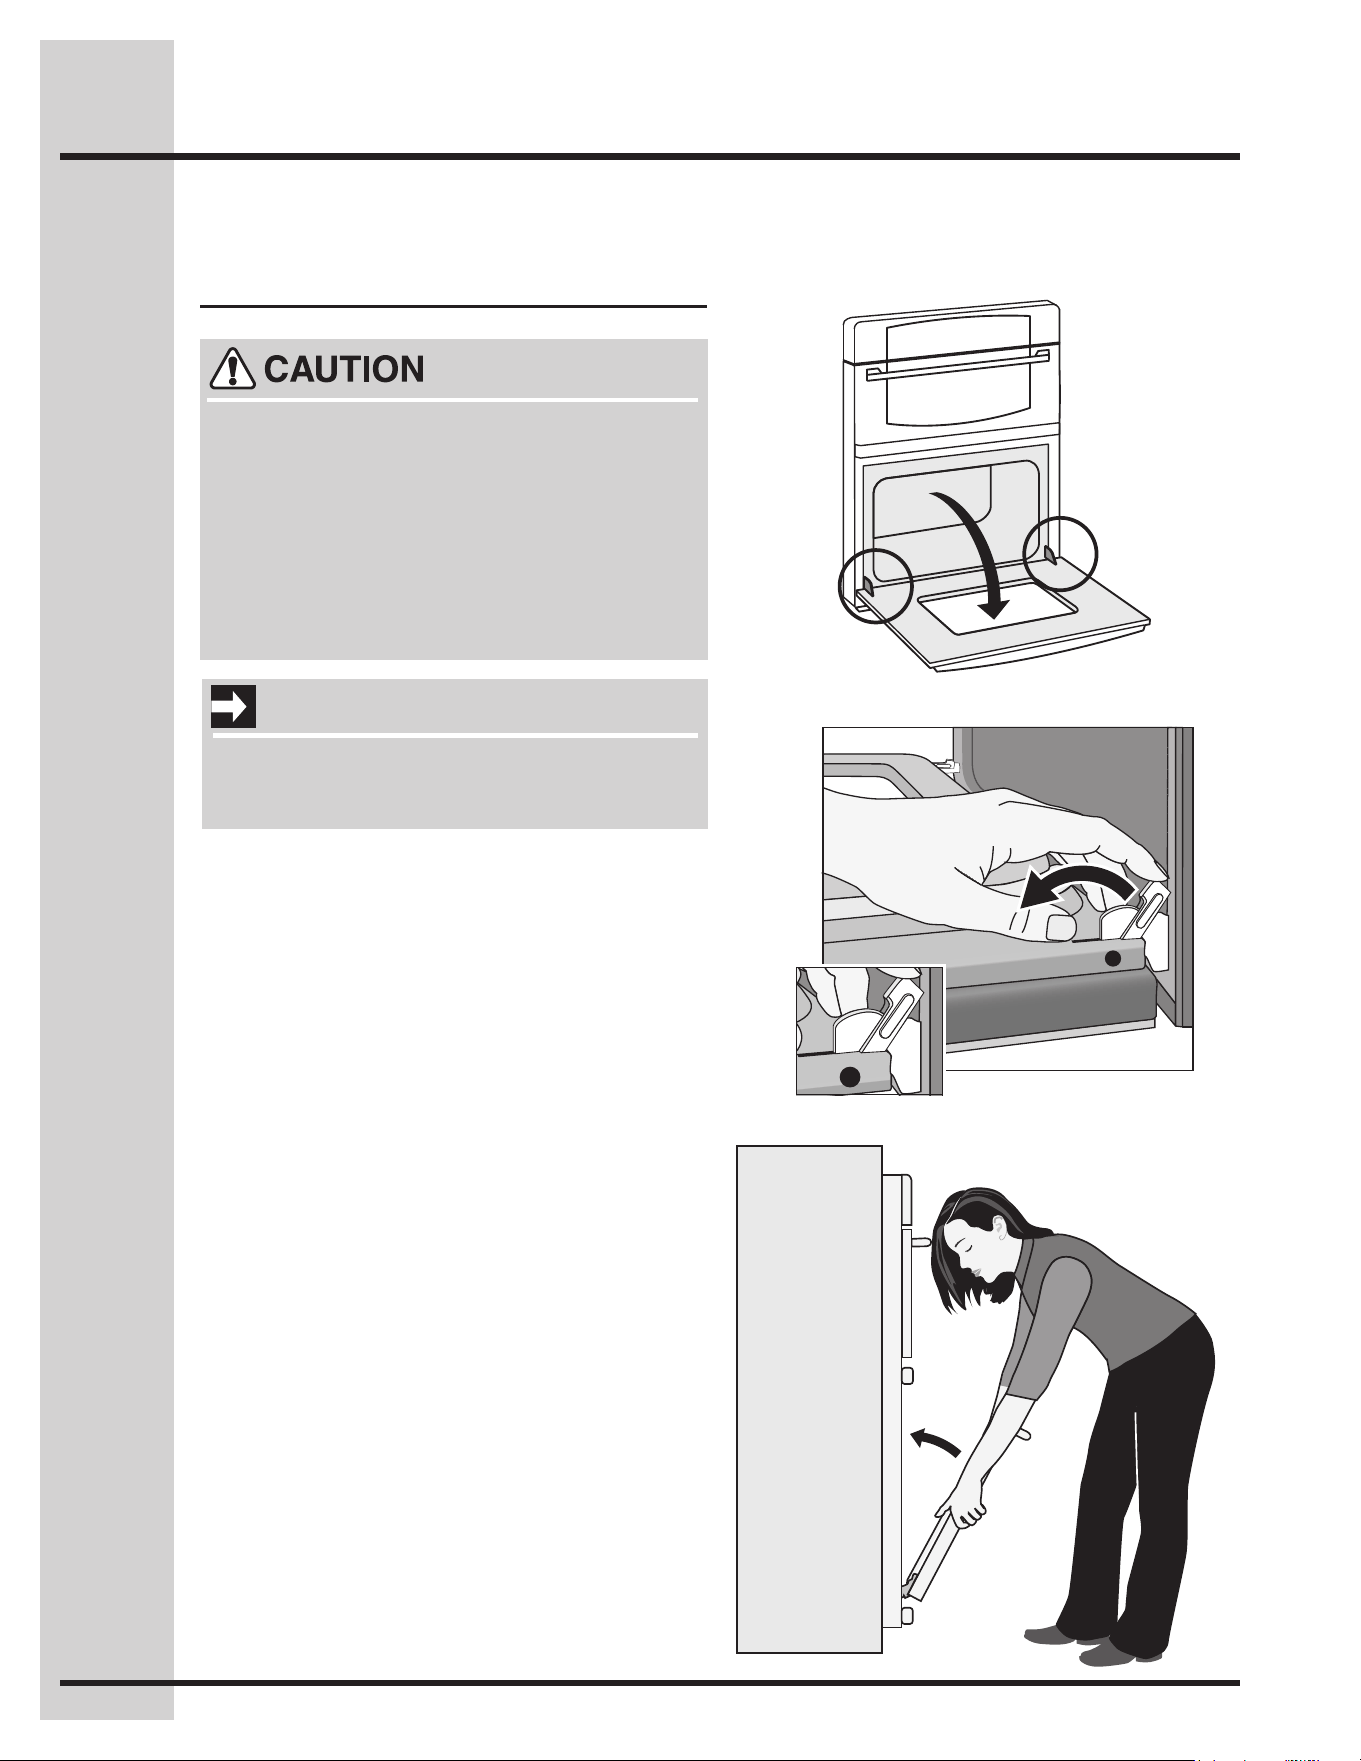
62
Lower Oven Care and Cleaning
1. Fully open the oven door -Fig. 1-.
2. Unlock both oven door hinge locks by pulling
them up and away from the oven frame until
theystop(unlockedposition)-Figs. 2-. If
neededuseasmallat-bladedscrewdriverto
assist with loosening the door hinge locks.
3. Firmly grasp both sides of oven door -Fig. 3-.
4. Beforecompletingthisstep,beprepared
to hold the whole weight of the door while
grasping the sides of the oven door with both
hands. Hold midway down the oven door sides.
Close the oven door to about 4 inches and
continue closing beyond the door stop position.
The oven door should release from the frame
on its own. -Fig. 3-.
5. Carefully lift door away evenly, slightly up and
out until both hinge arms are clear of the hinge
slots in the oven frame -Fig. 3- . After door has
beenremoved,besuretolaythedooratwith
theinsideofthedoordownward(neverrestthe
ovendoorwithanyweightonthedoorhandle).
To prevent possible burns, do not attempt •
to remove the oven door until the oven
has completely cooled.
To avoid possible injury to hands when •
removing or replacing the oven door,
follow the instructions below carefully
and always hold the oven door with hands
positioned away from the door hinge area
(See Fig. 3).
The oven door with Luxury-
Hold™ hinges
IMPORTANT
The oven door is heavy. Be careful when
removing and lifting the door. Do not lift the
oven door by the handle.
Fig. 2
Fig. 1
Fig. 3
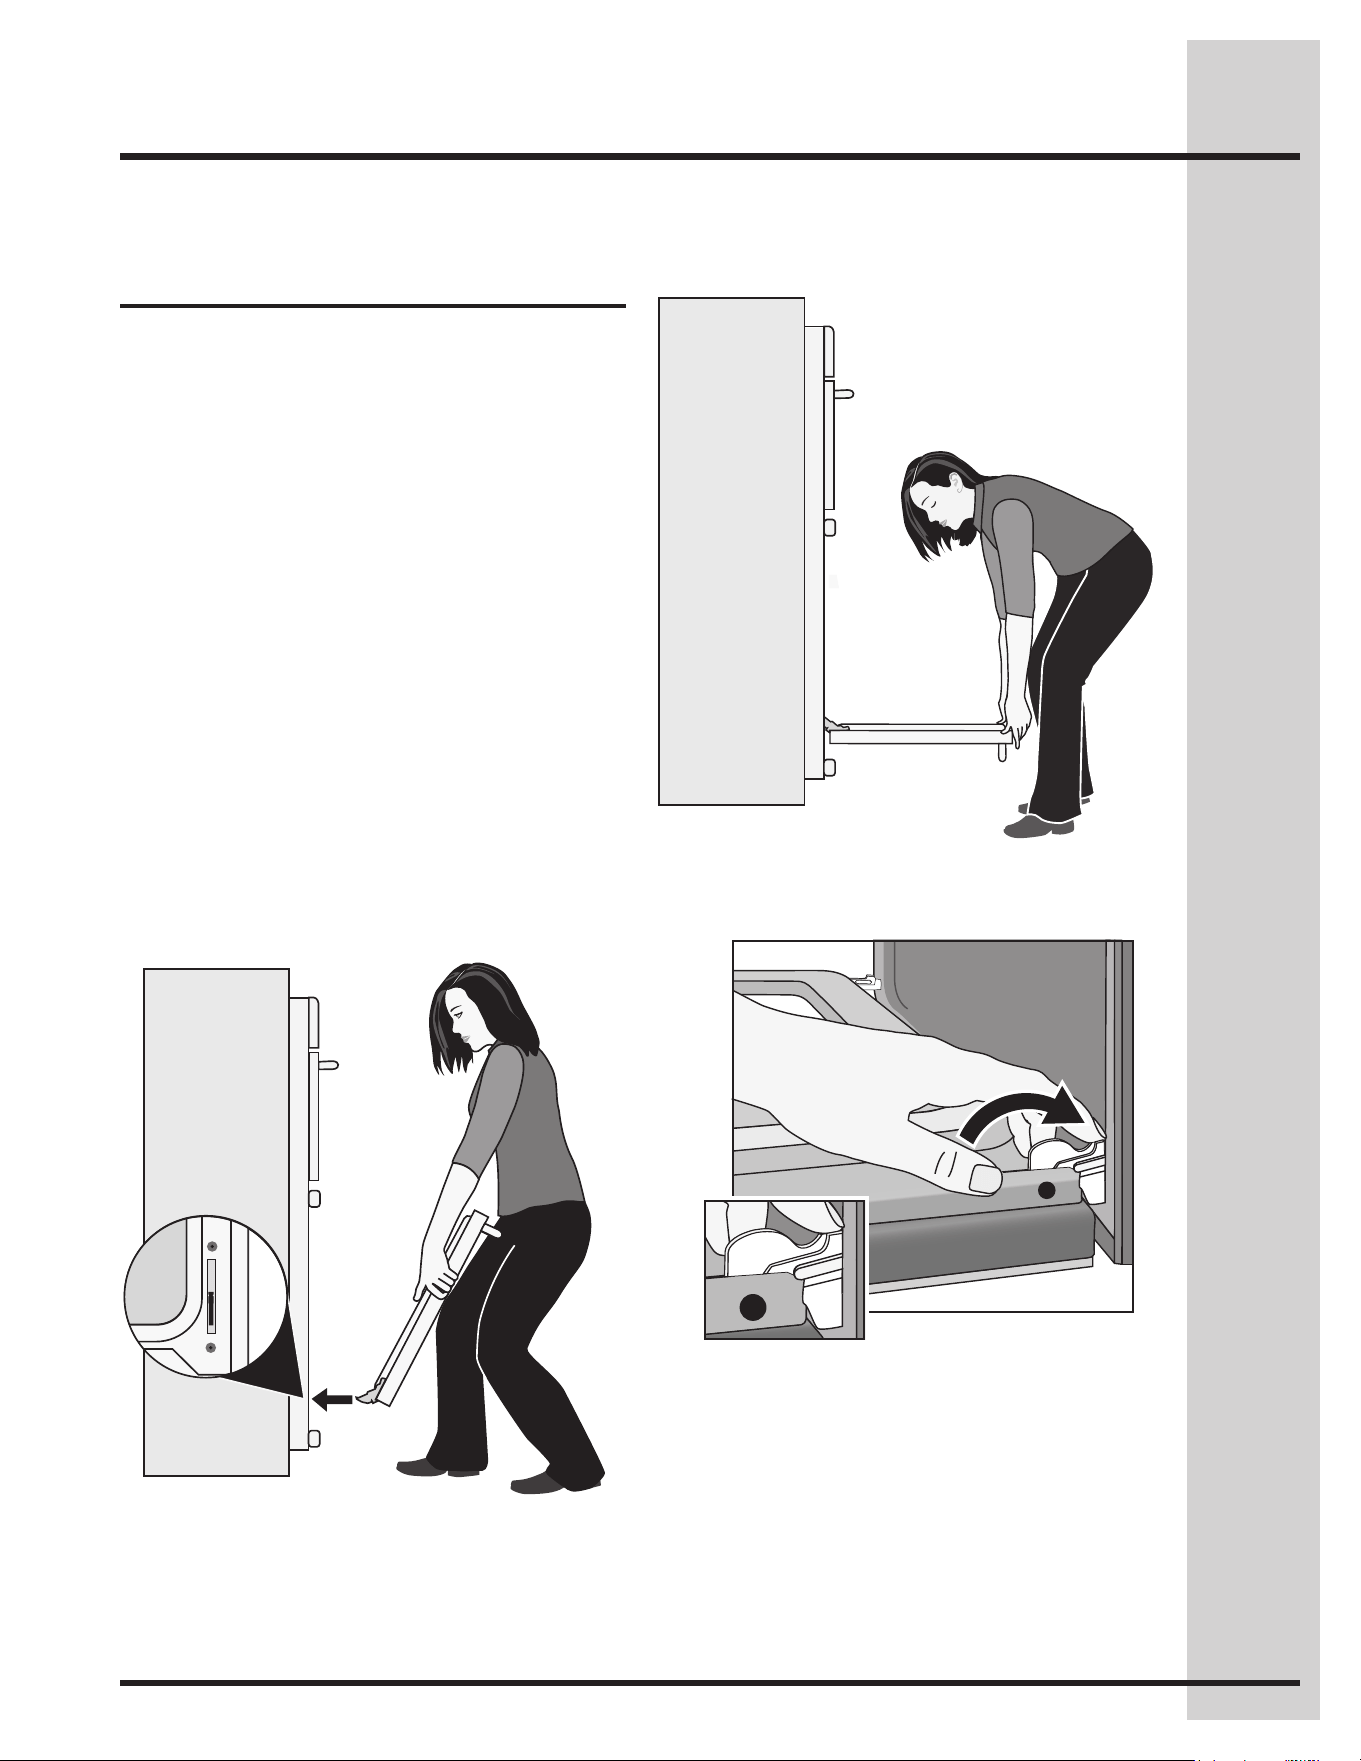
63
Lower Oven Care and Cleaning
To replace the Lift-Off oven door
1. Firmly grasp the oven door along both sides
justbelowthedoorhandle.Whenpositioning
the door hinge arms with the door hinge slots in
the oven frame, you may wish to use your knee
to stabilize the door before attempting to insert
the door hinge arms in the hinge slots -Fig. 1-.
2. Position the angle of the door to the door
removal angle and carefully insert the door
hinge arms fully and evenly into the door
hinge slots. Carefully let the weight of the door
transfer from your hands so that the oven now
supports the oven door.
3. Opentheovendoordowntothefullyopen
position -Fig. 2-.
4. With the door in the fully open position, push
both oven door hinge locks toward the oven
frame until they both are locked -Fig. 3-.
5. Close the oven door.
Fig. 1
Fig. 3
Fig. 2
The oven door with Luxury-
Hold™ hinges
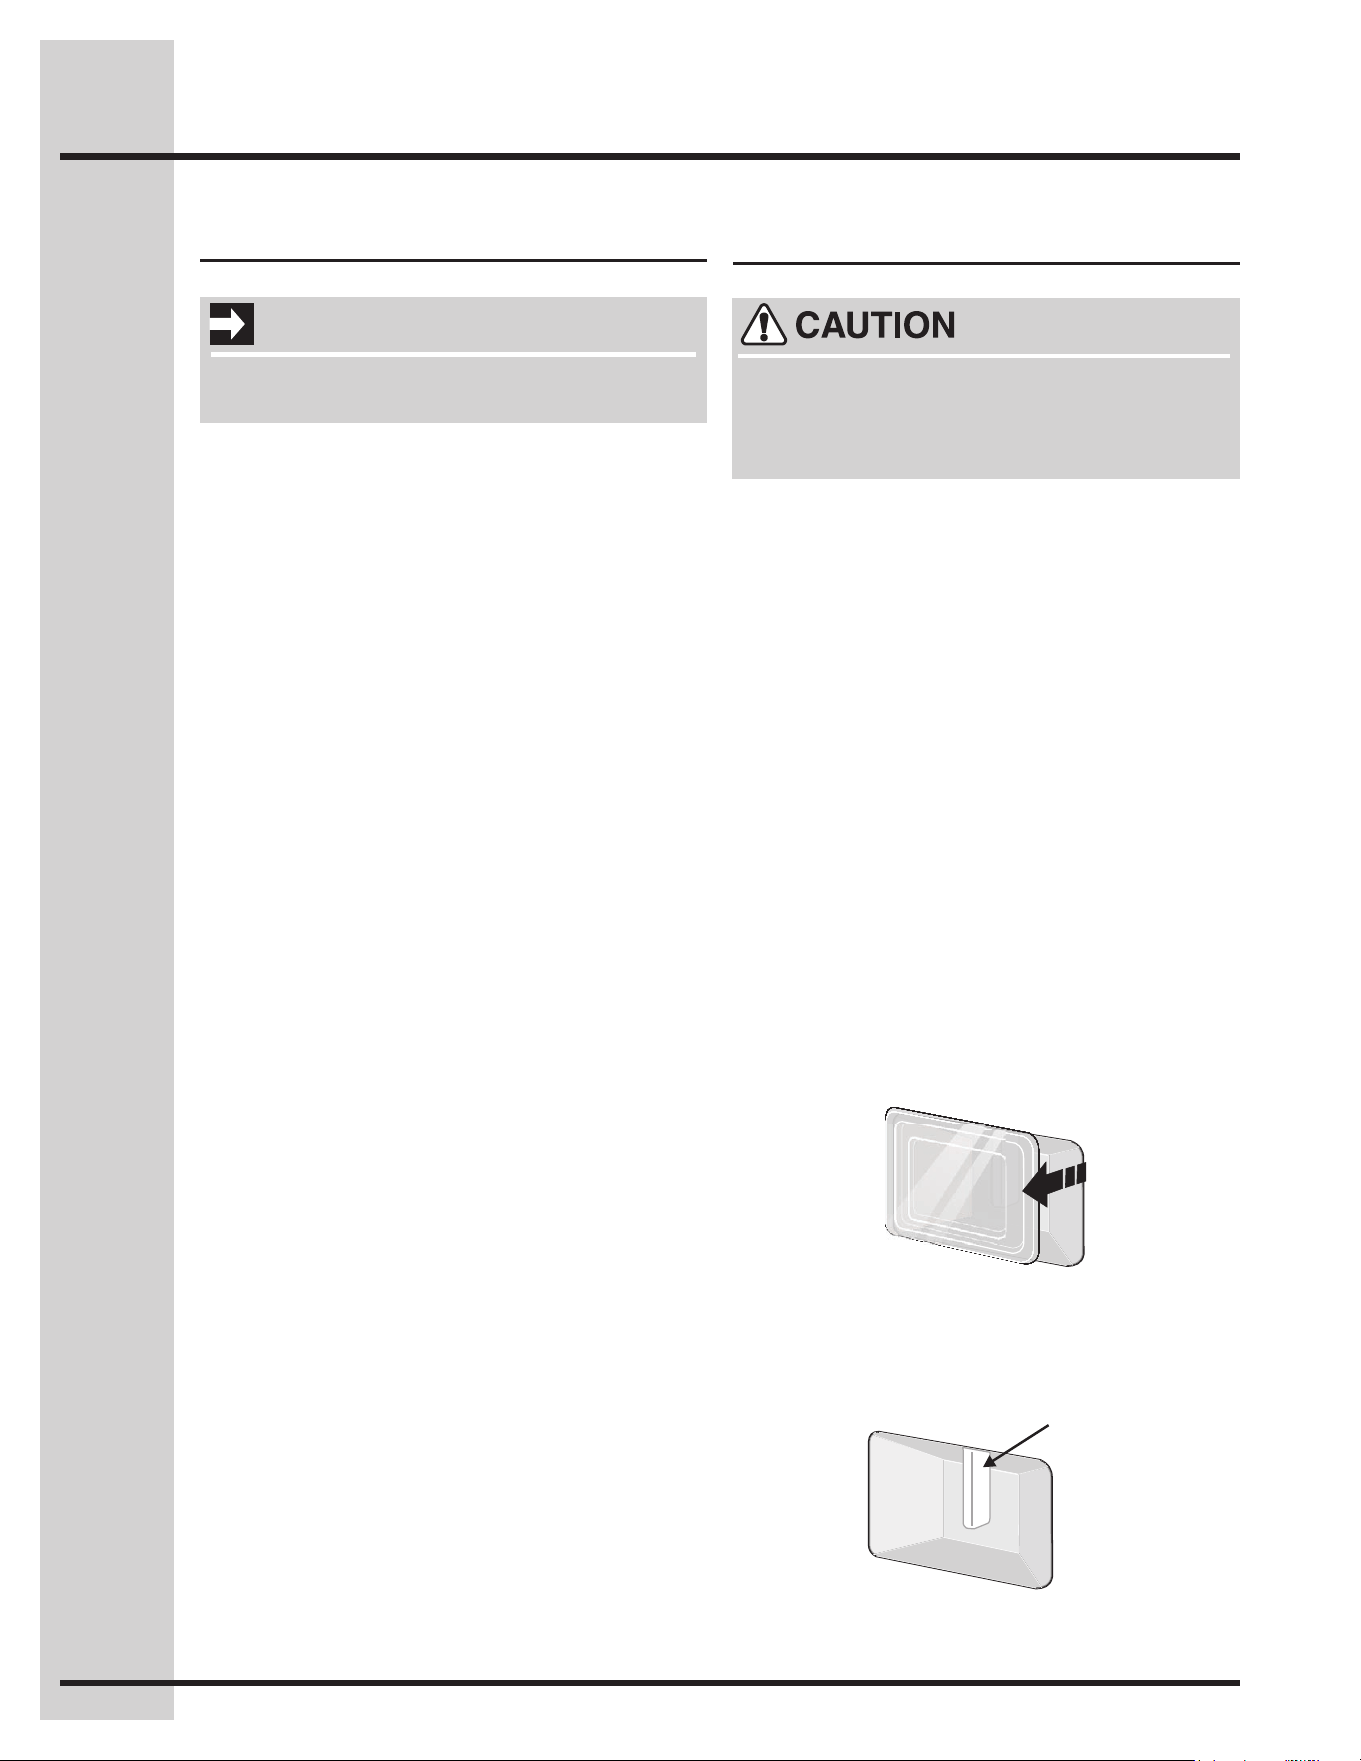
64
Lower Oven Care and Cleaning
• Do not close the oven door until all the interior
oven racks are fully inserted and retracted to
the back of the oven.
• Donothittheglasswithpots,pans,orany
otherobject.Theovendoorglassmaybreakor
even break at a later time unexpectedly.
• Scratching,hitting,jarringorstressingtheoven
door glass may weaken its structure causing
an increased risk of breakage at a later time.
• Youmayuseaglasscleanerontheoutside
of the oven door glass. Do not spray or allow
water or the cleaner to enter or drip down into
the oven door vents. Spray cleaner on cloth
rstandthenwipetheovendoorclean.
• Do not use strong oven cleaners, powders or
any harsh abrasive cleaning materials on the
outside of the oven door or glass.
• Never clean the oven door gasket. The oven
door gasket should always clean during the
Self-clean cycle.
Special door care instructions
IMPORTANT
Most oven doors contain glass that can
break. Read the following recommendations:
Changing lower oven lights
• Besuretherangeisunpluggedandallparts
areCOOLbeforereplacingovenlight.Wear
a leather-faced glove for protection against
possible broken glass or burns.
The lower oven light bulbs are located on both
side of the oven cavity and both are covered with
a glass shield. The glass shield must be in place
whenever the oven is in use.
Replacing the lower oven interior light bulbs:
1. Turn electrical power off at the main source or
unplug the appliance.
2. Remove lower oven interior light shield as
illustrated below.
3. Replace bulb with a new T-4 type 40 Watt
Halogen appliance bulb. Please note: do not
allowyourngerstotouchthenewbulbwhen
replacing. This will shorten the life of the new
bulb. Use a paper towel to cover the new bulb
when installing.
4. Replace glass shield over bulb.
5. Turn power back on again at the main source
(orplugtheappliancebackin).
6. The clock will then need to be reset.
Lift backside
of glass shield
and remove it.
Halogen
Light Bulb

65
Microwave Care and Cleaning
Exterior
Clean the outside with mild soap and water; rinse and
drywithasoftcloth.Donotuseanytypeofhousehold
or abrasive cleaner.
Door
Wipe the window on both sides with a damp cloth
toremoveanyspillsorspatters.Metalpartswillbe
easier to maintain if wiped frequently with a damp
cloth. Avoid the use of spray and other harsh cleaners
as they may stain, streak or dull the door surface.
Touch Control Panel
Care should be taken in cleaning the touch control
panel. If the control panel becomes soiled, open the
Microwave Oven door before cleaning. Wipe the
panel with a cloth dampened slightly with water only.
Drywithasoftcloth.Donotscruboruseanysort
of chemical cleaners. Close door and touch STOP/
CLEAR.
Interior
Cleaning is easy because little heat is generated to
the interior surfaces; therefore, there is no baking
and setting of spills or spattering. To clean the interior
surfaces,wipewithasoftclothandwarmwater.DO
NOTUSEABRASIVEORHARSHCLEANERSOR
SCOURINGPADS.Forheaviersoil,usebakingsoda
or a mild soap; rinse thoroughly with hot water. The
rack can be cleaned with hot soapy water, rinsed and
dried. NEVERSPRAYOVENCLEANERSDIRECTLY
ONTOANYPARTOFTHEMICROWAVEOVEN.
Waveguide Cover
The waveguide cover is made from mica so requires
special care. Keep the waveguide cover clean to
assure good oven performance. Carefully wipe with a
damp cloth any food spatters from the surface of the
coverimmediatelyaftertheyoccur.Built-upsplashes
may overheat and cause smoke or possibly catch fire.
Donotremovethewaveguidecover.
Odor Removal
Occasionally,acookingodormayremainintheoven.
To remove, combine 1 cup water, grated peel and
juiceof1lemonandseveralwholeclovesina2-cup
glassmeasuringcup.Boilforseveralminutesusing
100% power. Allow to set in oven until cool. Wipe
interior with a soft cloth.
Turntable/Turntable Support/Racks
The turntable, turntable support and racks can be
removed for easy cleaning. Wash them in mild,
sudsy water; for stubborn stains use a mild cleanser
and a non-abrasive scouring sponge. They are also
dishwasher-proof. Use top rack of dishwasher for
turntable support.
Foods with high acidity, such as tomatoes or lemons,
will cause the porcelain enamel turntable to discolor.
Donotcookhighlyacidicfoodsdirectlyontheturn-
table; if spills occur, wipe up immediately.
The turntable motor shaft is not sealed, so excess
water or spills should not be allowed to stand in this
area.
Disconnect the power cord before cleaning or leave the door open to inactivate the
oven during cleaning.

66
Solutions to Common Oven Problems
Before you call for service,reviewthefollowinglist.Itmaysaveyoutime&expense.Thelistincludes
common occurrences that are not the result of defective workmanship or materials in this appliance.
Questions or for service call: 1-877-4ELECTROLUX (1-877-435-3287)
Before you call
Problem Solution
Faulty Installation
• Placeovenrackincenterofoven.Placealevelon
the oven rack. Contact installing agent if rack and
cabinetcutoutooringarenotlevel.
• Kitchencabinetmisalignmentmaymakeoven
appeartobenotlevel.Besurecabinetsaresquare
and level. Contact cabinet maker to correct problem.
Entire appliance does not operate
• Thetimeofdayisnotset.Thetimeofdaymustrst
be set in order to operate the oven. See “Setting
clockatpowerup”intheGetting Started section.
• Besureelectricalcordissecurelyconnectedintothe
electricaljunctionbox.
• Cord/plugisnotinstalledand/orconnected.Cord
is not supplied with oven. Contact your dealer,
installing agent or authorized servicer.
• Servicewiringisnotcomplete.Contactyourdealer,
installing agent or authorized service agent.
• Electricalpoweroutage.Checkhouselightstobe
sure. Call your local electric company for service.
• Shortincord/plug.Replacecord/plug.
• Controlsarenotsetproperly.Seeinstructionstoset
the controls.
• Housefusehasblownorcircuitbreakerhastripped
immediately following installation.
• Housefusemaynotbefullyengaged.Checkfuseand
screw or engage circuit breaker securely.
Oven does not operate
• Besuretheovencontrolsaresetproperlyforthe
desired cooking feature. See Setting Lower Oven
ControlsinthisUse&CareGuideorreadthe
instructions “Entire appliance does not operate”in
this checklist.
Oven light does not work
• Replaceortightenbulb.See“Changing lower oven
lights”sectionsinthisUse&CareGuide.
Self-cleaning cycle does not work
• Makesuretheovendoorisclosed.
• Makesureyouhaveremovedtheovenracksand
the oven rack supports from the oven.
• Controlsnotsetproperly.Followinstructionsunder
“UsingtheSelf-CleanFeature”.
Flames inside oven or smoking from
oven vent
• Excessivespilloversinoven.Forexamplethiswill
happen for pie spillovers or large amounts of grease
left on the oven bottom. Wipe up excessive spillovers
beforestartingoven.Ifamesorexcessivesmoke
arepresentsee“Aboutbroiling”intheSetting
Lower Oven Controls section.

67
Solutions to Common Oven Problems
Questions or for service call: 1-877-4ELECTROLUX (1-877-435-3287)
Before you call
Problem Solution
Soil not completely removed after
self-cleaning cycle is completed
• Failure to clean bottom, from top of oven, frame of
oven or door area outside oven seal. These areas
are not in the self-cleaning area, but get hot enough
to burn on residue. Clean these areas before the
self-cleaningcycleisstarted.Burnedonresiduecan
be cleaned with a stiff nylon brush and water or a
nylonscrubber.Becarefulnottodamagetheoven
gasket.
• Excessive spillovers in oven. Set the self-clean cycle
for longer cleaning time.
Oven smokes excessively during
broiling
• Controlnotsetproperly.Followbroilinginstructions
under Setting Oven Controls.
• Meattooclosetothebroilelement.Repositionthe
broil rack to provide proper clearance between the
meat&theelement.Preheatthebroilelementfor
searing.
• Meatnotproperlyprepared.Removeexcessfatfrom
meat. Cut remaining fatty edges to prevent curling,
but do not cut into lean.
• Insertonbroilerpanwrongsideup&greasenot
draining. Always place grid on the broiler pan with
ribsup&slotsdowntoallowgreasetodripintopan
(somemodels).
• Greasehasbuiltuponovensurfaces.Regular
cleaningisnecessarywhenbroilingfrequently.Old
grease or food spatters cause excessive smoking.
Oven control panel beeps &
displays any F code error (for
example F10)
• Ovencontrolhasdetectedafaultorerrorcondition.
Press CANCELtoclearthedisplay&stopbeeping.
Try the bake or broil feature again. If the F code error
repeats, remove power supply to appliance, wait
5 minutes and then repower the appliance and set
clock for the time of day. Try the bake or broil feature
again. If the fault recurs, record fault and call for
service.
Poor baking results
• Manyfactorsaffectbakingresults.Makesurethe
proper oven rack position is used. Center food in the
oven and space pans to allow air to circulate. Allow
the oven to preheat to the set temperature before
placingfoodintheoven.Tryadjustingtherecipe’s
recommended temperature or baking time. If you
feeltheovenistoohotorcool,see“AdjustingOven
Temperature”intheSetting Your Preferences
sectionofthisUse&CareGuide.
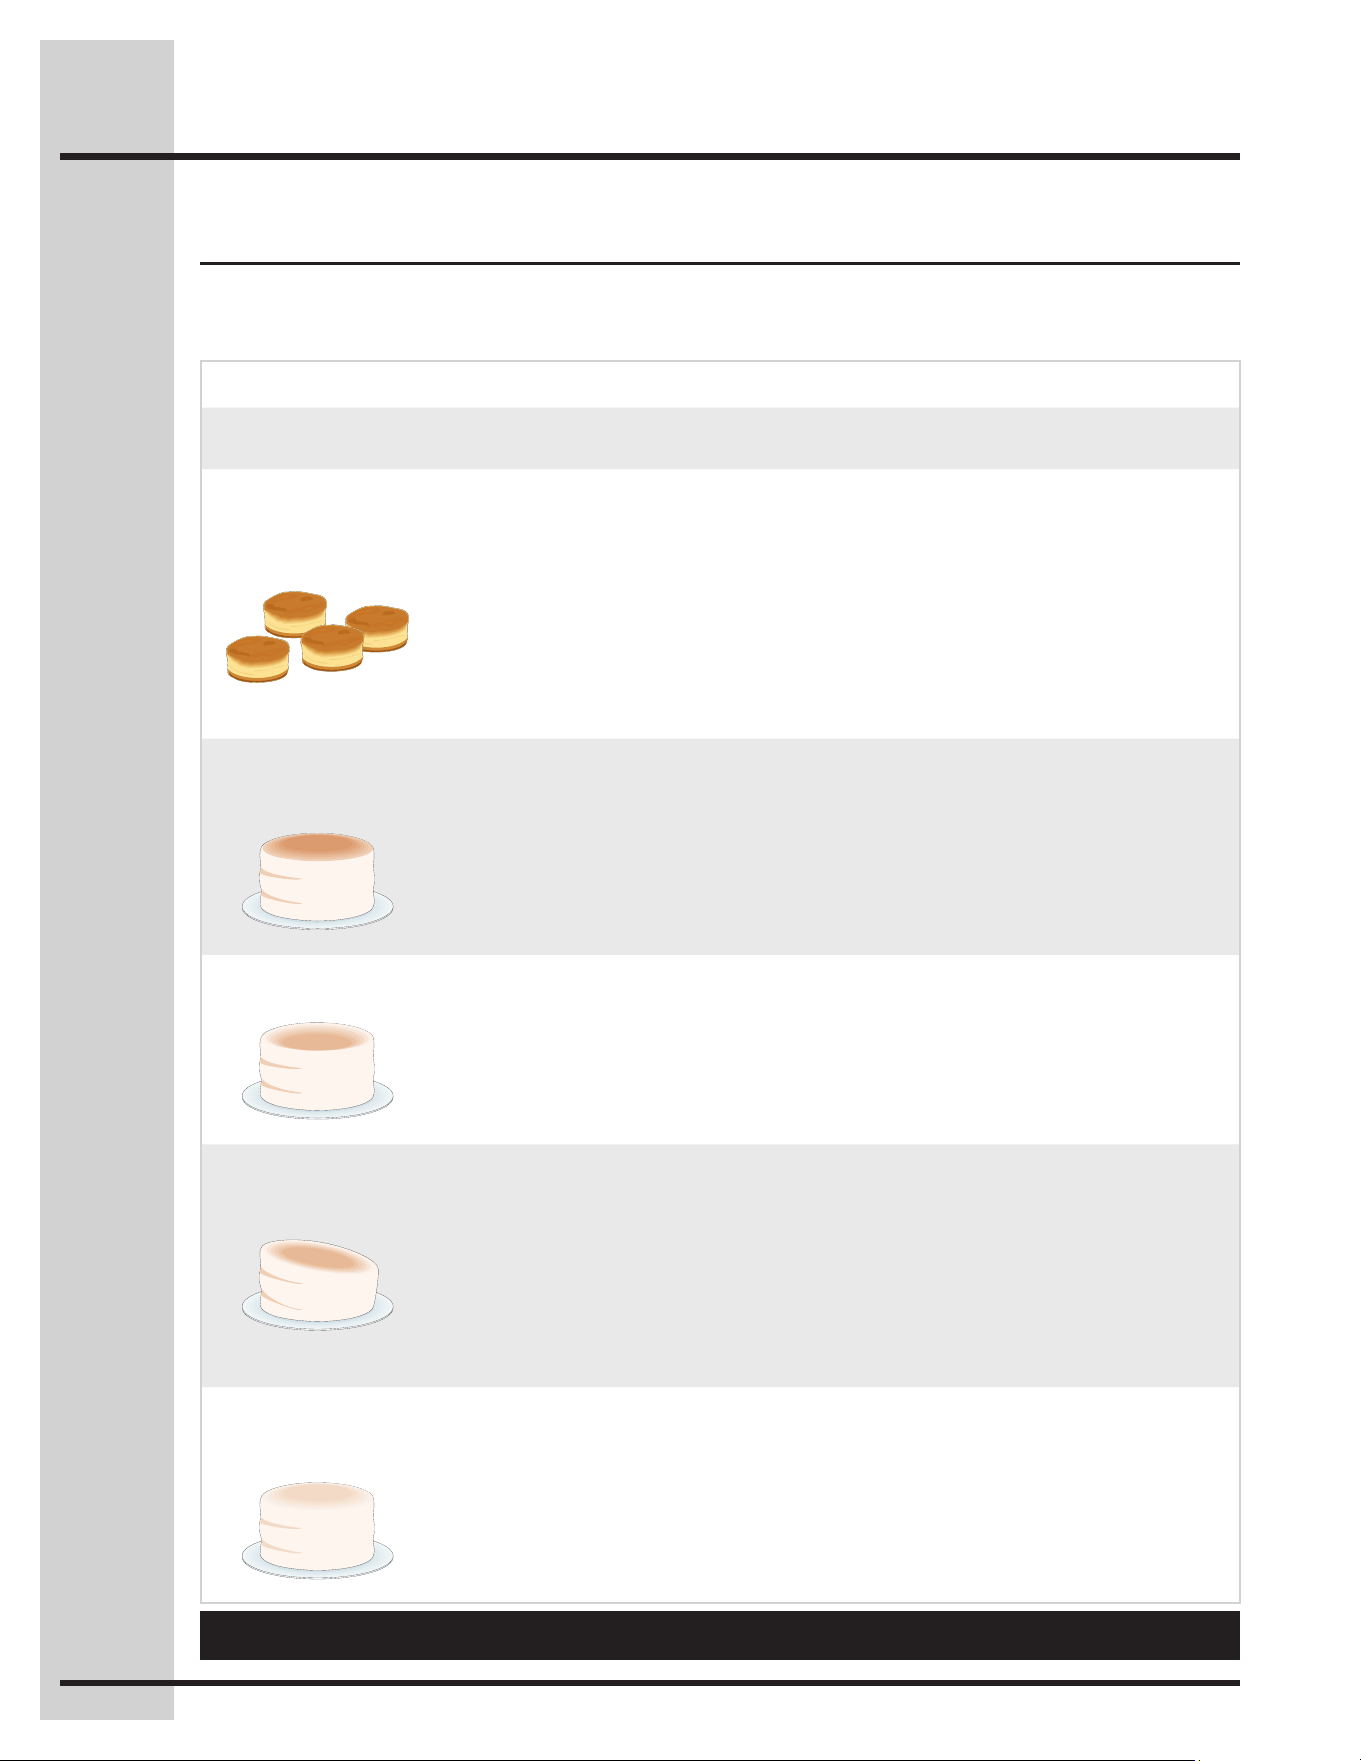
68
Solutions to Common Oven Problems
Questions or for service call: 1-877-4ELECTROLUX (1-877-435-3287)
Baking Problems and Solutions Chart
BAKING
PROBLEMS
CAUSES CORRECTIONS
Cookies and
biscuits burn on the
bottom.
• Cookiesandbiscuits
put into the oven before
the preheating time is
completed.
• Ovenrackovercrowded.
• Darkpanabsorbsheattoo
fast.
• Allowoventopreheattotheselected
temperature before placing food in oven.
• Choosepansizesthatwillpermit5.1cmto
10.2cm(2”to4”)ofairspaceonallsides
when placed in the oven.
• Useamedium-weightaluminumbaking
sheet.
Cakes too dark on
top or bottom.
• Cakesputintotheoven
before preheating time is
completed.
• Rackpositiontoohighor
low.
• Oventoohot.
• Allowoventopreheattotheselected
temperature before placing food in the
oven.
• Useproperrackpositionforbakingneeds.
• Setoventemperature25°F/12°Clowerthan
recommended.
Cakes not done in
the center.
• Oventoohot.
• Incorrectpansize.
• Pannotcenteredinoven.
• Setoventemperature25°F/12°Clowerthan
recommended.
• Usepansizesuggestedinrecipe.
• Useproperrackpositionandplacepanso
thereis5.1cmto10.2cm(2”to4”)ofspace
on all sides of pan.
Cakes not level.
• Rangenotlevel.
• Pantooclosetoovenwall
or rack overcrowded.
• Panwarped.
• Placeamarkedglassmeasuringcuplled
with water on the center of the oven rack.
If the water level is uneven, refer to the
installation instructions for leveling the range.
• Besuretoallow5.1cmto10.2cm(2”to4”)
of clearance on all sides of each pan in the
oven.
• Donotusepansthataredentedorwarped.
Foods not done
when cooking time
is up.
• Oventoocool.
• Ovenovercrowded.
• Ovendooropenedtoo
frequently.
• Setoventemperature25°F/12°C
higher than suggested and bake for the
recommended time.
• Besuretoremoveallpansfromtheoven
except the ones to be used for baking.
• Openovendooronlyaftershortest
recommended baking time.
Baking problems
For best cooking results pre-heat the oven when baking cookies, breads, cakes, pies or pastries, etc...
There is no need to preheat the oven for roasting meats or baking casseroles. The cooking times and
temperatures needed to bake a product may vary slightly from your previous appliance.

69
Microwave Service Call Check
Please check the following before calling for service:
Place one cup of water in a glass measuring cup in the oven and close the door securely.
OperatetheovenforoneminuteatHIGH100%.
A Doestheovenlightcomeon? YES ____ NO____
B Doesthecoolingfanwork?
(Putyourhandoverthefrontventilatingopenings.)
YES ____ NO____
C Isthewaterintheovenwarm? YES ____ NO____
If “NO” is the answer to any of the above ques-
tions, please check electrical outlet, fuse and/
or circuit breaker. If they are functioning prop-
erly, CONTACT YOUR NEAREST ELECTROLUX
AUTHORIZED SERVICER.
A microwave oven should never be serviced by
a “do-it-yourself” repair person.

70
Notes

71
Major Appliance Warranty Information
Your appliance is covered by a one year limited warranty. For one year from your original date of purchase, Electrolux will
repair or replace any parts of this appliance that prove to be defective in materials or workmanship when such appliance is
installed, used, and maintained in accordance with the provided instructions. In addition, the glass cooktop or radiant surface
elementofyourappliance(excludingbuilt-inandfree-standingrangeappliances)iscoveredbyatwothroughveyear
limitedwarranty.Duringthe2ndthrough5thyearsfromyouroriginaldateofpurchase,Electroluxwillprovideareplacement
glass cooktop or radiant surface element for your appliance which has proven to be defective in materials or workmanship
when such appliance is installed, used, and maintained in accordance with the provided instructions.
Exclusions
This warranty does not cover the following:
1. Products with original serial numbers that have been removed, altered or cannot be readily determined.
2. Product that has been transferred from its original owner to another party or removed outside the USA or Canada.
3. Rust on the interior or exterior of the unit.
4. Productspurchased“as-is”arenotcoveredbythiswarranty.
5. Products used in a commercial setting.
6. Service calls which do not involve malfunction or defects in materials or workmanship, or for appliances not in
ordinary household use or used other than in accordance with the provided instructions.
7. Service calls to correct the installation of your appliance or to instruct you how to use your appliance.
8. Expenses for making the appliance accessible for servicing, such as removal of trim, cupboards, shelves, etc.,
which are not a part of the appliance when it is shipped from the factory.
9. Servicecallstorepairorreplaceappliancelightbulbs,airlters,waterlters,otherconsumables,orknobs,
handles, or other cosmetic parts.
10. Labororin-homeservicecostsduringtheadditionallimitedwarrantyperiodsbeyondtherstyearfromyourorigi-
nal date of purchase.
11. Pickup and delivery costs; your appliance is designed to be repaired in the home.
12. Surcharges including, but not limited to, any after hour, weekend, or holiday service calls, tolls, ferry trip charges,
or mileage expense for service calls to remote areas, including the state of Alaska.
13. Damagestothenishofapplianceorhomeincurredduringtransportationorinstallation,includingbutnotlimited
tooors,cabinets,walls,etc.
14. Damagescausedby:servicesperformedbyunauthorizedservicecompanies;useofpartsotherthangenuine
Electrolux parts or parts obtained from persons other than authorized service companies; or external causes such
asabuse,misuse,inadequatepowersupply,accidents,res,oractsofGod.
DISCLAIMER OF IMPLIED WARRANTIES; LIMITATION OF REMEDIES
CUSTOMER’SSOLEANDEXCLUSIVEREMEDYUNDERTHISLIMITEDWARRANTYSHALLBEREPAIRORREPLACE-
MENTASPROVIDEDHEREIN.CLAIMS BASED ON IMPLIED WARRANTIES, INCLUDING WARRANTIES OF MER-
CHANTABILITY OR FITNESS FOR A PARTICULAR PURPOSE, ARE LIMITED TO ONE YEAR OR THE SHORTEST
PERIOD ALLOWED BY LAW, BUT NOT LESS THAN ONE YEAR.ELECTROLUXSHALLNOTBELIABLEFORCONSE-
QUENTIALORINCIDENTALDAMAGESSUCHASPROPERTYDAMAGEANDINCIDENTALEXPENSESRESULTING
FROMANYBREACHOFTHISWRITTENLIMITEDWARRANTYORANYIMPLIEDWARRANTY.SOMESTATESAND
PROVINCESDONOTALLOWTHEEXCLUSIONORLIMITATIONOFINCIDENTALORCONSEQUENTIALDAMAGES,
ORLIMITATIONSONTHEDURATIONOFIMPLIEDWARRANTIES,SOTHESELIMITATIONSOREXCLUSIONSMAY
NOTAPPLYTOYOU.THISWRITTENWARRANTYGIVESYOUSPECIFICLEGALRIGHTS.YOUMAYALSOHAVE
OTHERRIGHTSTHATVARYFROMSTATETOSTATE.
If You Need Service
Keepyourreceipt,deliveryslip,orsomeotherappropriatepaymentrecordtoestablishthewarrantyperiodshouldservice
be required. If service is performed, it is in your best interest to obtain and keep all receipts. Service under this warranty
must be obtained by contacting Electrolux at the addresses or phone numbers below.
This warranty only applies in the USA, Puerto Rico and Canada. In the USA and Puerto Rico, your appliance is warranted by
ElectroluxMajorAppliancesNorthAmerica,adivisionofElectroluxHomeProducts,Inc.InCanada,yourapplianceiswar-
ranted by Electrolux Canada Corp. Electrolux authorizes no person to change or add to any obligations under this warranty.
ObligationsforserviceandpartsunderthiswarrantymustbeperformedbyElectroluxoranauthorizedservicecompany.
Productfeaturesorspecicationsasdescribedorillustratedaresubjecttochangewithoutnotice.
Canada
1-800-265-8352
Electrolux Canada Corp.
5855 Terry Fox Way
Mississauga,Ontario,CanadaL5V3E4
USA
1-877-435-3287
ElectroluxMajorAppliancesNorthAmerica
P.O.Box212378
Augusta,GA30907