Loading ...
Loading ...
Loading ...
We do the utmost to ensure that the provided informaon is complete and accurate; however, images and
specicaons are subject to change without noce. Visit our website at www.ardaappliances.com
for the latest version of this manual.
- 6 -
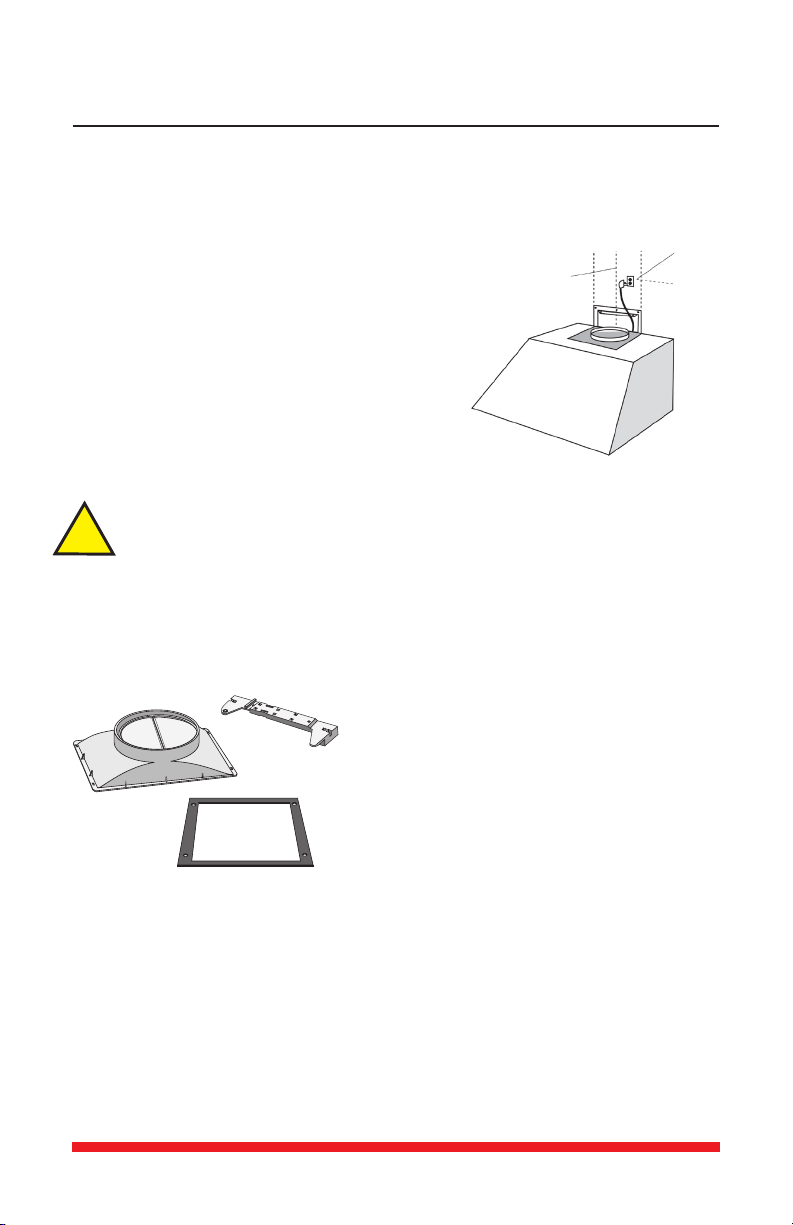
1. Install a 110/120V electric receptacle on the wall within the dimensions of the decorave
chimney (Fig. 6). Note that removal of the plug will void the
warranty of the range hood.
1. We recommend that two people mount the hood.
2.
3. Damper installaon :
Inside the hood, under the grease lters, you will nd the:
Damper (Fig. 7); Gasket (Fig. 8); Gasket screws (x 4); Wall bracket for the chimney (Fig. 9).
Set the bracket aside for use in Step G. Place the gasket on top of the hood. Place the damper
on top of the gasket. Using the screws provided, ax the damper to the hood.
When unpacking models HAM52A and HAM52B,
please note that the gasket and associated hardware
are packed inside the hood.
4. Before mounng the hood, plug the unit in and test all funcons for proper operaon:
5. Remove the grease lters from the boom of the hood to prevent damage during the
installaon.
6. With assistance from at least one other person, hold the hood temporarily in posion ensuring
the boom is above the minimum clearance for the cooking surface.
!
Fig.6
Center/plumb
Line B
Grounded
Outlet
Fig.7
Fig.8
Fig.9
Loading ...
Loading ...
Loading ...