
Loading ...
Loading ...
Loading ...
20
MAINTENANCE
WARNING :
▪ Turn off the unit and unplug the power supply before cleaning to avoid electric shock.
▪ Do not wash the indoor unit with water to avoid electric shock.
▪ Do not use volatile liquid to clean the indoor unit.
▪ Do not use liquid or corrosive detergent to clean the indoor unit and do not splash water or other liquid
on the unit, otherwise it may damage the plastic components or even cause electric shock.
NOTE : Do not remove the front panel when cleaning it.
CLEANING THE SURFACE
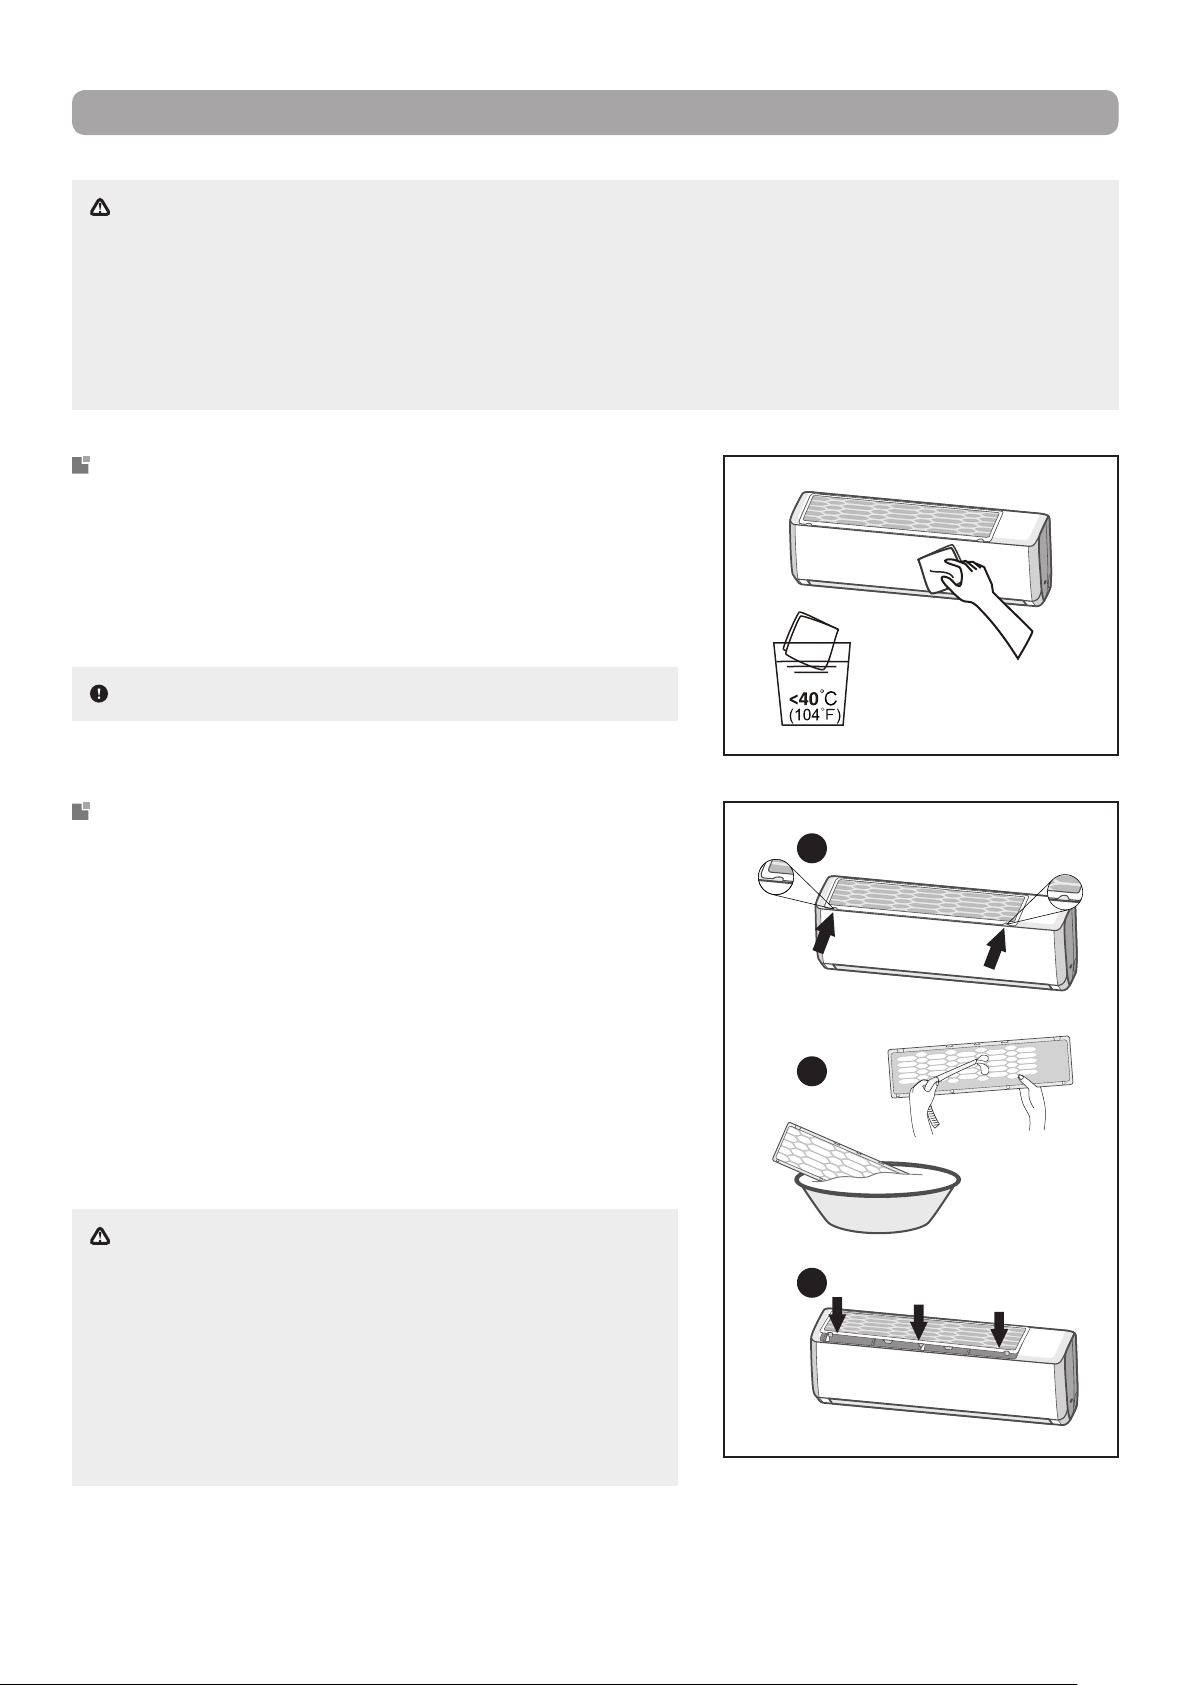
Gently wipe the surface of the indoor unit with a dry cloth or
one moistened with warm water.
If using a damp cloth, use water no warmer than 40 °C (104 °F).
Try to clean the unit frequently to keep it in good condition.
WARNING :
▪
The lter should be cleaned every three months. If there
is a lot of dust in the operating environment of the indoor
unit, lter cleaning should be more frequent.
▪ When
removing the dust lter, avoid touching the ns to
prevent injury.
▪ Do not use an open ame or hair dryer to dry the dust
lter to avoid deformation and re hazard.
CLEANING THE DUST FILTER
1. To remove the lter, rst press the spring fasteners at both
ends in the direction indicated by the arrows
in the illustra-
tion
, then release the lter from the clamps. Pull the lter for-
ward and remove it.
2. Use clean water to wash the dust lter or a vacuum to col-
lect the dust. If the lter is very dirty (e.g. grease), use warm
water (45 °C) with a neutral detergent to clean it. Put the
lter in a shaded location to dry it.
3. After cleaning, reinstall the lter by sliding it along the guide
rails on both sides, then press the edges of the lter to snap
it into place, as indicated by the arrows in the illustration.
1
2
3
Loading ...
Loading ...
Loading ...