Loading ...
Loading ...
Failure to comply with these instructions may
result in a hazardous situation which, if not
avoided, may result in injury.
Spiders and small insects can spin webs and
nest in the grill ing transit and
warehousing s flow
obstruction round the
Burner T_ FIRE"
can cau_ an
unsafe {
To ;K
FIRE bes
as ;Irill.
Also do _ummer
and fall or in your
area, and if used for an
extended period
1. Remove the screw from the rear of each Burner
using a Phillips Head Screwdriver.
2. Carefully lift each Burner up and away from the
Gas Valve Orifice.
3. Check and clean Burner/Venturi Tubes for insects
and insect nests. A clogged tube can lead to a fire
beneath the grill.
4. Refer to the figure below and perform one of
these 3 cleaning methods:
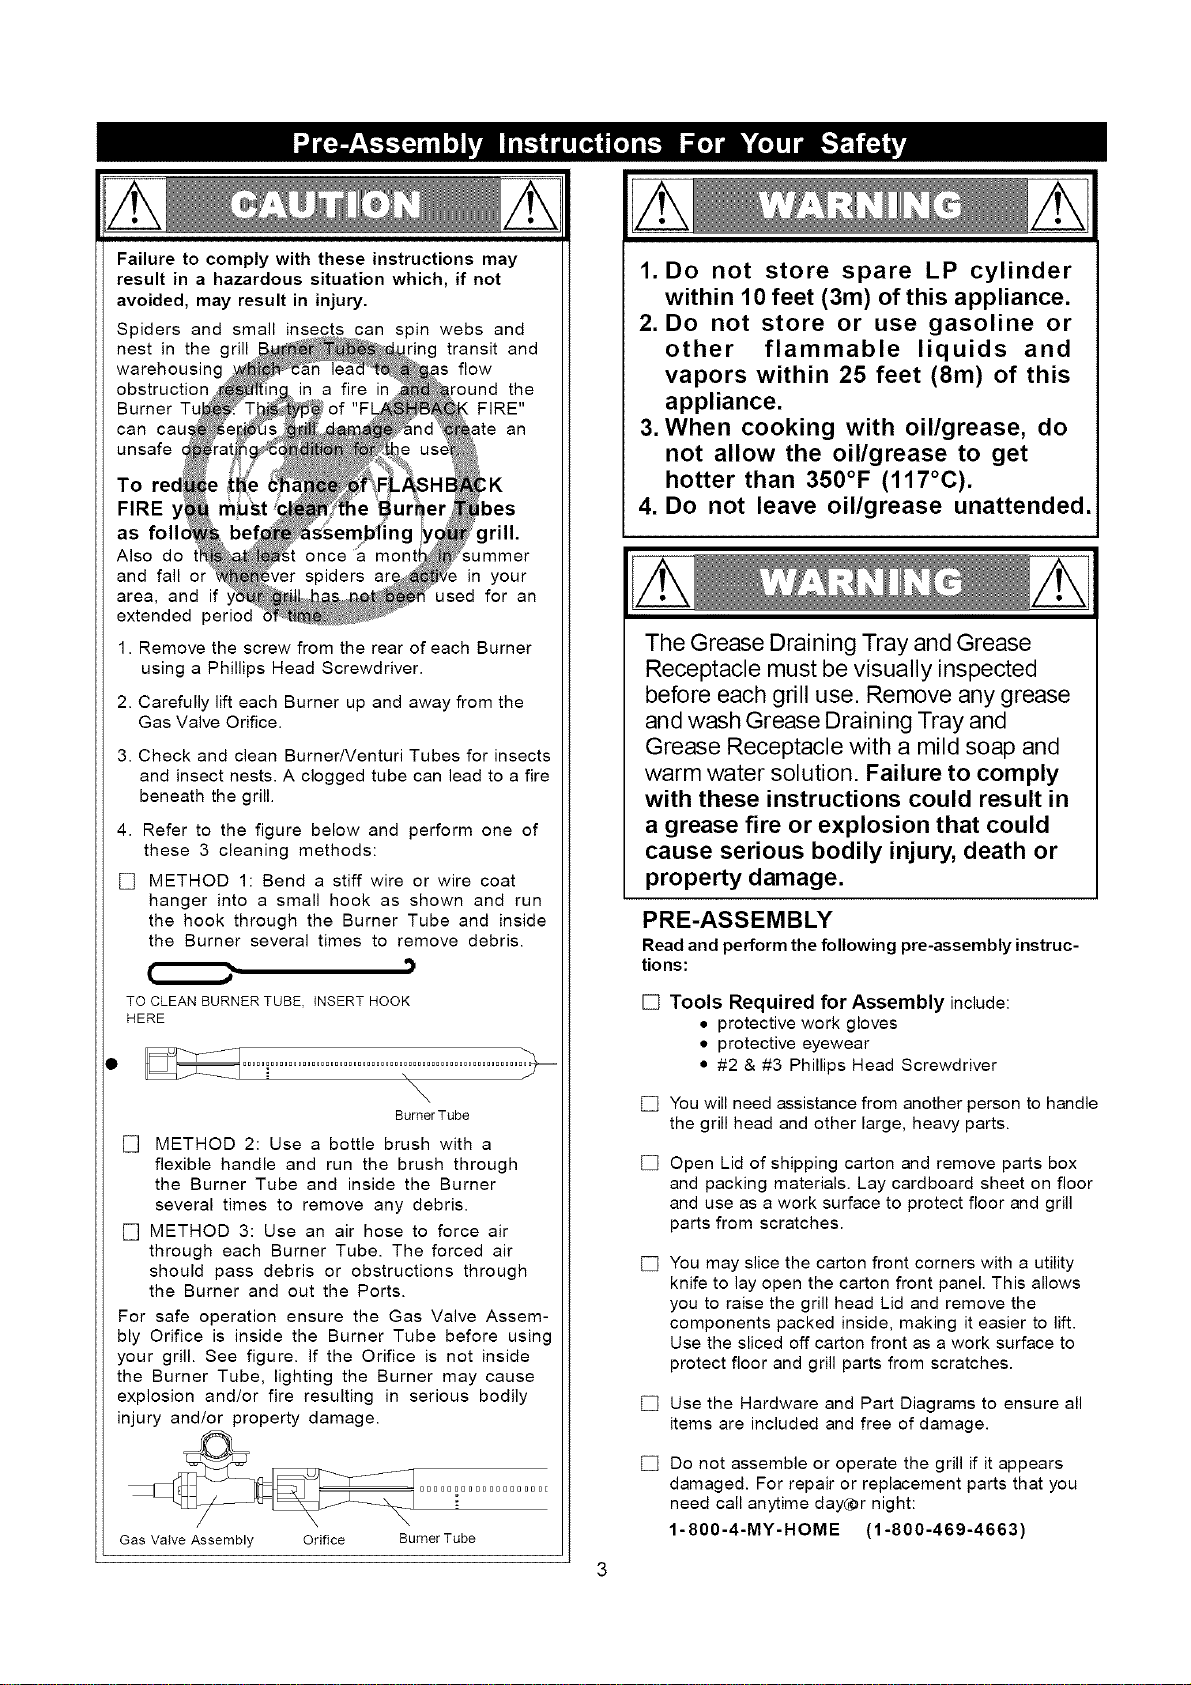
[] METHOD 1: Bend a stiff wire or wire coat
hanger into a small hook as shown and run
the hook through the Burner Tube and inside
the Burner several times to remove debris.
,)
TO CLEAN BURNER TUBE, INSERT HOOK
HERE
\
BurnerTube
[] METHOD 2: Use a bottle brush with a
flexible handle and run the brush through
the Burner Tube and inside the Burner
several times to remove any debris.
[] METHOD 3: Use an air hose to force air
through each Burner Tube. The forced air
should pass debris or obstructions through
the Burner and out the Ports.
For safe operation ensure the Gas Valve Assem-
bly Orifice is inside the Burner Tube before using
your grill. See figure. If the Orifice is not inside
the Burner Tube, lighting the Burner may cause
explosion and/or fire resulting in serious bodily
injury and/or property damage.
__j_ _ 0 [] [] 0 [] 0 [] 0 [] 0 [] 0 [] [] [] 0 [] 0 E
Gas Va+ve Assembly Orifice Burner Tube
1. Do not store spare LP cylinder
within 10 feet (3m) of this appliance.
2. Do not store or use gasoline or
other flammable liquids and
vapors within 25 feet (8m) of this
appliance.
3. When cooking with oil/grease, do
not allow the oil/grease to get
hotter than 350°F (117°C).
4. Do not leave oil/grease unattended.
The Grease Draining Tray and Grease
Receptacle must be visually inspected
before each grill use. Remove any grease
and wash Grease Draining Tray and
Grease Receptacle with a mild soap and
warm water solution. Failure to comply
with these instructions could result in
a grease fire or explosion that could
cause serious bodily injury, death or
property damage.
PRE-ASSEMBLY
Read and perform the following pre-assembly instruc-
tions:
[] Tools Required for Assembly include:
• protective work gloves
• protective eyewear
• #2 & #3 Phillips Head Screwdriver
[]
[]
[]
[]
[]
You will need assistance from another person to handle
the grill head and other large, heavy parts.
Open Lid of shipping carton and remove parts box
and packing materials. Lay cardboard sheet on floor
and use as a work surface to protect floor and grill
parts from scratches.
You may slice the carton front corners with a utility
knife to lay open the carton front panel. This allows
you to raise the grill head Lid and remove the
components packed inside, making it easier to lift.
Use the sliced off carton front as a work surface to
protect floor and grill parts from scratches.
Use the Hardware and Part Diagrams to ensure all
items are included and free of damage.
Do not assemble or operate the grill if it appears
damaged. For repair or replacement parts that you
need call anytime day(_r night:
1-800-4-MY-HOME (1-800-469-4663)
Loading ...
Loading ...
Loading ...