Loading ...
Loading ...
Loading ...
13USING YOUR OVEN
On completion of cooking
When the set time has elapsed, the oven will turn off, the
timer will beep and the indicators will flash.
1. Turn the and controls to the
off position.
2. Press or symbols or to stop the clock
from beeping.
Switching the clock display ON and OFF
1. Press together and symbols for 3 seconds to
switch off the display.
2. Press together and symbols for 3 seconds to
switch the clock display on again.
NOTE: If a timer mode is set, then it is not possible to
switch the display off.
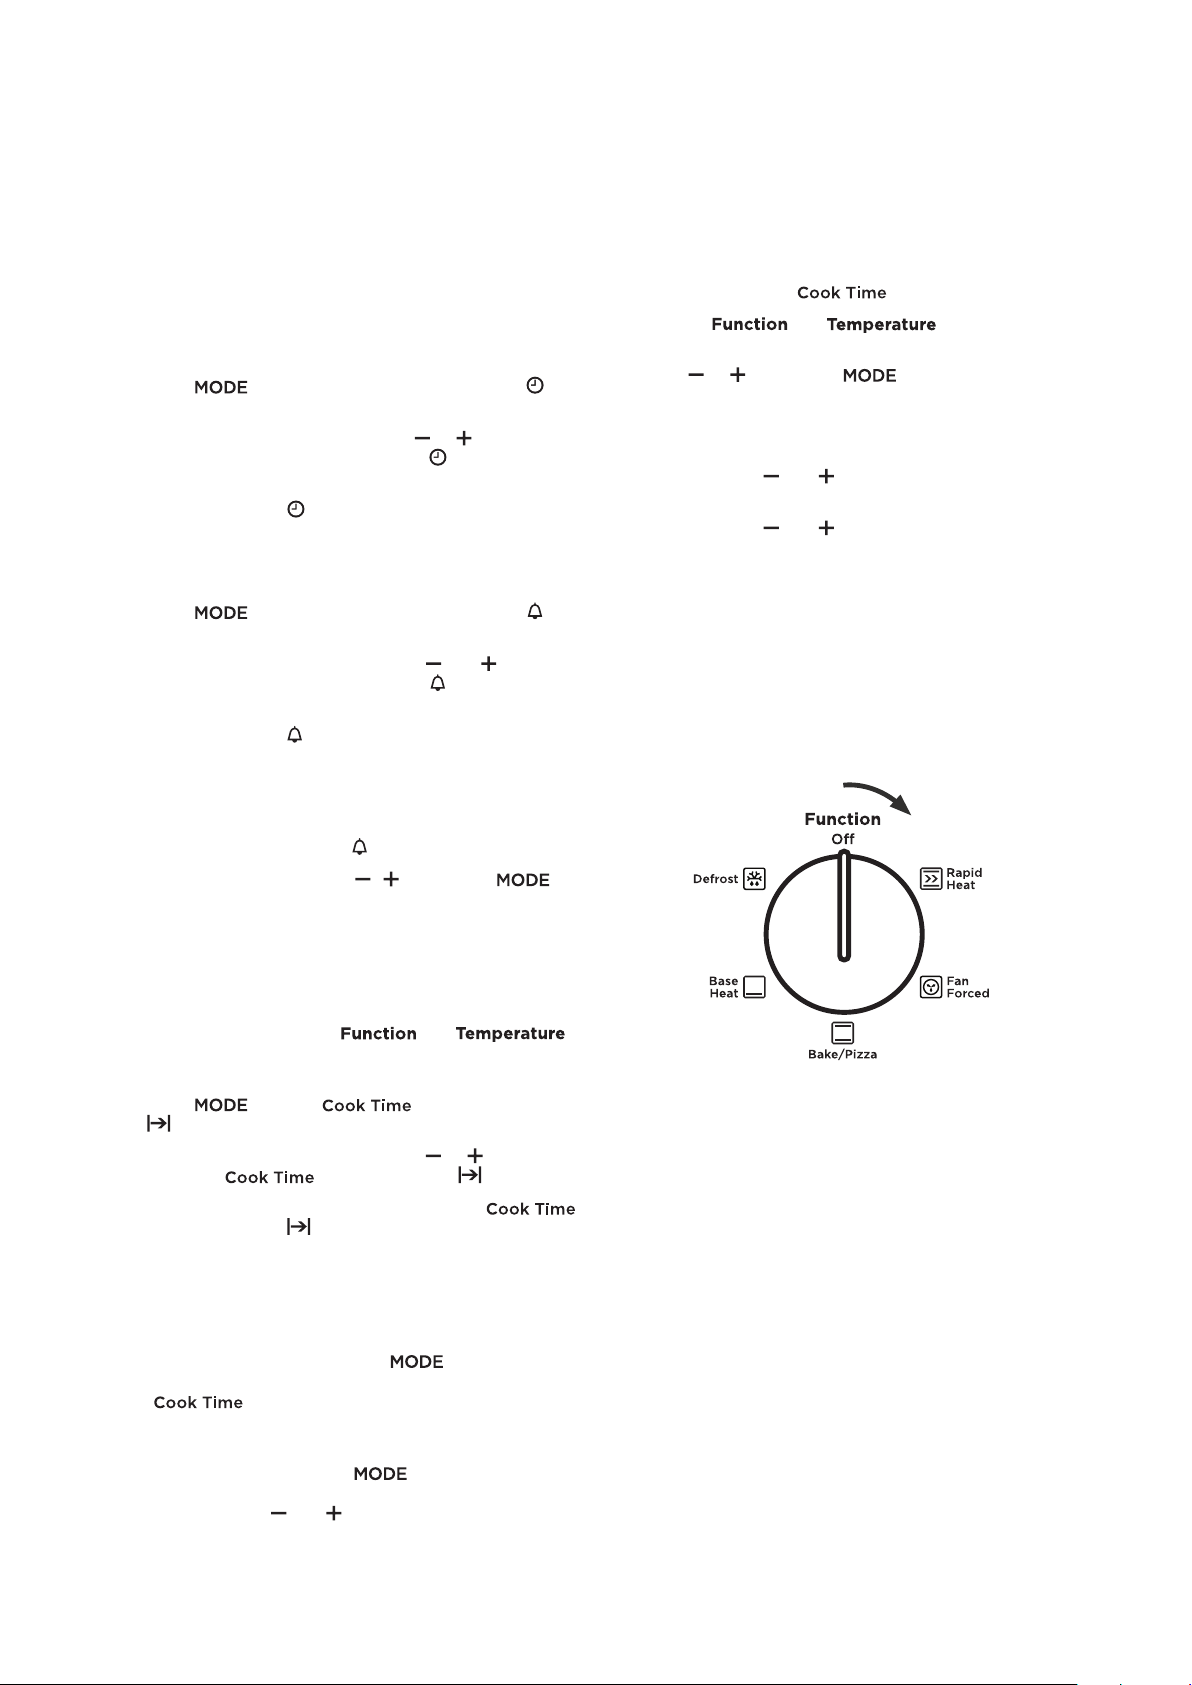
Select the oven function
Turn the oven function selector clockwise to select the
desired oven function.
NOTE: each oven function has a default temperature
which can then be adjusted as outlined below.
Safety Cut-out feature
The oven automatically switches itself off if the
temperature is not adjusted or the appliance is left
operating after a period of time. The oven switches itself
off after:
• 12.5 hours when the temperature is set less than
120°C.
• 8.5 hours when the temperature is set to 120°C
or above, and below 200°C.
• 5.5 hours when the temperature is set to 200°C or
above, and below 250°C.
• 3.0 hours when the temperature is set at 250°C.
DEMO Mode
The oven can be set to operate in a demo mode (e.g. in a
retail store). In this mode the display works and functions
can be set but the oven does not actually heat. When
in this mode the text ‘DEMO’ will be lit. The following
instructions show how to enter and exit ‘Demo’ mode.
disappear, confirming the time has been set. Once the
time has been entered, the clock advances minute by
minute.
NOTE: The clock has a 24 hour display.
Changing the time of day
1. Press until the “Clock” indicator symbol
begins flashing.
2. To set the time of day, press the or symbols
while the “Clock” indicator symbol
is flashing.
3. After 5 seconds from the last change, the “Clock”
indicator symbol will disappear, confirming the
time has been set.
Setting the minute minder
1. Press until the “Timer” indicator symbol
begins flashing.
2. Set the countdown time by using and symbols
while the “Timer” indicator symbol
is flashing.
3. After 5 seconds from the last change, the “Timer”
indicator symbol will stop flashing, confirming the
timer has been set. The countdown time remaining
will appear on the display.
4. Once the set time has elapsed, a beeper will sound
for 1 minute. The time indication “0.00” and a flashing
“Timer” indicator symbol
will appear on the display.
5. To stop the beeper, press , symbols or .
NOTE: This feature has no effect on the oven operation.
With the minder operating, the time of day cannot be
displayed.
Setting the cooking duration
1. Select the desired oven and .
The oven indicator light will appear and the heating
source will switch on.
2. Press until the indicator symbol
begins flashing.
3. Set the cooking duration by using or symbols
while the indicator symbol is flashing.
4. After 5 seconds from the last change, the
indicator symbol will stop flashing, and the time of
day will be displayed.
NOTE: Do not forget to add pre-heating time if necessary.
To check or cancel settings
1. To check your settings, press until the
indicator symbol flashes next to the mode
( , etc) that you want to display. After 5
seconds from the last change, the indicator will stop
flashing and the time of day will be displayed.
2. To cancel a setting, press until the indicator
symbol flashes next to the setting to be cancelled.
Press and hold and symbols together until the
setting is cleared.
This knob cannot be
turned anticlockwise
from off position
Loading ...
Loading ...
Loading ...