Loading ...
Loading ...
Loading ...
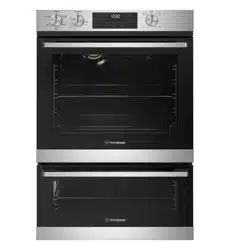
12 USING YOUR OVEN
heated, it produces steam in the same way a boiling kettle
does. When steam comes into contact with the oven door
glass, it will condense and produce water droplets. To
reduce condensation, ensure that the oven is pre-heated
before placing food in the oven cavity. It is recommended
that condensation is wiped away after each use of
the oven.
The effects of dishes on cooking results
Dishes and tins vary in their thickness, conductivity, colour
etc. which affects the way they transfer heat to the food.
• Aluminium, earthenware, oven glassware and bright
shiny utensils reduce cooking and base browning.
• Enamelled cast iron, anodized aluminium, aluminium
with non-stick interior and coloured exterior and dark,
heavy utensils increase cooking and base browning.
• To increase base browning simply lower the shelf
position. To increase top browning, raise the
shelf position.
• Always place dishes centrally on the shelf to ensure
even browning.
• Single level cooking gives best results in conventional
modes. If cooking on more than one level use a fan
cooking function.
Operating your oven temperature selector
A thermostat controls the temperature in your appliance.
The temperature can be selected within the specified
range. To set the temperature, turn the temperature
selector in a clockwise direction to the desired setting. An
indicator light above the temperature selector will come
on. When the set temperature is reached, the element
switches off and the indicator light goes off. When the
oven temperature falls below the set temperature, the
element switches on and the oven indicator light comes
on again.
WARNING
CAUTION
Once the food is cooked, turn the temperature selector
back in an anti-clockwise direction. Do not force it right
round in a clockwise direction as this will result in damage
to the thermostat.
NOTE: For multifunction ovens the desired cooking
function must be selected before the oven will operate.
Once the desired function has been selected, use the
temperature selector to set the required temperature.
Pre-heating your appliance
For best results when baking you must pre-heat the
oven for 30 minutes. Pre-heat the grill for 3 minutes to
obtain best results. Pre-heating your appliance allows it
to reach the required temperature quickly and efficiently.
When baking bread or cakes, load the oven as quickly as
possible after pre-heating and leave the oven door open
for the shortest time. This will minimise loss of heat from
the oven and ensure the best results.
USING YOUR OVEN (CONTINUED)
Pre-heating with “Rapid Heat”
For electric multifunction appliances preheat your oven
by selecting the “rapid heat” function. This function
allows your oven to reach the preset temperature quicker
than any other cooking function.
• Turn the function selector to “Rapid Heat”.
• Set the desired pre-heat temperature, by rotating
your oven temperature selector. When the indicator
light goes out the oven has reached the desired
preset temperature. Select the oven function you
require for cooking or baking and place your food
into the oven.
Pre-heating with other functions
• It is recommended you preheat your appliance when
cooking or baking.
• Set the desired pre-heat temperature, by rotating
your oven temperature selector. When the indicator
light goes out the oven has reached the desired
preset temperature, place your food into the oven.
Pre-heating “grill”
• Preheat the grill for at least 3 minutes to obtain best
results. This will help to seal the natural juices of
steak, chops and other meats for a better flavour.
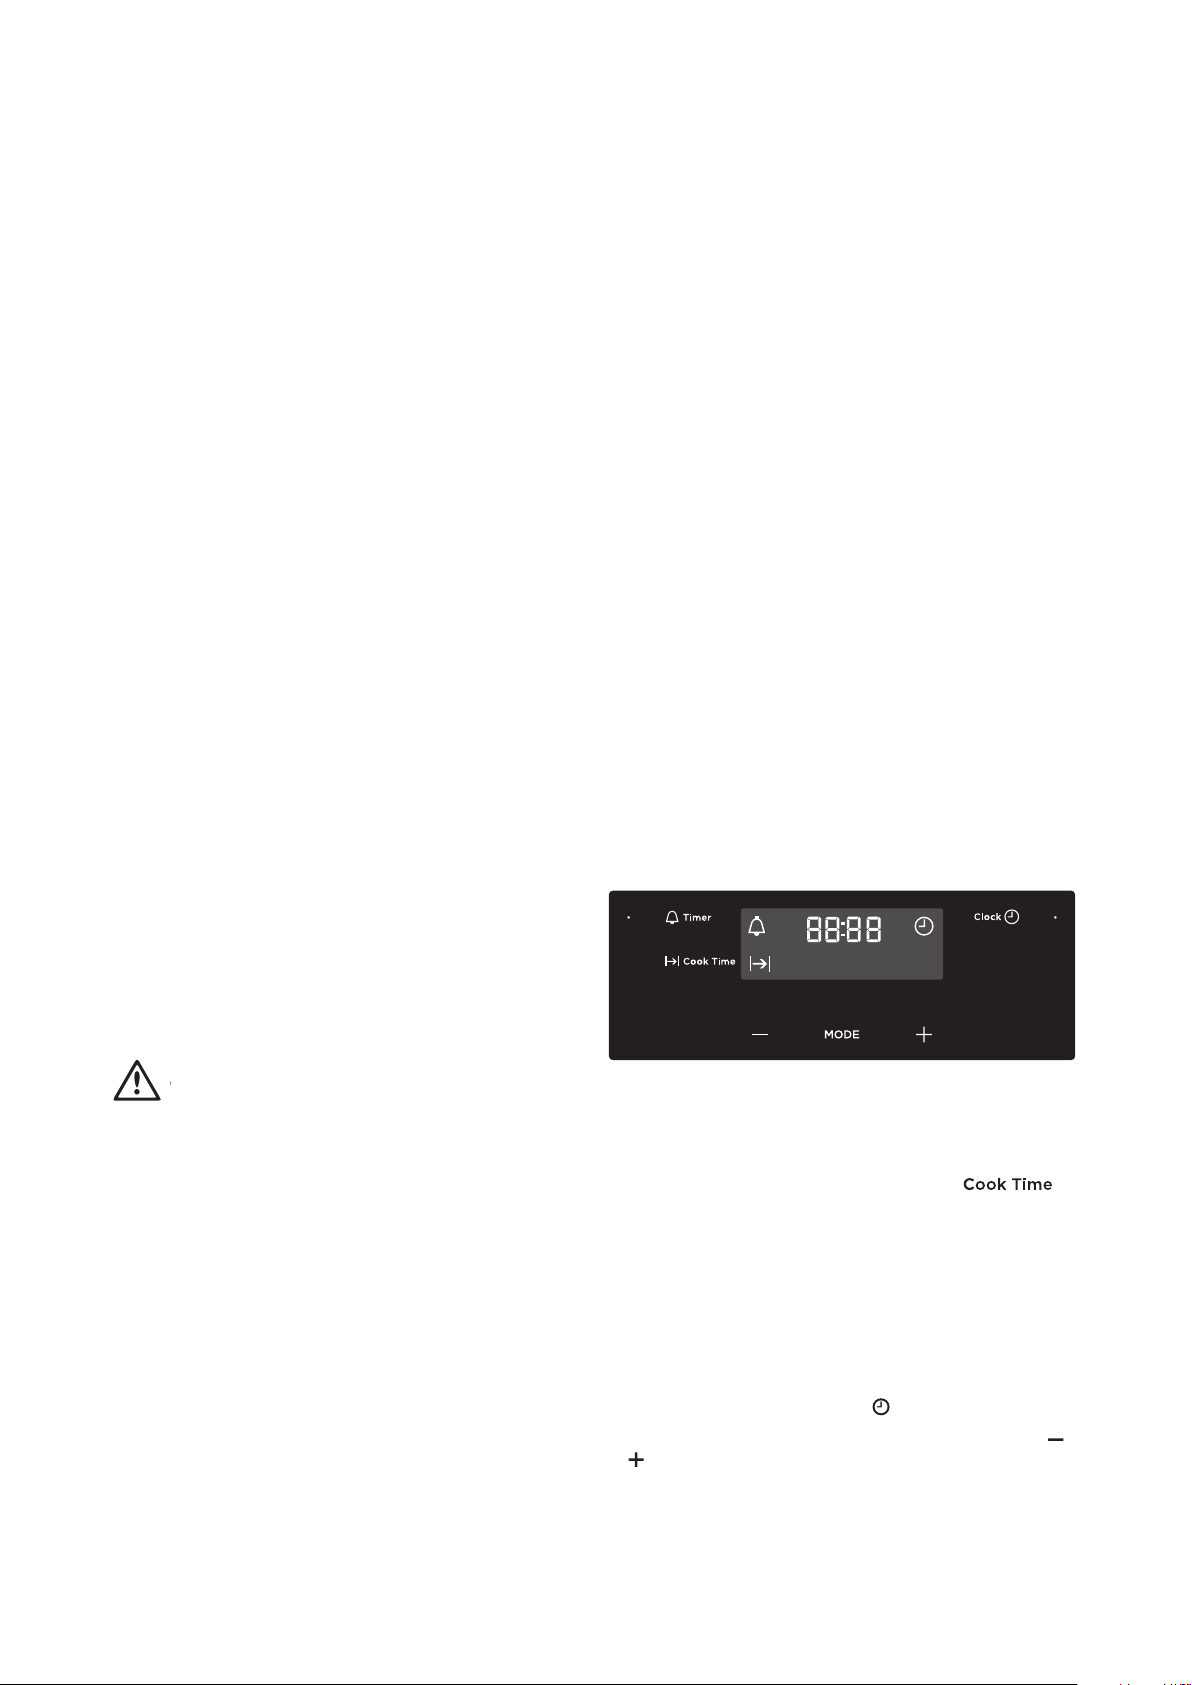
Operating the electronic clock
General features
The oven is equipped with an electronic clock that can be
used to turn the oven off automatically. The
function automatically turns the oven off after a set
amount of time.
NOTE: Your touch control clock only operates with your
main oven.
Setting the time
Before the appliance can be used, the time must be set.
After the appliance has been electrically connected,
“12:00” will be displayed and the
clock icon will flash.
To set the time of day in hours and minutes, touch the
or symbols. Refer to the diagram above.
5 seconds after the last change, the clock symbol will
Loading ...
Loading ...
Loading ...