Loading ...
Loading ...
Loading ...
15
Replacing/Changing Cutting Device
mWARNING! Always switch the machine o, remove the
batteries and let it cool down before changing/replacing the
cutting device.
mWARNING! Cutting devices are very sharp and become
hot during use. Handle them carefully.
mWARNING! Wear safety gloves when handling cutting
devices in order to avoid injuries like burns and cuts.
mWARNING! Make sure all bolts are completely
tightened before operating the machine. Don't operate the
machine if any bolts are missing, loose, or damaged.
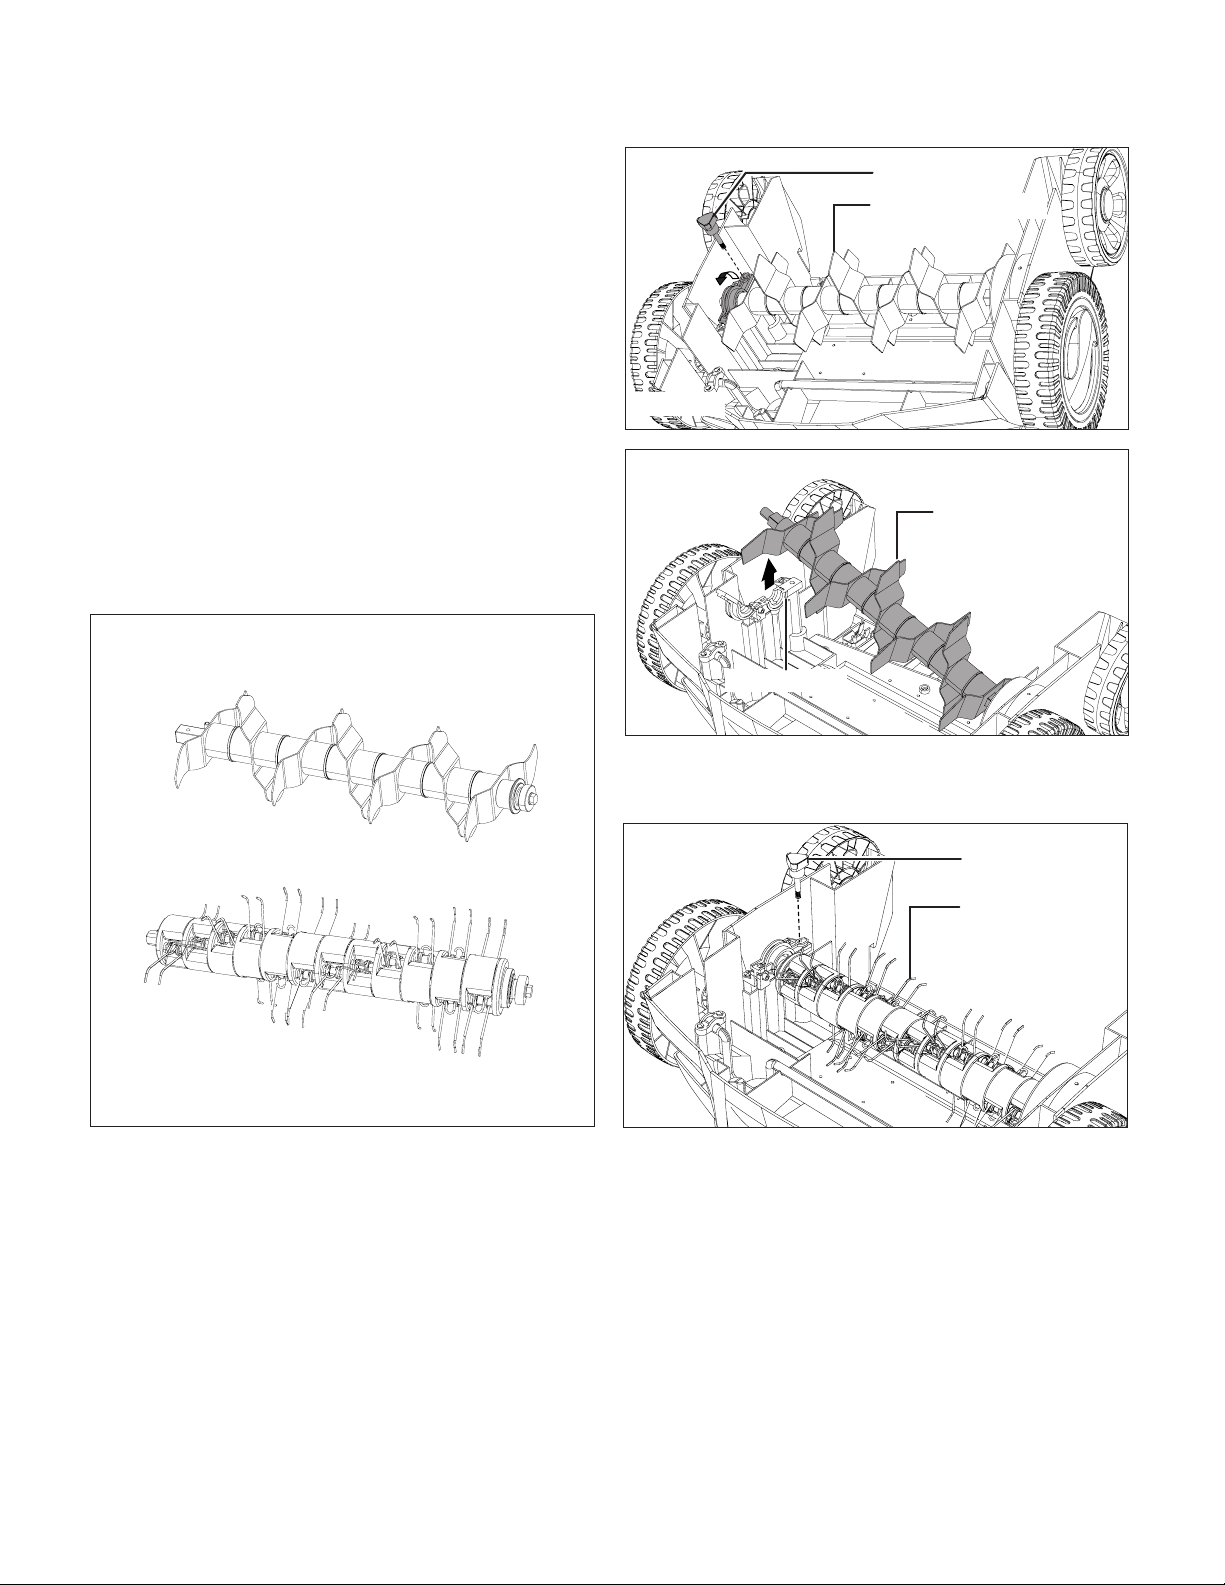
The product has two functions, scarifying and raking. The
scarifying cylinder is pre-assembled on the machine. The
raking cylinder is included in the supply box. The cylinder can
be changed according to the application (Fig. 10).
mWARNING! Before performing any maintenance, always
remove the batteries and wait until the tine cylinder comes to
a complete stop. Wear protective gloves when handling the
tines.
1. Remove the thatch collection bag.
2. Place the machine upside down on a at stable surface to
access the underbody.
3. Remove the lock screw and open the lock used to secure
the scarifying cylinder. Lift the scarifying cylinder up to
remove it from the housing (Figs. 11 – 12).
4. Insert the raking cylinder and press it into the holder.
Refasten the lock and x the assembly with the lock screw
(Fig. 13).
5. Turn the lawn scarier + dethatcher back on its wheels.
Attach the thatch collection back and resume operation.
NOTE: If you have any questions, please call the Snow Joe
®
+
Sun Joe
®
customer service center at 1-866-SNOWJOE
(1-866-766-9563) for assistance.
After Use
1. Switch the machine o, remove the batteries and let it
cool down.
2. Check, clean and store the machine as described
previously.
Fig. 10
Scarifying cylinder with blades
Raking cylinder with spring metal tines
Fig. 11
Lock screw
Scarifying cylinder
Fig. 12
Scarifying cylinder
Cylinder lock
Fig. 13
Raking cylinder
Lock screw
Loading ...
Loading ...
Loading ...