Loading ...
Loading ...
Loading ...

17
ENGLISH
Installing and Removing the Battery Pack
(Fig. D1)
WARNING: Ensure the tool/appliance is in the off
position before inserting the batterypack.
NOTE: For best results, make sure your battery pack is
fullycharged.
To install the battery pack
12
into the tool handle, align the
battery pack with the rails inside the tool’s handle and slide
it into the handle until the battery pack is firmly seated in the
tool and ensure that it does notdisengage.
To remove the battery pack from the tool, press the release
button
13
and firmly pull the battery pack out of the tool
handle. Insert it into the charger as described in the charger
section of thismanual.
Proper Hand Position (Fig. D2)
WARNING: To reduce the risk of serious personal
injury, ALWAYS use proper hand position asshown.
WARNING: To reduce the risk of serious personal
injury, ALWAYS hold securely in anticipation of a
suddenreaction.
Proper hand position requires one hand on the auxiliary
handle
3
, with the other hand on the main grip
18
.
and adapt to your own applications. The following are some
basic set‑up steps that will apply to all biscuitjoints.
Biscuit Size Selection (Fig. E)
As mentioned earlier, the three biscuit sizes are #0, #10 and
#20. It is a good rule of thumb to use the largest biscuit
size that will physically fit in the application. Unless you are
joining narrow face or picture frames or using 1/2" (12mm)
or thinner stock, you will find the #20 biscuit size to suit
most applications. After selecting the biscuit size, set the
depth adjustment knob to the corresponding size (see
Controls section). Also, be sure the fine depth adjustment is
correctly set by first testing in a scrap piece. This is extremely
important as you do not want to discover during glue‑up
that your biscuit slots are not quite deepenough.
Biscuit Location and Layout (Fig. O–R)
Generally, biscuits may be spaced and located at your
discretion. For edge joints, a good rule of thumb is to space
biscuits every 6"–10" (150mm–255mm) on center. It is
further recommended that biscuits be placed so that the
centerline of the end biscuits is 2"–3" (50mm–75mm)
from the end of the workpiece. When joining face frames or
picture frames where the workpiece is narrow, you may have
to choose the smaller biscuit sizes to keep from “breaking
out” on the end of the joint. Breaking out should be avoided
if possible, but if not you can assemble the joint and trim
off the exposed biscuit tip after the glue sets (see Figure O).
When working with material up to 1" (25mm) thick, we
advise to use a single biscuit located in the approximate
center of the material thickness. If thicker stock is to be
joined, you may choose to use 2biscuits across the thickness
for greater strength (see Figure P). Biscuit locations should be
marked by first positioning the mating pieces exactly as they
are to be assembled. Next, make a mark at 90° to the joint
interface across both pieces at the desired biscuit locations
(see Figure Q). See Application section for more specific
information on joint layout. The marks you make will then be
aligned with one of the center registration marks on the tool,
again, depending upon your specificapplication.
Making the Cut
Prior to making any cut, be sure that all fence adjustments
are set and lock knobs are tight. Also, be sure you have
selected the proper depth setting. Clamp your workpiece
firmly and align the biscuit joiner’s center registration mark
with your layout mark. Turn on the tool and let the blade
come up to full speed (approximately 1second). Grasping
the switch handle and auxiliary handle and positioning the
fence firmly and squarely against the workpiece, plunge the
blade until it bottoms against the stop. Continuing to hold
the tool squarely and firmly, allow the return spring to retract
the blade from the work and then release the switch to shut
the tool off. It will take some practice to obtain a “feel” for the
tool to produce accurate joints, so practicing in scrap wood
first isadvisable.
Usage
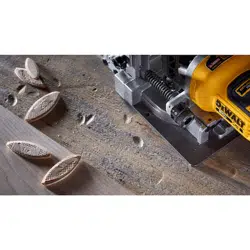
Biscuit joiners are primarily used for making cabinetry and
furniture, joining millwork or other similar applications
where a strong, accurate joint is required in wood or wood
by‑products. There are literally hundreds of variations of
joints that can be made with your Biscuit joiner. We will limit
our discussion to six basic joints that can be used to build on
OPERATION
WARNING: To reduce the risk of serious personal
injury, turn unit off and remove the battery pack
before making any adjustments or removing/
installing attachments or accessories. An
accidental start‑up can causeinjury.
3. Push the AirLock™ connector onto the adapter
connectorpoint.
4. Rotate the collar to the lockedposition.
NOTE: The ball bearings inside collar lock into slot and
secure the connection.The power tool is now securely
connected to the dustextractor.
NOTE: The sleeve of the dust extraction port can be
removed if damaged and replaced by the user. The
sleeve is available as an optional accessory and can be
replaced using ascrewdriver.
Dust Bag (Fig.N)
The dust bag
17
provided fits snugly over the straight
adaptor
15
described above. To empty the bag, open the
zipper underneath and dump dustout.
NOTE: When the bag becomes full, the dust will back‑up
into the adaptor and the exhaust port on the right rear of the
tool. To clean out, turn off, remove battery, disconnect from
the tool and remove packeddust.
Loading ...
Loading ...
Loading ...
