Loading ...
Loading ...
Loading ...
TP-7092 2/21 63Section 4 Scheduled Maintenance
4.2.4 Oil Change Procedure
Note: Dispose of all waste materials (engine oil, fuel,
filter, etc.) in an environmentally safe manner.
Drain the oil while it is still warm.
1. Drain the oil.
a. Press the OFF button on the generator set
controller.
b. Disconnect the utility power to the generator
set.
c. Disconnect the generator set engine starting
battery, negative (- ) lead first.
d. Remove the end panels from the enclosure by
lifting the panels up and out. Then lift off the
service-side panel to access the oil drain valve
and hose.
e. Clean the area around the dipstick and oil fill
cap.
f. Remove the oil drain hose from its retaining
clip. Remove the cap from the oil drain hose
and lower the hose into an oil collection
container.
g. Open the oil drain valve on the engine.
h. Remove the dipstick and oil fill cap. Allow time
for the engine oil to drain completely.
i. Close the oil drain valve. Replace the cap on
the oil drain hose. Replace the oil drain hose in
its retaining clip.
j. Replace the dipstick.
2. Replace the oil filter.
a. Clean the area around the oil filter.
b. Loosen the oil filter by rotating it
counterclockwise with an oil filter wrench. On
20 kW models, allow the oil to drain from the
filter. Then remove the oil filter.
c. Clean the gasket sealing surface of the oil filter
adapter.
d. Apply a light coat of clean oil to the rubber seal
of the new oil filter.
e. Install the new oil filter following the instructions
provided with the filter.
3. Fill with oil.
Note: When the oil is drained, some oil remains in the
engine. The amount of oil needed to refill the
engine may be less than the capacity shown in
Figure 4-2. Use the dipstick shown in Figure 4-1
to check the oil level during the fill. Do not fill past
the full mark on the dipstick.
Note: See Section 4.2.3 for the recommended oil type.
Generator Set Model Oil Capacity, L (qt.)
14 kW 1.8 (1.9)
20 kW 1.9 (2.0)
Figure 4-2 Engine Oil Capacity
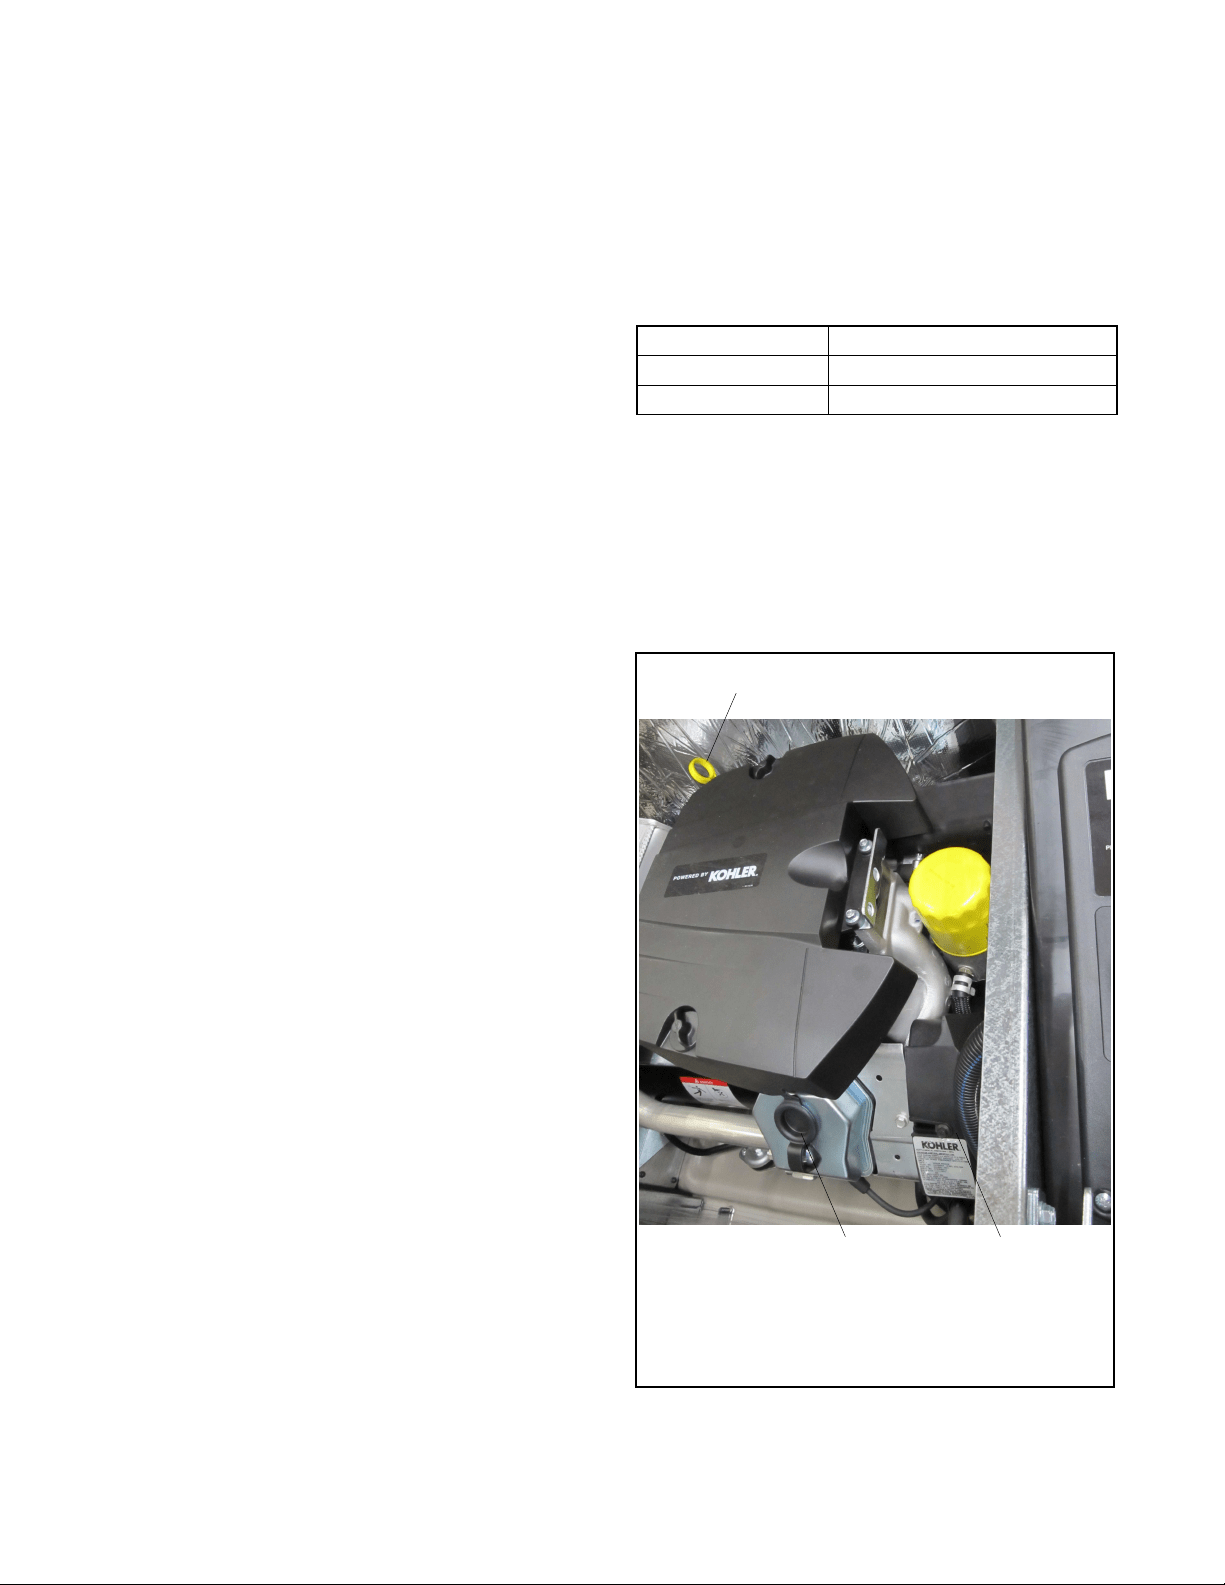
a. Add oil through the oil fill port; see Figure 4-3.
b. Use the dipstick to check the oil level before
starting to add the final quart of oil. Fill the
engine to the F mark on the dipstick.
c. Reinstall the dipstick and the oil fill cap.
3
img1062
Note: 20 kW model shown; 14 kW model is similar
1. Dipstick
2. Oil cooler located under shroud (20 kW only)
3. Oil fill location
1
2
Figure 4-3 Oil Fill Components
Loading ...
Loading ...
Loading ...