Loading ...
Loading ...
Loading ...
— 11 —
STEP 7
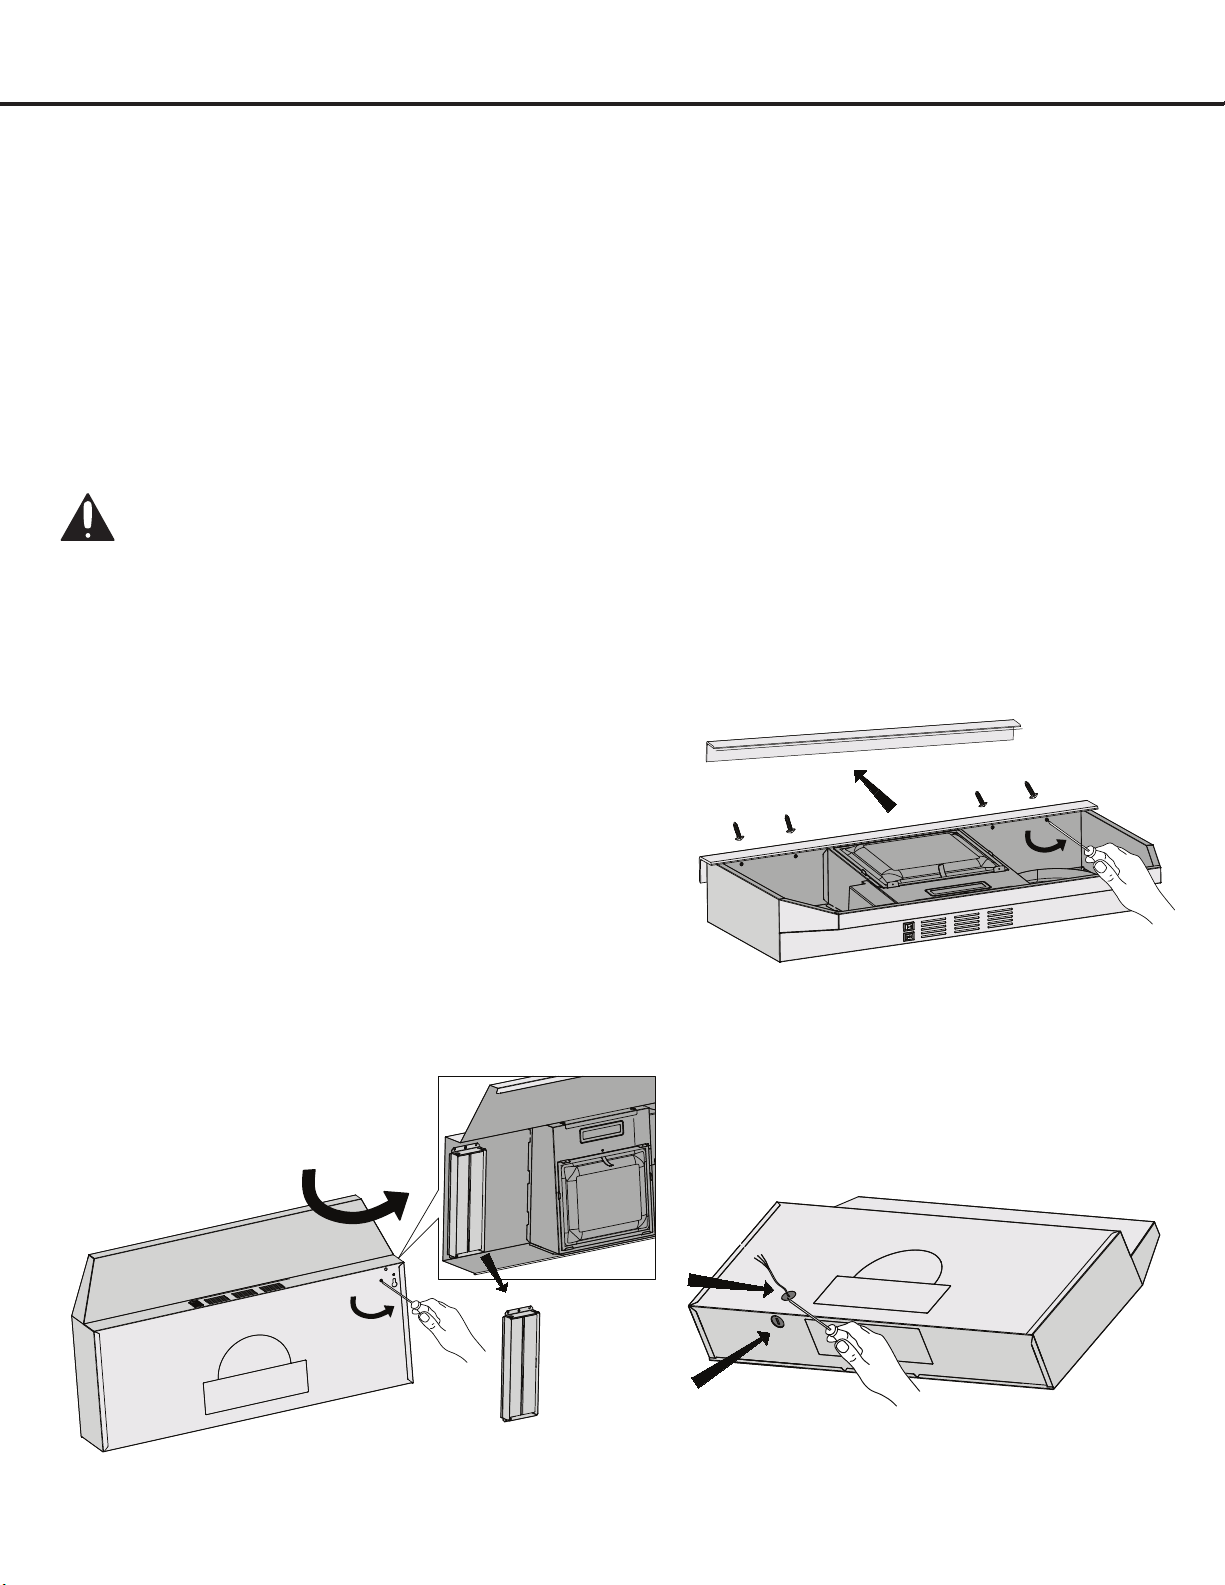
Remove Accessories
• Unscrew and remove corner bead located underneath the hood
(see Figure 1).
• Unscrew the rectangular damper located underneath the hood,
by removing top screws (see Figure 2).
• Use a tool to punch the wiring hole, from the two options for
holes. Please choose hole A or hole B according to wiring
requirement (see Figure 3).
Installation
STEP 6
Preparations
NOTE: To avoid damage to your hood, prevent debris from entering the vent opening.
• Determine and mark the centre line on the ceiling or wall where the range hood will be installed.
• Make sure there is proper clearance within the ceiling or wall for exhaust vent.
• Duetotheweightandsizeofthisunit,pleasemakesurethatthesupportsystemorframeworkbeingusedisstableand
secure in the ceiling or wall.
• Put a thick, protective covering over countertop, cooktop or range to protect from damage or dirt.
• Removeanyhazardousobjectsaroundtheareawheninstalling.
CAUTION
If moving the cooking range is necessary to install the hood, turn OFF the power on an electric range at the main
electrical box. SHUT OFF THE GAS BEFORE MOVING A GAS RANGE.
Figure 1
Figure 2 Figure 3
A
B
Loading ...
Loading ...
Loading ...