Loading ...
Loading ...
Loading ...
www.linarie.com.au
cont. installation
7
Slide-in racks Placement Warning
Leveling Your Appliance
Before you start heating, place your food in suitable cookware and
place it in the middle of the desired coo-king zone as described
before. Make sure that the bottom of the cookware and the cooking
surface are clean and dry.
The cooking zones have different power levels
(see “Description of the appliance“).
These can be set in steps by turning the corresponding power
control knob clockwise to the desired position.
When you have finished cooking, switch off the cooking zone
by turning the power control knob to the “Off” position ( ).
Slight heating of small quantities
Melting chocolate, butter, and foods that burn quickly
Gentle cooking / simmering
Slow warming up
Reheating/ Rapid simmering/ Cooking rice
Pancakes
Sauteing / Cooking pasta
Stir-frying/ Searing/ Bring soups or water to the boil
Power level Suitability
Controlling the heating zones of the hob
Take out of the 4 cooker feet from oven cavity, which be packed
together with backing rack, and then screw them into the 4 plinth
in lower part of cooker. These feet level off the oven when necessary.
The height of the cooker can be adjusted by means of adjustable
feet in the plinth. Adjust the feet by tilting the cooker from the side.
Then install the product into position. It is essential that the cooker
be standing level before installation.
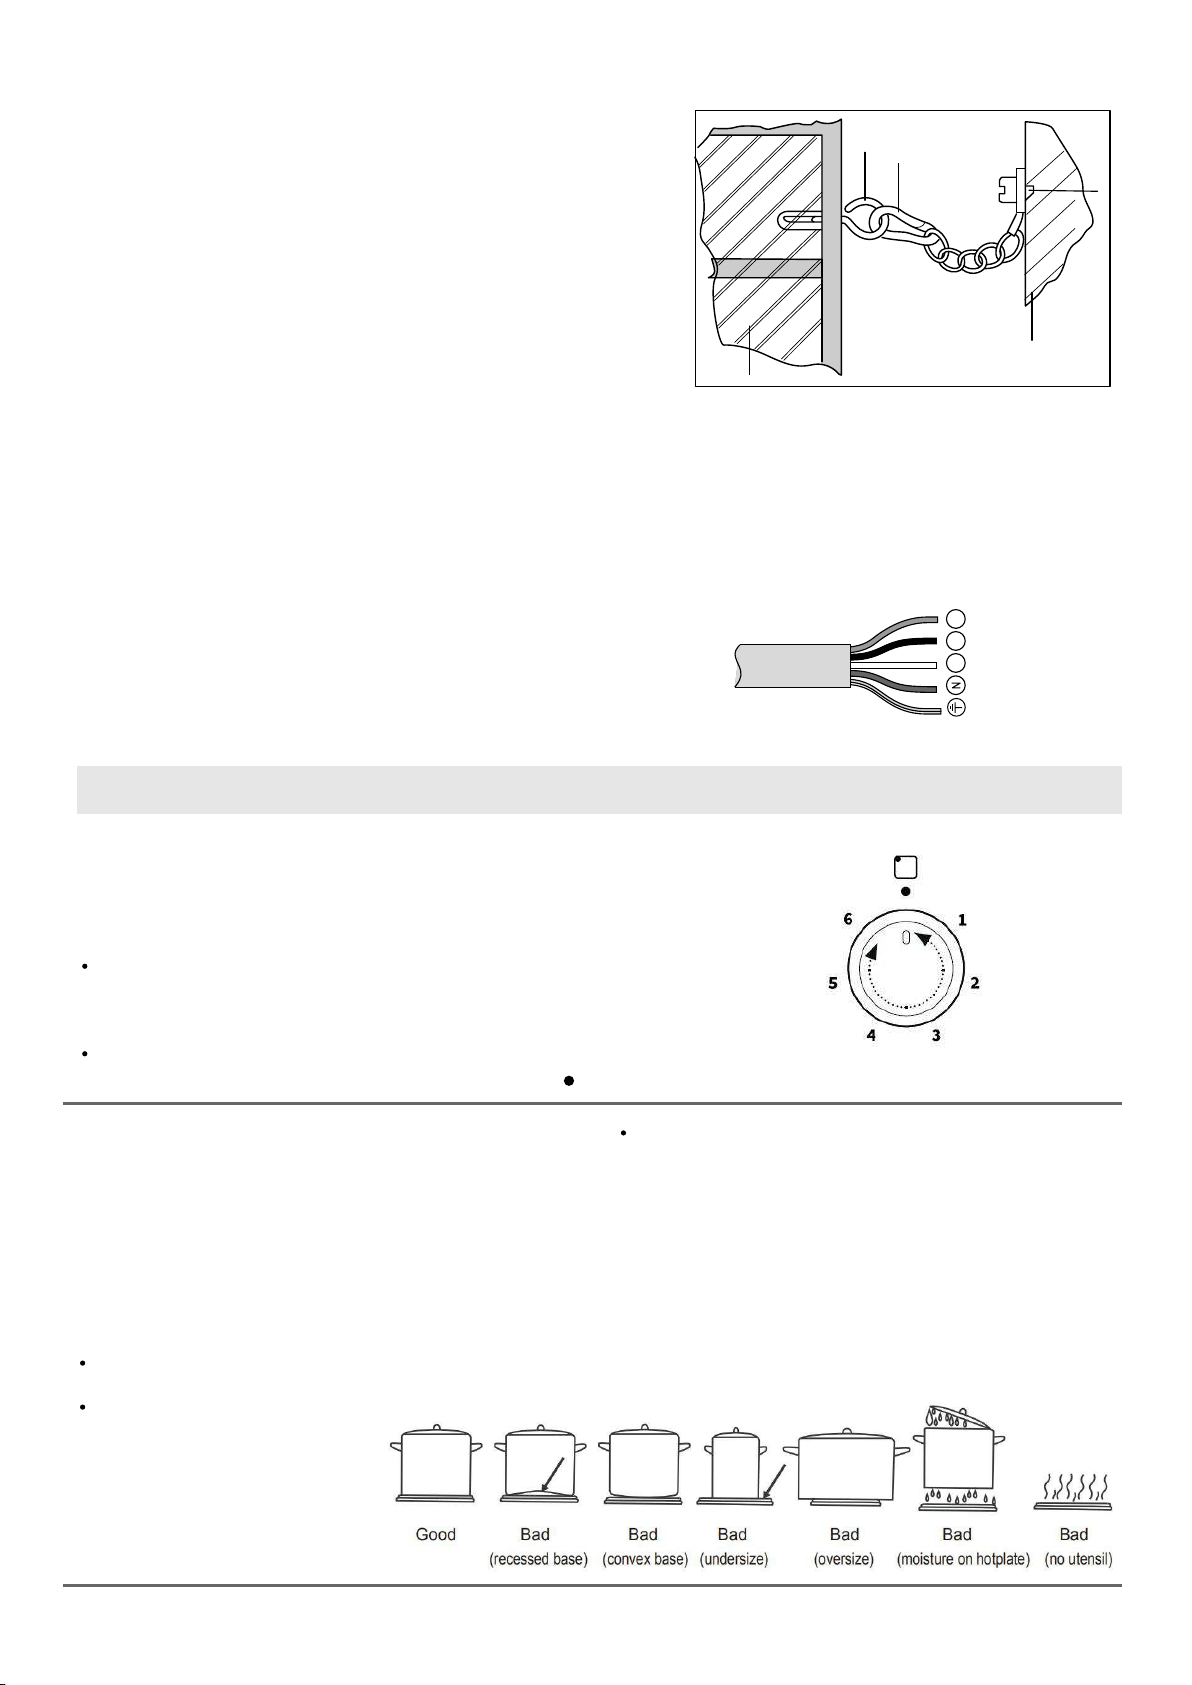
Fitting the safety chain and hook
Electrical connection
To prevent the cooker from tipping forward, two lengths of chain
MUST BE fixed to the back of the cooker, which should be secured
to the hooks provided at all times. The hooks should be secured
to the wall at the rear of the cooker. The chains should always be
attached to the hooks when the cooker is in position against the wall.
Fix the hooks into the wall immediately behind the cooker on both
sides. Ensure the chain to the hook before using or cleaning the oven.
All electrical work must be carried out by a suitably qualified and
authorized electrician. No a terations or willful changes in the electricity
supply should be carried out. Before attempting the connection, check
whether the voltage indicated on the rating label corresponds to the
actual mains voltage.
Earthing wire should be installed in such manner to be the last one
pulled out in case the safety relief device of the mains lead should fail.
Mains lead behind the oven must be placed in such manner to avoid
touching the back panel of the oven because of the heat it develops
during operation.
1 Stability hook
2 Safety chain
3 Kitchen wall
8. OPERATION
1. Connect the appliance to the main electrical supply
correctly and switch on the main supply.
grey
blue
yellow - green
2. Check the appliance and its functions.
black
grown
L1
L2 L3
4 Firmliy fix chain to cooker rear
5 Rear of cooker
If a cooking zone is still too hot to touch after use, this is
indicated by the corresponding coo-king zone indicator
light at the front of the hob.
Do not touch the cooking zone!
The warning signal will disappear again when the surface
has cooled down to a safe tempera-ture.
This can also be used as an energy-saving func-tion:
Use the still hot cooking zone for subse-quent cooking
processes.
1 - 2
2 - 3
3 - 4
4 - 5
5 - 6
Do not use pots and pans that are unsteady and likely
to rock or overbalance.
Do not operate the cooktop tor an extended time
without utensil on the Hilight.
4
5
3
2
1
Loading ...
Loading ...
Loading ...