Loading ...
Loading ...
Loading ...
P90 Series Vertical Shaft Engines
84
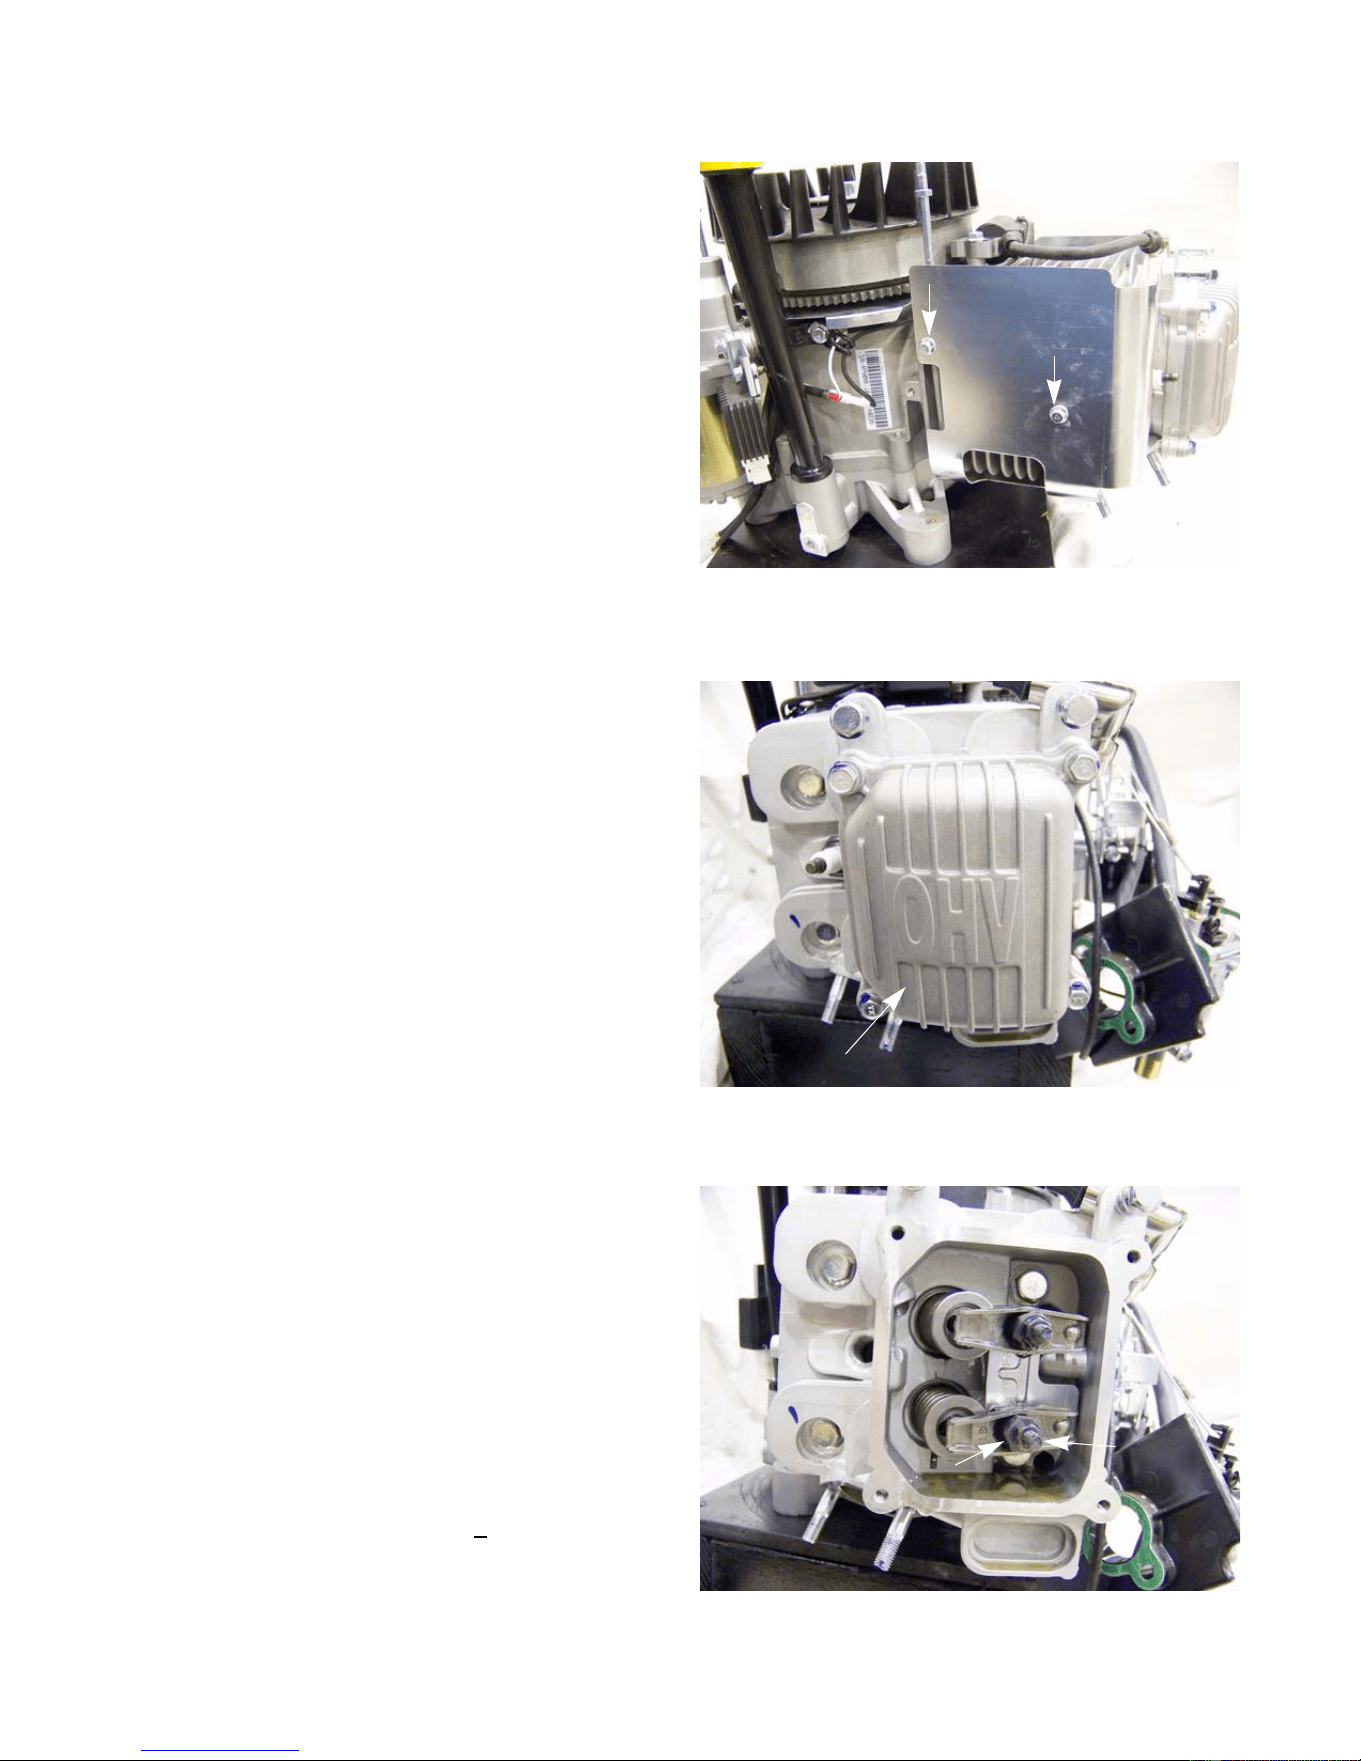
6. Remove the two screws, indicated by the arrows in
Figure 9.3, that secure the baffle to the cylinder
using an 8 mm wrench.
7. Remove the baffle.
8. Remove the spark plug using a 13/16” or 21mm
wrench.
9. Rotate the crankshaft until it is at TDC of the com-
pression stroke by following the steps described in
the valve lash section of Chapter 1: Introduction.
10. Remove the four screws securing the valve cover
using a 10mm wrench.
See Figure 9.4.
11. Loosen the jam nuts and fulcrum nuts that secure
the rocker arms using a 10mm wrench and a 14mm
wrench.
12. Pivot the rocker arms aside, or remove them com-
pletely, and remove the push rods.
NOTE: Once broken-in, the rocker arm should be
kept with its corresponding valve.
NOTE: The intake and exhaust push rods are iden-
tical and interchangeable. It is preferable,
but not absolutely necessary, to return the
same push rods to their original locations on
engine with substantial (
>100 hours) operat-
ing time.
13. Remove the head bolts using a 14 mm wrench.
Figure 9.3
Figure 9.4
Valve cover
Figure 9.5
Jam nut
Fulcrum nut
www.mymowerparts.com
For Discount Cub Cadet Parts Call 606-678-9623 or 606-561-4983
www.mymowerparts.com
For Discount Cub Cadet Parts Call 606-678-9623 or 606-561-4983
Downloaded from www.ManualsFile.com manuals search engine
Loading ...
Loading ...
Loading ...