Loading ...
Loading ...
Loading ...
NOTE: The seat may have been shipped in a box.
Remove the four screws from the bottom of seat and
place seat in position against the seat pivot bracket.
Follow the directions above to attach the seat.
Quick AdjustmentSeat
Remove the two bolts from the bottom of the seat
and remove the packing straps. Replace the bolts.
Line up plastic seat spacers with the slots in seat
pivot bracket. Slide seat in until front seat spacer
engages the seat stop. To adjust the seat refer to
the Adjustment Section. See Figure 4.
Seat
Spacers
-Slot
Stop
_eat
Spacers
Figure 4
NOTE: If the seat was shipped in a box, line up plastic
seat spacers with the slots in seat pivot bracket and
sfide seat in until front seat spacer engages seat stop.
WARNING: Before operating your unit,
stand behind quick adjustment seat and
pull back on seat, making sure seat is
engaged in seat stop.
RemovingShippingBrace
WARNING: The shipping brace, used for
packaging purposes only, must be removed
and discarded before operating your riding
mower.
WARNING: Make sure the dding mower's
engine is off, remove the ignitionkey, and set
the parking brake before removing the
shipping brace.
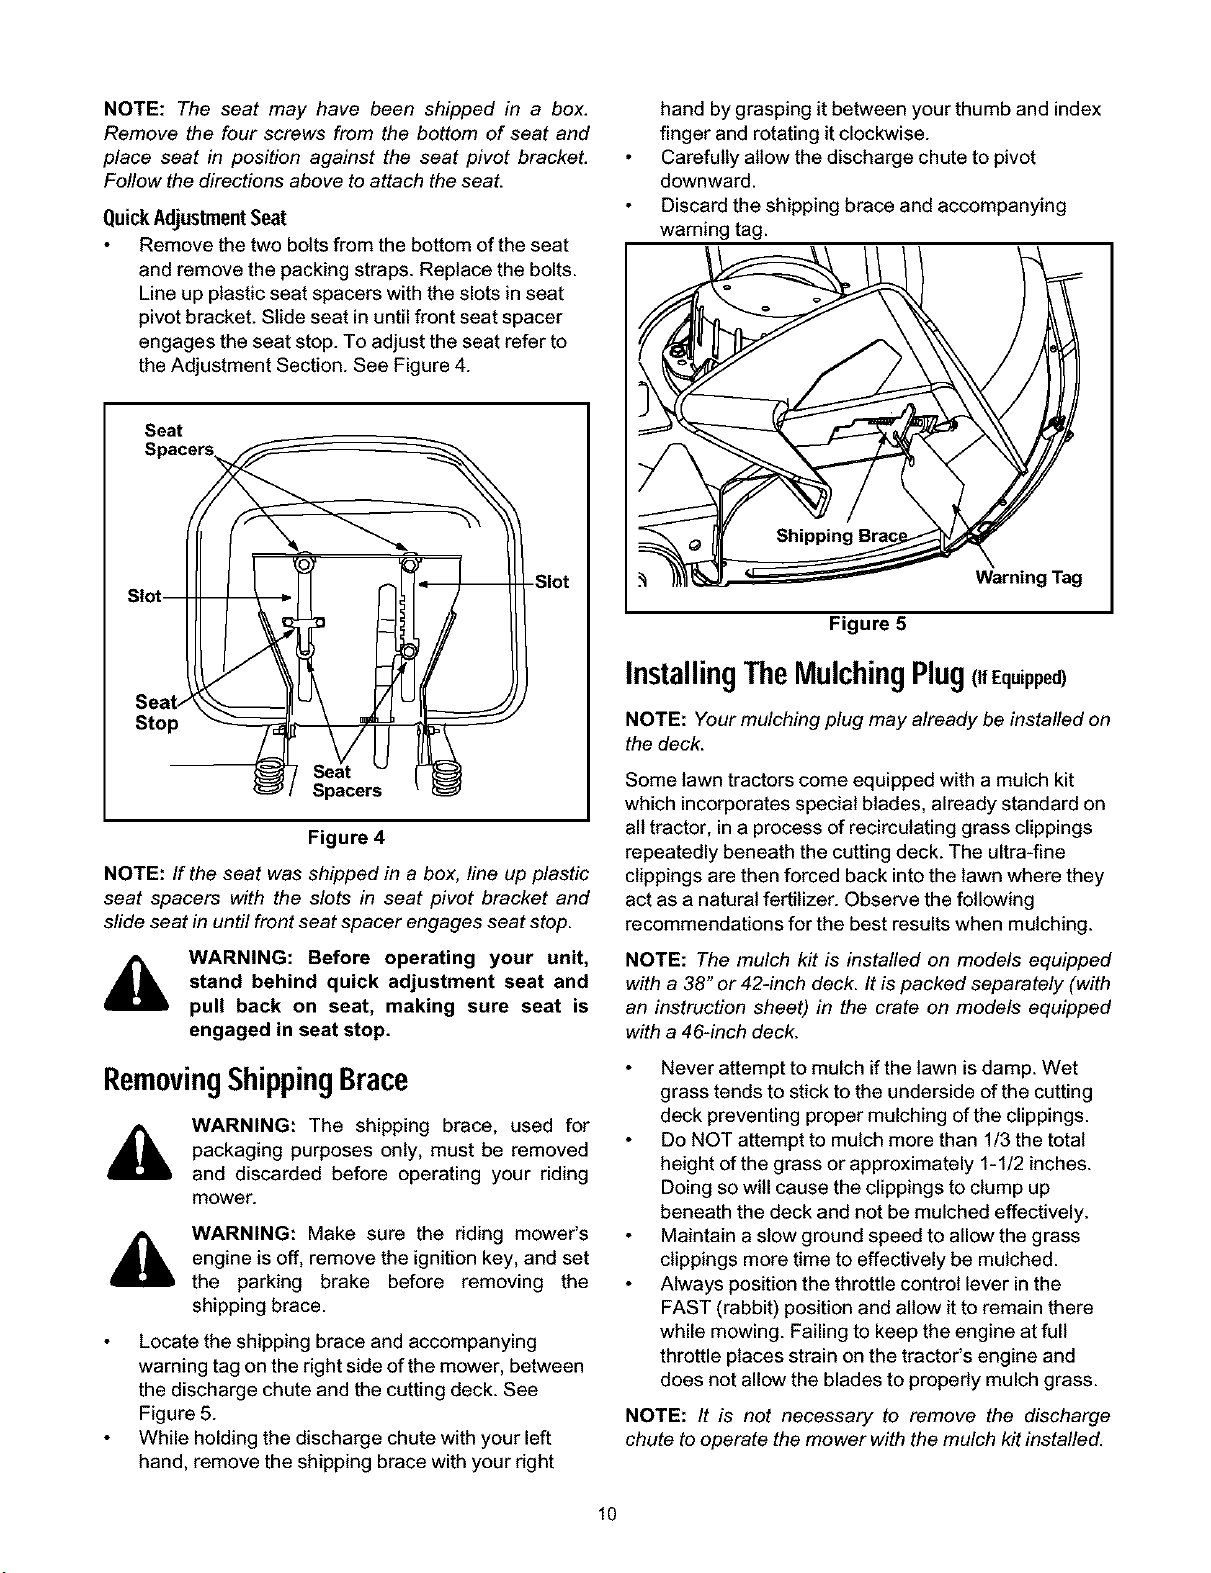
Locate the shipping brace and accompanying
warning tag on the right side of the mower, between
the discharge chute and the cutting deck. See
Figure 5.
While holding the discharge chute with your left
hand, remove the shipping brace with your dght
hand by grasping it between your thumb and index
finger and rotating it clockwise.
Carefully allow the discharge chute to pivot
downward.
Discard the shipping brace and accompanying
warning tag.
Warning Tag
Figure 5
InstallingTheMulchingPlug(IfEquipped)
NOTE: Your mulching plug may already be installed on
the deck.
Some lawn tractors come equipped with a mulch kit
which incorporates special blades, already standard on
all tractor, in a process of recirculating grass clippings
repeatedly beneath the cutting deck. The ultra-fine
clippings are then forced back into the lawn where they
act as a natural fertilizer. Observe the following
recommendations for the best results when mulching.
NOTE: The mulch kit is installed on models equipped
with a 38" or 42-inch deck. It is packed separately (with
an instruction sheet) in the crate on models equipped
with a 46-inch deck.
Never attempt to mulch if the lawn is damp. Wet
grass tends to stick to the underside of the cutting
deck preventing proper mulching of the clippings.
Do NOT attempt to mulch more than 1/3 the total
height of the grass or approximately 1-1/2 inches.
Doing so will cause the clippings to clump up
beneath the deck and not be mulched effectively.
Maintain a slow ground speed to allow the grass
clippings more time to effectively be mulched.
Always position the throttle control lever in the
FAST (rabbit) position and allow it to remain there
while mowing. Failing to keep the engine at full
throttle places strain on the tractor's engine and
does not allow the blades to propedy mulch grass.
NOTE: It is not necessary to remove the discharge
chute to operate the mower with the mulch kit installed.
10
Loading ...
Loading ...
Loading ...