Loading ...
Loading ...
Loading ...
!
S CTIlON 3
I STEP
BY STEP GUIDES TO
INSTALL
I
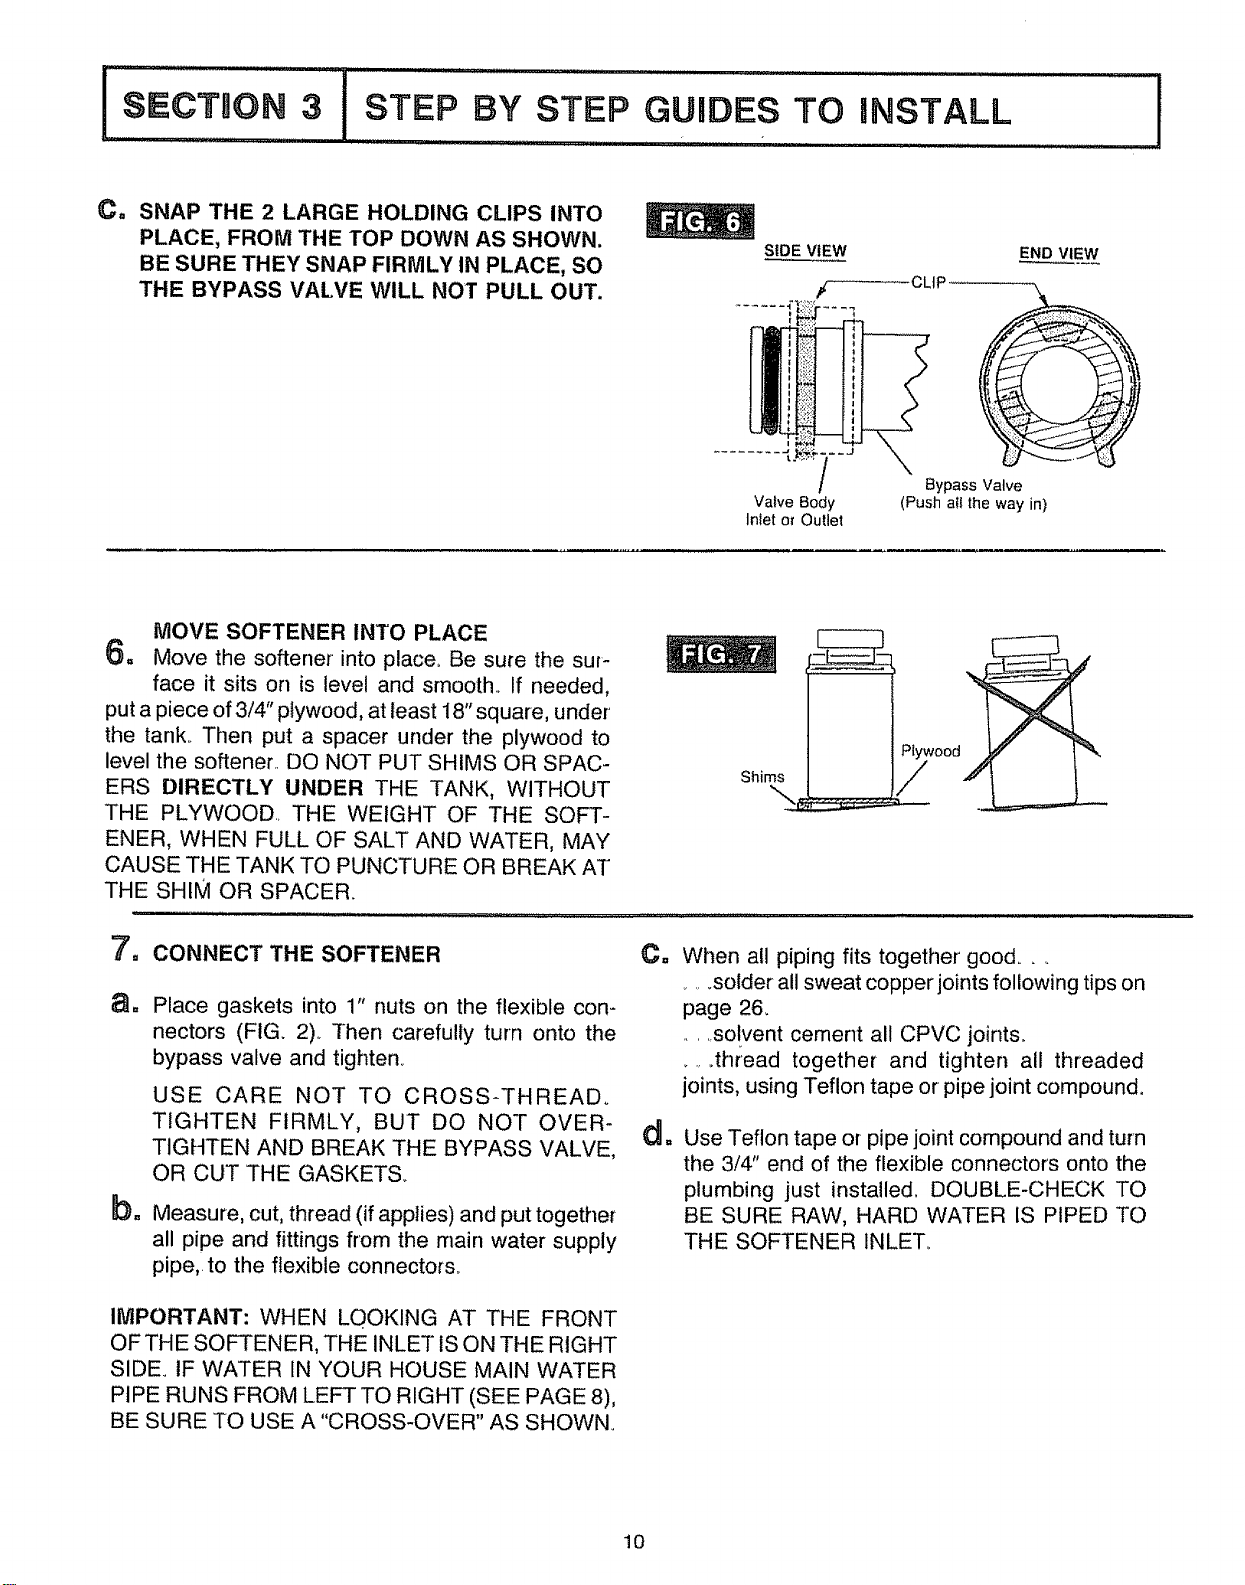
C, SNAP THE 2 LARGE HOLDING CLIPS INTO
PLACE, FROM THE TOP DOWN AS SHOWN.
BE SURE THEY SNAP FIRMLY IN PLACE, SO
THE BYPASS VALVE WILL NOT PULL OUT.
S|DE VIEW
# CLaP
END VIEW
"t t' ,- J
/
Valve Body
Inlet or Outlet
Bypass Valve
(Push atl the way in)
MOVE SOFTENER INTO PLACE
6o Move the softener into place. Be sure the sur-
face it sits on is level and smooth.. If needed,
put a piece of 3/4" plywood, at least 18" square, under'
the tank.. Then put a spacer under the plywood to
level the softener.. DO NOT PUT SHIMS OR SPAC-
ERS DIRECTLY UNDER THE TANK, WITHOUT
THE PLYWOOD.. THE WEIGHT OF THE SOFT-
ENER, WHEN FULL OF SALT AND WATER, MAY
CAUSE THE TANK TO PUNCTURE OR BREAK AT
THE SHIM OR SPACER.
Shims
Plywood
/
btl
CONNECT THE SOFTENER
Place gaskets into 1" nuts on the flexible con-
nectors (FIG. 2).. Then carefully turn onto the
bypass valve and tighten.
USE CARE NOT TO CROSS-THREADo
TIGHTEN FIRMLY, BUT DO NOT OVER-
TIGHTEN AND BREAK THE BYPASS VALVE,
OR CUT THE GASKETS_
Measure, cut, thread (if applies) and put together
all pipe and fittings from the main water supply
pipe,, to the flexible connectors.
Ca
When all piping fits together good..
......solder all sweat copper joints following tips on
page 26.
.... solvent cement all CPVC joints.
.... thread together and tighten all threaded
joints, using Teflon tape or pipe joint compound.
Use Teflon tape or pipe joint compound and turn
the 3/4" end of the flexible connectors onto the
plumbing just installed, DOUBLE-CHECK TO
BE SURE RAW, HARD WATER IS PIPED TO
THE SOFTENER INLET°
IMPORTANT: WHEN LO.OKING AT THE FRONT
OFTHE SOFTENER, THE INLET IS ON THE RIGHT
SIDE. tF WATER IN YOUR HOUSE MAIN WATER
PIPE RUNS FROM LEFT TO RIGHT (SEE PAGE 8),
BE SURE TO USE A "CROSS-OVER" AS SHOWN.
10
Loading ...
Loading ...
Loading ...