Loading ...
Loading ...
Loading ...
8 9INSTALLATION OF THE APPLIANCEINSTALLATION OF THE APPLIANCE
Freestanding installation (continued)
Installation of screw-in feet
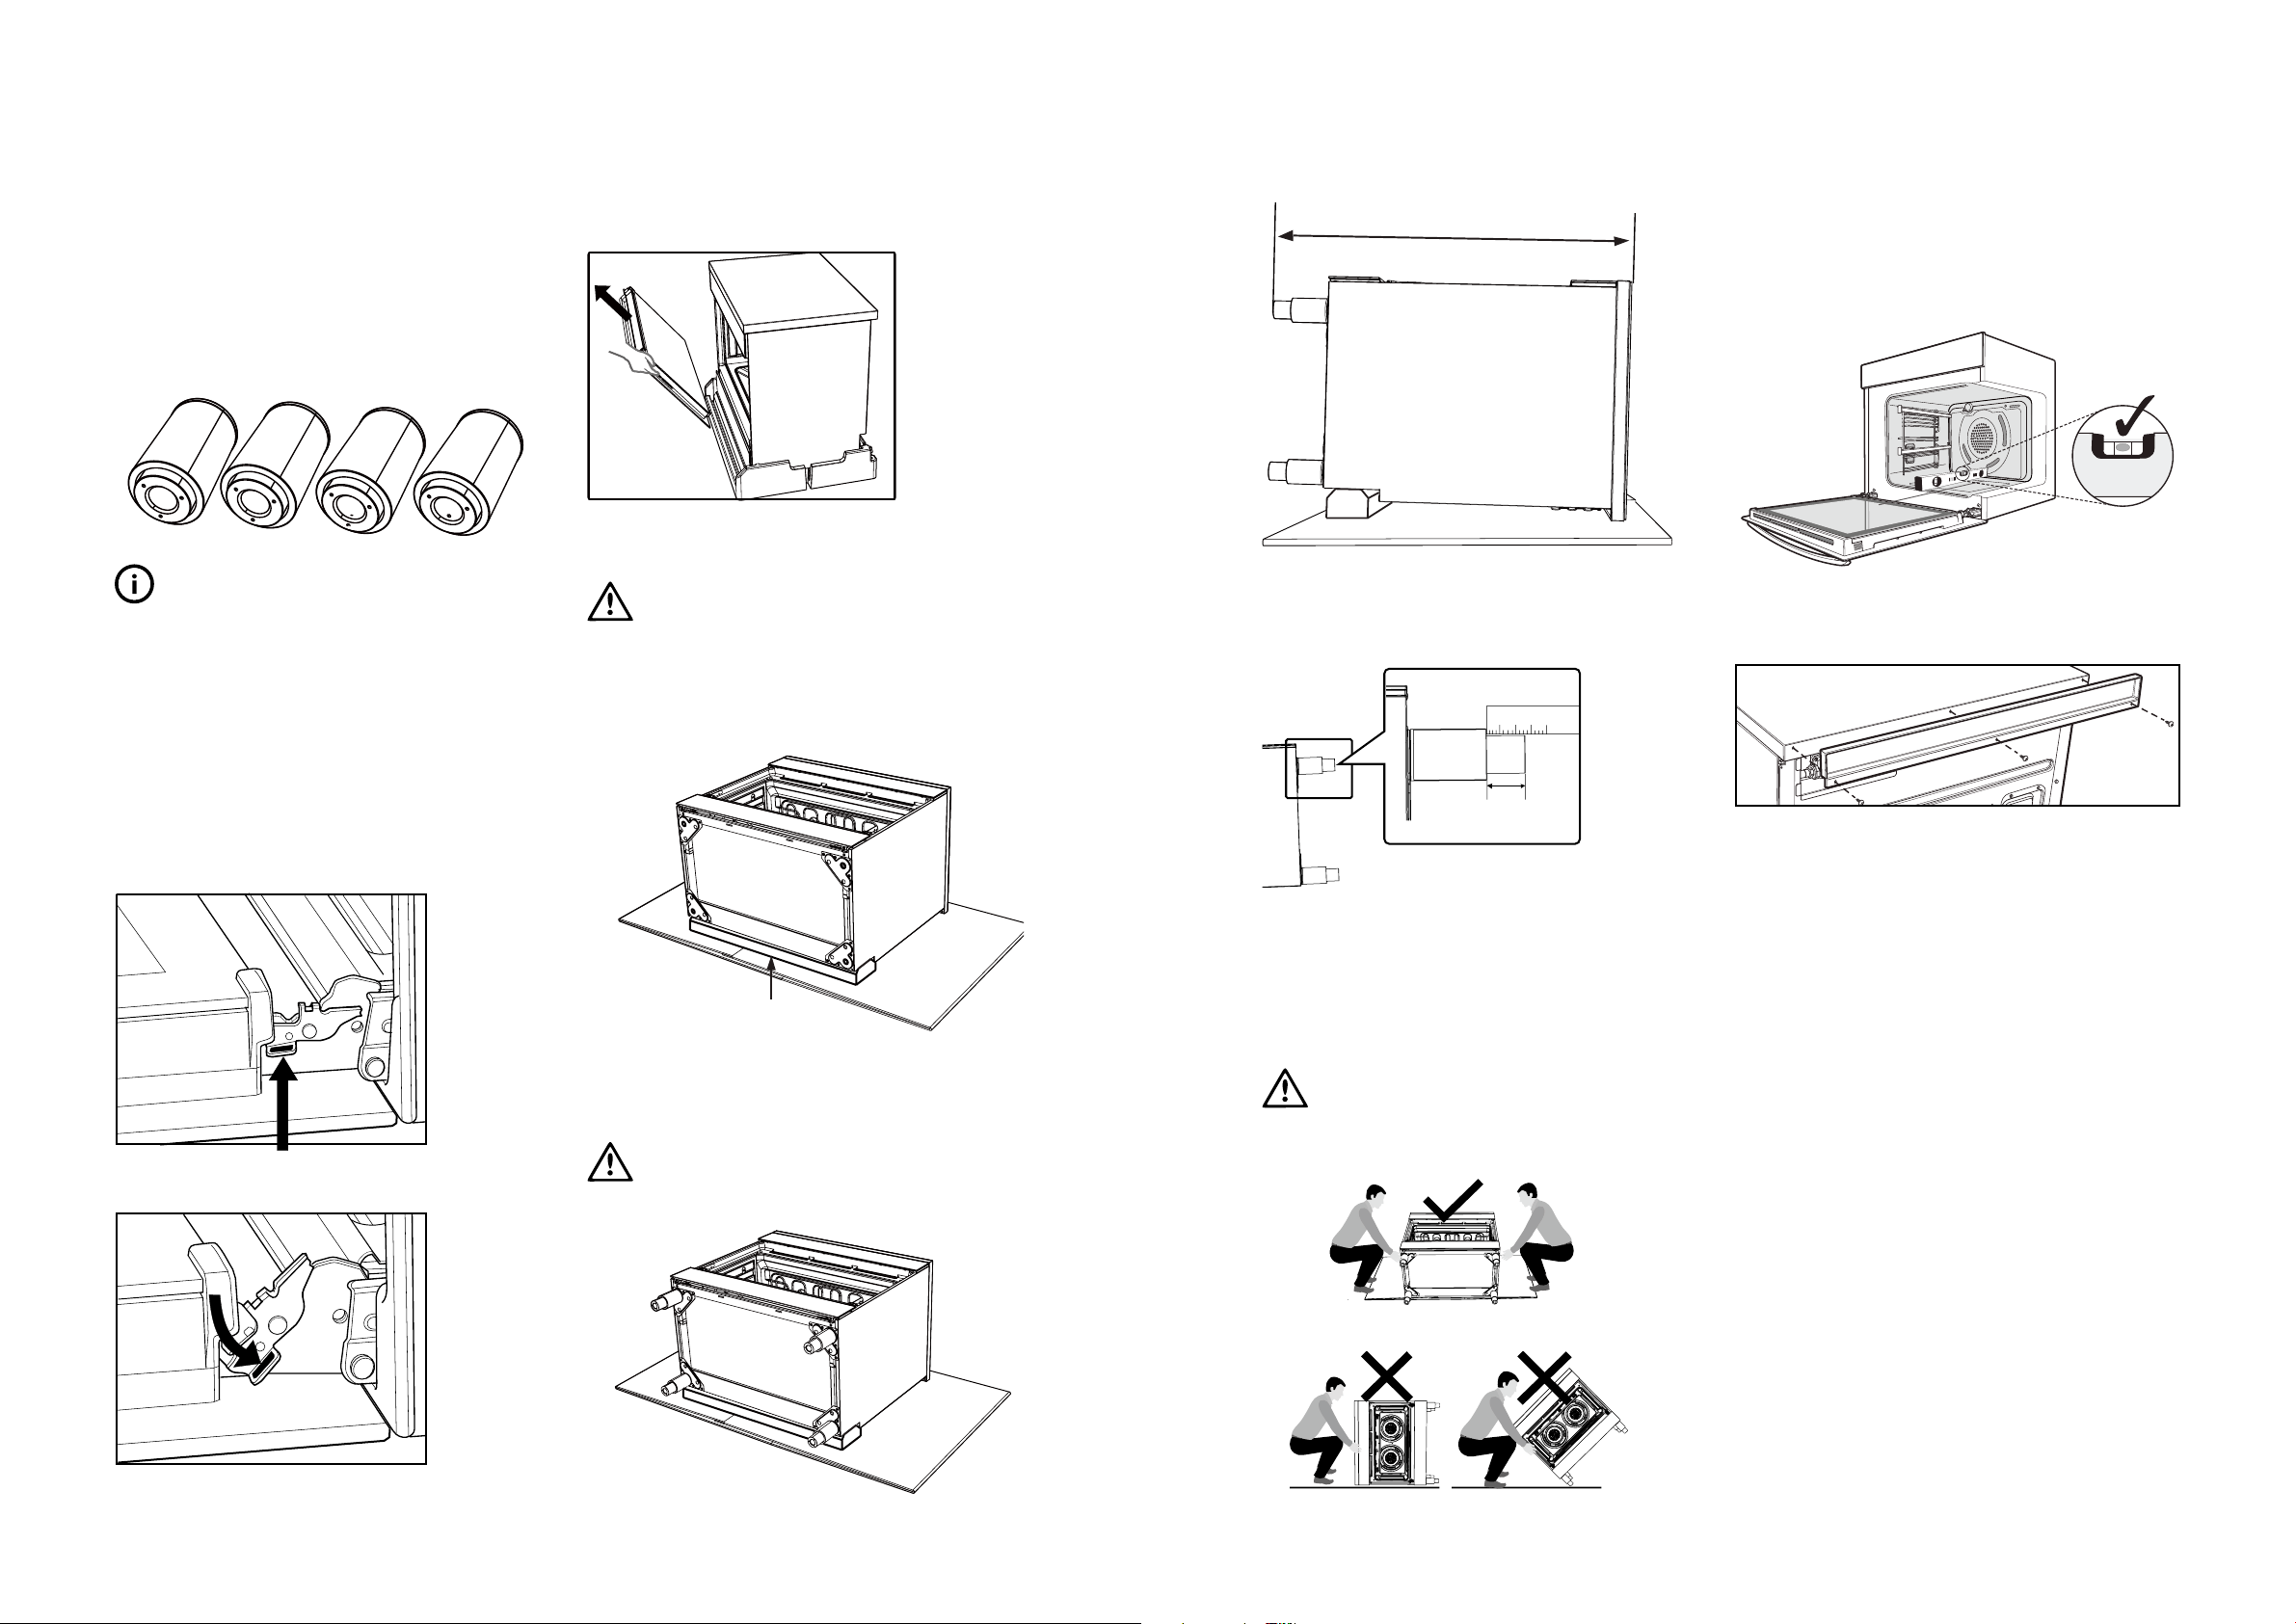
• Freestanding appliance are supplied with four
screw-in feet in the internal accessory pack.
The screw-in feet can be adjusted by turning the
lower half clockwise or anti-clockwise.
IMPORTANT
• Your cooker is supplied with two silver feet and
two black feet, it is recommended to install the two
sliver feet at the front of the appliance for the best
aesthetics.
• If the appliance is a gas hob model, remove the
burner cap and burner crown. Store all items safely,
away from the installation area.
You MUST remove the oven door before commencing
installation
Locking tab up at normal position
Press the locking tab down for removing the door.
Press the locking tab down for
Gently close the door until it comes to a stop. Then lift
the door off the hinge
.
Tilt and carefully lay the appliance on its back to gain
access to the installation point for the screw in feet.
CAUTION
• To avoid scratching the floor and the appliance
itself, fold the packaging carton board and place
it underneath the appliance as protection.
• The cooker MUST be laid on its back when
installing the feet.
Put the oven door handle protection
foam underneath the laid down cooker to
protect your cooker when puting it upright
Install the four supplied feet via the four installation
points. Make sure that each foot is securely fastened.
CAUTION
Do not over-torque the foot.
Adjust the height of the screw-in feet to make sure the
hob surface is 10mm above the bench when appliance
is upright.
Bench height + 10mm minimum
If your kitchen has a 900mm height kitchen bench
top, follow the quick measurement guide below before
putting the cooker upright
For a 900mm height kitchen bench top,
adjust the lower half of the feet to measure
50mm as shown in the illustration.
50mm
Tilt the appliance upright by lifting the back of the hob
and pivoting it about the back two feet.
WARNING
Heavy item! This step must be performed by two
persons.
Leveling oven
Place a level in the oven as below making sure the
level sits on the front and rear forms. Adjust the feet
accordingly to level the appliance.
Installing splashback
Fit splashback to rear of hob with three screws provided.
INSTALLATION OF THE APPLIANCE (CONTINUED)
Loading ...
Loading ...
Loading ...