Loading ...
Loading ...
Loading ...
12
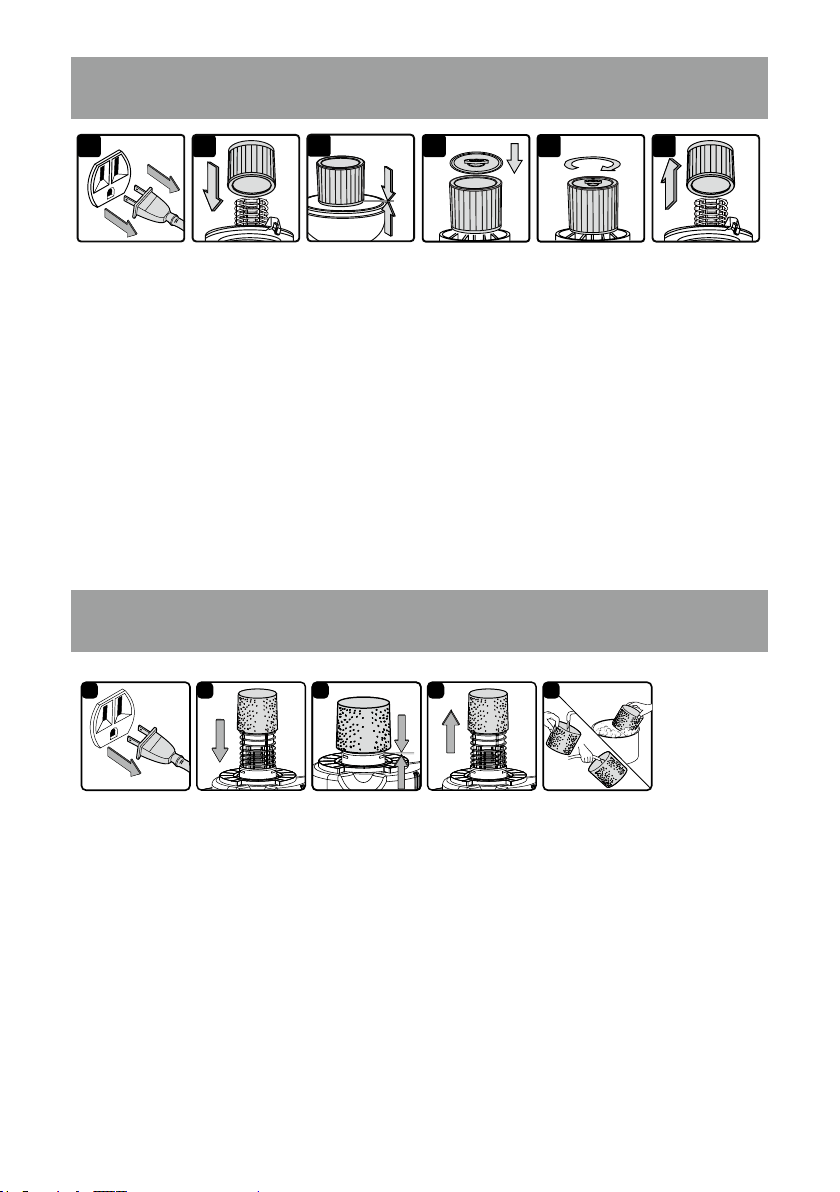
INSTALLING CARTRIDGE FILTER
1. Verify that the power cord is disconnected from the outlet (Fig. 1).
2. Remove the power head and place in an upside down position.
3. Install the cartridge lter over the lter cage making sure the cage is completely covered.
Carefully push lter in until it stops against the power head (Fig. 2 & 3).
4. Place the lter retainer on top of the cartridge lter over the raised lip and tighten down by
turning the retainer clockwise; do not over-tighten (Fig. 4 & 5).
5. Place the power head back onto the collection tank.
REMOVING & CLEANING CARTRIDGE FILTER
1. Unlock and remove the lter retainer by turning retainer handle counterclockwise.
2. Carefully remove the cartridge lter by sliding it off the lter cage (Fig. 6).
3. Clean the cartridge lter by gently tapping or brushing dirt off. Cleaning should not be done
indoors in living areas. For optimal performance a new lter is recommended.
4. Install cleaned or new lter as instructed above.
INSTALLING & CLEANING CARTRIDGE FILTER
2
3
4 5 6
1
1 2 3 4
5
INSTALLING FOAM WET FILTER
1. Verify that the power cord is disconnected from the outlet (Fig. 1).
2. Remove the power head and place in an upside down position. Follow instructions to remove
the cartridge lter.
3. Carefully slide foam wet lter down over the lter cage making sure the cage is completely
covered (Fig. 2 & 3).
4. Place the power head onto the collection tank.
CLEANING FOAM WET FILTER
1. With the removed power head in an upside down position, carefully remove the foam wet lter
(Fig. 4).
2. Use a mild soap and water solution to wash the foam wet lter and rinse with clean water (Fig. 5).
3. Allow the lter to air dry for 24 hours before installing onto the lter cage.
INSTALLING & CLEANING FOAM WET FILTER
Loading ...
Loading ...
Loading ...