Digger All Season Carrier - Model D-75
Step By Step Instructions
Step 1) Remove all parts from carton.
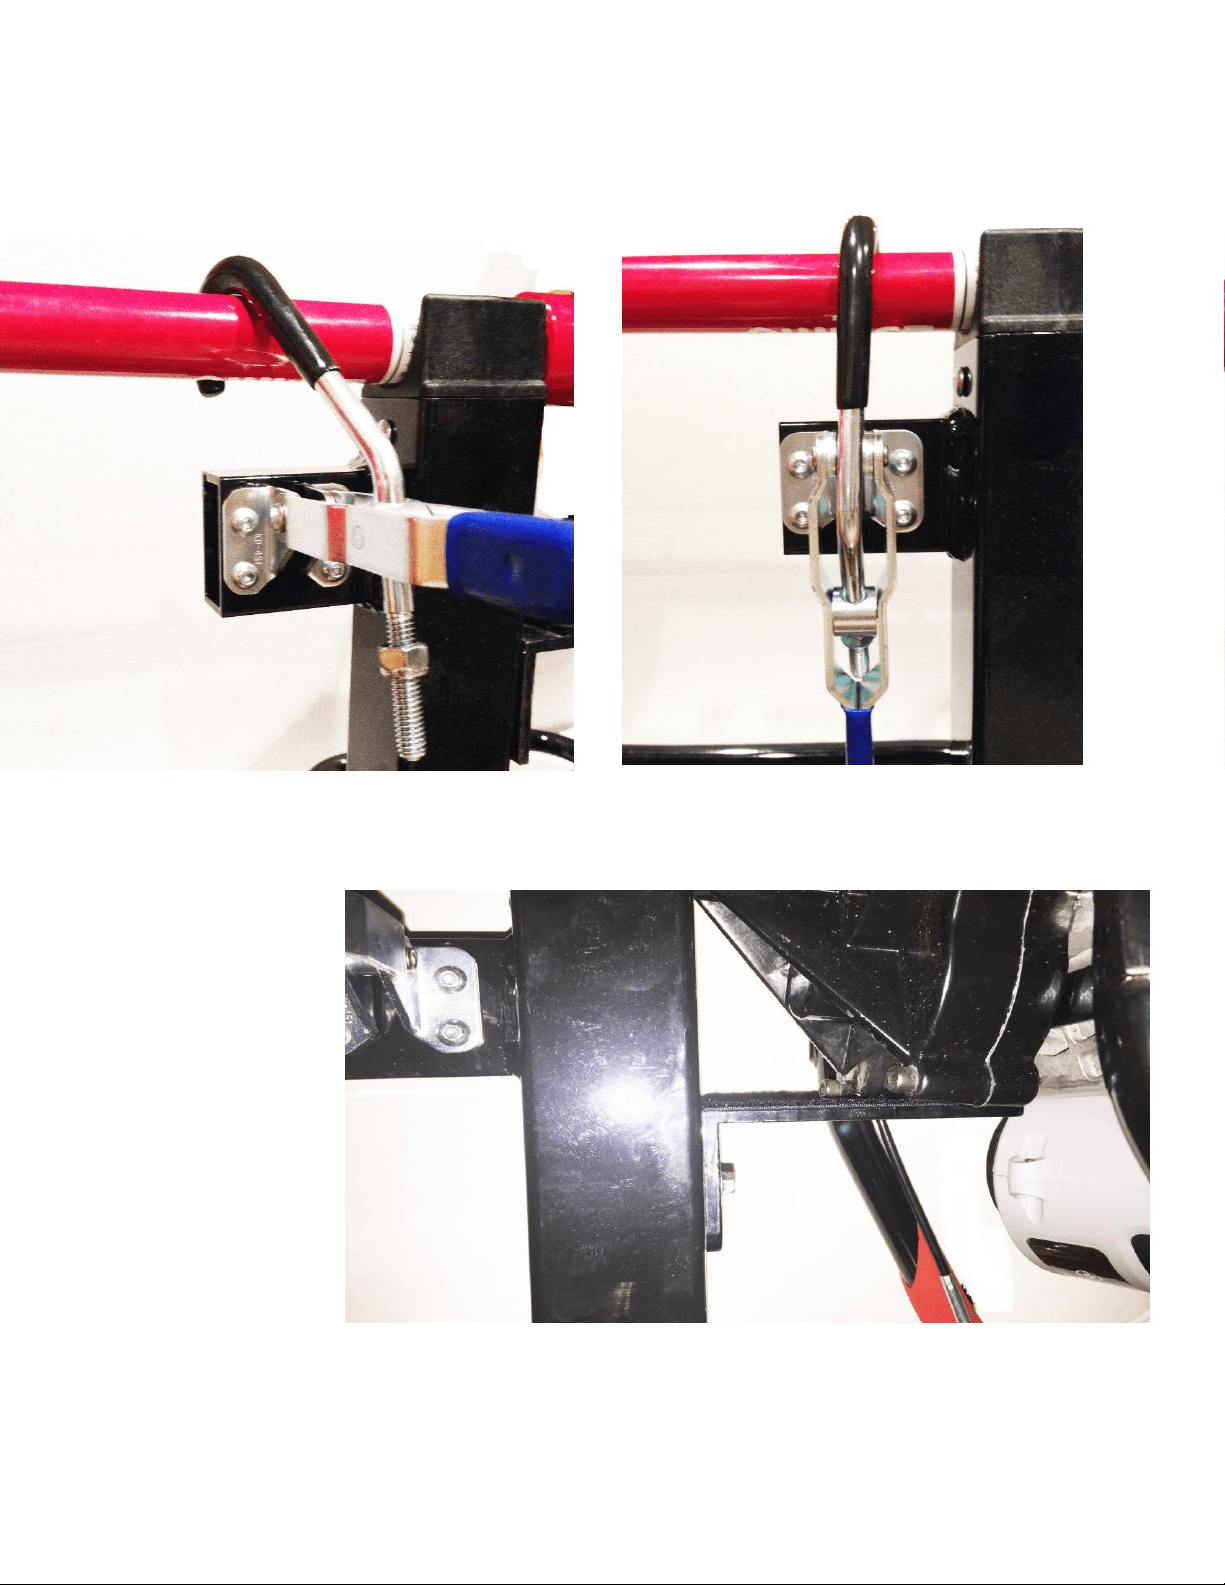
Step 2) Place the U Frame (I) on your ATV Rack or Snowmobile Bumper.
Step 3) Once you are satisfied with the placement of the U Frame place
the 5 mounting bolts (E) through the holes on the U Frame (I), choosing
the holes that are closest to a support or cross section on the bumper or
rack.
Step 4) Take the Sandwich Plate (A) and slide it underneath your rack or
bumper, lining the holes on the plate with the bolts and holes on the U
Frame.
Step 5) Start tightening the mounting bolts slowly, moving from one to
another so you tighten the plate equally across the rack or bumper.
Step 6) Check to make sure the carrier is snug and does not move. If it moves or slides at all check which bolt is loose
and tighten that bolt and nut.
If you are going to use the carrier for holding ice augers or weed whippers, please follow the steps below.
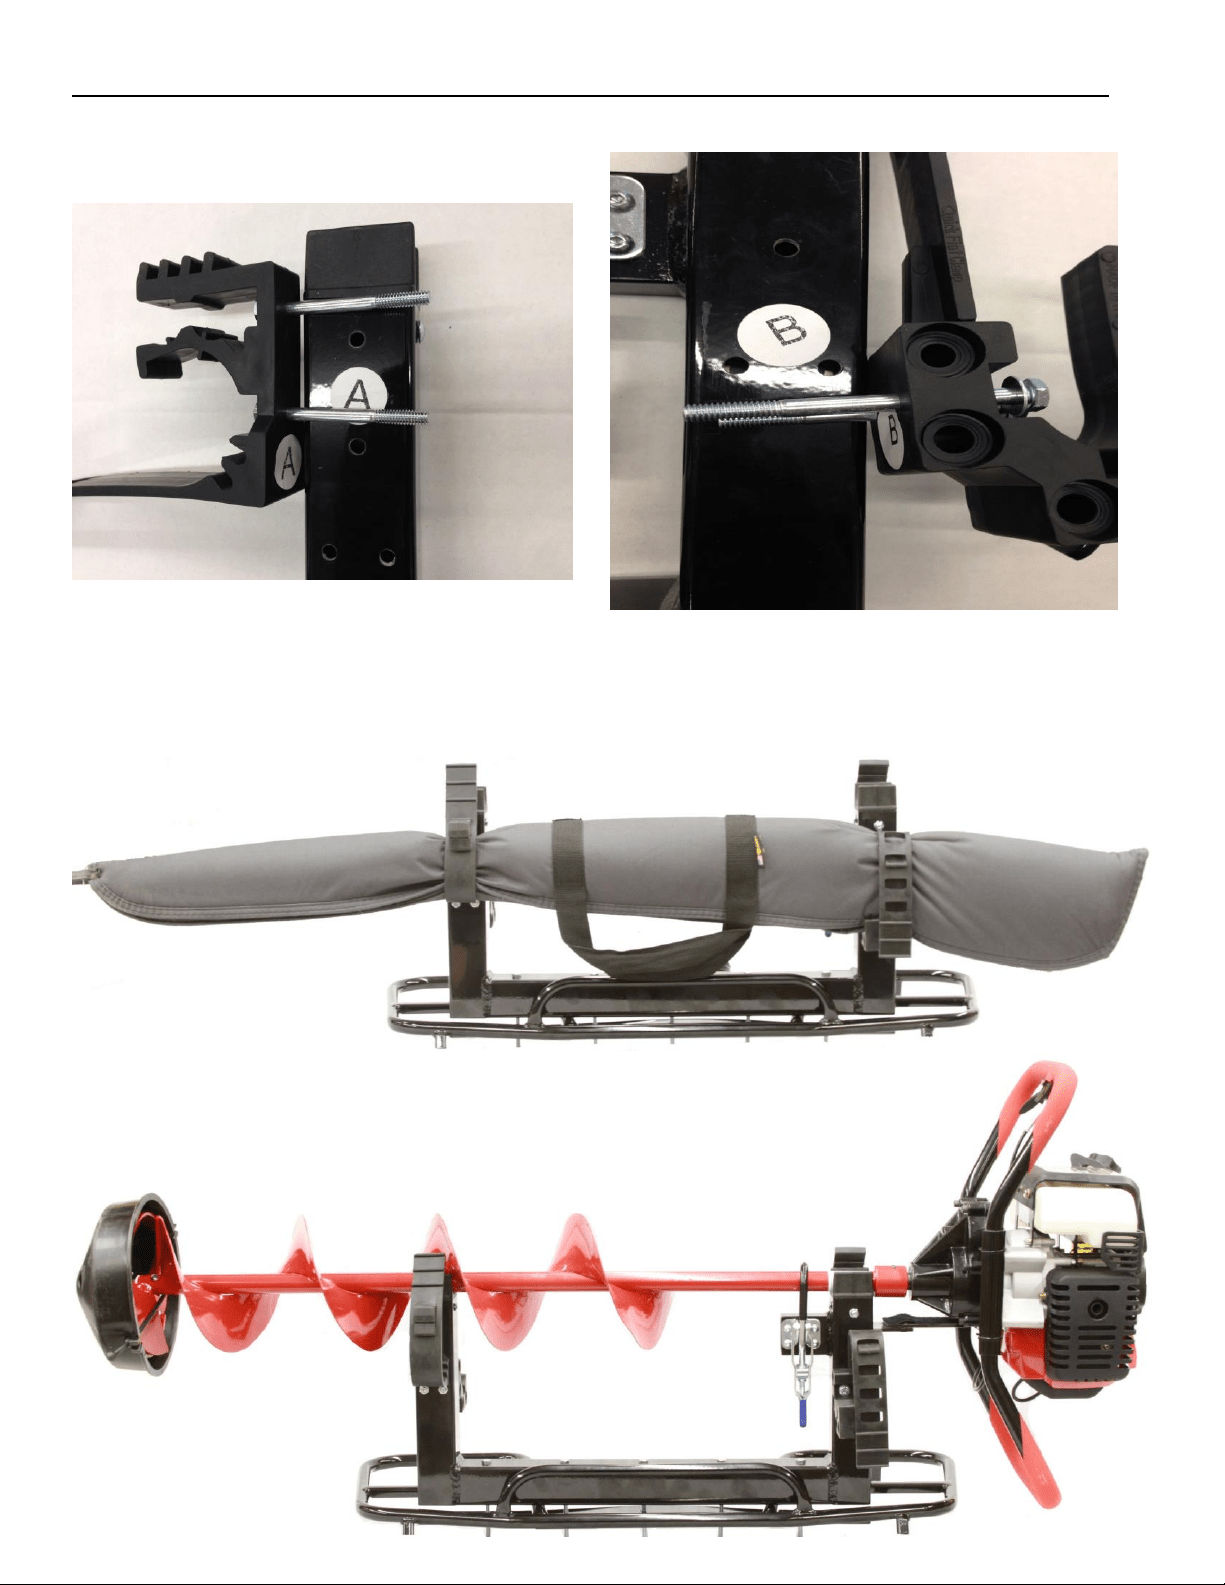
Step 1) Place your auger in the plastic shaft cradles (H) with the power head to the side that has the J Hook and Clamp (D
and G).
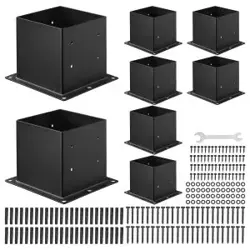
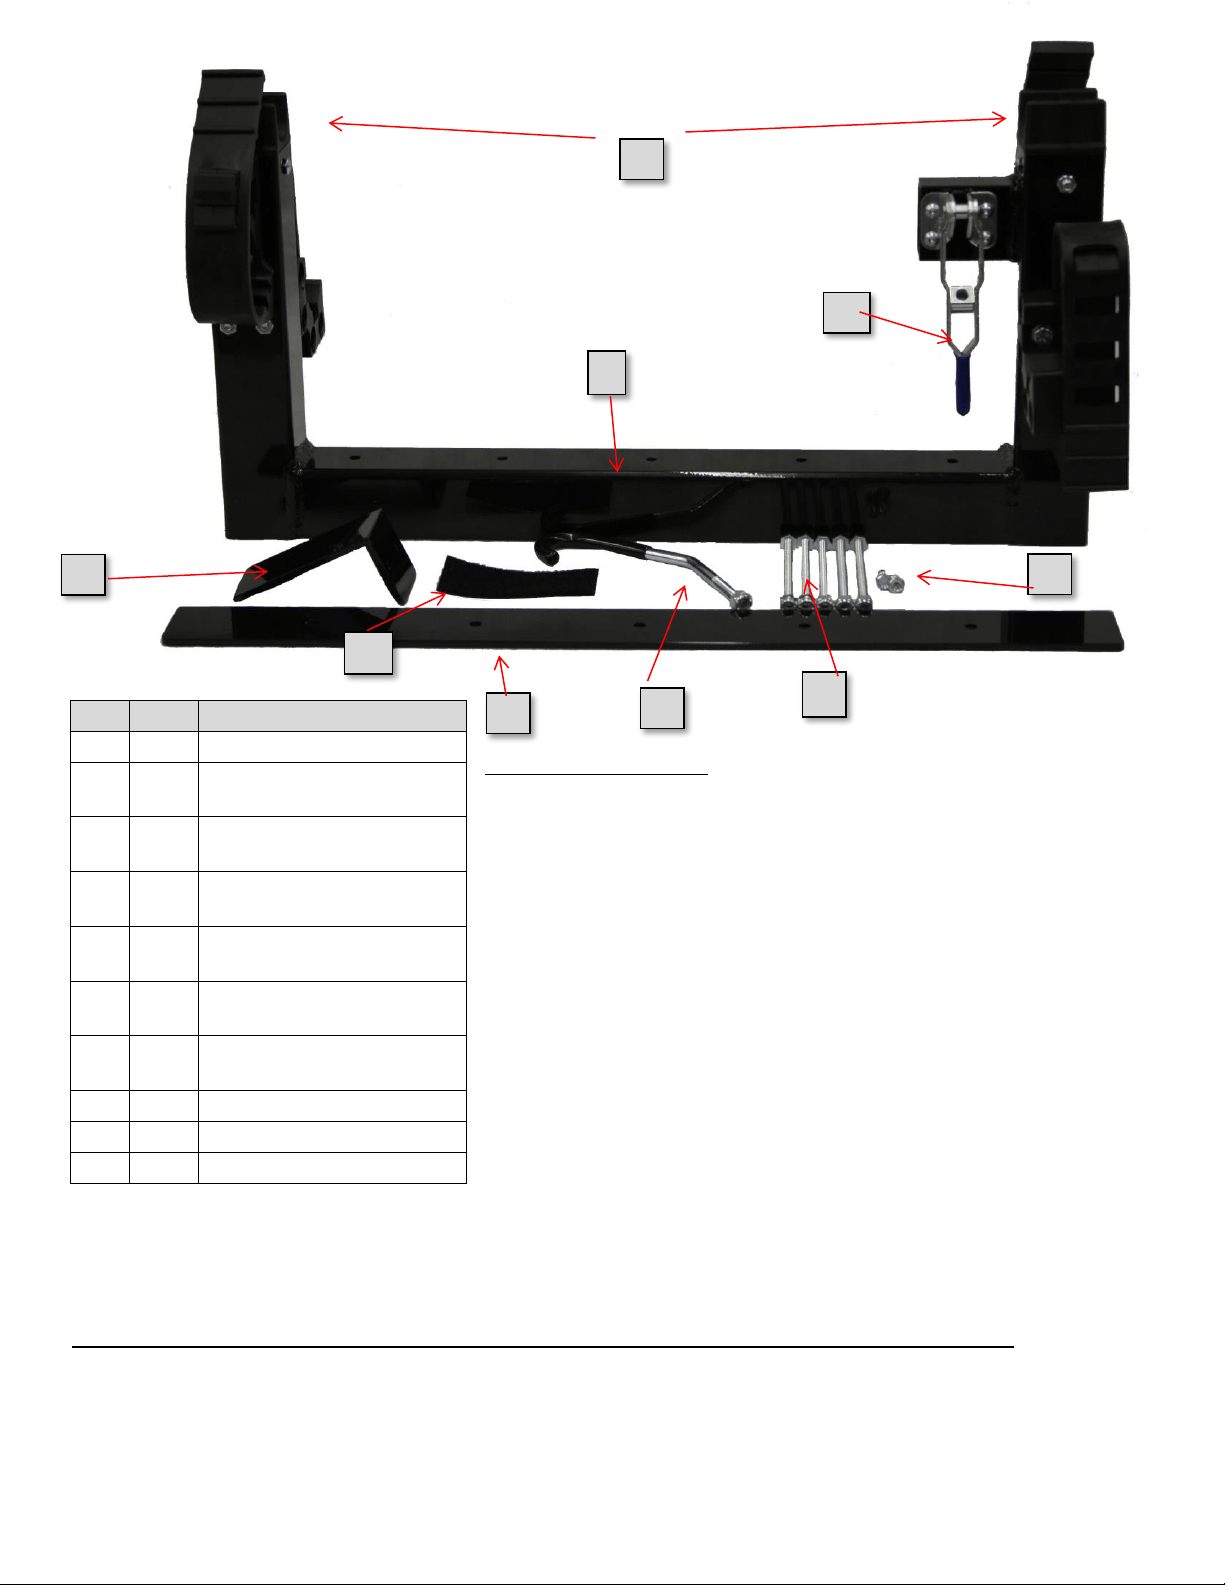
Part
Qty
Part Description
A
1
Sandwich Mounting Plate
B
1
Motor Head Bracket for Ice
Auger and Weed Whippers
C
1
Self Adhesive Pad for
Motor Head Bracket
D
1
Adjustable Auger/Shaft
Hook
E
5
Mounting Bolts: 1/4”X4”
Bolts with Lock Nuts
F
2
Self-Tapping Screws for
Motor Head Bracket
G
1
Over Center Shaft
Clamp/Toggle
H
2
Plastic Auger/Shaft Cradles
I
1
Main U Frame
J
2 Set
Quick Fist Rubber Clamps
A
B
F
E
D
C
G
H
I
Step 2) Spin the motor head so the gas tank is up or if you have a propane make sure you rotate to the direction that the
manufacture recommends.
Step 3) Clamp down the auger with the J hook and toggle (D and G). You will see two nuts on the Adjustable Auger Hook.
If you are gripping a smaller diameter shaft, take the free spinning nut off and use only the lock nut.
Step 4) After the motor head is where you want it and the clamp is fully engaged on the auger shaft you can now decide
where you want the motor head bracket (B) to be placed in order to support the motor. Place the motor head bracket
(B) underneath where you want it to hold the motor and use the two self-tapping screws (F) to fasten the motor head
bracket to the U frame.
Step 5) After the motor head bracket (B) is fastened you can attach the self-adhesive pad (C) to the top of the motor
head bracket. This will give you some padding and also prevent any vibration between your auger and the bracket.
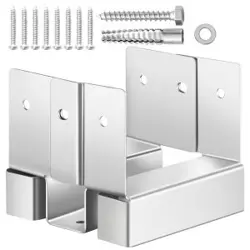
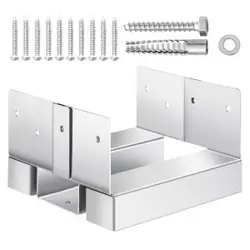
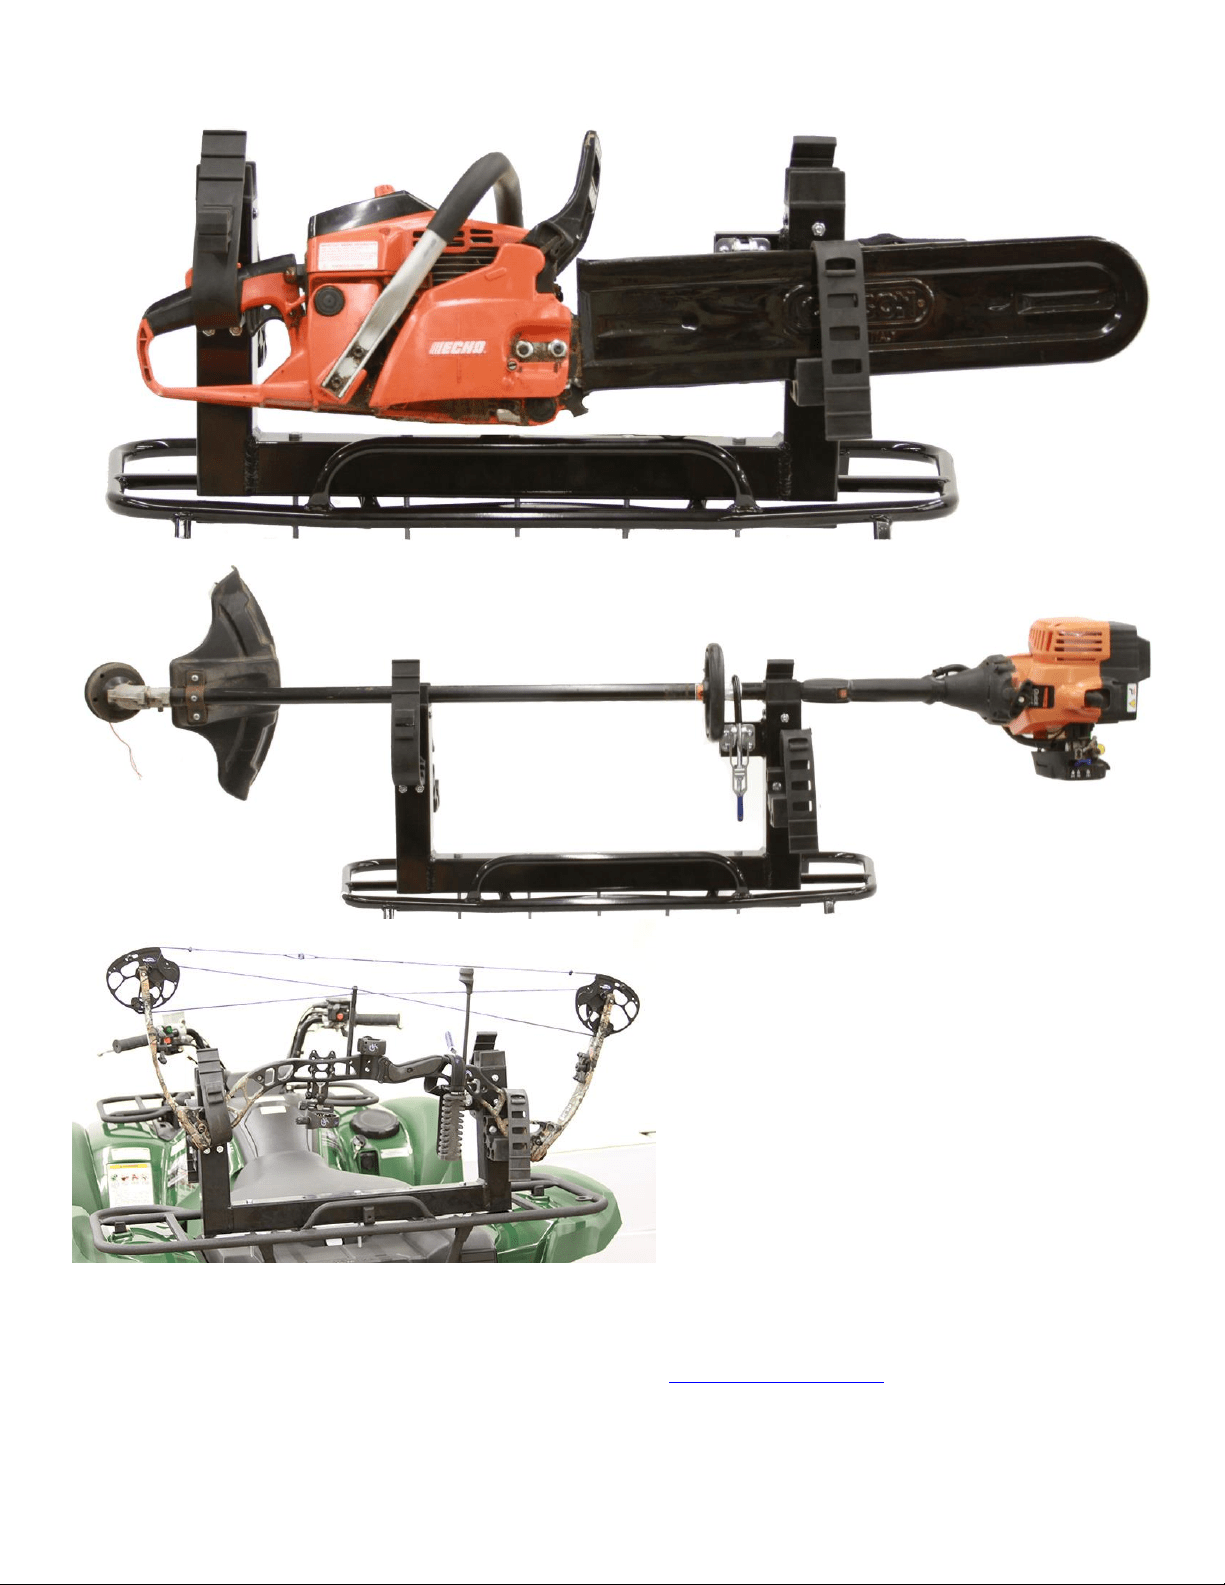
Please follow the below steps for installing the patented Quick Fist rubber clamps for firearms, bows and chainsaws.
Step1) Match up the Quick Fist Clamps with the matching letter on the carrier. Example: The letter A on the Carrier will
match with letter A on the rubber clamps.
Step 2) Using a 7/16” wrench, ratchet or drill driver with 7/16” socket, attach the rubber clamps to the carrier using the
supplied bolts and lock nuts. Please note that due to the different thickness in rubber, Clamp A and C use the 2.75” long
bolt and Clamp B and D use the longer 3.25” bolt. Also, please place a washer between the hex head of the bolt and the
rubber on the clamp as shown in the right photo above. This will ensure you have a secure and solid connection.
All Set! Thank you greatly for the support in purchasing and using our Digger All Season Carrier. We truly hope you are
satisfied with our product and please let us know if we can be of any assistance.
Digger Anchor Company 7444 County Road 27 NW Pennock MN I www.diggeranchor.com I info@diggeranchor.com