Loading ...
Loading ...
Loading ...
6
C6. Customisable proles (see “14. Selecting your personal
prole”)
2.4 Description of the accessories (D) (*varies
according to model)
Accessories in the Starter pack:
D1. “Total Hardness Test” indicator paper
D2. Pre-ground coee measure
D3. Descaler
D4. Water softener lter
D5. Cleaning brush
D6. Hot water spout
D7. Ice cube tray
D8. Coee pot
D9. Travel mug
2.5 Description of milk carafe (hot) (E)
E1. Milk carafe lid
E2. Milk carafe
E3. Froth adjustment/Clean dial
E4. Milk carafe connector (removable for cleaning)
E5. Milk spout (adjustable height)
E6. Milk intake tube (silicone)
E7. Milk spout extension
2.6 Description of milk carafe (cold) (F)
F1. Milk carafe lid
F2. Milk carafe
F3. Froth adjustment/Clean dial
F4. Milk carafe connector (removable for cleaning)
F5. Milk spout
F6. Milk intake tube (rigid plastic)
3. SETTING UP THE APPLIANCE U
Please note:
• Possible traces of coee in the grinder are the result of
settings tests performed on the appliance before sale,
proof of the meticulous care and attention we invest in our
products.
• The rst time you use the appliance, all removable accesso-
ries (milk carafe (E) and (F), travel mug* (D9), coee pot*
(D8), water tank (A21) and (A22)) destined to come into
contact with water or milk should be rinsed with hot water.
We recommend washing the milk carafes in a dishwasher.
• You should customise water hardness as soon as possible
following the instructions in section “17. Setting water
hardness”.
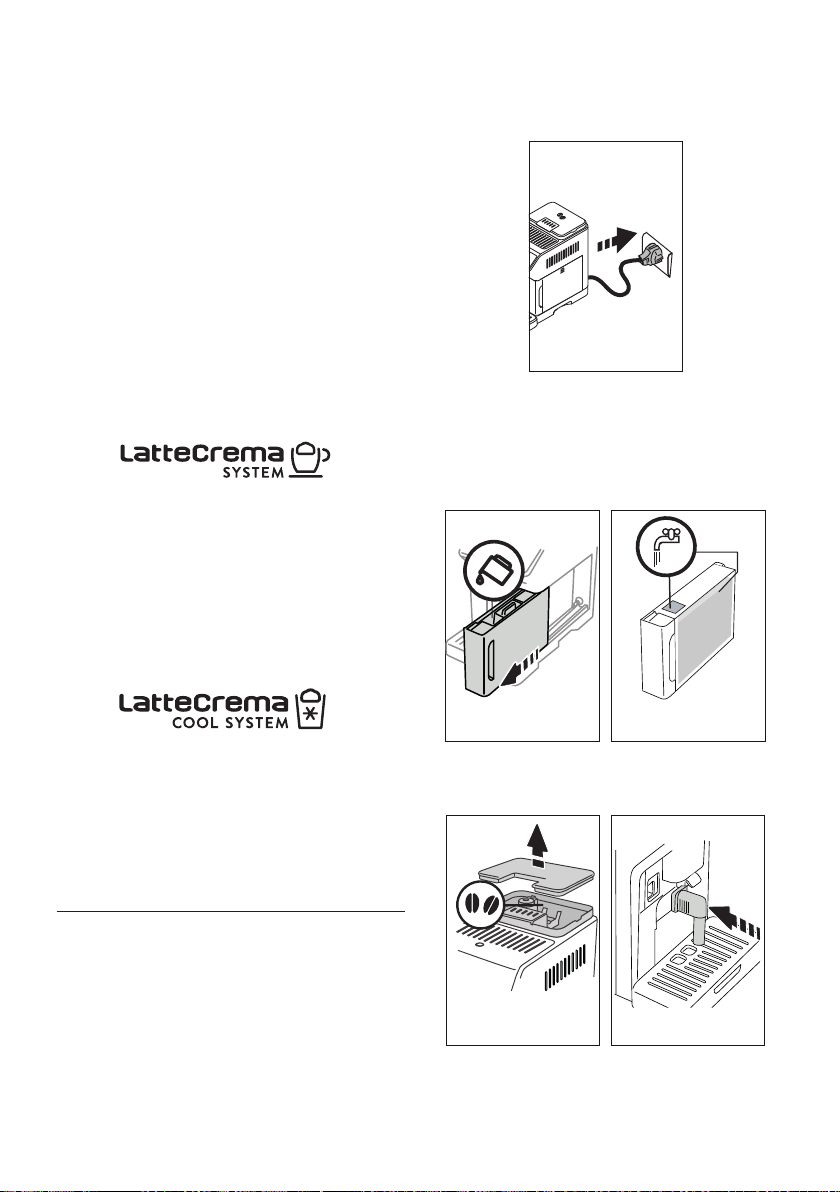
1. Connect the appliance to the mains supply (g. 1).
1
2. Press the ag corresponding to the desired language and
conrm the selection by pressing “Done”.
Now follow the instructions indicated on the display of the
appliance:
3. Remove the water tank (A22) (g. 2) and ll to the MAX
line with fresh water (g. 3);
2
32 3
MAX
4. Then put the tank back and conrm by pressing “Next”;
5. Fill the beans container (A2) (g. 4), then conrm by press-
ing “Next”.
4
5
6. Insert the hot water spout (D6) on the accessories con-
nector (A8) (g. 5) and place a container with a minimum
Loading ...
Loading ...
Loading ...