
Loading ...
Loading ...
Loading ...
21
Assembly Instructions
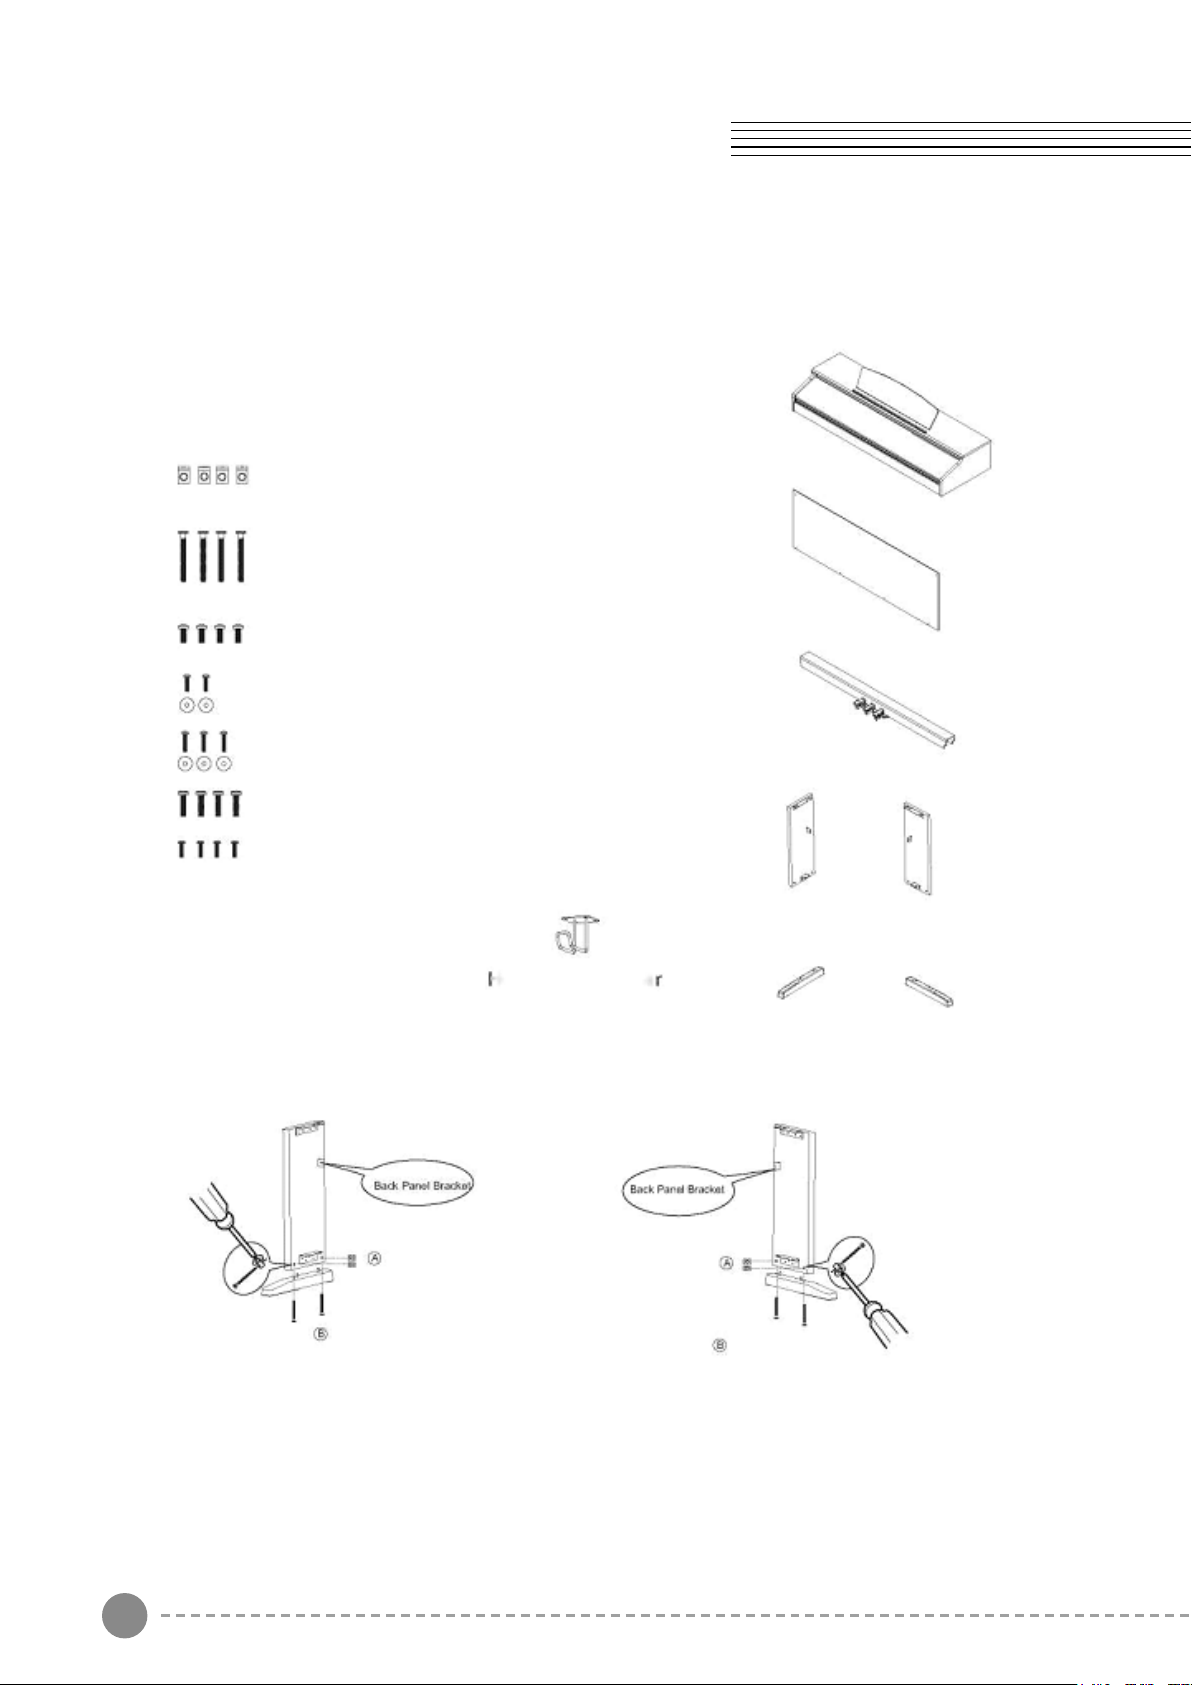
What's Included
1. Assembling the Stand Legs
Place the four Cylindrical Nuts (A) into the holes in the Stand Legs, with the slot facing out.
Use a screw driver to align the threads in the nuts with the openings on the bottom of the
Stand Legs.
Cylindrical Nuts (A) x 4
Piano Body
Back Panel
Pedal Board
Legs (2)
Headphones
holde
Feet(2)
Foot Bolts (B) x 4 Piano
Body Bolts (C) x 4
Back Panel Bolts (D)x 2
Back Panel Bolts (E)x 3
Pedal Board Bolts (F) x 4
Headphone Bolts (G) x 4
Place the do wells in the feet into the appropriate holes in the bottom of the Stand Legs.
Make sure that the feet are facing away from the back panel bracket as shown below.
Threated two Foot Bolts(B) through the foot and into the cylindrical washers, rotating the
washer to align if needed. Firmly tighten and repeat for the other side.
2. Attaching the Pedal Board
Starting with the right Stand Leg, align the holes in the Pedal Board with the holes in the
Pedal Board Bracket as shown. Make sure that the pedals are facing towards the front of
the Stand Legs.
Thread two Pedal Board Bolts (F) through the Pedal Board and into the bracket. Repeat
with the left Stand Leg and tighten all bolts fully.
3. Attaching the Back Panel and Piano Body
Using two Back Panel Bolts (D) with washers, and three Back Panel Bolts (E) with
washers, attach the Back Panel to the stand. Please note that the pedal board is not
predrilled for the Back Panel Screws, and they must be driven in manually.
Loading ...
Loading ...
Loading ...