Loading ...
Loading ...
Loading ...
1514
6 Always be sure to turn the
Dual-Speed Control Dial
to the "OFF" position and
wait for the Sieve to stop
spinning before removing
the Juice Pitcher from under
the spout. Unplug the unit
after each use.
5 When the Pulp Basin is
completely full, it must
be emptied before you
continue juicing. See
disassembly instructions.
7 Remove the Juice Pitcher
from under the spout. You
may close the Juice Pitcher
Lid and store juice in the
Juice Pitcher if desired.
NOTE: To do this, you’ll first need
to tip the Juice Pitcher forward
at a slight angle, so that the lid’s
large hole has some separation
from the spout, then you can slide
out the pitcher. This is the reverse
of what you did during assembly.
8 Immediately move the
No-Drip Spout cover
downward over the spout
to avoid any residual drips
onto the unit or onto the
surface below the juicer.
TIP: We recommend using your
left hand to pull the Juice Pitcher
away, while using your right hand
to swing the No-Drip Spout cover
down and over the spout opening.
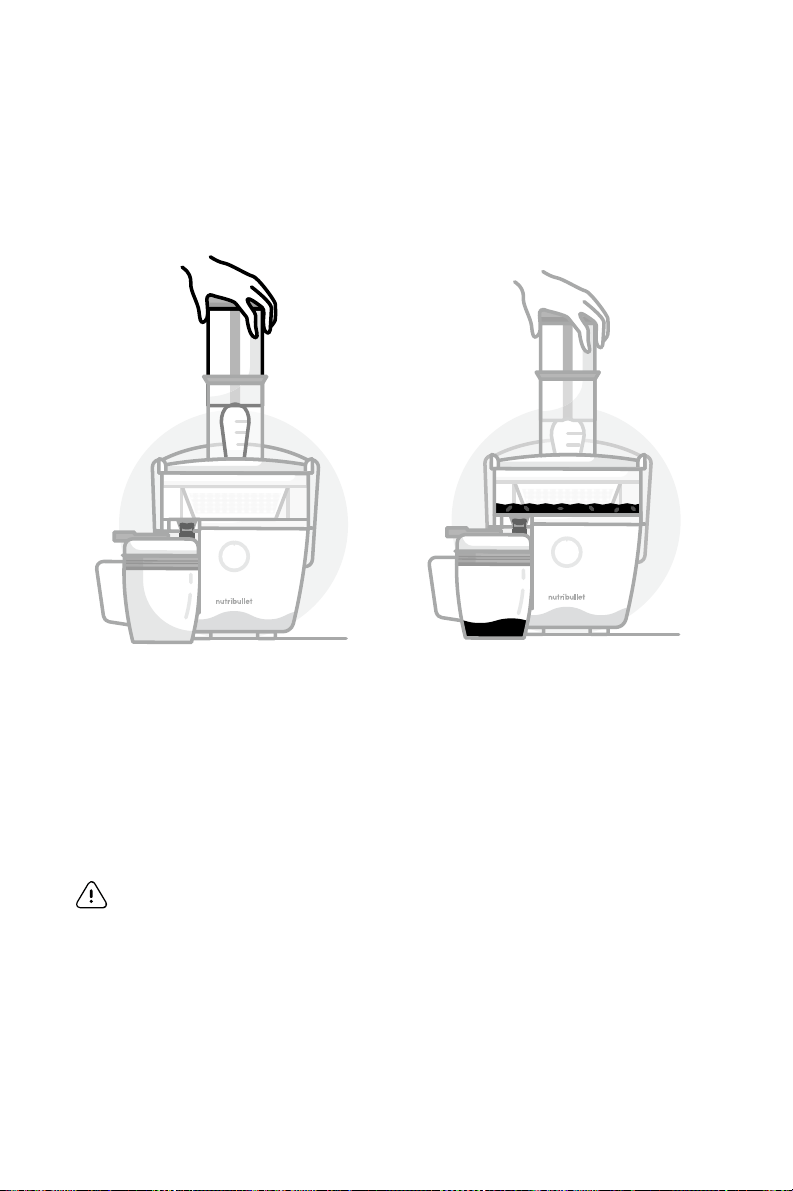
4 Juice will begin to flow out
of the spout and into the
Juice Pitcher, while the
pulp will be separated and
stored in the Pulp Basin.
3 While the motor is running,
begin gently guiding your
ingredients into the feed
chute using the Food Pusher.
NOTE: Do not use excess force or
speed when pushing food down
with the Food Pusher, as it will not
allow for maximum juice yield.
WARNING: Never use hands/
fingers or other tools to push food
down the feed chute into the Sieve.
Only the Food Pusher should be
used to push down ingredients.
Loading ...
Loading ...
Loading ...