Loading ...
Loading ...
Loading ...
13
3. Insert the lever into the desired slot.
6-Position Height Adjustment (From front to rear):
(1) 1.4 in. (35 mm)
(2) 1.7 in. (43 mm)
(3) 2.0 in. (53 mm)
(4) 2.4 in. (60 mm)
(5) 2.8 in. (70 mm)
(6) 3.0 in. (75 mm)
4. Reinsert the batteries and the safety key to the lawn
mower and resume normal use.
Starting + Stopping
mWARNING! Before switching on the mower, make sure
that it is not in contact with any foreign objects. Keep your
hands and feet a safe distance away from the rotating mower
blade and the ejector opening. Failure to comply with these
warnings can result in severe personal injury.
IMPORTANT: Do not start the mower in tall grass.
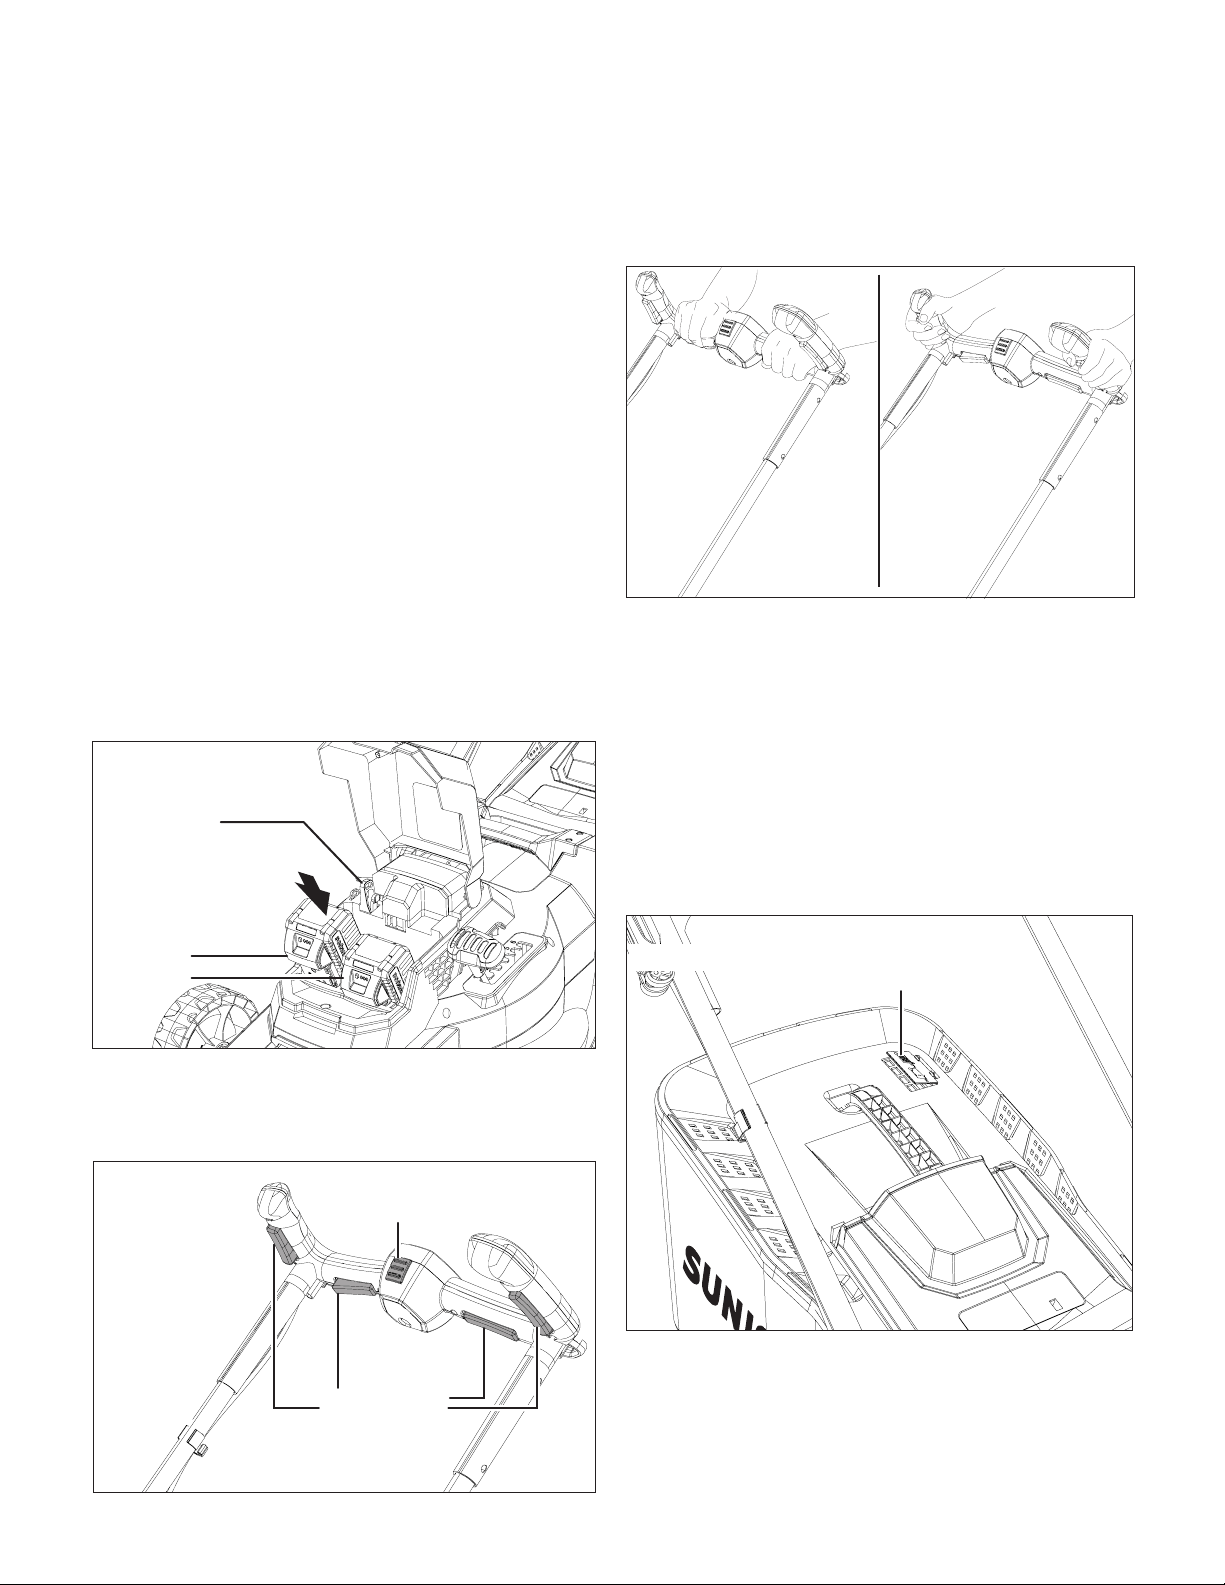
1. Make sure the unit's On/O buttons are not squeezed.
Insert the batteries and the safety key in their slots
(Fig. 12). Close the battery compartment cover.
2. To start the machine, press and hold the safety lock
button while squeeze one of the On/O buttons. Once the
machine powers on, release the safety lock button and
proceed with operation (Fig. 13).
NOTE: To achieve the most comfort during operation, the
lawn mower comes with 2 sets of On/O switch buttons
(totally 4), any one of them can trigger the mower. Choose
the button based on your desired position to operate the
mower (Fig. 14).
3. To stop the mower, release the On/O switch buttons.
mWARNING! The mower blade will continue to rotate for
a brief period after the unit has been switched o. Do not tilt or
carry the unit while the motor is still running and do not touch
the blade while it is still rotating. Failure to comply could result
in severe personal injury.
Grass Bag Filling Level Indicator
1. The grass bag is equipped with a lling level indicator
window that is opened by the airow that the lawn mower
generates during operation (Fig. 15).
2. If the ap closes during mowing, this indicates that the
grass bag is full and must be emptied.
NOTE: To ensure that the lling level indicator functions
properly, keep the holes under the ap clean and
permeable.
Fig. 12
Battery
packs
Safety key
Fig. 13
Push lock button
On/O switch
buttons
Fig. 14
Fig. 15
Grass indicator
window
Loading ...
Loading ...
Loading ...