Loading ...
Loading ...
Loading ...
– 6
Lock parking brakes.
Remove the tin tub.
Pull the locks of the placement mechanics up.
Pull the push handle upward. The disposal system
is unlocked and lowered.
Pull the disposal system out by the handle.
Reinsert the disposal system and lock it with the
push handle.
몇 WARNING
Risk of crushing! Under no circumstances should you
hold your hands between the disposal system and
spacer or allow them to come close to the lifting mech-
anism while locking it. Hold the disposal system by the
handle with one hand and lock it with the other by actu-
ating the push handle.
Insert the tin tub.
몇 CAUTION
Risk of injury and damage! Observe the weight of the
appliance when you transport it.
When transporting in vehicles, secure the appliance ac-
cording to the guidelines from slipping and tipping over.
몇 CAUTION
Risk of injury and damage! Note the weight of the appli-
ance in case of storage.
This appliance must only be stored in interior rooms.
몇 Warning
First remove the mains plug before doing any job on the
vacuum cleaner.
Have the vacuum cleaner regularly inspected according
to the respective national accident prevention regula-
tions.
Maintenance work must be carried out by a specialist at
regular intervals in accordance with the specifications of
the manufacturer. The existing stipulations and safety
requirements are to be here observed. Work on the
electrical plant may only be carried out by qualified elec-
tricians.
If you have any more questions, your KÄRCHER
branch will be happy to help.
No periodic maintenance intervals are specified for this
device. The following maintenance is to be performed
as necessary:
Wash the filter.
Change the filter.
Replace the filter.
The filter can be washed out under running water.
ATTENTION
Risk of damage! Do not use washing agents or bleach.
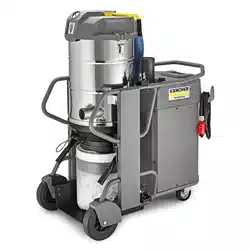
1 Lid of filter chamber
2 Filter spreader
3 Washer ring
4 Filter
Switch off the appliance and disconnect from the
network.
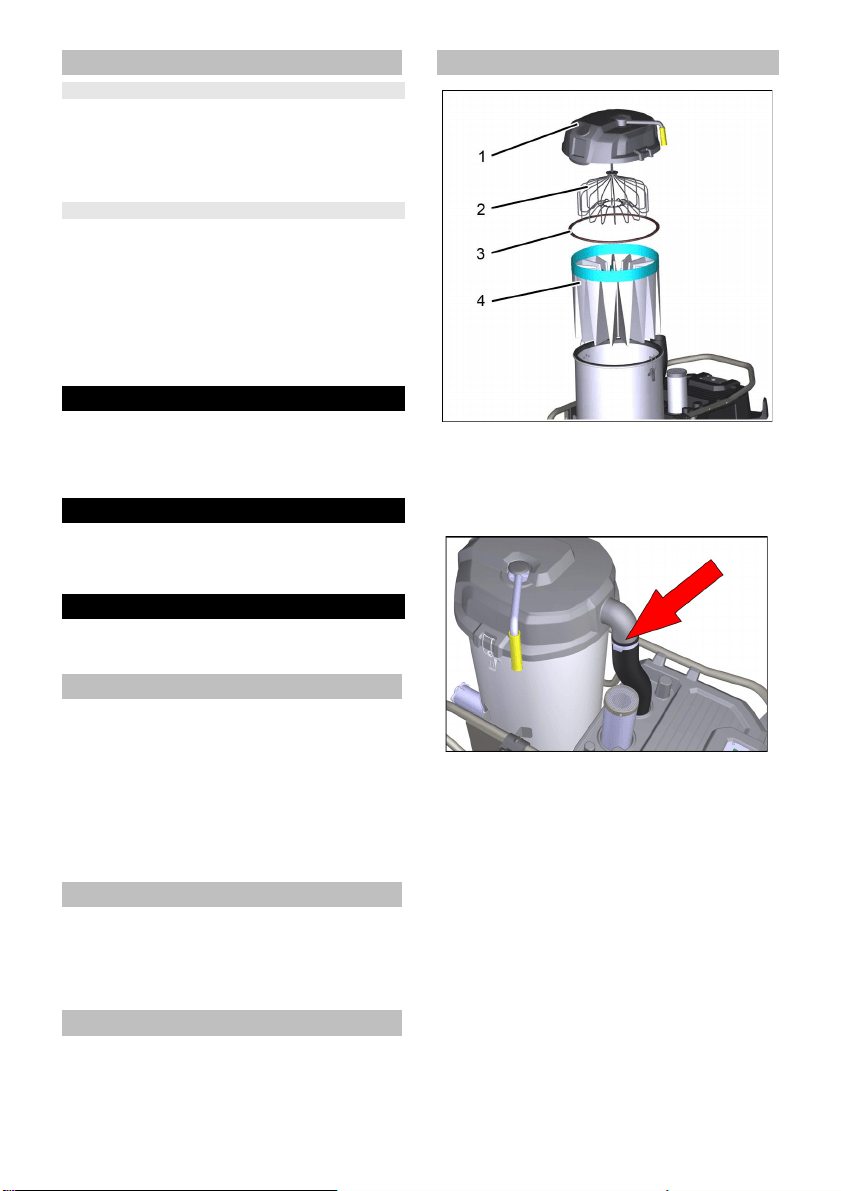
Remove the hose clamp on the connection hose.
Use a screwdriver.
Open locks.
Remove the lid of the filter chamber.
Take out the filter.
Check sealing ring for damage.
Insert the new filter in reverse sequence and take
care to ensure that the filter spreader is aligned cor-
rectly in the filter bag.
LP appliances
Remove the disposal system
Insert the disposal system
Transport
Storage
Care and maintenance
Inspection and maintenance work
Maintenance intervals / user maintenance
Wash the filter
Changing/ replacing filter
17EN
Loading ...
Loading ...
Loading ...