Loading ...
Loading ...
Loading ...
21
www.spirittness.com
STEP FIVE
安装步骤5
5
6
14
50
L
L
26
50
Start
Finish
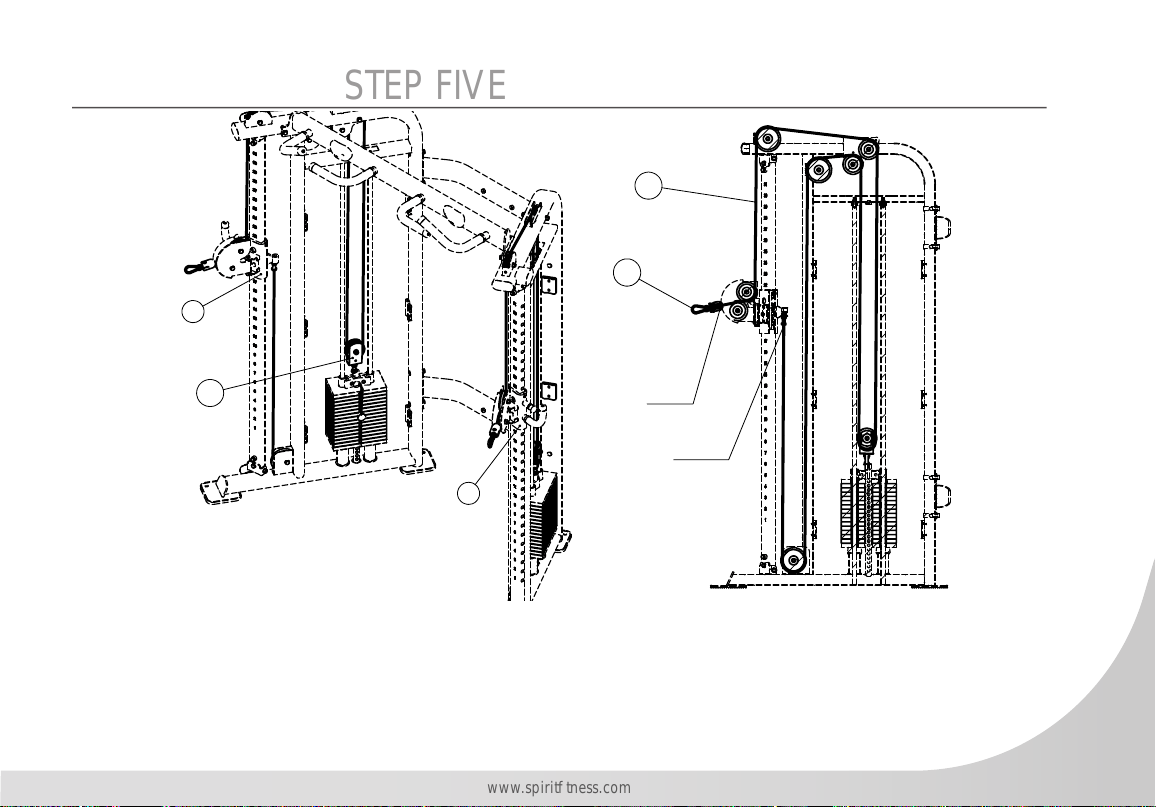
Repeat this step for both sides of the machine.
Follow the diagram with the Cable Assembly (No. 26) through the framework as shown. Pay special attention to make
sure the cable end with the bolt is connected at the “Finish” and the cable end with the loop is positioned at the “Start”
as shown in the diagram.
Wrench Tighten Bolts and Nylon Lock nuts
Loading ...
Loading ...
Loading ...