P. 1
STANDARD PAGE & GUIDELINES
Title Page
Logos, allowed symbols, standard text boxes & other guidelines
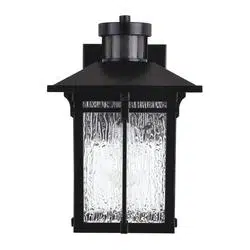
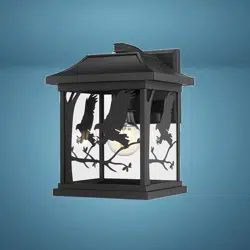
EAGLE 1-Light Outdoor Wall Light
INSTALLATION MANUAL
SKU NUMBER: 356-1270
MODEL: Eagle BLK
2022-10-17
Questions, problems, need help?
Call our customer service department at
1-866-839-2888, 8 a.m. - 5 p.m., EST, Monday - Friday
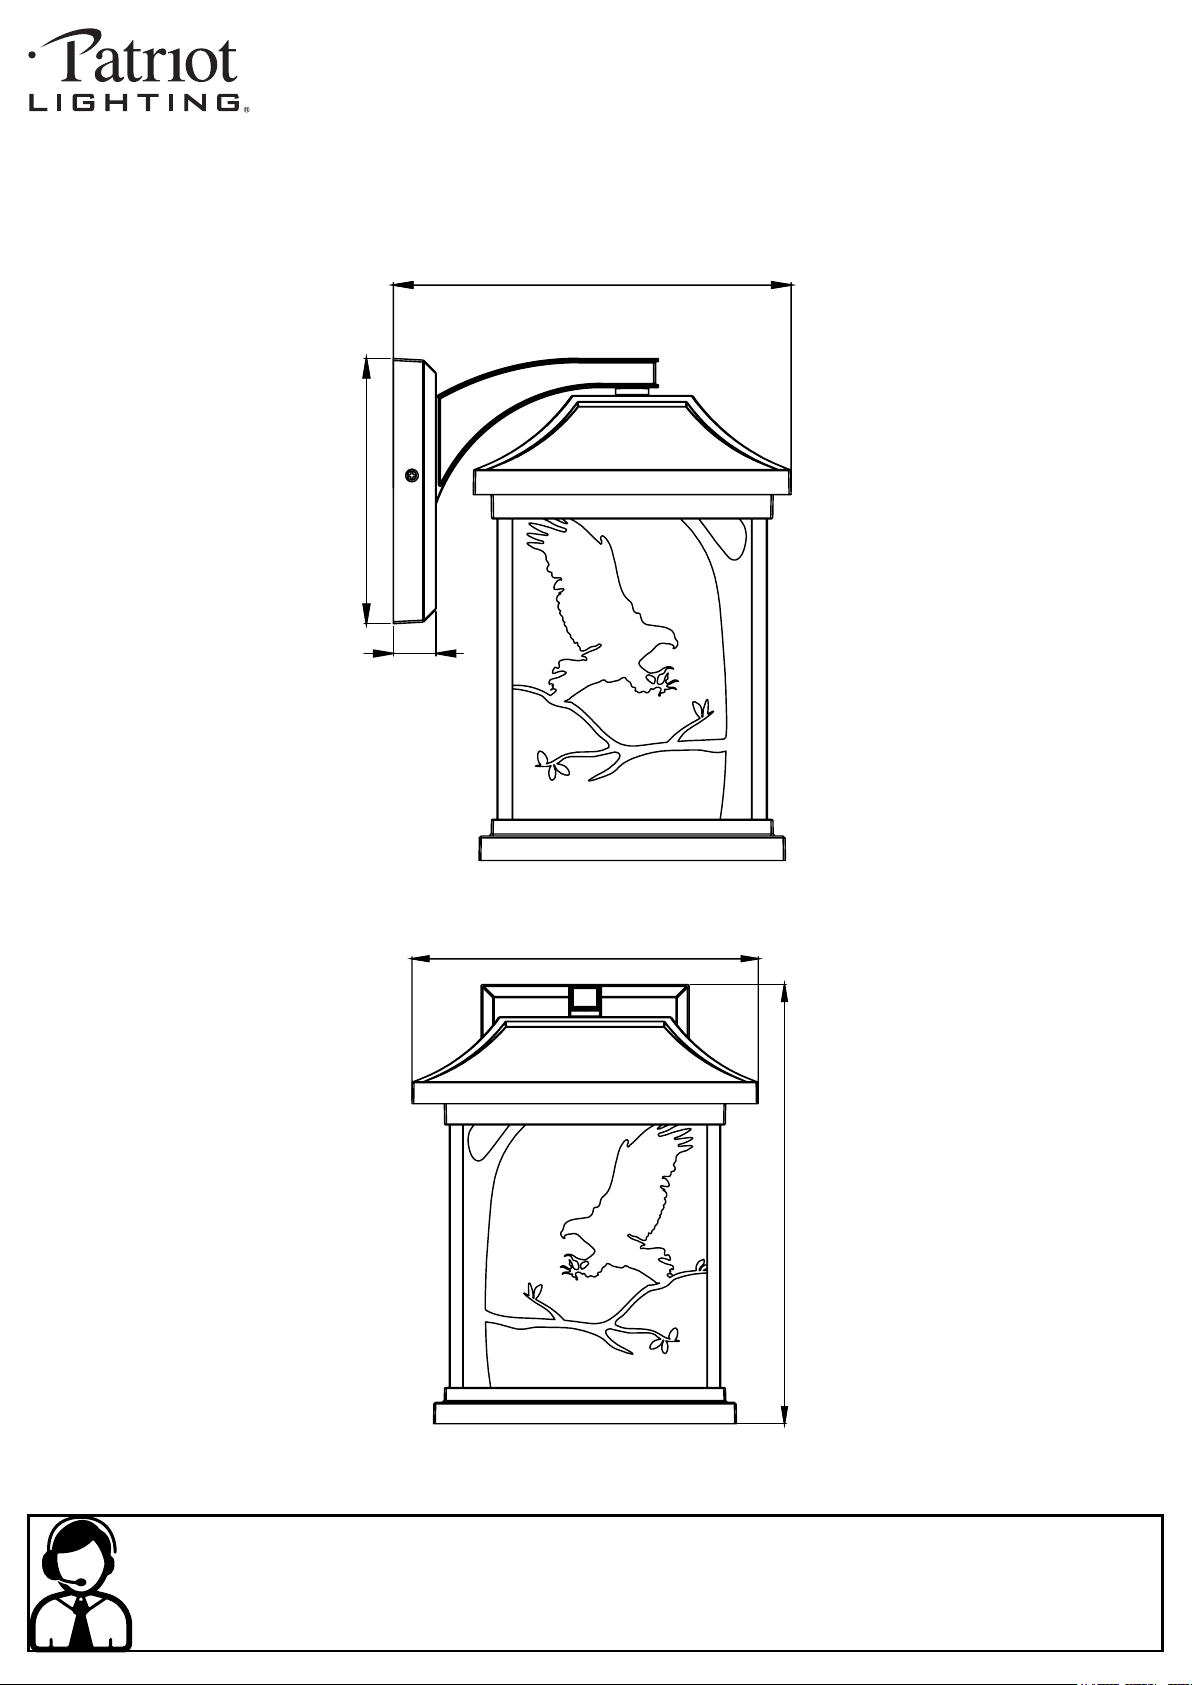
8”
8”
10 1/8”
5 3/8”
7/8”
P. 2
PACKAGE CONTENTS
BB
AA
CC
DD
Bulb (not supplied)
B
A
P. 3
PARTS LIST
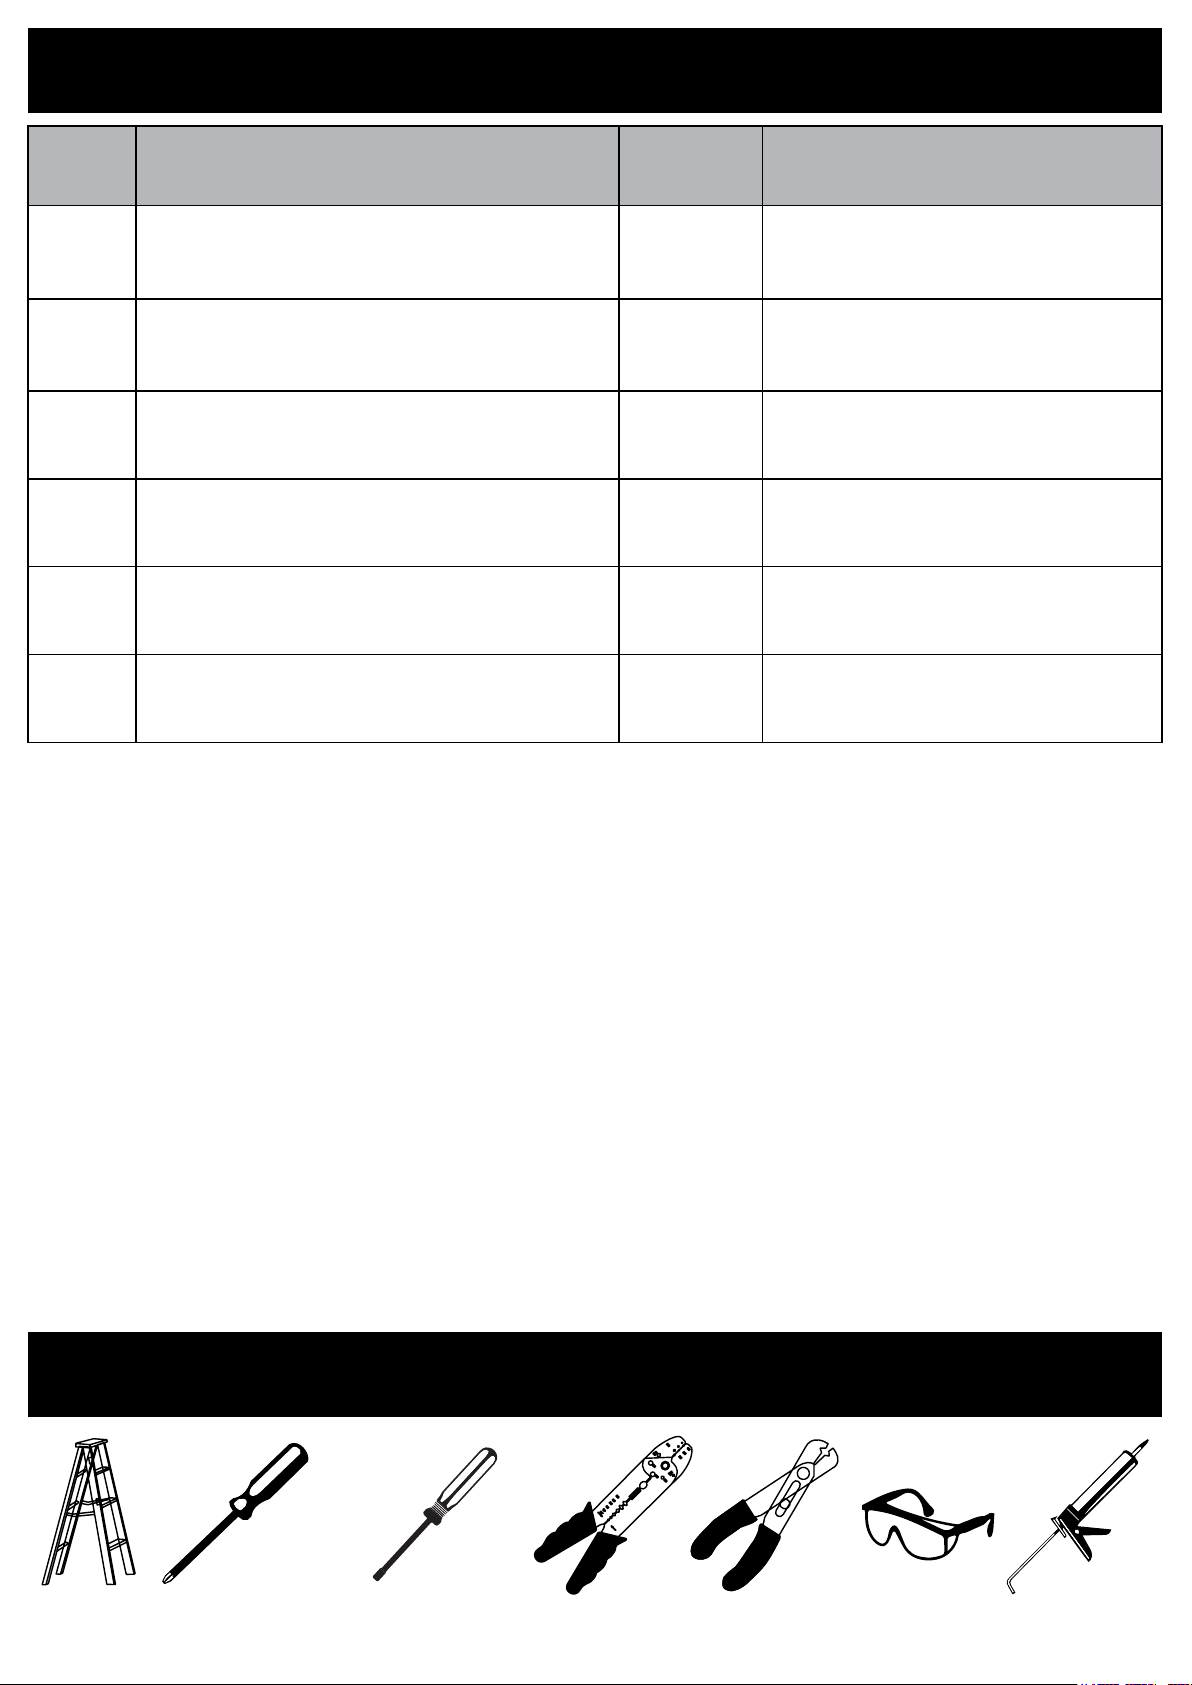
TOOLS REQUIRED (not supplied)
PART # DESCRIPTION QUANTITY
REPLACEMENT PART
AVAILABILITY
A Mounting Plate 1 Not Available
B Backplate 1 Not Available
AA Twist-cap Connector 3 Not Available
BB Grounding Bolt #5x5 mm 1 Not Available
CC Bolt #8x25 mm 2 Not Available
DD Bolt #7x10 mm 2 Not Available
Ladder
Phillips Screwdriver Safety glassesWire cutterWire stripperSlotted Screwdriver
Silicone
sealant
P. 4
SAFETY INFORMATION
CAUTION
Please carefully read the following important safety information before handling or installing this light. There is a risk
of serious injury while handling this product. To minimize these risks, please note:
• Before starting the installation of this xture or the removal of a previous xture, disconnect the power by turning
o the circuit breaker or by removing the fuse at the fuse box.
• Be careful not to damage or cut the wire insulation (covering) during xture installation. Do not permit wires to
contact any surface having a sharp edge. To do so may damage or cut the wire insulation, which could cause
serious injury or death from electric shock.
• Do not mount or place near gas or electric heaters, replace, candles or other similar sources of heat.
• If you have any doubts or questions about the installation of this xture, consult a qualied electrician.
• Do not cover the product with cloth, paper or any material not part of the product when in use.
• Read and follow all instructions that are on the product or provided with the product.
• Before beginning assembly of product, make sure all parts are present. Compare parts with package contents
diagram and parts list. If any part is missing or damaged, do not attempt to assemble the product.
• Keep this installation manual for future reference.
NOTICE
Any modication or alteration from what is specied in this instruction manual will void any and all warranty on this
product.
PATRIOT LIGHTING® is not responsible for any damage to the unit or personal property caused by improper
installation. If you disregard instructional warnings, you will void your warranty and possibly deal with damage.
SAFETY NOTICE
PREPARATION
Before beginning assembly, installation or operation of product, make sure all parts are present. Compare parts with
parts list and diagram on previous pages. If any part is missing or damaged, do not attempt to assemble, install or
operate the product. Contact customer service for further assistance at 1-866-839-2888, 8am – 5pm EST, Monday-
Friday.
P. 5
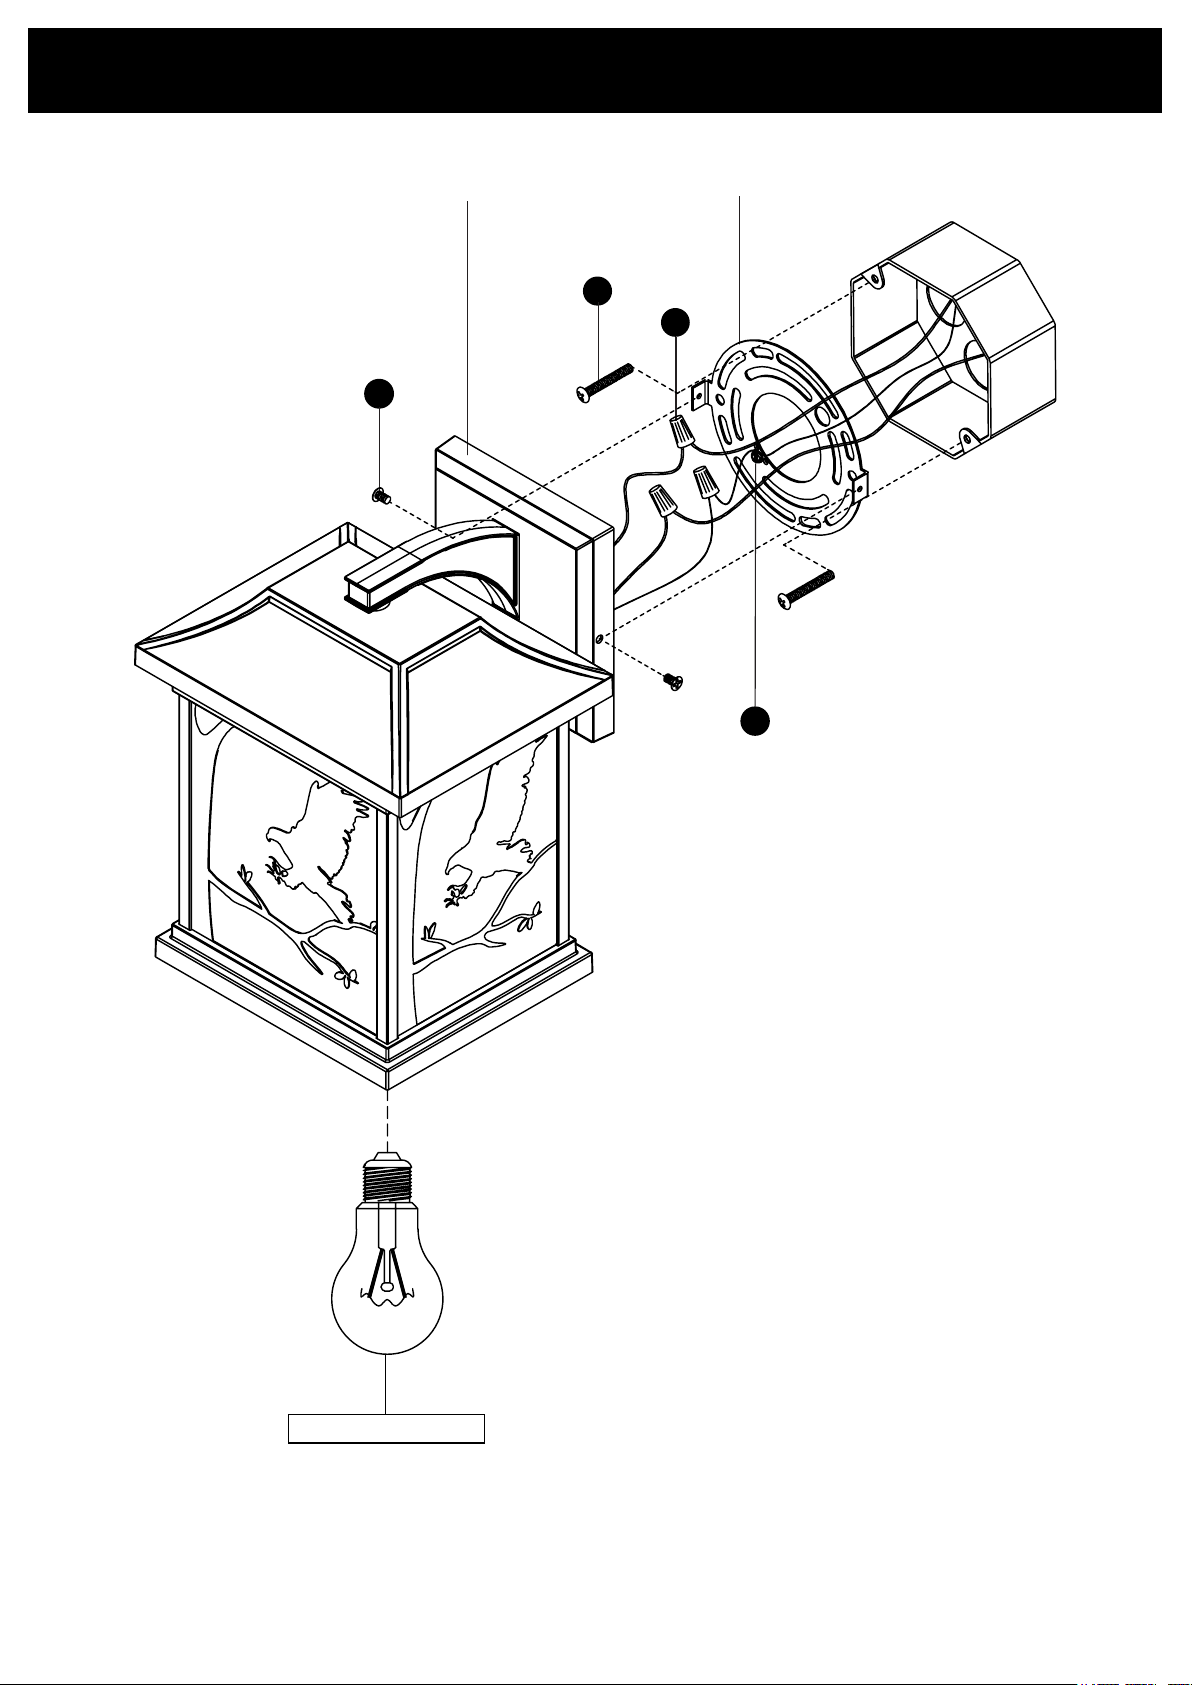
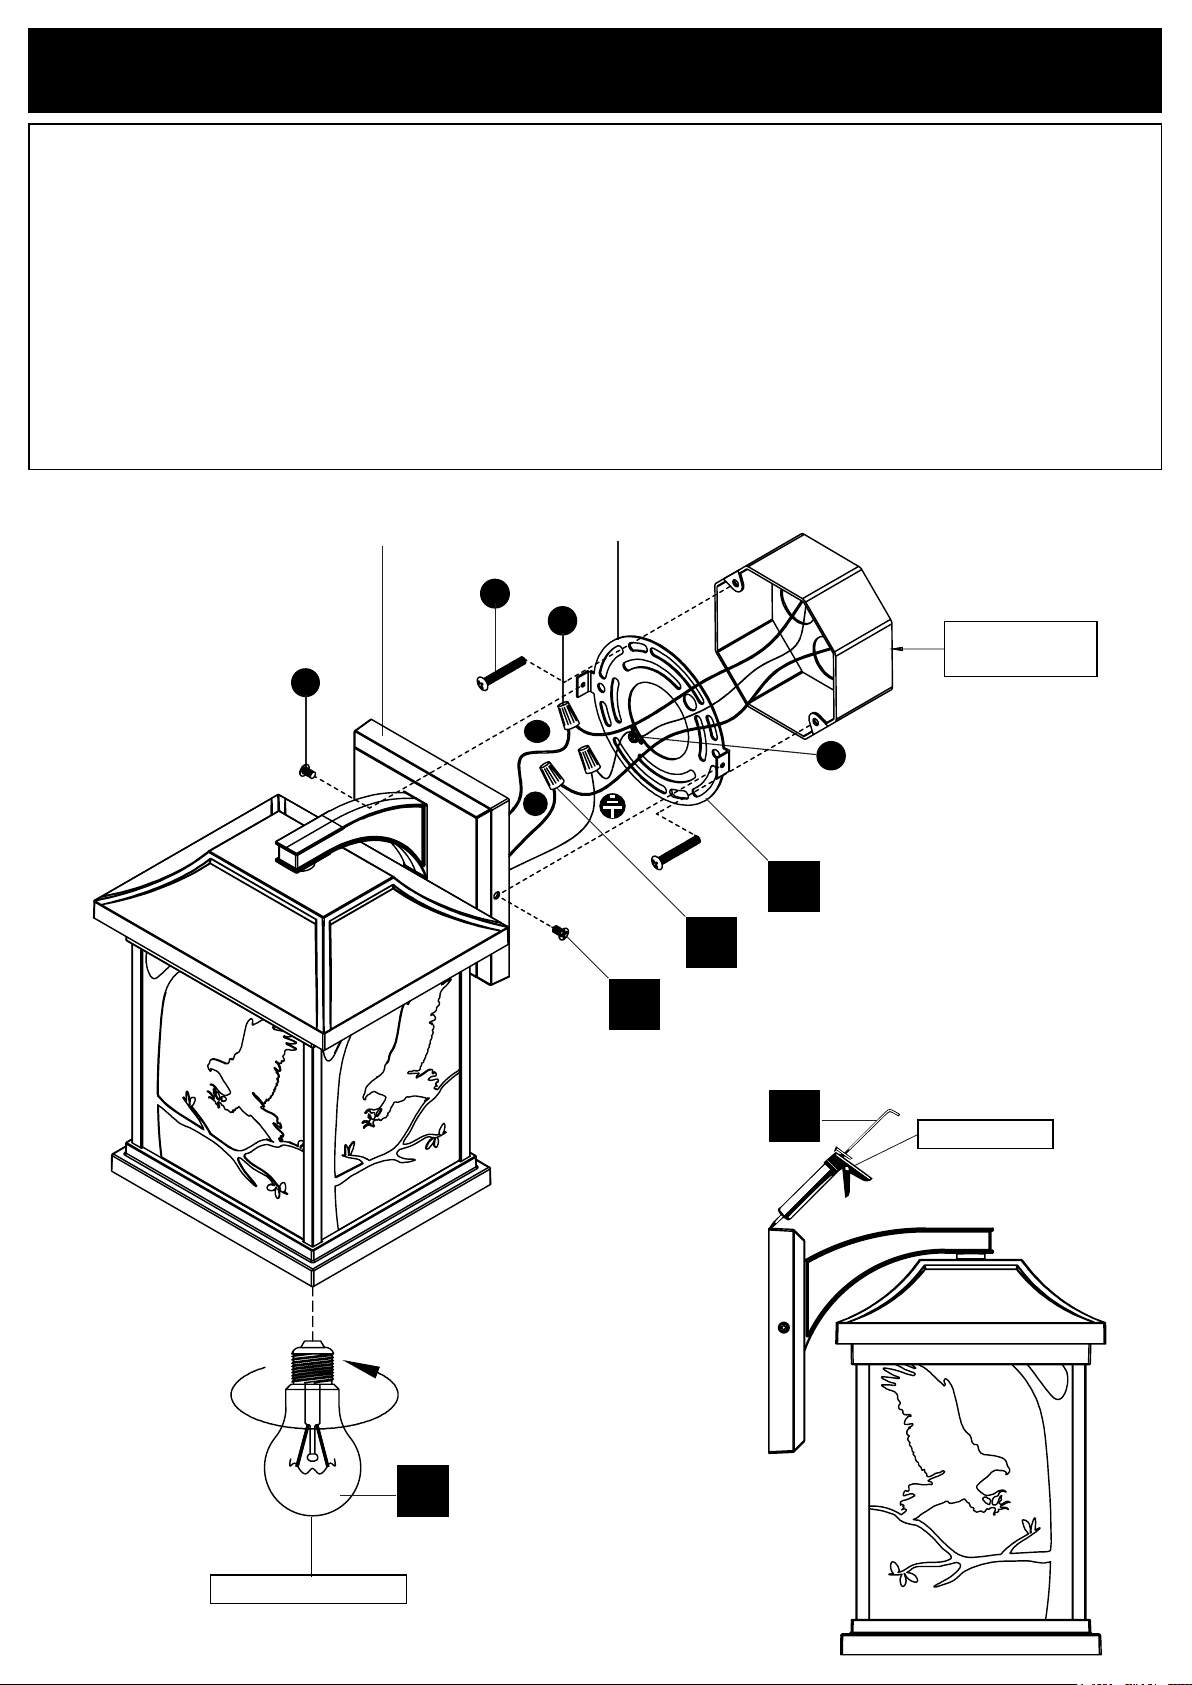
INSTALLATION
1.1. Uninstall mounting plate (A) by rotating bolts (DD) counterclockwise. If the house ground wire is copper (option A)
x the copper (ground) wire from the junction box to the mounting plate (A) by wrapping it around the green (ground)
bolt (BB), then connect it to the xture copper (ground) wire with a provided twist cap connector (AA). Alternatively,
you can connect both copper (ground) wires together directly with a provided twist cap connector (AA). If the house
ground wire is green (option B) splice the green (ground) wire (1/2in strip) to expose the copper wire within, then loop
the exposed wire to the green (ground) bolt (BB) on the mounting plate (A). Then attach it to the copper (ground) wire
from the xture using a provided twist cap connector (AA). Then, pass all wires through mounting plate (A). Connect
the xture neutral (white) wire to house neutral (white) wire and the xture black (live) wire to the house black (live)
wire. Use provided twist cap connectors (AA) to make all connections.
1.2. Install the mounting plate (A) to your junction box with the bolts (CC).
1.3. Install the backplate (B) back to the mounting plate (A). Ensure that bolts (DD) are securely tightened.
1.4. Carefully install the bulbs (not supplied) into the socket (base bulb is E26, and maximum bulb wattage is 60W).
1.5. Apply a clear silicone sealant (not supplied) around the outside perimeter of the backplate (B).
1.5
Not supplied
BB
AA
CC
DD
1.1
1.2
1.3
1.4
Junction box
(not supplied)
N
L
Bulb (not supplied)
B
A

P. 6
MAINTENANCE AND CARE
Patriot Lighting products will remain beautiful for many years if you properly care for them.
Patriot Lighting does not recommend the use of harsh abrasive cleansers on any of its products. Harsh cleansers will
damage the nish of your product.
To Replace Bulb:
1. Disconnect the power by turning o the circuit breaker or by removing the fuse at the fuse box.
2. Carefully unscrew the bulb from the socket counterclockwise.
3. Replace with new bulb and securely install into the socket by rotating clockwise.
This xture requires a E26 base bulb. Maximum bulb wattage is 60W.
To clean the light xture, disconnect the power by turning o the circuit breaker or by removing the fuse at the
fuse box and wipe the light xture with a damp, non-abrasive cloth. Gentle reminder, do not use harsh or abrasive
cleaners as it will damage the nish of your product.
FIVE-YEAR LIMITED WARRANTY: If, during normal use, this PATRIOT LIGHTING
®
lighting xture breaks
or fails due to a defect in material and workmanship within ve (5) years from the date of original purchase,
simply bring this lighting xture with the original sales receipt back to your nearest MENARDS
®
retail store.
At its discretion, PATRIOT LIGHTING
®
agrees to have the product or any defective part(s) repaired or re-
placed with the same or similar PATRIOT LIGHTING
®
product or part free of charge, within the stat-
ed warranty period, when returned by the original purchaser with original sales receipt. This warranty; (1) ex-
cludes expendable parts including but not limited to light bulbs; (2) does not cover damage that has resulted
from abuse or misuse; and (3) does not cover any losses, labor, injuries to persons/property or costs, This
warranty does give you specic legal rights and you may have other rights, which vary from state to state.