Loading ...
Loading ...
Loading ...
12
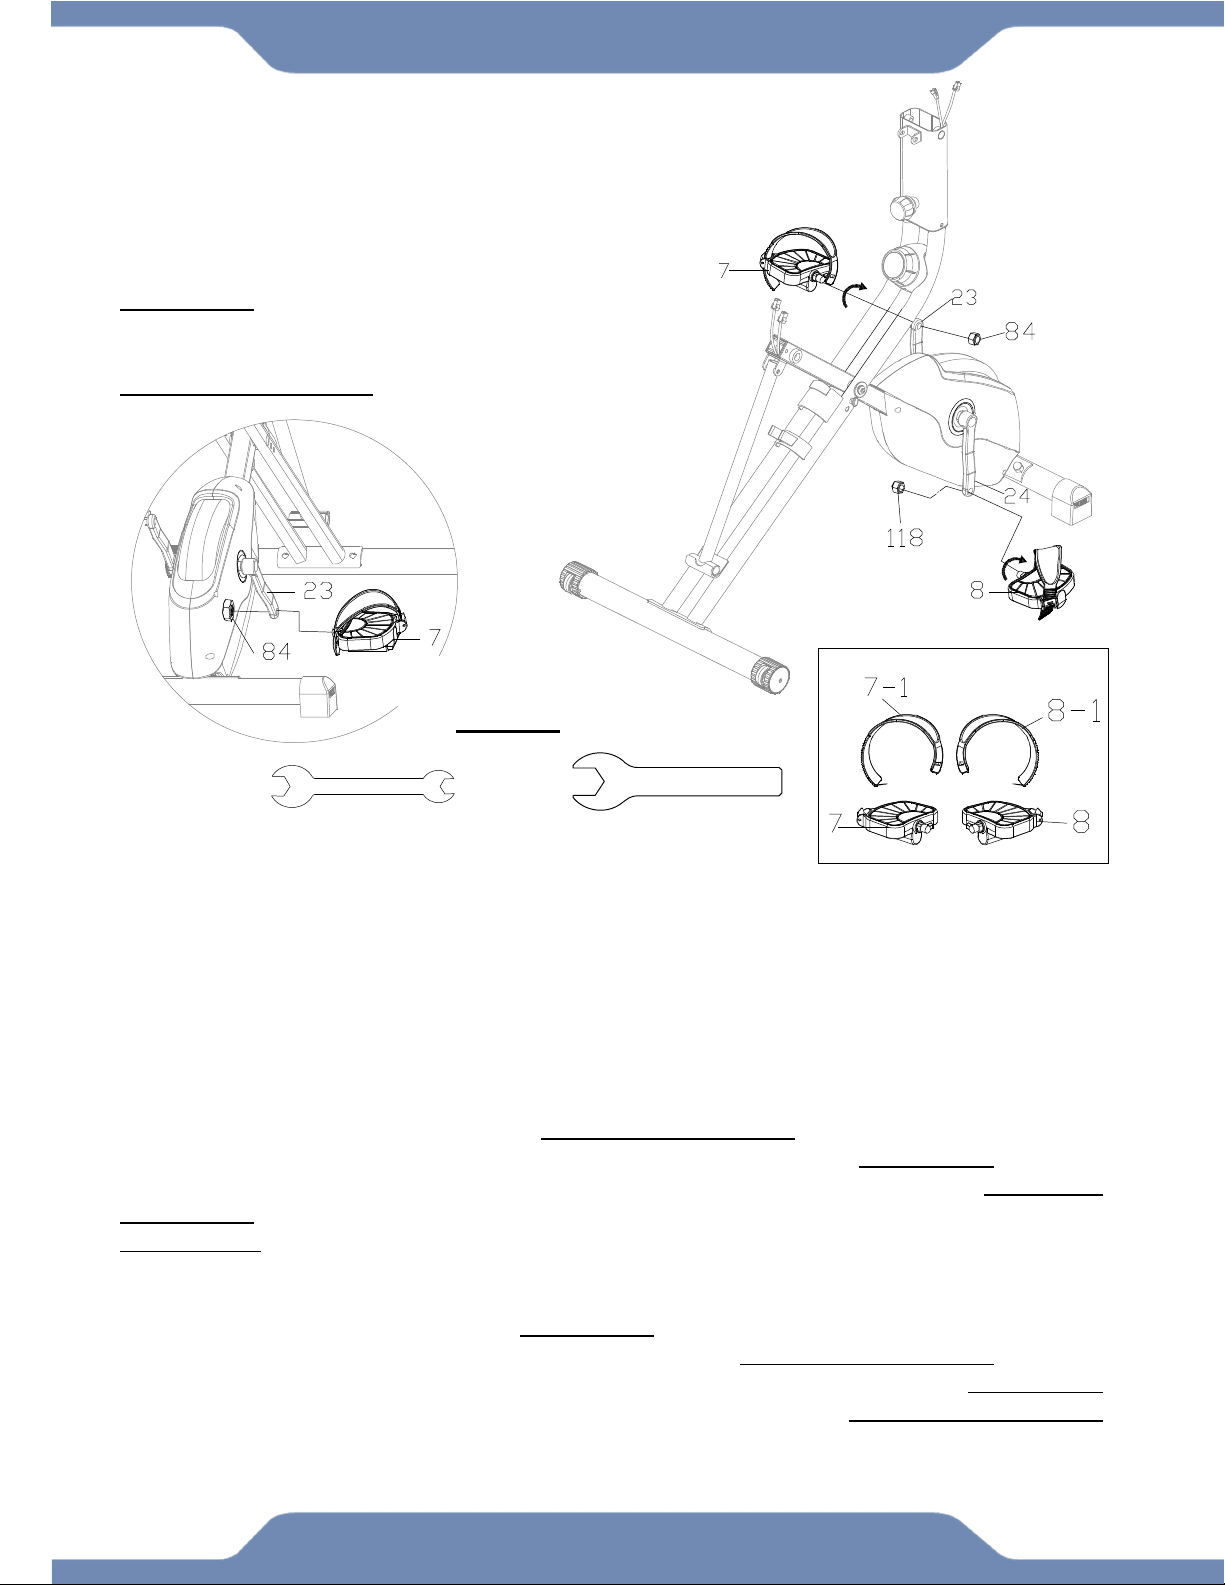
ASSEMBLY
IMPORTANT:
Make sure the right pedal matches up with the right crank and the left
pedal matches up with the left crank. If matched incorrectly, the cranks
may become damaged or stripped.
IMPORTANT:
Screw the Right Pedal (8) into the Right Crank (24) in a
CLOCKWISE direction.
Screw the Left Pedal (7) into the Left Crank (23) in a
COUNTER-CLOCKWISE direction.
.
STEP 2
TIP: The Cranks, Pedals, Pedal Shafts and Pedal Straps are marked “R” for Right and “L” for Left.
2A. Instalilng the Pedal Straps: Remove the Left Nylon Nut (84) and Right Nylon Nut (118)
from the Left & Right Pedals (7,8). Install the Left & Right Pedal Straps (7-1, 8-1) on to the Left
& Right Pedals (7, 8). See Figure B.
2B. Installing the Left Pedal: Insert the Left Pedal (7) into the threaded hole in the Left Crank
(23). Turn the Left Pedal (7) by hand in a COUNTER-CLOCKWISE direction until snug. Attach the
Left Nylon Nut (84) onto the protruding Left Pedal (7) in a CLOCKWISE direction.
Simultaneously tighten the Left Pedal (7) using the 13-15mm Wrench by turning it COUNTER-
CLOCKWISE and tighten the Left Nylon Nut (84) with the Wrench 19mm provided in the
CLOCKWISE direction. See Figure C.
2C. Installing the Right Pedal: Insert the Right Pedal (8) into the threaded hole in the Right
Crank (24).Turn the shaft by hand in a CLOCKWISE direction until snug. Attach the Right Nylon
Nut (118) onto the protruding Right Pedal (8) in a COUNTER-CLOCKWISE direction.
Simultaneously tighten the Right Pedal (8) with the 13-15mm Wrench in the CLOCKWISE
direction and the Right Nylon Nut (118) with the 19mm Wrench with a COUNTER-CLOCKWISE
direction.
TOOLS
13-15mm Wrench 1 PC 19mm Wrench 1 PC
Figure C Figure B
Loading ...
Loading ...
Loading ...