
Loading ...
Loading ...
Loading ...
5 6
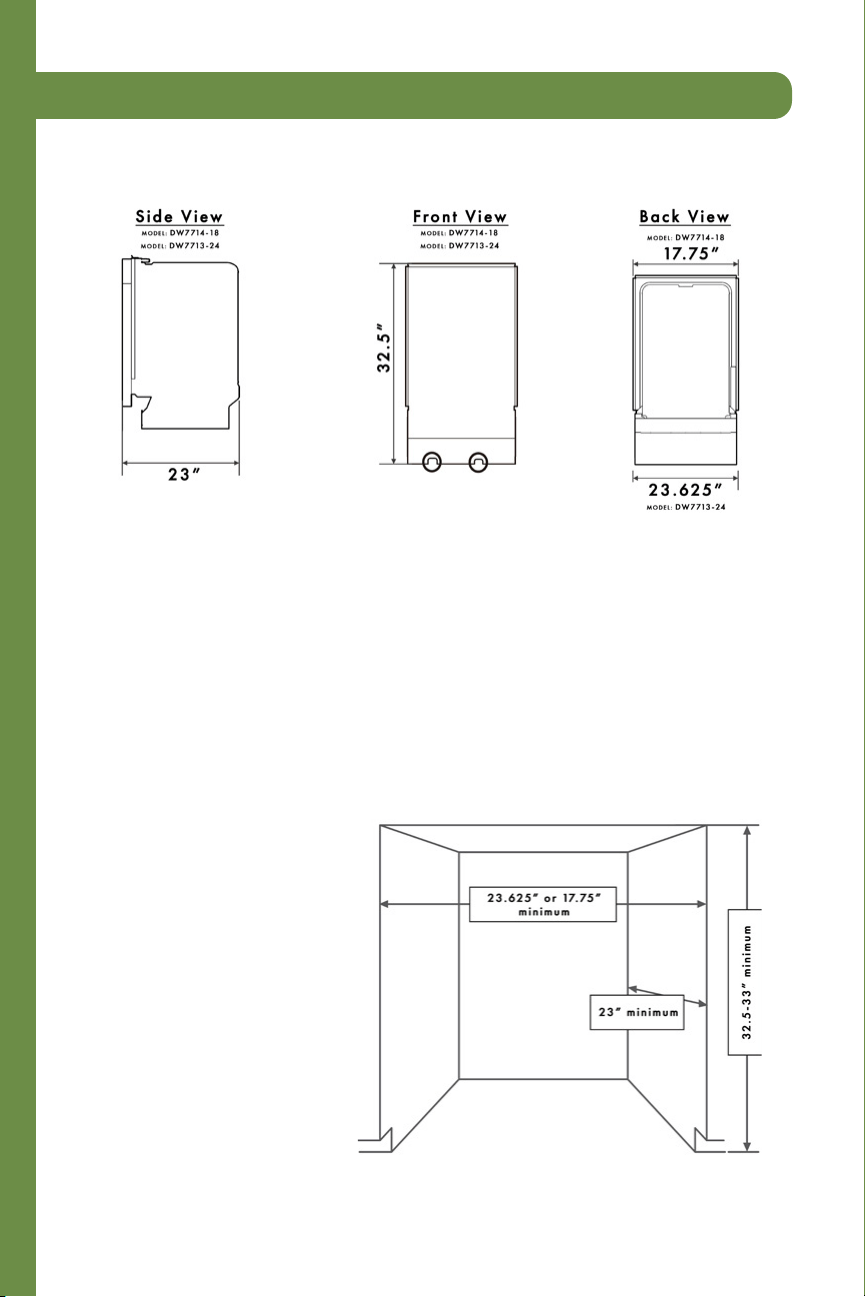
Product Dimensions
The water supply line, power cable, and drain hose should go through the space
behind the dishwasher. The power cable runs in channels under the dishwasher to
connections in the front.
Enclosure Dimensions
This dishwasher is designed to be enclosed on the top and on both sides by a
standard residential kitchen cabinet unit. The installation enclosure must be clean and
free of any obstructions.
The enclosure must be at least
23.6 inches wide, 23 inches
deep, and 32.5-33 inches high.
For the front door of the
dishwasher to be flush with the
leading edge of the counter top,
the counter top must be at least
23 inches deep. For kick plate
installation, there needs to be a
2-3” inch wood filler between
the bottom of the counter top
and the top of the dishwasher.
preparing the dishwasher enclosure
Be sure that the plumber follows these instructions closely so that the new dishwasher
works properly and that you’re not at risk of injury when washing dishes.
Step 1: Check the Parts and Tools
Before starting on the installation, prepare all the necessary tools and parts required
to install the dishwasher. This will save installation time and simplify the installation
process. Below are all the parts that are provided with the dishwasher. See Step 5.
installing the dishwasher
Installation Bracket #1 x2 Installation Bracket #2 x2 ST3.9*13 x2
(for the kick plate)
ST4*14 x10
(for install brackets 1&2)
ST3.5*9 x2 ST3.5*45 x4
(for the dishwasher panel)
ST3.5*25 x2
(for the dishwasher panel hook)
Dishwasher Panel Hook Adjustment Cap x2
Cable Tie
(for the drain hose)
Kick Plate Condensation Strip
Loading ...
Loading ...
Loading ...