Loading ...
Loading ...
Loading ...
10
Assembly
Connecting the Poles
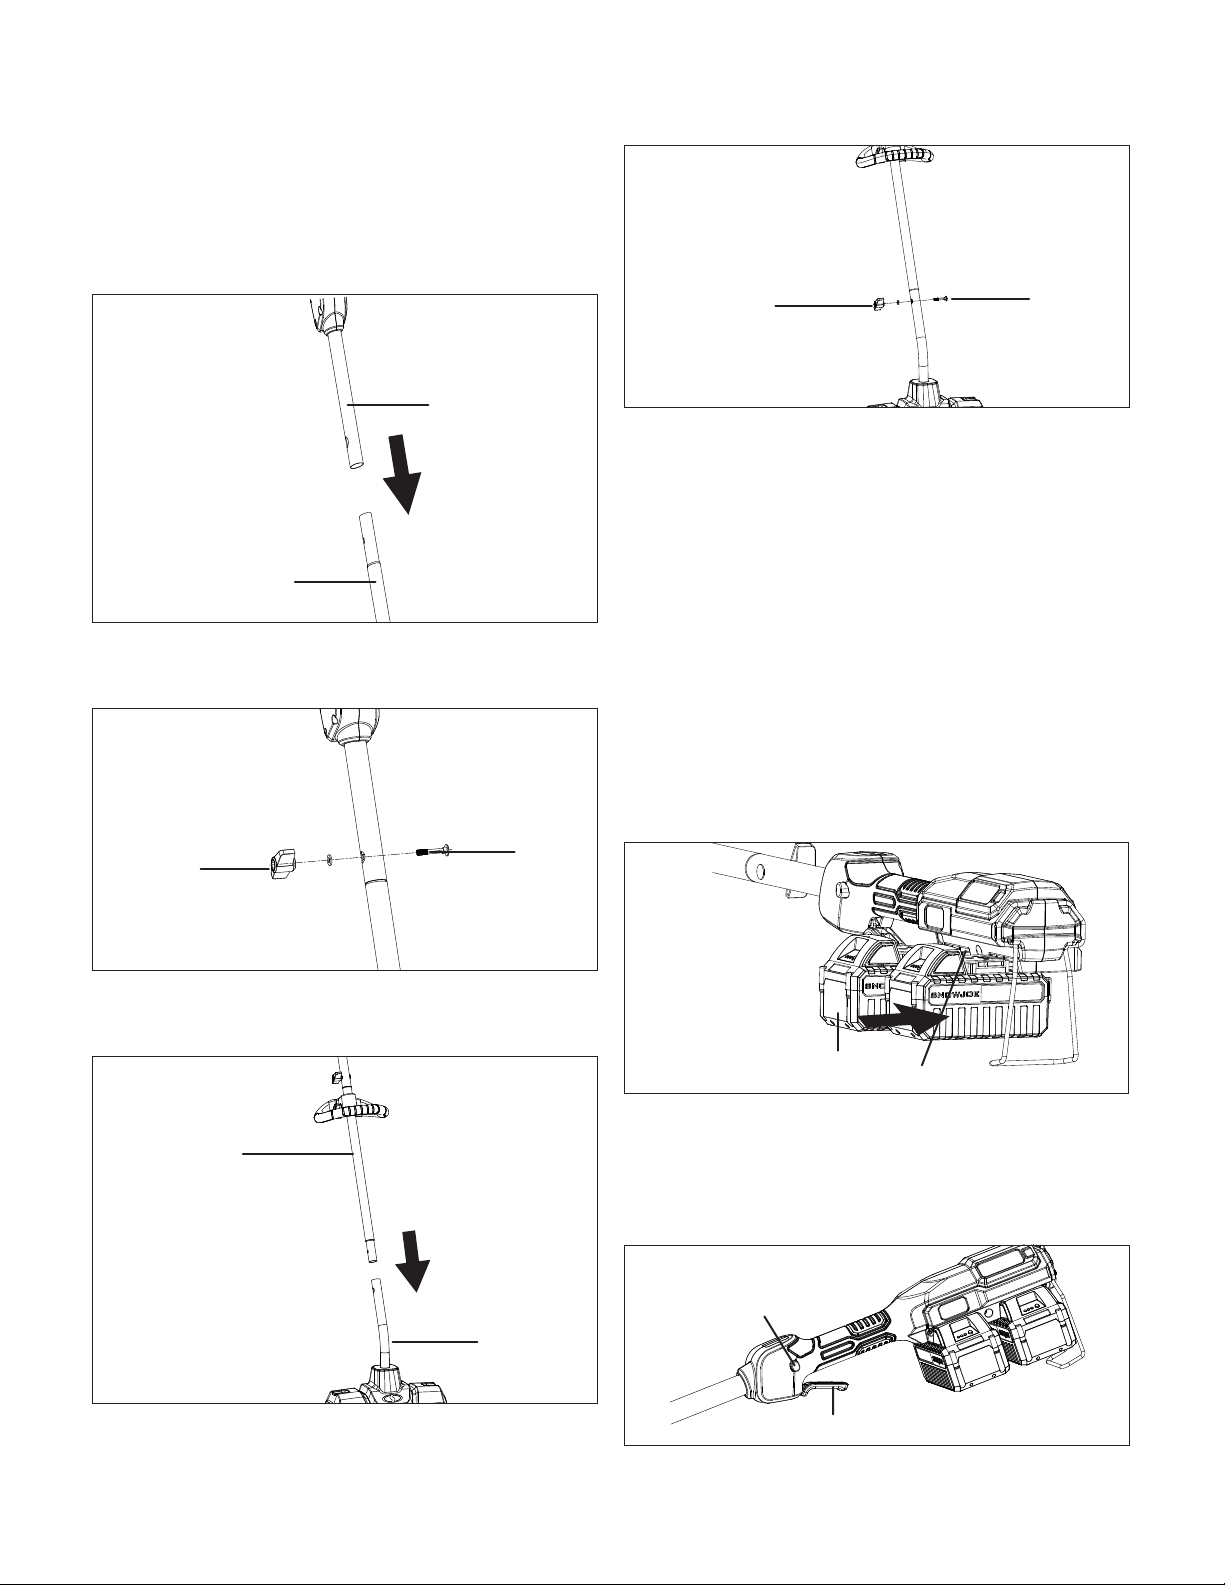
1. Connect the upper pole assembly with the middle pole
assembly. Align the screw holes (Fig. 4).
Upper pole
assembly
Middle pole
assembly
Fig. 4
2. Insert a bolt through the aligned holes in the poles and
secure the other end with a knob (Fig. 5). Twist until tight.
Pole knob
Bolt
Fig. 5
3. Connect the upper pole + middle pole assembly with the
lower pole assembly. Align the screw holes (Fig. 6).
Upper pole +
middle pole
assembly
Lower pole
assembly
Fig. 6
4. Insert a bolt through the aligned holes in the poles and
secure the other end with a knob (Fig. 7). Twist until tight.
Pole knob
Bolt
Fig. 7
NOTE: To avoid the wiring inside the poles intervening the
assembly, make sure to connect the upper pole assembly and
the middle pole assembly first. You may have to carefully move
the wiring inside the poles to one side when inserting the bolt.
Operation
mWARNING! Keep the area to be cleared free of stones,
toys or other foreign objects that the rotor blades might pick up
and throw. Such items could be covered by snow and are easy
to overlook, so be sure to conduct a thorough inspection of the
area before beginning work.
Starting the Machine
1. Slide the batteries down in the battery compartment until
they click/lock into position (Fig. 8).
Battery
Battery compartment
Fig. 8
2. To start the cordless snow shovel, push and hold the safety
switch on the side of the handle grip with your thumb and
then squeeze the On/Off switch with your fingers. Once the
machine powers on, you can release the safety switch and
proceed with operation (Fig. 9).
On/Off switch
Safety switch
Fig. 9
3. To stop the cordless snow shovel, release the On/Off
switch.
Loading ...
Loading ...
Loading ...