Loading ...
Loading ...
Loading ...
-16-
Maintenance
▶ Service
P r e v e n t i v e
m a i n t e n a n c e
performed by unauthorized per so n nel
may result in misplacing of internal
wires and components which could
cause serious hazard. We recommend
that all tool service be performed by a
Bosch Factory Service Center or Autho -
rized Bosch Service Station.
▶ Tool Lubrication
Your Bosch tool has been properly
lubricated and is ready to use. It is
recommended that tools with gears be
regreased with a special gear lubricant
at every brush change.
▶ Carbon Brushes
The brushes and commutator in your
tool have been engineered for many
hours of dependable service. To
maintain peak efficiency of the motor,
we recommend every two to six months
the brush es be examined. Only genuine
Bosch replace ment brushes specially
designed for your tool should be used.
▶ Bearings
Bearings which become noisy (due to
heavy load or very abrasive material cut -
ting) should be replaced at once to
avoid overheating or motor failure.
▶ Cleaning
Certain cleaning
agents and sol vents
damage plastic parts. Some of these
are: gasoline, carbon tetrachlo ride, chlo -
rinated cleaning solvents, ammonia and
house hold detergents that contain
ammonia.
Clean the planer stand regularly and
ensure that it springs back freely.
Ventilation openings and switch levers
must be kept clean and free of foreign
matter. Do not at tempt to clean by
inserting pointed objects through
openings.
▶ Drive Belt
The drive belt is a normal maintenance
part and should be inspected
periodically for wear. If the drive belt
shows signs of drying out, cracking or
tearing, it should be replaced. If the
drive belt will not track properly or
comes off the pulleys, it should be
replaced.
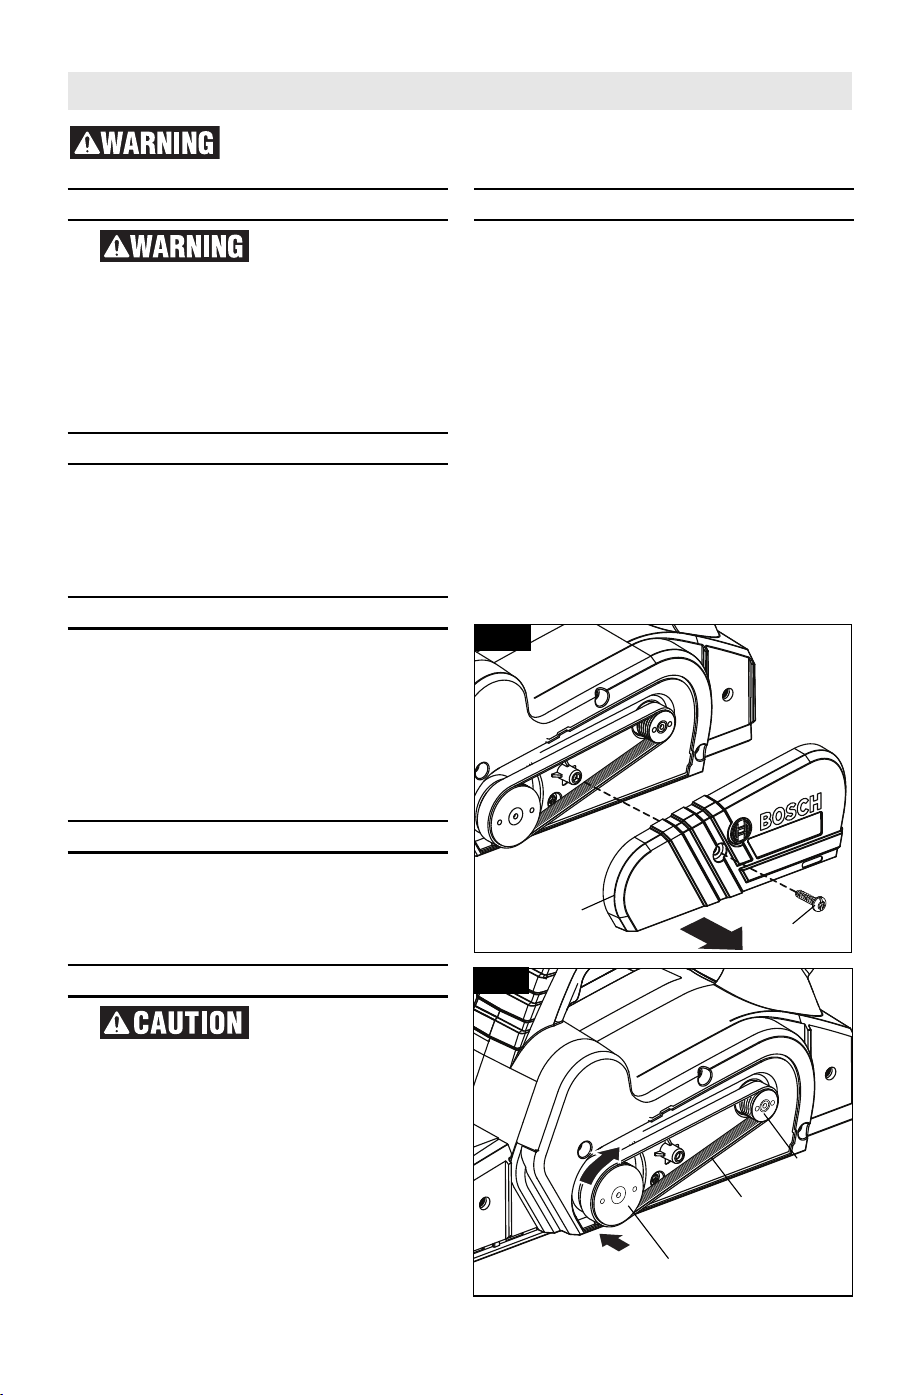
Installing new drive belt: Loosen screw
and remove the drive belt cover (Fig.
15). Cut and remove the worn drive
belt. Before installing the new drive
belt, clean both pulleys thoroughly. First
place the new drive belt onto the drive
pulley then rotate clockwise while
pushing the belt onto the driven pulley
(Fig. 16). Reinstall the drive belt cover
and securely tighten screw (Fig. 15).
To avoid accidents, always disconnect the tool and/or charger from the
power supply before servicing or cleaning.
Fig. 15
SCREw
DRIVE BELT
COVER
Fig. 16
DRIVEN
PULLEY
DRIVE
PULLEY
DRIVE
BELT
2610052960.qxp_PL2632 7/17/19 8:53 AM Page 16
Loading ...
Loading ...
Loading ...