Loading ...
Loading ...
Loading ...
-13-
Operating Instructions
▶ Trigger "ON/OFF" Switch
Hold the tool with
both hands while
starting the tool, since torque from the
motor can cause the tool to twist.
If the “Lock-ON”
button is
continuously being depressed, the
trigger cannot be released.
Never leave the
trigger locked "ON".
Before plugging the tool in, check that
the trigger lock is "OFF". Accidental
start-ups could cause injury.
Be aware of the
location and setting
of the switch "Lock-ON" button. If the
switch is locked "ON" during the use, be
ready for emergency situations to switch
TO TURN THE TOOL “ON”: Depress the
“Lock-OFF” button on either side of the
tool and squeeze the trigger switch.
TO TURN THE TOOL “OFF”: Simply
release the trigger switch.
Your planer is also equipped with a
“Lock-ON” button located on the front
of the handle that allows continuous
operation without squeezing the trigger.
TO LOCK THE SWITCH ON: Squeeze
trigger switch fully, depress the “Lock-
ON” button and release trigger.
TO UNLOCK THE SWITCH: Squeeze
trigger switch and release it without
depressing the “Lock-ON” button.
▶ Cord Swivel
The swiveling ball joint on the power
cord makes it easy to position the cord
in a way that makes it easier to use the
tool (Fig. 1).
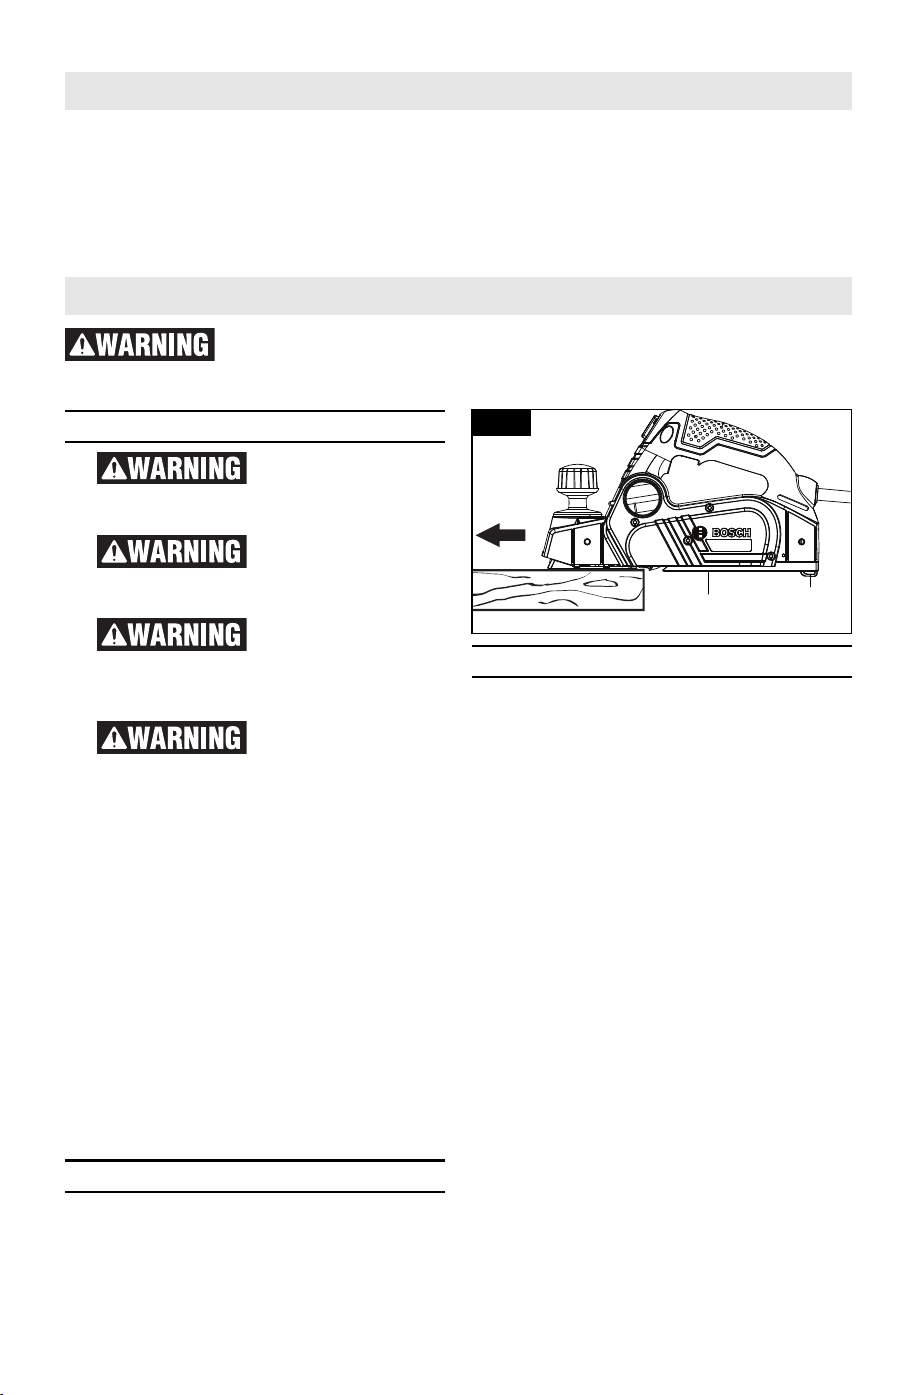
▶ Planing Action
Proper planing action helps to achieve
the desired result. With practice and
experience, it will become second
nature. Make sure that the workpiece is
held in place securely on your work
surface, and standing comfortably, hold
the planer firmly with both hands.
1. With the planer fully adjusted, place
the front shoe on the workpiece, (be
certain that the blade drum is not in
contact with the work) and start the
planer as described earlier.
2. With pressure on the front shoe, and
the fence against the side of the work
(to control the width or angle,) feed
the planer steadily until the full length
of the rear shoe passes over the edge
of the workpiece. (Fig. 10)
3. Then gradually transfer pressure to
the rear shoe, and continue planing
to the end of the cut.
4. If pressure is not maintained over
the rear shoe through the end of the
cut, a divot may be created in the
workpiece once the front shoe clear
the end of the workpiece. To
minimize this possibility, use a 3-way
edge clamp to hold a piece of scrap
wood (at least 1-1/2" (38 mm) thick)
on the end of the workpiece, aligned
stop in front of the cutting edge to
achieve the proper depth and
evenness (levelness) and with the
blade retainer in this position and
tighten it with the locking screws.
This will automatically adjust the
blade to the correct height and
levelness.
3. Tighten the retainer screws.
4. Remove blade and retainer assembly
from the leveling fixture.
5. Repeat the procedure for the second
blade.
PLANER
STAND
SHOE
Fig. 10
Assembly
Disconnect the plug from the power source before making any
assembly, adjustments or changing accessories. Such preventive safety
measures reduce the risk of starting the tool accidentally.
2610052960.qxp_PL2632 7/17/19 8:53 AM Page 13
Loading ...
Loading ...
Loading ...