Loading ...
Loading ...
Loading ...

Installation and Setup 8
6 Press the power switch on the back of the S1 to the “on” position. The faders jump and the LEDs blink during initialization.
Joining Multiple S1s
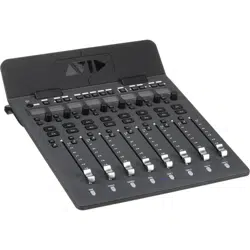
The S1chassis includes small magnets along each side to hold multiple units together. Place two S1s next to each other and the
built-in magnets will hold them together.
If a more rigid solution is required, clip the included S1 Link plate to the underside of one unit (both ends of the Link plate are also
magnetic), being sure to orient it correctly as shown below. Then set the other S1 onto the Link plate.
Do not attempt to lift or move the S1s when linked as this can cause damage to the link and/or the S1 units.
If your configuration includes a Dock you can link it to an S1 using the same S1 Link plate. Simply snip off the top of the rubber
foot on the side of the Link plate you want to attach to the Dock as shown below.
7 Proceed to Installing EuControl Software.
Power switch
Do not place magnetic media such as audio tapes directly on S1. While the built-in S1 magnets are not strong enough to affect
other studio equipment they can affect audio tapes or other media if left directly on top of or against the sides of the S1.
Attaching a Link plate (shown at left) and two S1s linked
Snip or cut foot at red line to link S1 to a Dock
Loading ...
Loading ...
Loading ...
