Loading ...
Loading ...
Loading ...
12 English
Description of the device
The device is available in 2 different versions:
● CVS 65/1 Bp Pack (1.517-300.0)
Battery and charger included in the scope of delivery
● CVS 65/1 Bp (1.517-301.0)
Without battery and charger
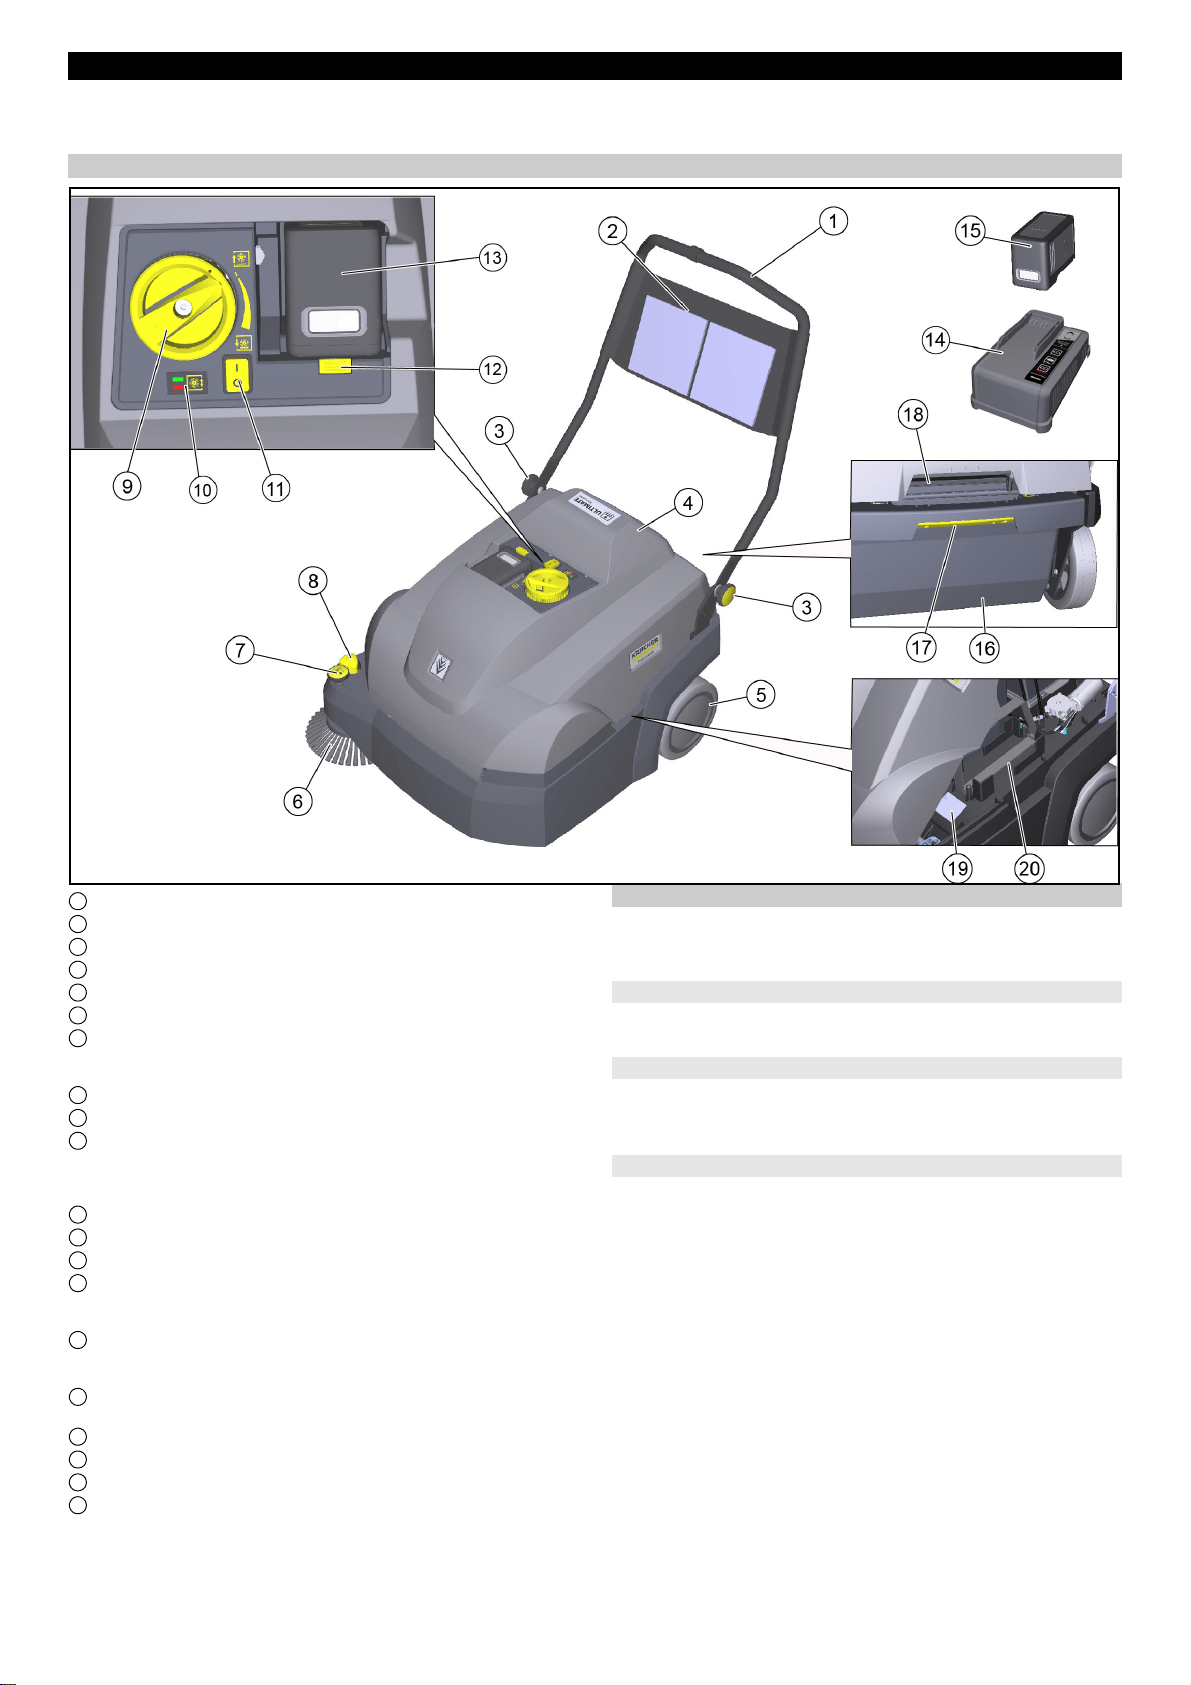
Device illustration
1 Push handle
2 Storage net (not for replacement battery)
3 Star screws for push handle adjustment (2x)
4 Cover
5 Rear wheel (2x)
6 Right side brush
7 Side brush adjustment
– Adjust contact pressure
– Raise the side brush
8 Lower the side brush
9 Roller brush contact pressure adjustment (sweeping pattern)
10 Roller brush contact pressure display
– LED does not light up: Lower the roller brush further
– Green LED: correct adjustment
– LED red: Raise the roller brush
11 On/off switch
12 Battery release mechanism
13 Battery compartment
14 Charger, “Battery Power+”
– Only included in the scope of delivery for the CVS 65/1 Bp
Pack
15 "Battery Power+ 36/75" rechargeable battery
– Only included in the scope of delivery for the CVS 65/1 Bp
Pack
16 Removable waste container
– A dust bag (option) can be inserted into the waste container.
17 Waste container release mechanism
18 Device cover recessed grip
19 Type plate
20 Compartment for replacement battery (with retaining strap)
Safety devices
Safety devices protect the user and may not taken out of opera-
tion or functionally circumvented.
Adhere to the safety instructions in the chapters!
Cover switch
The cover switch prevents the device from starting when the de-
vice cover is open.
On/off switch
The on/off switch prevents the device from starting up uninten-
tionally. Switch off the on/off switch when parking the device or in
the event of danger.
Electronics
If the roller brush is overloaded, the electronics switch off the de-
vice and the LED flashes.
In this case, switch off the device at the on/off switch and before
switching it back on, turn the roller brush all the way up using the
contact pressure adjustment.
Loading ...
Loading ...
Loading ...