Loading ...
Loading ...
Loading ...

instructions
nuwavenow.com
16 17
ENGLISH
nuwavenow.com
INSTRUCTIONS
16 17
increments between
50F and 400F (10C -
204C).
2. To quickly adjust the
temperature, hold down
the arrows until desired
cooking temperature is
reached.
Note: Cooking
temperature can be
adjusted at any time before
or during the cooking
process. Once the display
is switched to temperature
display, it will remain in the
temperature display.
TIME
1. To set a different
cooking time, press
the [↑] and [↓] buttons
above and below the
time icon. The control
panel will display
"00:15" and "time."
• The time will adjust in
1-minute increments.
2. To quickly adjust the
time, hold down the
arrows until desired
cooking time is
reached.
• The maximum
selectable cooking
time differs
depending on the
selected cooking
temperature.
• 50F - 275F (10C -
135C), maximum
cooking time
is 00:00~99:59
(0-minutes to 99-hrs.;
59-minutes).
• 280F - 345F (138C
- 174C), maximum
cooking time is
00:00~24:00 hours
(0-minutes to
24-hours).
• 350F - 400F (177C
- 204C), maximum
cooking time
is 00:00~1 hour
(0-minutes to1 hour).
Note: Cooking time can
be adjusted at any time
before or during the
cooking process. The Brio
will beep 3 times half-way
through the cooking cycle
to alert you to remove the
basket from the unit, shake
the food in the basket, and
then reinsert the basket to
nish cooking.
PREHEAT
The unit will preheat to
the temperature of the
next cooking cycle. For
example, if Sear 1 is set to
400F (204C), the unit will
Preheat to 400F (204C).
If Sear 1 is not used, the
unit will preheat to the set
cooking temperature.
1. Press the ON/OFF
button and adjust your
cooking temperature
and time for Stage 1
cooking.
2. Press the PREHEAT
button to engage the
Preheat function.
• The LED display will
show the set cooking
temperature, "pre,"
and "temp."
• The unit will
ALWAYS preheat
to the cooking
temperature of the
next cooking cycle.
3. Press the START/
PAUSE button to begin
preheating.
• The unit will begin
preheating to the set
temperature.
• The LED display
will show the set
cooking/preheat
temperature
(ashing), "pre," and
"temp."
• During preheat the
cooking temperature
can be adjusted by
using the [↑] and
[↓] buttons above
and below the
temperature icon.
• The cooking time
can be adjusted
also by pressing the
[↑] and [↓] buttons
above and below the
time icon.
4. When the unit
reaches the preheat
temperature the unit
will move into a ve
(5) minute hold. The
unit will maintain the
preheat temperature
during this ve (5)
minute hold.
• The LED display will
show "5" (ashing),
"ready," and "time."
AUTO PREHEAT
The Brio defaults to
Automatic Preheat at 350F
(177F), the default cooking
temperature.
• You can turn the
Automatic Preheat off
or on again by pressing
PROG + PREHEAT at
the same time.
• Temperature range is
50F - 400F (10C-204C).
• After it has reached the
set cooking temperature,
Brio will go into a
5-minute countdown
just like the typical
PREHEAT function.
• If no action is taken
within the ve (5)
minute hold, the unit
will automatically go
into standby mode.
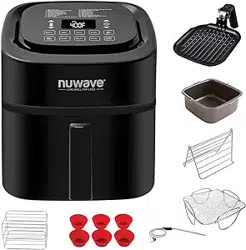
5. Place your food into
the unit, slide the Fry
Pan Basket with Base
Tray back into the Brio.
The unit will begin
cooking at the set
temperature and time.
6. The preheat cycle
can be canceled
anytime by pressing
the PREHEAT button.
The unit will end the
preheat cycle and
automatically go into
the next cooking cycle.
7. When the unit is
nished cooking the
LED display will show
"End" and beep three
(3) times.
Loading ...
Loading ...
Loading ...