Loading ...
Loading ...
Loading ...
Installation - Connecting Optional Ice Maker To Water Supply
To avoid electric shock, which can cause death or severe personal injury, disconnect the
refrigerator from electrical power before connecting a water supply line to the refrigerator.
To Avoid Property Damage:
• Copper tubing is recommended for the water supply line. Water supply tubing made of 1/4"plastic is not
recommended since it greatly increases the potential for water leaks. Manufacturer will not be responsible for
any damage if plastic tubing is used for supply line.
• DO NOT install water supply tubing in areas where temperatures fall below freezing.
• Chemicals from a malfunctioning softener can damage the ice maker. If the ice maker is connected to soft
water, ensure that the softener ismaintained and working properly.
IMPORTANT: Ensure tlqat your water supply line connechons comply with all local plumbing codes.
Before Installing The Water Supply Line, You Will Need
• Basic Tools: adjustable wrench, flat blade screwdriver, and Phtlhps"'_screwdriver
• Access to a household cold water hne with water pressure between 20 and 120 psi
• A water supply hne made of t'_inch (6 4 mm) OD, copper tubing To determine the length of copper tubing needed,
yoL; w=llneed to measure the distance from the ice maker inlet valve at the back of the refrigerator to your cold water
p_pe T_qelqadd approxmqately 7 feet (2 1 meters), so the refngerator can be moved out for cleaning (asshowlq/
• A shutoff valve to connect the water supply hne to your household water system DO NOT use a self pterc_ng type
shutoff valve
• A compression nut and ferrule (sleeve) for Colqnectlng the water supply hneto tlqe _cemaker inlet valve.
NOTE: Water hne ktt number 5303917950, avatlable from your apphance dealer at addtt;onal cost, conta;ns 25 feet
(7 6 meters) of _,_.inch QD copper tubing, a saddle type shutoff valve (nonptercmg), (2) _,_.inch brass compresston
nuts, (2) ferrules/sleeves, and mstructtons for mstalhng a water supply line.
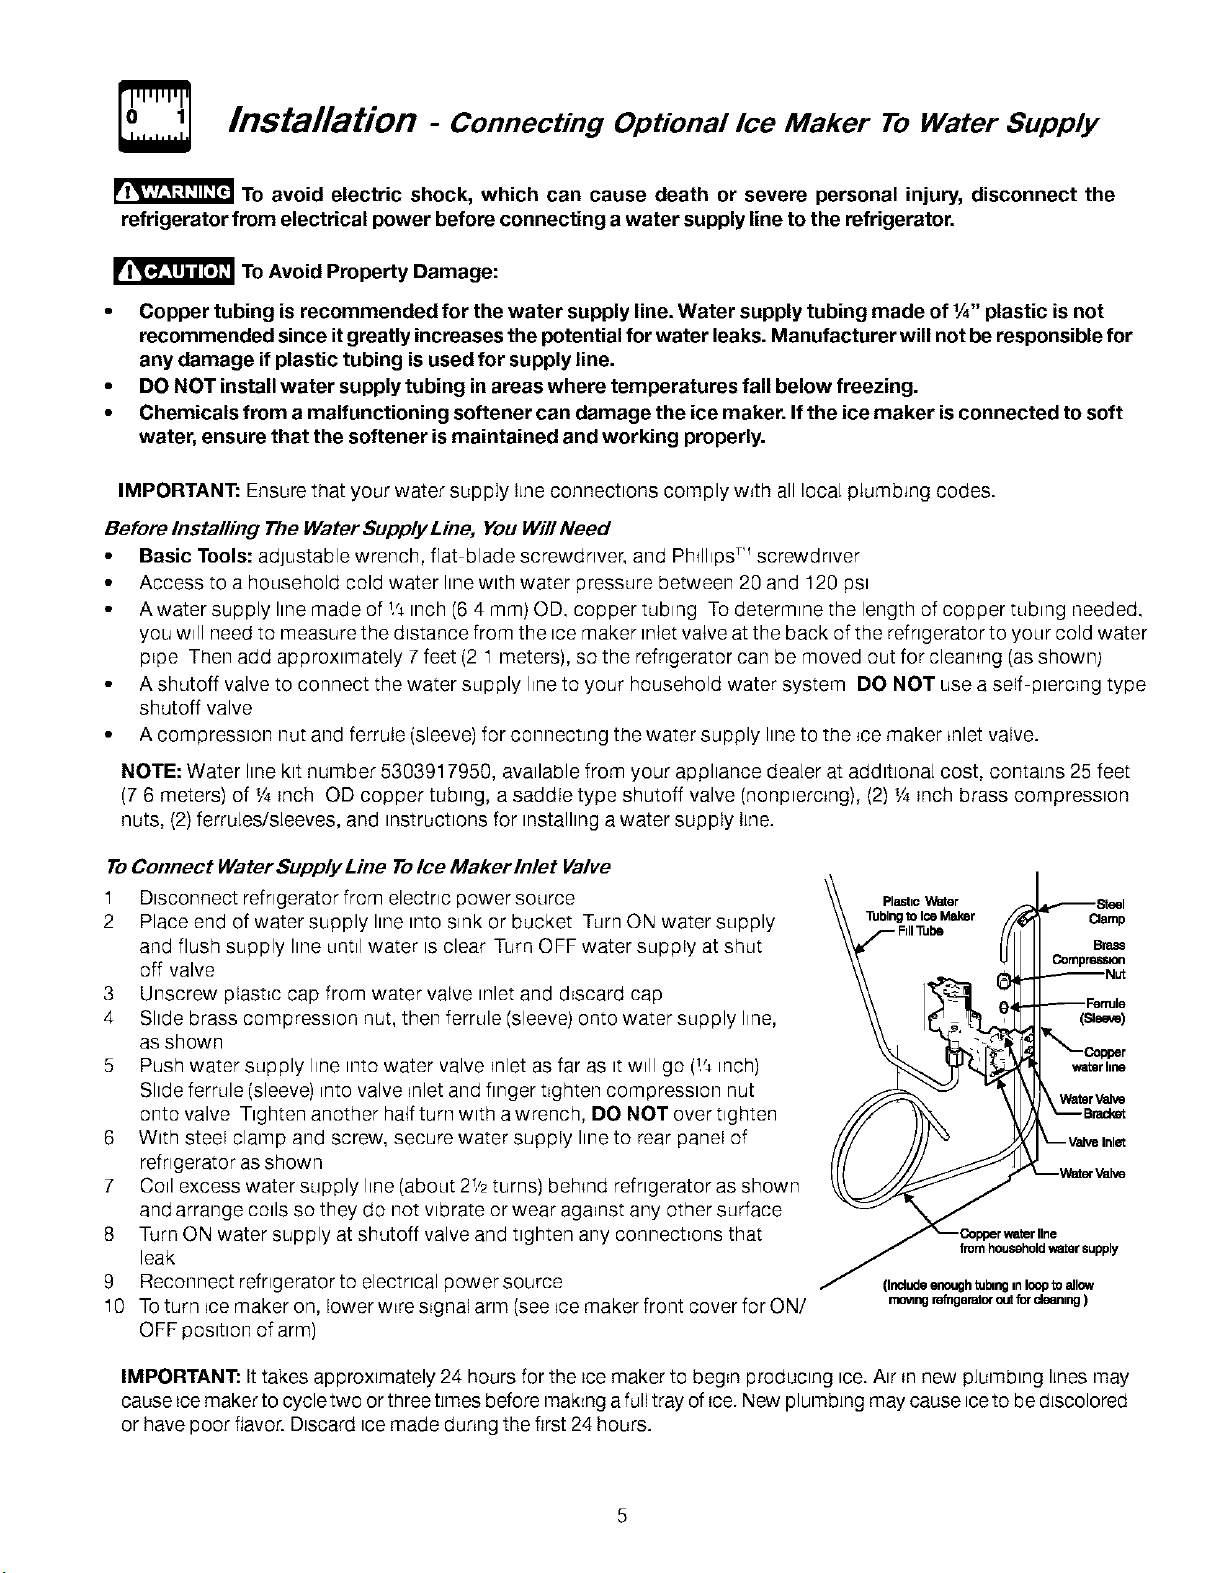
ToConnect Water Supply Line ToIce Maker Inlet Valve
1 Disconnect refrigerator from electric power source PlasttcWater _Steal
2 Place end of water supply hne rote sink or bucket Turn ON water supply TublngtoFtllmubelCeMale_rClamPBra==
andflLishsLipplyllneLintllwaterlsclearTLirnOFFwatersLipplyatshLit _ _ __
Oempressm_
off valve Nut
3 Unscrew plastic cap from water valve ilqletand d_scard cap Forruto
4 Shde brass compresston nut, then ferrule (sleeve) onto water supply hne, )
as shown ""i
5 PL,shwatersL, pp,yhne,ntowaterva,ve,nletasfaras,twdlgoi'.'_mch) _ _}_____
Shde ferrule (sleeve) rote valve inlet and finger t_ghten compresston nut
onto valve Ttghten another half turn with a wrench, DO NOT over t=ghten
6 With steel clamp and screw, secure water supply line to rear panel of
refrtgerator as shown 1, _g_u::
7 Cotl excess water supply hne (about 2,2 turns) behnd refngerator as shown
and arrange coils so they do Rot wbrate or wear against any other surface
8 Turn ON water supply at shutoff valve and nghten any connecbons that
leak
9 Recolqlqeotrefrigerator to electrical power source / (Indudeenoughtul_ngmlooptoallow
10 To turn ice maker on, lower w_res_gnalarm (see _cemaker front cover for ON/ ,,,_,__=_go_o=_d=.,ng)
OFF posthon of arm)
IMPORTANT: It takes approxtmately 24 hours for the ice maker to beg_nproducing tce.Atr m new plumbing hnes may
cause ice maker to cycle two orthree t;i-nesbefore i-nakfnga fulltray of ice. New plul-nb;ngmay cause iceto be d;scolored
or have poor flavor. Dtscard tce made during the first 24 hours.
Loading ...
Loading ...
Loading ...